Feel Good Berry Smoothie

by Susan Smith in


Bio-tiful’s organic kefir is made from organic whole milk from my beloved Riverford Organic Farmers’ own dairy herd. Kefir is a two thousand year old, bio-live, smooth, tangy, cultured milk drink that’s long been revered in Russia and Eastern Europe for its health benefits because it’s full of beneficial bacteria a.k.a ‘friendly’ or ‘helpful’ bacteria (the good guys) that help displace the harmful bacteria (the bad guys) in your gut. 

For people who are less than vigilant about eating healthily, the bad guys have no problem invading your body via your bloodstream causing chronic inflammation and ultimately disease. The good guys in kefir (known as probiotics) help to protect the delicate cells lining the gut, to efficiently move food through the gut, to synthesise certain vitamins and to ferment indigestible foods. In short, they are essential for good digestive health, strengthening the immune system, improving nutrient uptake and the absorption of minerals.

In addition to organic kefir, I’ve used raw organic milk (you can use goat’s, cow’s, coconut or homemade nut milk), fresh organic blueberries and frozen organic mixed berries. I then supercharged my Feel Good Berry Smoothie with a powerful antioxidant powder to create the most delightfully cool and luscious, nutritious drink. 

The word kefir means ‘feel good’ in Turkish. Precisely so. I find this quick-to-make Feel Good Berry Smoothie the most cheerfully delicious, fruit-packed way to energise my day. 

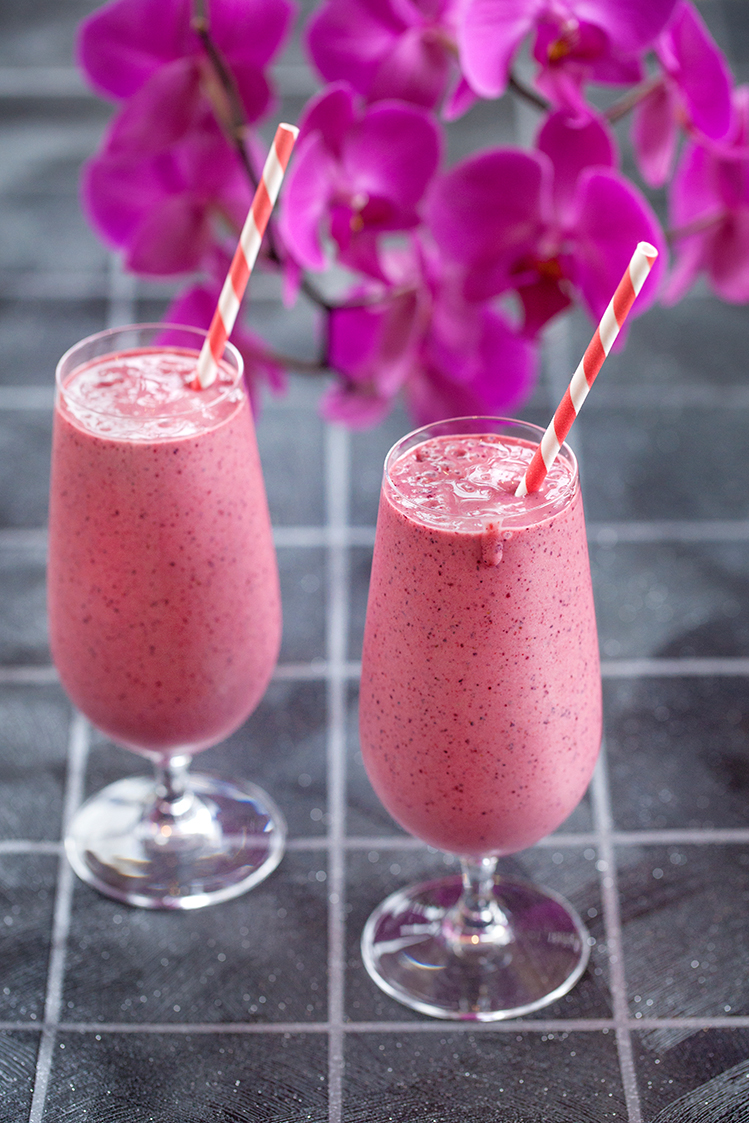
Feel Good Berry Smoothie (makes 2 large glasses)

Ingredients

250ml Bio-tiful kefir (or natural coconut yogurt)

250ml organic raw whole milk (or other milk of choice e.g. coconut, almond, tiger nut cashew etc.)

150g organic mixed frozen berries (I used Duchy Organic Berry Mix)

125g fresh organic blueberries

2 small/medium organic bananas

2 tsp organic Berry Radical Antioxidant Powder or organic Amla Powder (Indian Gooseberry powder)

2-3 drops natural liquid steviaoptional


Instructions

Using a high-power blender, whizz all the ingredients together for about 30 seconds until smooth and creamy. 

Pour into two tall glasses and don’t wait to enjoy!


Carbohydrate 43g Protein 20g - per large glass serving


Red Velvet Cupcakes

by Susan Smith in


All you need is love, but these little cupcakes ain’t half bad at making the point! Primal Plate’s Red Velvet Cupcakes are the sweetest-tasting, sexiest-looking, Valentine’s day indulgence to share with your sweetheart. For all the world you might think that one bite into one of these aggressively pink, attitudinal cupcakes would be enough to send Primal sugar phobes into a state of apoplexy… but their good looks deceive. 

These light-as-a-feather cupcakes are in fact a nutritious health food made from organic grass-fed butter, organic tiger nut flour, raw cacao and fresh beetroot. No added sugar, no grains, no artificial food colour. Talk about share the love!

Over the past few weeks Sarah seems to have been really cake-hungry because she’s frequently been asking “When are you going to make more cake?” As it turns out Valentine’s day is just the right time because, after waiting for so long, she was only too happy to help me by patiently making little ‘love notes’ out of greaseproof paper and ribbon hearts to decorate these bad boys! Gloriously chocolatey and dressed to kill for the occasion, they taste every bit as good as they look. 

As for the not so sweet-toothed or love-struck, they’re just yummy little everyday cakes to eat plain with a really good cup of tea or coffee. 

Red Velvet Cupcakes (makes 18)

Ingredients - for the cupcakes

250g organic premium tiger nut flour

3 tbsp organic raw cacao powder

1 tsp organic ground cinnamon

2 tsp gluten-free baking powder

½ tsp bicarbonate of soda

200g organic unsalted butter, softened to room temperature

150g Sukrin Gold

3 organic eggs, at room temperature

2 tsp pure vanilla extract

120 ml organic milk or other milk of choice - e.g. almond, cashew or coconut milk 

2 medium-sized organic beetroots, finely grated


Ingredients - for the buttercream (enough to decadently decorate 8 cupcakes)

200g Sukrin Icing

100g organic unsalted, preferably raw, grass-fed butter

2 tbsp fresh organic beetroot juice (or use milk if you don’t have a juicer)

½ tsp pure vanilla extract


Instructions - for the cupcakes

Pre-heat the oven to 180℃ / 350℉ / Gas mark 4

Place 18 paper cupcake cases into two 12 hole muffin trays

Combine the tiger nut flour, cacao powder, cinnamon, baking powder and bicarbonate of soda in a medium size mixing bowl. Fork through to get rid of any lumps.

Fix the double-bladed ’S’ shaped knife into a food processor and place the softened butter, Sukrin Gold, the bowl of dry ingredients, vanilla extract and eggs into the processor bowl. 

Process for about 30 seconds until well mixed. You may need to scrape down the sides of the of the bowl once or twice to make sure everything is incorporated. Add 100 ml of the milk and process again for another 10 seconds. You’re aiming for a creamy (not too runny) consistency. Add the remaining 20ml of milk and process for a few more seconds if the mixture still seems a little too thick.  

Scrape the mixture out of the processor bowl into a clean mixing bowl and stir in the grated beetroot until evenly incorporated.

Using a small ice cream scoop fill each paper case with approximately 50g-55g of the cake mixture.  

Bake in the middle of the oven for 18 - 20 minutes.

Allow the cupcakes to cool briefly in the baking tins before removing them and cooling completely on wire racks.

Instructions - for the buttercream icing

Place all the ingredients in a medium sized bowl and whisk together with an electric beater until light and fluffy. 

Place a large star shaped nozzle into a disposable piping bag. Cut the end of the bag off so that the end of the nozzle is not covered. Twist the bag immediately behind the back of the nozzle to prevent the icing coming out until you’re ready. 

Place the bag into a large tall glass and fold the top of the bag over the edge of the glass. Alternatively, get someone else to hold the bag open whilst you fill it.

Carefully fill the bag with the prepared buttercream. Close the top of the bag by twisting it tightly - you can secure it with a rubber band to make sure the buttercream can’t ooze back out of the top - then push the buttercream down inside the bag to remove any air-locks. 

Starting at the outer edge of the cupcake, slowly squeeze the piping bag to allow the buttercream to gently fall onto the cupcake. Keep going around the cupcake in increasingly smaller circles until you reach the middle. N.B. the nozzle needs to stay slightly raised above the surface of the cake so you don’t drag the icing as you go. 

Decorate with fresh berries or edible flowers - organic rose petals would be nice - if you don’t want the fiddle and faff of making Sarah’s fabulously conceived love notes!

cupcake decorations.jpg

Notes

If your oven shelves are not large enough for both baking trays to fit side by side on the middle shelf, then swap them over after about 12 minutes cooking time - no earlier because the mixture needs time to set. If you have a double oven, you can use them both to ensure these cupcakes bake evenly to perfection - much easier than swapping the trays over during baking.

 Carbohydrates 7g Protein 3g - per cupcake

Carbohydrate 1g Protein 0g - per serving of buttercream


Best Ever Vegetarian Gravy

by Susan Smith in


I’m sort of selling myself short on today’s recipe title because this gravy may well be the best ever gravy for everyone; vegan, vegetarian and carnivore alike. It doesn’t need meat juices from the roasting pan for depth of flavour, this stand-alone gravy is as intensely flavoursome as any I’ve tasted…ever! Better still, it can be made well in advance, so there’s no last minute panic to rustle up a tasty gravy whilst the rest of dinner goes cold. Simply make ahead of time then, whilst you’re plating up the rest of the meal, re-heat your gravy to boiling point and pour over.   

I knocked this vegetarian gravy up ‘out of the blue’ in about 15 minutes flat whilst the Nut Loaf that was featured on last week’s Primal Plate blog was resting in its tin before being turned out and sliced. Frantically looking around my kitchen for any ingredients that I could gravy-fie to get our meal onto the table pronto, the first thing I espied was the tomato juice leftover from a 400g tin of chopped tomatoes I’d used to make the Nut Loaf. The second was my husband’s glass of red wine poured in readiness for dinner.

Combined with a few other store cupboard ingredients - not least Sukrin almond flour to thicken - it was gravy alchemy. A light, bright, delicious, vegetarian accompaniment to elevate the pure and simple into the most tasty meal imaginable. 

Best Ever Vegetarian Gravy (Serves 4)

Ingredients

1 tbsp organic olive oil
1 organic medium onion, finely chopped
1 dsp organic tomato puree
2 tsp organic reduced salt vegetable bouillon powder
1 heaped tsp Sukrin organic reduced fat almond flour
75 ml organic tomato juice (I used the juice that I’d drained from a 400g tin of organic chopped tomatoes)
75 ml red wine
200ml fresh filtered water
1 tbsp organic tamari
½ tsp Marmite or natural yeast extract
1 fresh bay leaf - optional

Instructions

Heat the olive oil in a medium sized saucepan. Add the chopped onion and cook gently with the pan lid on for about 8-10 minutes, stirring occasionally, until the onion is soft and light golden in colour.

Meanwhile, in a small bowl, combine the Sukrin almond flour with a little of the tomato juice, stirring well to make sure there are no lumps before adding the rest of tomato juice. Set aside.

When the onions are soft and golden, take the saucepan off the heat and add the tomato puree and bouillon powder. Stir everything together really well until it forms into a smooth-ish paste then add the red wine. Keep stirring until this is fully integrated, then do the same with the almond flour/tomato juice mixture. Finally add the water, the tamari, the Marmite and the bay leaf (if using).

Set the pan back over a medium-hot heat and stir continuously until the gravy comes to the boil and has thickened slightly. Turn the heat down to a simmer and continue cooking, uncovered, for a further 10 to 15 minutes.

Strain the gravy through a stainless steel sieve into a clean saucepan - I also like to press about half of the softened onions through the sieve to achieve a gravy with a bit more substance. Cover the pan and set aside until you’re ready to eat.

Alternatively, strain into a clean glass or ceramic bowl, cover and store in the refrigerator for up to a week.

Notes

The drained chopped tomatoes can be used to make Nut Roast, Virgin Mary Vegetable Cocktail (recipe coming soon) and Coconut King Prawn Curry (recipe also coming soon) - as you can see I’m currently awash with ideas for organic tinned tomato recipes!

I’ve not included sea salt or freshly ground pepper in the ingredients list for this recipe because quite frankly the Swiss bouillon powder, tamari and Marmite do the trick without. However, if you’re using ‘no-salt’ natural yeast extract you might want to test for seasoning and adjust to taste if needs be.


Carbohydrate 4g Protein 2g - per serving


Nut Roast

by Susan Smith in ,


2017 began in much the same way that 2016 ended… assisting Mirror Imaging with two back-to-back winter weddings and spending the rest of January up to my neck in legalese and paperwork. True, for the sake of our health and wellbeing I do still spend quality time in the kitchen devising good things to eat, but actually getting around to photographing the end result and writing up the recipes to share on Primal Plate’s blog has, over the past month, been a stretch too far. Sorry. 

With the start of the new year and a couple of pounds gained, I turned my attention away from the meaty feasts (organic and pasture-fed, no less) that we’d enjoyed over Christmas and reignited my appreciation for all things vegetarian. I know that generally nutloaf gets a bad press - at least with non-vegetarians - but I kid you not, this fabulously flavoursome Nut Roast could knock most meat dinners into a cocked hat. Healthy and chock-full of protein from an abundance of nuts, this Nut Roast has all the savoury heartiness of meat without the heaviness. Plus, it packs more taste, it costs less to make, it looks better on the plate and you can prepare it in advance. Served with my mouthwatering vegetarian gravy (recipe coming soon) that Sarah thought was so tasty it must have made with homemade chicken stock, some seasonal oca roasted with thyme (the nearest low-carbohydrate equivalent to roast potatoes) and tender stem broccoli, this low-carb, Primal, vegetarian meal is so good it verges on the genius.  

It’s equally delicious served cold with salad. 

Nut Roast (Serves 6)

Ingredients

50g raw organic pecans 

50g raw organic Brazil nuts 

50g blanched organic almonds

2 tbsp raw organic pumpkin seeds 

25g organic unsalted butter

3 large organic shallots, peeled and finely chopped

150g organic chestnut mushrooms, coarsely chopped 

50g raw organic cashews, coarsely chopped 

2 tbsp organic smooth almond butter

2 tsp Marmite

100g organic strong cheddar cheese - finely grated

3 tbsp organic parsley, finely chopped

1½ tbsp organic sage, finely chopped

400g tin organic chopped tomatoes, well drained

2 organic medium eggs, beaten

1 dsp Sukrin organic coconut flour

Celtic sea salt

Freshly ground organic black pepper

Organic watercress or chopped parsley to serve

Organic oca are part of the yam family and look a little like radishes when raw. When roasted in the oven they make a fantastic low-carb potato substitute, close in favour and texture to roast new potatoes.

Organic oca are part of the yam family and look a little like radishes when raw. When roasted in the oven they make a fantastic low-carb potato substitute, close in favour and texture to roast new potatoes.

Instructions

Melt 10g of the butter over a very low heat (or in a microwave). Grease a 400g /1lb loaf tin with the melted butter before lining with a long strip of non-stick baking parchment to cover the base and narrow sides of the tin. Grease the baking parchment too. 

Toast the pecans, Brazil nuts, blanched almonds and pumpkin seeds in a large frying pan over a low heat until nicely golden. 

Take the pan off the heat and allow the nuts/seeds to cool slightly, then whizz in a food processor until finely chopped.

Pre-heat oven to 190℃ / ℉ / Gas mark

Melt the remaining 15g of butter in a small frying pan and gently cook the chopped shallots for about 3-4 minutes until soft and beginning to turn golden. Add the chopped mushrooms to the pan and continue to cook for a further 5 minutes, stirring occasionally.

In a large bowl, combine the toasted ground nut mixture with the cooked shallots and mushrooms and the rest of the ingredients. Season with sea salt and black pepper and mix together well. 

Spoon into the prepared loaf tin and level off the top. Cover with a piece of buttered non-stick foil.

Cook for 45 minutes or until a skewer inserted in the middle comes out clean. Remove the tin foil - if the top isn’t evenly browned pop the nut loaf back into the oven, uncovered, for a further 5-10 minutes.

Cool for 15 minutes in the tin before loosening around the edges with a small knife and carefully turning out onto a warm serving plate. Peel away the parchment paper and cut into slices.


Carbohydrate 12g Protein 15g - per serving


Blueberry and Apple Jellies

by Susan Smith in ,


Want a fast and easy, make-ahead, low-carb, festive dessert to rival Christmas pudding? This is it! With a flavour profile that’s light, lively and as sweet as it is tart, I’ve stolen this recipe from Annie Bell’s book ‘Low Carb Revolution’ then made it suitable for vegetarians/vegans by using agar agar rather than gelatine to make deliciously fruity, firm set jellies. 

This is jelly come-of-age. Rich in vitamin C, vitamin K, manganese and other antioxidants it looks elegant, tastes delicious and is as close to health food as you can get. The perfect antidote to the groaning Christmas table and eating and drinking more than is strictly good for you!

Blueberry and Apple Jellies (Serves 4)

Ingredients

1 litre clear apple juice (I used Coldpress Golden Delicious apple juice)

150g organic blueberries

2 level tbsp Clearspring agar flakes (see Notes below)

Sprigs of organic mint - to garnish


Instructions

Pour the apple juice into a medium saucepan and bring to the boil. When at boiling point, turn the heat down and let the apple juice simmer away, uncovered, until it is reduced by half. 

Take off the heat, cover and leave to cool (I plunged the base of the pan into cold water to speed things up) 

When cold, sprinkle the agar flakes over the surface of the apple juice and then heat without stirring until boiling. Simmer, stirring occasionally until the agar flakes have completely dissolved, which takes about 5 minutes.

Take off the heat and allow the apple jelly mixture to cool down in the pan for 15 minutes. 

Meanwhile, divide the blueberries equally between four individual glasses.

Ladle or pour the apple jelly over the blueberries, which will float to the surface. Cover and chill until set.

Decorate with a sprig of fresh mint and serve.


Notes

Agar agar is a gelling agent, made from algae (extracted from seaweed) which is mainly used for setting jellies. It is a viable vegetarian alternative to gelatine, which is made from animal collagen. However, agar agar makes a distinctly firm-set jelly that won’t melt-in-the-mouth like gelatine-set puddings do. 

A very small amount of agar agar will set a large amount of liquid so you need to be very precise with your measuring. Clearspring recommend using 1 tablespoon of agar flakes to set 240ml of liquid. I used 2 tablespoons (slightly less) to set 500ml (i.e. the reduced quantity of apple juice in this recipe) and it still made a very firm jelly. When I re-create this dessert for our Christmas Eve celebrations I intend to use just 1½ tablespoons of agar flakes to see if this produces a slightly softer mouth-feel. If successful, I’ll update this blog accordingly.  

You can find agar flakes online (click the link above) in most health food shops and big supermarkets in the Japanese food section. 


Carbohydrate 33g Protein 0g - per serving


Pine Kernel Torte

by Susan Smith in


Since I began writing this blog, I seem to have inadvertently established a new family tradition of celebrating every family members birthday with cake! At this time of year, it’s always tricky coordinating the execution of my recipes with Sarah’s photography skills because she only ever uses natural day light and in wintertime this starts to fail mid afternoon. No such problems photographing cake though, because it usually accompanies our second cup of morning coffee. 

My husband’s birthday happens to fall exactly one week before Christmas Eve and for me it always heralds the start of the festive season. This year I did him proud by creating this delicious Pine Kernel Torte to celebrate his special day. Served with sliced clementines, a little rosemary, honey and whipped cream, there is something very ‘Christingley’ about it. 

This easy to make aromatic cake has a lovely texture reminiscent of frangipane combined with a light nutty crunch. I think it’s the perfect teatime treat for birthdays and Christmas both and, as with all Primal Plate recipes, it does not subject the sweet-toothed to the ‘kiss of death’ from either sugar or grains. Happy, healthy Christmas everyone!

Pine Kernel Torte (Serves 8)

Ingredients

100g organic ground almonds

50g organic tiger nut flour

50g Sukrin reduced-fat organic almond flour

1 tsp gluten-free baking powder

175g organic, unsalted, grass-fed butter + a little extra for greasing the cake tin - softened

150 Sukrin Gold

3 large organic eggs

1 tsp vanilla extract

60ml fresh-squeezed clementine juice (2 organic clementines)

100g organic pine nuts

Finely grated zest of 1 organic lemon

1 tbsp malt whisky or extra clementine juice - if required 

Sukrin Icingfor dusting the cake


To Serve:

Sliced organic clementines

2 sprigs fresh rosemary, leaves only - finely chopped

Lightly whipped organic cream

Raw ‘runny’ honey

Instructions

Pre-heat the oven to 190℃ / 375℉ / Gas mark 5

Grease the bottom and sides of a 23cm spring form cake tin with butter and line with baking parchment. 

Sift the almond flour, tiger nut flour and baking powder into a medium sized bowl. Stir in the ground almonds. 

Fix the double-bladed ’S’ shaped knife into the food processor and place the softened butter, Sukrin Gold, tiger nut/almond flour mix, eggs, clementine juice and vanilla extract into the processor bowl. 

Process for about 30-40 seconds until well mixed and a creamy (not runny) consistency. You may need to scrape down the sides of the of the bowl once or twice to make sure everything is incorporated.

Scrape the contents out of the processor into a large bowl and using a rubber spatula fold in 40g of the pine nuts and the lemon zest. 

If the mixture seems a little too thick, loosen it down with a tablespoon of whisky or extra clementine juice.

Tip the cake mixture into the prepared cake tin, levelling it out and smoothing the surface before scattering the remaining (60g) of pine nuts evenly over the top. 

Bake in the pre-heated oven for 35-40 minutes or until a skewer inserted into the centre of the cake comes out clean.

Leave the cake to cool in the tin for 15 minutes then turn out onto a wire rack to cool completely. 

When cold, place the cake in the centre of cake stand or flat plate and sift a layer of Sukrin Icing evenly over the top.

Serve with sliced clementines, a little fresh rosemary, a drizzle of honey and some whipped cream for a fabulously different ‘take’ on cake.  


Notes

If you don’t have a food processor: Use a hand-held electric whisk to beat the butter and Sukrin Gold together until light and fluffy before whisking in the eggs one at a time, alternating with a third of the flour mixture between each egg to prevent the mixture from curdling. When all the eggs and flour have been incorporated, briefly whisk in the clementine juice and vanilla extract then, using a rubber spatula, fold in the pine nuts and lemon zest before continuing with the recipe above.

The finished cake does not rise very much - it’s not meant to. Whilst the cake tin may seem a little too big for the amount of cake mix - it’s a bit tricky levelling the raw cake mixture out in the tin - I decided that using a cake tin with deeper sides would be the best way to protect the pine nut topping from scorching during baking, which it did.

Almost all raw, untreated honey will crystallise, especially in cold weather. Most can be brought back to ‘runny’ status by leaving in a warm place overnight e.g. wrapped in a thick towel and left over a radiator. However, don’t allow raw honey to warm-up above 35℃ because this will destroy its natural health-giving enzymes and potentially its subtle flavour too. The Raw Honey Shop https://www.therawhoneyshop.com/ has so many wonderful honeys to choose from but Mandarin or Pine honey would be a wonderful addition to this Pine Kernel Torte.

The cake is best eaten on the day it’s made but will keep very well in an airtight container for up to 3 days.


Carbohydrate 8g Protein 10g - per slice of cake (without the clementines and honey accompaniments)


Nutty Parsnip Gratin

by Susan Smith in , ,


I am fully “living life on the veg” courtesy of Riverford Organics, and I could not be happier with my regular supply of the freshest, tastiest organic produce that they deliver every Friday straight to my door. An absolutely brilliant service!

Notwithstanding my new-found addiction to drinking a large glass of freshly pressed juice every day - which I’m convinced is far more life enhancing than the proverbial ‘apple a day’ that’s reputed to ‘keep the doctor away’ - I’m having a ball creating new recipes from a plethora of organic fruit and vegetables that you can never reliably find on supermarket shelves.

Because eating Primal is what my close family prefers, we never succumb to eating white potatoes or even compensate very often with other high-carb root vegetables. However, last week I couldn’t resist ordering some new season parsnips for inclusion in my weekly Riverford box of goodies. When they arrived, I thought I’d go all out and make a main meal of them.

Totally delicious, this creamy Nutty Parsnip Gratin has a gorgeous sweet spiciness about it that pairs beautifully with salty Parmesan cheese and crunchy roasted hazelnuts. In fact, I think I’ve succeeded in elevating the humble parsnip to giddying new heights with this dish! Let’s just say, when you dive in with your fork you might not even recognise that you’re eating parsnips - it’s just the most perfectly balanced, tasty, autumnal meal that ticks all those cold-weather comfort food cravings without a potato or grain in sight. How good is that? 

Nutty Parsnip Gratin (serves 3-4)

Ingredients

500g organic parsnips (trimmed and peeled weight of approximately 3 large parsnips)

2 large organic shallots

300ml organic whole milk 

125ml organic double cream

1 dsp fresh rosemary leaves, finely chopped (about 2 decent sprigs of rosemary)

1 tsp English mustard

¼ tsp organic nutmeg, freshly grated 

1 tsp Celtic sea salt

80g Parmesan cheese (I used Gran Moravia vegetarian Parmesan-style hard cheese), finely grated

50g organic roasted, blanched hazelnuts, chopped

40g organic ground almonds

15g organic unsalted butter

Freshly ground organic black pepper


Instructions

Pre-heat the oven to 200℃ / 400℉ / Gas mark 6

Peel and finely slice the parsnips lengthways into 2-3mm thick strips using a mandolin. If the parsnips are large, first cut them in half across the middle, then cut the top half into quarters and using a vegetable peeler, trim away the fibrous core before slicing.

Peel the shallots and still using the mandolin, slice them very finely.

In a large, wide, lidded sauté pan heat the milk to scalding point (just below boiling) then add the parsnip and shallot slices, pressing them down into the milk (the vegetables won’t be completely covered at this stage).

Cover and cook over a medium-low heat for 4 minutes until the parsnips are soft but not broken up. Tip: Gently stir the vegetables around after 2 minutes to ensure that everything cooks evenly. Take off the heat and set aside.

In a medium-sized bowl, mix together the cream, rosemary, mustard, nutmeg and salt, then stir in half the grated cheese. Pour the mixture over the parsnips and shallots and gently combine everything together. Tip into a gratin dish, press down with the back of a spoon and level off the top.

In a small bowl mix together the rest of the cheese, ground almonds, chopped hazelnuts and a good grating of freshly ground black pepper. Scatter evenly on top of the parsnip mixture.

Dot all over with small pieces of cold butter and bake the gratin for 30 minutes until lovely-bubbly, crisp and golden.

Eat and enjoy.

Notes

Nutty Parsnip Gratin tastes special enough to serve as a vegetarian main course with all the trimmings on Christmas Day. It’s also a brilliant make-ahead vegetable side dish for carnivores - I imagine that served alongside something meaty, it would be an absolute winner.

It doesn’t matter so much for this recipe because you’re boiling the milk anyway, but because it’s kinder to cows and much healthier for humans, I only ever buy whole milk that’s raw and organic from Gazegill Organics This is what they say:

Here at Emma’s Dairy we believe that cows should have the freedom to roam, grazing our pastures and producing raw organic milk that is naturally high in omega 3. Our cows produce a natural amount of milk and are not intensified in any way to produce more, thats why our milk is rich in butterfat and protein. We do not homogenise our milk but believe that in leaving a cream line you can enjoy simply put an un-tampered with natural product that is full of natures best, we also offer raw organic milk and pasteurised milk as well as cream and offer UK wide delivery, we hope you enjoy it.” 


Carbohydrate 31g Protein 15g - per serving


'In The Pink' Vegetable Juice

by Susan Smith in


I’ve recently been watching a 9-part educational series called ‘The Truth About Cancer’, which has been my inspiration for today’s super juice recipe. Ty Bollinger’s self-learning programme offers hope for anyone diagnosed with cancer and for the people who love and care for them. It’s currently estimated that half the world’s population will be diagnosed with cancer at some time in their life and the truth is, there are many powerful, natural cancer preventions that we’re not being told about.

It’s by no means the full story, but it comes as no surprise to me that one of the most powerful and simplest ways to avoid cancer, or beat it if you have it, is through super nutrition and diet.

Hippocrates said “Let food be thy medicine and medicine be thy food.” The trouble is, the food industry pays no attention to health, and the health industry pays no attention to food.

The convenience foods most people are sold on and the allopathic medicines we’re routinely prescribed are chock-a-block with unnatural, man-made chemicals that are alien to the body. Namely; herbicides, pesticides, antibiotics, growth hormones, preservatives, refined sugar, glutamates, artificial colours, flavour enhancers as well as chemically-engineered crops and genetically modified, hydrogenated seed and vegetable oils. No wonder we get sick.

If you want to stay healthy and protect yourself against disease and premature ageing, your best strategy is to take control of what goes into your body. Let the recipes on this site be your inspiration. Eat real, organically-grown food and stop eating sugar and sugar-forming foods (high carbohydrate food and too much meat). We all have cancer cells in our body all of the time, which are normally kept under control by our immune system. However, when you’re getting too much sugar, insulin levels in the body rise and over time, your body cells’ insulin receptors burn-out and you end up with high blood sugar. High blood sugar is the precursor to Type 2 diabetes, cancer and other scary diseases. Eating too much sugar not only feeds cancer, it causes cancer cells to replicate and curbs the immune system that would otherwise attack and destroy abnormal cells.

Switching your body’s energy supply from sugar to fat makes sense because cancer cells cannot use fat for fuel.

Healthy fats, e.g. organic grass-fed butter and ghee, cold-pressed coconut oil, extra virgin olive oil, wild salmon fish oil, avocado, walnut and macadamia oils are in fact vital to health and well-being.

Once you’ve eliminated the crap from your diet, it’s time to overdose on nature’s disease-fighting foods to build, or re-build, a healthy immune system. Eating a rainbow of raw, fresh, organic fruit and vegetables will kick-start the process. The way to get the maximum possible amount of vitamins, minerals, enzymes and amazing phytochemicals into your body is by juicing (I use the Angel cold-press juicer) and for soups and smoothies, a high power blender (I use a Vitamix machine). These machines are expensive but for good-value nutrition, they’re worth every penny.

Earthy yet sweet-tasting, this vibrant looking ‘In The Pink’ Vegetable Juice packs a powerful punch of cancer-fighting nutrients like vitamins C, A and E, beta-carotene, folic acid and potassium that will boost energy levels and help safeguard you from cancer and other diseases. It’s truly a way to drink yourself better and to stay young.

‘In The Pink’ Vegetable Juice - makes 2 servings

Ingredients

4 organic carrots - unpeeled

1 organic beetroot (with leaves if possible) - unpeeled

2 sticks organic celery (with leaves if possible) 

1 organic yellow pepper - including stem and seeds

1 organic red pepper - including stem and seeds 

I thick wedge of organic green cabbage

1 organic cooking apple - unpeeled and uncored 

Instructions

Roughly slice all the vegetables into largish pieces that will fit the feeder tube of your juicer, then juice away as per your machine manufacturer’s instructions. N.B. We find alternating between soft and hard veggies and fruits makes the juicing process easier. 

Pour into 2 tall glasses and drink immediately to retain all the life-enhancing vitamins, minerals and phytochemical goodness (the washing-up can wait!)

Notes

In most cases, when you’re preparing organic fruits and vegetables there’s no need to peel, trim or core before juicing. Just a quick wash or wipe over and you’re ready to go. 

For several years I stopped using my Angel juicer and making multiple-fruit smoothies in my Vitamix. The reason? I suffered an acute inflammatory response to the massive hit of fruit sugar in my daily smoothie, which developed into a painful, itchy, debilitating skin-rash. This only went away when I started eating a low-carb, Primal diet, which is how I came to start writing Primal Plate’s blog. In retrospect, there was no need for me to throw the baby out with the bath water! Learning from my mistake, I now make predominantly vegetable-based juices because too much fruit = too much fructose (fruit sugar) = insulin resistance = disease! 


Carbohydrate 24g Protein 4g - per serving


Celebration Carrot Cake

by Susan Smith in


I’m not cut out to be a landlady. I used to think that renting out property in an era of low interest rates would be a savvy way to create a retirement income. I’ve changed my mind. Firstly, I don’t get to retire because owning rental property isn’t so much an investment as a business. Secondly, the reason there aren’t many, if any, beautiful, immaculately maintained houses ‘To Let’ is because the majority of tenants, no matter how well you vet them, will trash rental property rather than treat it as their own. Worse still, in our namby pamby society legal ‘rights’ favours the tenant over the landlord, so if your ex tenant is willing to lie through their teeth to avoid paying for the damage they’ve caused, you’re forced into a dispute that takes weeks of wearisome effort pulling all the evidence together in order to prove your loss. It’s such stuff and nonsense that has kept me from posting Primal Plate recipes for the past couple of months. The good news is that I’ve finally been afforded some time and respite to get my blog back on track before seeing my ex-tenants in court! And, on a happier note, we’ve now appointed Sarah to be the sole custodian of a fabulously refurbished property. Lucky, lucky girl!

Accordingly, this wonderfully tasty, nutritious carrot cake made its star debut at a family get-together last week to celebrate Sarah moving to her new home, to mark a milestone birthday, to wish “bon voyage” to someone special fulfilling his lifetime ambition to visit Australia and not least for me to honour some creative time back in the kitchen. Everyone unanimously agreed that it was “The best cake you’ve ever made!” I concur. Enhanced by orange zest and warming spices, Celebration Carrot Cake has an autumnal feel that’s made extra special with the most delicious Cream Cheese Frosting and Caramelised Pecans. With more than a passing nod to the 1960’s, Primal Plate’s Celebration Carrot Cake is an updated, healthy version of classic carrot cake. It’s the perfect expression of all that I love about eating Primal. A delicious, seemingly indulgent cake that’s impossible to resist but with no grains, no gluten, no refined sugar and less carbs than a small banana! For the sweet-toothed and health conscious, I think that’s something to celebrate in its own right.

Celebration Carrot Cake (Serves 12)

Ingredients for the cake

80g unsalted organic butter (or coconut oil), melted + extra for greasing

3 tbsp organic maple syrup            

200g organic ground almonds 

100g organic tiger nut flour

1 tsp organic nutmeg, freshly grated            

1 tbsp organic ground cinnamon    

1 tsp gluten-free baking powder

¼ tsp Celtic sea salt    

5 large organic eggs, room temperature            

2 tsp pure vanilla extract                     

3 large organic carrots, peeled & finely grated (you should end up with about 250g prepared carrot)

75g raw organic pecans, chopped

Finely grated zest of 1 large organic orange


For the Cream Cheese Frosting

200g organic cream cheese

3 tbsp organic maple syrup

1 tbsp Sukrin icing sugar

1 tbsp vanilla extract

185 ml organic double cream


For the Caramelised Pecans - optional

40g raw organic pecans (or walnuts)

1 tsp organic maple syrup

½ tsp organic coconut oil


Instructions - to make the cake

Pre-heat the oven to 190℃ / 375 ℉ / Gas mark 5

Grease well and base line 2 x 7 inch loose-bottomed sandwich tins (to save time, I use Lakeland’s baking parchment ready-cut liners)

In a small saucepan over a low heat melt the butter (or coconut oil) and maple syrup together. Take off heat and allow to cool for 5 minutes.

In a large bowl, combine the ground almonds, tiger nut flour, sea salt, baking powder, cinnamon, and nutmeg

In a separate bowl, with an electric whisk, beat together the eggs, vanilla extract & melted butter/maple syrup mix until frothy and well combined.

Stir the carrots, orange zest and chopped nuts into the wet ingredients

Stir the wet ingredients into the dry ingredients

Divide the mixture equally between the cake tins, spreading it out evenly and levelling off the top

Bake in the centre of pre-heated oven for 35 minutes

Cool in their tins for two hours before turning out onto a wire cooling tray and removing the paper discs.

Instructions - to make the Cream Cheese Frosting

Beat the cream cheese, maple syrup, vanilla essence, Sukrin icing sugar together in a large bowl with a handheld electric whisk until well combined and light and fluffy. 

In a separate bowl, whip the double cream until it stands in medium peaks. N.B. Don’t over whisk your cream at this stage because it will solidify even more when you try to incorporate it into the cream cheese mixture, which means you might end up with lumpy rather than smooth cream cheese frosting. 

With a rubber spatula, gently fold the whipped cream into the cream cheese mixture until evenly combined. 

Instructions - to make Caramelised Pecans

Heat a small non stick frying pan over a medium-low heat. 

Add the coconut oil, maple syrup and pecans to the pan (in a single layer) and cook for 4-5 minutes, stirring and turning the nuts over occasionally, until caramelised and golden. 

Turn onto a plate to cool. 

Instructions - to assemble and decorate Carrot Cake

Transfer one of the sandwich cakes onto a serving plate or cake stand. Spread one half of the Cream Cheese Frosting on top and using a flexible metal spatula level out to just within the outermost edges to create the sandwich cake filling. 

Place the second sandwich cake directly on top of the first cake. Dollop the remaining half of Cream Cheese Frosting on top, spreading it out evenly before gently swirling the surface into a simple, decorative-looking finish. 

Decorate with caramelised pecan (or walnut) halves, if liked 


Carbohydrate 16g Protein 9g - per slice


Strawberry Ice Cream

by Susan Smith in


Last week I had to tell Sarah that I couldn’t make the No Churn Double Chocolate & Cherry Ice Cream for a recent supper party she was hosting, because there were no decent cherries left in the shops. Besides, as a last hurrah for English summer berries, I fancied making some no-sugar, no-dairy Strawberry Ice Cream instead. She wasn’t best pleased. The look of disappointment that flashed across her face immediately metamorphosed into disbelief. “How?”, she asked.

Sarah is always astonished when I cull ingredients that are considered intrinsic to a recipe’s success and the finished dish looks and tastes as good as the original. Nay, oftentimes better! At the heart of most yummy ice cream is a custardy concoction of sugar, cream or milk and egg yolks, but even substituting Paleo/Primal friendly ingredients like raw, organic honey or maple syrup for refined sugar, and raw organic cream or milk for industrially produced and processed dairy, doesn’t necessarily go far enough. Recent health scares within my own family have motivated me to make even more effort to support people whose bodies are already in a state of turmoil - their condition exacerbated by eating sugar or anything that turns to sugar - such as grains, potatoes, too much meat and high amounts of fructose (fruit sugar) in so-called healthy fruits.

So, undeterred by Sarah’s initial resistance to my suggestion of Strawberry Ice Cream and with more than a passing nod to Hugh Fearnley-Whittingstall’s recipe for the same in his book Light & Easy, I confidently told her it would prove to be a deliciously sophisticated dessert for her guests. I was right. I love its colour - a sort of soft, antique-pink, its creamy texture (I was almost tempted to rename it Strawberries n’ Cream Ice Cream!), and above all its intense, fresh strawberry flavour.

In theory, because both sugar and fat don’t freeze (butter does, but that’s because it contains water) you should never mess ‘willy-nilly’ with the amounts specified in ice cream recipes for either ingredient if you want to achieve a smooth, softer, less-icy texture. Also, before churning, the ice cream mixture needs to taste a bit sweeter than you think it should, because after freezing it will taste less so. Raw, runny honey à la Hugh Fearnley-Whittingstall’s version of strawberry ice cream, works well in frozen desserts - that’s until you’re trying to pare back on healthy sweeteners too. In this recipe I wanted sweetness without sugar, and creaminess without fat. The solution is alcohol. Like sugar and fat, alcohol won’t freeze so adding a tablespoon of pure, organic vodka to the ice cream mix before churning stops it from becoming too hard and makes it easier to scoop. 

As regular readers of this blog will know, my preferred all-natural, safe alternative to refined sugar in all its guises is Sukrin. Free from calories and carbohydrates, Sukrin’s sweeteners have the aroma, sweetness and flavour of regular sugars but, according to Sukrin, none of the aftertaste found in most other sweeteners. Call me supersensitive, but I do sometimes experience a lingering, cooling taste-sensation in my mouth afterwards. To minimise this, I like to use Sukrin in combination with another sweetener - usually honey or maple syrup - rather than on its own. Nevertheless, to challenge my tastebuds and to see whether I could get away without any honey, I made two batches of ice cream. The first with Sukrin:1 in combo with a little honey and the second with just Sukrin:1. It seems the freezing process not only dumbs down sweetness but also, if it existed, any aftertaste. 

Hurrah! There was no discernible difference between the two - they both tasted delicious, which means Primal Plate's Strawberry Ice Cream is good to go, even for vegans.

You should still be able to find British strawberries in the shops up until the end of September so don’t ‘snooze and lose’ like I did with Sarah’s cherries! Just make sure your strawberries are ripe and full flavoured so you can continue to enjoy a taste of summer for just a little while longer. 

Strawberry Ice Cream (Serves 6)

Ingredients

75g raw, organic cashew nuts

100ml fresh, cold filtered water

1 large (or 2 small) organic bananas (unpeeled weight approximately 200g)

85g Sukrin:1 sweetener

400g ripe strawberries, hulled and roughly chopped

Juice of ½ lemon 

1 tablespoon pure vodka (or Kirsch)


To Serve - optional

Extra strawberries, hulled and sliced

A squeeze of fresh lemon juice

Sukrin icing sugar

Instructions

Soak the cashews in cold, filtered water to cover for 6-8 hours, or overnight. Then drain.

Peel the banana and break into pieces then place in a high-powered blender with the drained cashews, Sukrin:1. and 100ml of fresh cold filtered water. 

Blitz thoroughly until the mixture forms into a thick, creamy, smooth puree. 

Add the strawberries, vodka and lemon juice and blitz again, just until smooth. 

Pour the contents of the blender into a jug, then cover and chill in a refrigerator until cold. 

Now churn the mixture in an ice cream maker, according to the manufacturer’s instructions until it’s soft-set.

Transfer the ice cream into a plastic freezer container, before smoothing off the top and pressing a piece of waxed paper (or cling film) directly onto the surface to stop ice crystals from forming. Cover with a lid and and place in the freezer until solid. 

If you don’t have an ice cream machine, pour into a plastic freeze-proof container and freeze for about an hour until the sides start to get solid. Then mash with a fork to combine the solid ice cream at the sides of the container with the still liquid centre. Straightaway, put it back into the freezer for another half-hour then take it out again and repeat the mixing and mashing. Continue doing this every half hour until the ice cream is soft-set, then let it freeze solid.

About 30 minutes before serving remove the ice cream from the freezer to soften slightly.

Serve scoops of ice cream with sliced strawberries macerated in a little sieved Sukrin icing sugar and a squeeze of lemon juice, if liked. 


Notes 

Always start scooping ice cream from the outer edge where it is softest. This stops ice crystals forming on the outer edges when it’s refrozen. Before returning to the freezer replace the waxed paper and the container lid.

N.B. If you have a sweet tooth and want to eat healthily, it’s best if you to stick with Sukrin’s all-natural sugar alternatives, 100% pure stevia, xylitol, raw honey, pure maple syrup, molasses, and coconut palm sugar.

Carbohydrate 9g Protein 3g - per serving of ice cream (without extra strawberries)


Courgette Polpette

by Susan Smith in ,


I’ve rifled today’s recipe for Courgette Polpette (the Italian name for meatballs, which you pronounce pohl / PET / teh) from Hugh Fearnley Whittingstall’s River Cottage Baby and Toddler Cookbook. He in turn, adapted his recipe from the Italian cookery writer Ursula Ferrigno.

Unabashed, Primal Plate has adjusted the recipe again to convert it into very tasty, grain-free, low-carb finger food for grown-ups and children alike. Sarah and I have trialled these on the run between venues at Mirror Imaging weddings over the past two weekends and, it’s official, we both think these vegetarian nuggets of goodness are picnic fare extraodinaire! Piled into individual lunch boxes alongside sweet, organic cherry tomatoes and cubes of feta cheese, with a bamboo stick to spear them directly into our hungry mouths, it is the most delicious and sustaining, no-mess, packed lunch I’ve ever eaten!  

Easy to make and really, really yummy, these little nibbles would also be great served-up as canapés or as a vegetarian main course served straight out of the oven with homemade tomato sauce. Alternatively, serve them hot, warm or cold with a fresh Tomato Salad and/or our Speedy Seedy No-Grain Soda Bread.

In addition to being healthy and Paleo/Primal friendly, Courgette Polpette are a fantastic way to use up a glut of home-grown courgettes. In fact, if you don’t own an allotment, this is the time of year to make friends with someone who does! Demand for these moreish morsels could well outstrip the seemingly endless bounty of easy-to-grow courgettes that beleaguers most gardeners at the height of the growing season, which just happens to be now. 

In fact, I could happily eat Courgette Polpette ad infinitum for breakfast, lunch or supper. They will keep for several days in the refrigerator and as a stand-by treat for summertime get-togethers - and for busy wedding photographers - they’re an absolute winner. 

Courgette Polpette (makes about 24)

Ingredients

2 tbsp olive oil

2 organic shallots, finely chopped 

500g organic courgettes, cut into small dice

Grated zest of an organic lemon

1 medium organic egg, lightly beaten

30g finely grated parmesan-style cheese (or other well-flavoured hard cheese)

½ ball of vegetarian mozzarella, drained, dried and cut into small dice

50g organic pine nuts, lightly toasted

100g organic ground almonds

1 tbsp Sukrin reduced-fat coconut flour

1-2 tbsp chopped parsley

Sea salt and freshly ground black pepper

Olive oil or melted butter - for greasing

Instructions

Line a large baking sheet with non-stick tin foil and then brush over the surface of the foil with a little olive oil or melted butter.

Heat the oven to 200C / 390F/ Gas mark 6.

Dice the courgettes and chop the shallots. 

Whilst you’re preparing the vegetables, lightly toast the pine nuts in a small dry frying pan over a low heat - keep your eye on them, they can quickly turn from golden to burnt! When they're lightly toasted, take the pan off the heat and set aside to cool.

Heat 2 tablespoons of olive oil in a large frying pan over medium heat. Add the shallots and cook for 2-3 minutes until soft but not browned. Add the courgettes to the pan and continue to fry over a medium heat for a further 10-12 minutes until tender and golden. Drain on kitchen paper and set aside to cool. 

In a large bowl, combine the cooled courgette mixture with the rest of the ingredients, season well, then form into small balls the size of a walnut (you’ll need approximately 25g for each polpetta). 

Place on the baking sheet and bake for 15 minutes, until golden brown. 

Serve hot, warm or cold.


Carbohydrate 13g Protein 15g - per serving (approx. 2g carbohydrate per polpetta)


No-Churn Double Chocolate & Cherry Ice Cream

by Susan Smith in


Last week, the weather forecasters promised us that there was a heatwave heading our way and in response to this welcome “summer-where-are-you?” turnaround, I decided to celebrate by making ice cream. Second time around (the first batch was as solid as a rock!) it was voted a spectacular success. With a taste and texture to rival Haagen Daz or Green & Black’s, this sophisticated, silky-smooth, chocolatey ice cream has no added sugar and doesn’t need an ice cream machine to make it. It tastes so good, I’m thinking of setting up in business!

Most no-churn ice creams rely on just two ingredients - straight-out-of-a-tin sweetened condensed milk and double cream. Unfortunately, as fine and dandy as it may sound to just open-up a tin and whip up some cream to make ice cream, a little more stove-top effort is required for the health conscious who don’t eat sugar. Actually, it’s more time than effort that’s needed here. The base for Primal Plate’s version of no-churn ice cream is simply made from organic full-fat coconut milk and Sukrin Gold - a natural, healthy, almost zero-calorie, sugar-free sweetener - gently simmered together for 45-60 minutes until it bubbles down into sweetened condensed milk. Easy or what?

Choosing the flavourings for my ice cream was a no-brainer. Just the sight of dark, sweet, juicy English cherries at the height of their seasonal deliciousness (just 4 weeks every July and August) is enough to tempt me to binge on more of them than I can reasonably afford. However, taking this pleasure one step beyond bliss is the winning flavour combination of cherries and chocolate brought together in a delectable ice cream.

Better still, dark chocolate and cherries are ranked No.1 and No.3 respectively on the Top Ten Paleo Super Foods which means that not only does this decadent ice cream taste divine, it is really good for you too. Anti-inflammatory, anti-carcinogenic, cardio protective…the list of health benefits for cherries and cacao goes on. So if you love ice cream, dark chocolate or, like me, cherries, now is the time to indulge yourself completely guilt-free with this low-carb, no added sugar, cooling chocolate and cherry iced cream sensation. 

Although temperatures in the East Midlands never really did hit the high spots this week, this No-Churn Double Chocolate & Cherry Ice Cream most certainly did. Whether you’re stepping out into the sunshine to enjoy a refreshing scoop or two, or you want to create a fabulous 5-star dessert for your next summer soiree, I think you’ll be hard pressed to find anything more pleasing.

No-Churn Double Chocolate & Cherry Ice Cream (Serves 6)

Ingredients

300ml organic double cream

400ml organic full-fat coconut milk

50g Sukrin Gold

30g organic raw cacao powder, sifted

1 tsp pure vanilla extract

6-10 drops organic clear liquid stevia

50g dark chocolate (at least 70% - I used Callibaut 72% Satongo chocolate chips

225g dark cherries

Extra to serve:

Whole cherries, washed

Dark chocolate, finely chopped or grated


Instructions

In a medium saucepan, bring the coconut milk and Sukrin Gold to a light boil. Simmer on a low heat for 45-60 minutes, stirring occasionally (be careful, the mixture has a tendency to bubble-up and splatter when stirred!) or until it has reduced in volume by half. Do not cover the pan.

Mix in the raw cacao powder and vanilla extract and whisk together until all is combined and smooth. Pour into a large mixing bowl, cover and let it cool down to room temperature. Do not refrigerate.

Meanwhile, wash and pit the cherries and cut them into small pieces. And, if you’re not using chocolate chips, roughly chop the chocolate into small pieces with a serrated knife.

Add the double cream (straight from the refrigerator) to the bowl of cooled condensed milk.

Whip the cream and condensed milk together until slightly thickened and the mixture falls in ribbons from the whisk. N.B. The mixture just needs to hold its shape rather than stand in stiff peaks.

Add the chocolate chips and cherry pieces to the whisked cream then very gently stir everything together with rubber spatula until evenly combined.

Pour into a plastic freezer container, smooth off the top then press a piece of waxed paper (or cling film) directly onto the surface to stop ice crystals from forming. Cover with a lid and and place in the freezer for at least 3-4 hours.

Notes:

It’s easier to cut the cherries into pieces if you have them facing skin side up on your chopping board.

To soften the ice cream before serving, let it sit at room temperature for about 15 minutes or in the refrigerator for 30 minutes. 

Always start scooping ice cream from the outer edge where it is softest. This stops ice crystals forming on the outer edges when it’s refrozen. Before returning to the freezer, replace the waxed paper and container lid. 

Full-fat ice cream will become more solid the longer you freeze it. For the best texture and taste, eat within 2 weeks.   


Carbohydrate 16g Protein 5.5g - per serving


Happiness Soup

by Susan Smith in , , , ,


Here in the East Midlands you wouldn’t know we’re halfway through summer already. So much anticipation of balmy weather, so many disappointingly grey days. As a cook, I look forward to an abundance of seasonal summer produce that can be simply prepared and eaten outside. As part of team Mirror Imaging, we look to the skies for our most epic wedding shots and, as someone who hasn’t been on holiday for more than sixteen years, I am feeling bereft of summer sun this year. There’s no point in complaining, when summer doesn't deliver on its promise, it’s time to cook up the sunshine yourself.

For most people, yellow is a happy colour so it’s no accident that this bright, cheerful, sunshine-yellow, lemony broth has been entitled Happiness Soup. The inspiration and indeed its name is borrowed from Nigella’s recipe as featured in her book Nigella Summer. All I had to do was tweak the original version to make it grain-free and low-carbohydrate as well as something beautiful to behold. 

Easy to make and as gloriously golden-yellow as the midday sun, this light and lovely soup not only raises the spirits, it’s clean, fresh, citrus and anise flavour perks up the appetite too. 

If it doesn’t give you something to smile about on a dismal summer’s day, I don’t know what will!

Happiness Soup (Serves 4)

Ingredients

1 small organic onion, finely chopped

500 grams yellow courgette        

zest & juice of 1 organic lemon

40g organic butter (or for vegans 3 tbsp olive oil)

1 tsp turmeric

800 ml vegetable stock (or for non-vegetarians chicken stock) - see note below        

1 small cauliflower, florets only

Celtic sea salt

3-4 sprigs fresh tarragon, leaves only, finely chopped

Freshly ground black pepper


Instructions

The courgettes do not need to be peeled. Simply wash and trim the ends off before slicing them into 5mm (⅛ of an inch) rounds and then finely dicing them into very small confetti-like cubes. 

To make cauliflower ‘rice’, cut off the florets - you don’t need any of the stem - then blitz the florets in a food processor for about 30 seconds until it comes together into a powdery cauliflower ‘snow’. 

Melt the butter in a large saucepan over a medium/low heat. With the pan lid on, gently sweat the finely chopped onion in the butter for 8 minutes until soft and translucent but not coloured. 

Add the diced courgettes and the lemon zest to the pan and stir to coat. Cover with a circle of greaseproof paper (cut to fit the pan), put the pan lid back on, then cook on a gentle heat for about 5 minutes, stirring occasionally, until they've slightly softened.

Stir in the turmeric, the stock and 40ml of the lemon juice and then drop in the cauliflower ‘rice’. Cook, uncovered, for 6 minutes, or just until the courgettes and cauliflower ‘rice’ are tender. Taste for seasoning. Add a little more salt and lemon juice if it needs it. 

Leave to cool slightly before serving, then ladle into 4 pre-warmed soup bowls before adding a generous sprinkling of chopped tarragon on top of each bowl and a grinding of black pepper, if liked.


Notes

This soup is best eaten warm rather than hot.

For vegetable stock, I generally make up some Marigold vegetable bouillon concentrate with freshly filtered water. I then strain it - as I did here- to remove any re-hydrated bits of veg that would otherwise spoil the clean, good looks of my finished sauce or soup. Use homemade vegetable stock, if you prefer. 

For non-vegetarians, a chicken stock made from freshly filtered water and the concentrated juices leftover from roasting a chicken will add extra depth and flavour to the soup. 


Carbohydrate 12g Protein 5g - per serving


Sweet Potato Gnocchi With Sage Butter & Goats Cheese

by Susan Smith in , ,


Good news for all Primal/Paleo enthusiasts who still crave potatoes. Today’s blog post for sweet potato gnocchi offers all that’s best about the much-loved spud - golden and crisp on the outside, soft and fluffy on the inside - without going off-piste. These delicious little pillows of potato-like perfection have the heart of soft, light-tasting mashed potato and the soul of crispy, caramelised, umami-flavoured chips.

Sweet potatoes offer a healthier, lower-starch alternative to other potato varieties, but here I’ve tamed down their sweetness and cancelled out their higher water content with primal-friendly ingredients to mimic the taste and texture of regular potatoes. As a cook, there have been many occasions when I’ve thought that only potato can properly complete a meal that’s lacking the comfort and pleasure of something satisfyingly starchy. No longer. These sweet potato gnocchi have the density and depth of flavour I’ve been missing and are the perfect potato substitute for any meal crying out for chips, mash, roasties or croquettes. 

However, I think today’s recipe for Sweet Potato Gnocchi With Sage Butter & Goat’s Cheese is at its best presented as a gratifyingly simple, vegetarian main course. With just enough sweetness from the gnocchi to complement the saltiness of strong-tasting goat’s Cheddar, it’s a combo that’s so tasty you won’t even think about reaching for the ketchup! Also, these beauties are a brilliant dinner-party starter or, piled onto a platter with freshly grated goat’s Cheddar and crispy fried sage leaves scattered over, they will blow your guests away when handed around as a hot savoury canapé to accompany drinks. 

Unlike traditional gnocchi that’s made from regular potato and refined wheat flour, Primal Plate gnocchi are grain-free, potato-free and gluten-free too. They may require a little effort to make but the pre-cooked and cooled gnocchi ‘sausages’ can be stored, still in their cling-film wrapping, for up to 2 days before being cut into gnocchi-sized pillows and quickly fried off in butter. Finally, without compromise, my appetite for potato is satiated!

Sweet Potato Gnocchi With Sage Butter & Goats Cheese (Serves 6)

Ingredients

750g organic sweet potatoes (should yield about 500-550g sweet potato puree)

1 organic egg yolk, lightly beaten

200g organic ground almonds

50g Sukrin organic coconut flour

50g organic arrowroot powder

1½ tsp Celtic sea salt

100g full-fat organic soft cheese

40g organic butter

18 fresh sage leaves

100g Quicke's Goat Cheddar (I purchased this from Waitrose's deli counter) or Parmesan-style cheese, freshly grated - to serve

Freshly ground black pepper - to serve


Instructions

Pre-heat oven to 180°C / 350℉ / Gas mark 4

Place the sweet potatoes on a baking tray and bake for 45-60 minutes (depending on their size) until completely cooked through.

Remove the potatoes from the oven and whilst they’re still hot cut them in half, then scoop out the centres of each. Pass the sweet potato flesh through a fine sieve into a large bowl. Discard the skins.

Add the ground almonds, coconut flour, arrowroot powder, cream cheese, egg yolk and sea salt to the sieved sweet potatoes and mix everything together well. 

Cover and chill for 20-30 minutes in a refrigerator.

Bring a wide, deep pan of water to boil.

Divide the cooled gnocchi mixture into manageable portions (about 200g each). Roll each portion out between cling film into a 2 cm (¾ inch) thick long sausage. Twist the ends of the cling film together tightly then cook each sausage for 6 minutes in the boiling water.

At the end of the cooking time, remove the gnocchi sausage from the boiling water with the aid of two spatulas and lay each one down in an ice-cold water bath to cool down.

Once cool, remove the cling film and slice each sausage into little gnocchi ‘pillows’ i.e. about 2.5cm (1 inch) long pieces. Cover and keep chilled. N.B. They can be stored for up to 2 days in a refrigerator.

When you’re ready to eat, heat 40g grass-fed butter in a large frying pan set over a medium heat. Do not let the pan get too hot - you want the butter to foam, not burn. Sizzle the sage leaves for 1 minute, then remove from the pan and set aside. 

Top left: Gnocchi rolled into cling wrapped  'sausages'. Top right: Blanching in simmering water (put the lid on). Bottom left: In the ice cold water bath. Bottom right: Chopping the chilled Gnocchi 

Top left: Gnocchi rolled into cling wrapped  'sausages'. Top right: Blanching in simmering water (put the lid on). Bottom left: In the ice cold water bath. Bottom right: Chopping the chilled Gnocchi 

Now add the gnocchi pillows to the pan and fry them in the sage-infused butter until golden on the outside and light and fluffy in the centre. Depending on how many people you’re feeding, you may have to do this in several batches. N.B. It’s important that you don’t overcrowd the pan and if the butter starts to burn, clean the pan out and start afresh with more butter. When the gnocchi are nice and golden on all sides, lift them onto a warm plate lined with kitchen paper.

Serve the gnocchi hot with a generous amount of grated goat’s Cheddar sprinkled over and a good grinding of fresh black pepper. Garnish with the crispy sage leaves.


Carbohydrate 29g Protein 13g - per serving


Perfect Roast Chicken

by Susan Smith in ,


Everyone’s favourite, it’s been said "A kitchen is not truly your own until you’ve roasted a chicken in it." Simple and delicious, the perfect roast chicken is aromatic, succulent and tasty with golden, crispy skin. 

Harking back to my childhood, white chicken meat was considered superior to red meat and would most often grace the table for special occasions. Worlds away from the pitiful, intensively reared chickens that now predominate most supermarket shelves, my remembrance is of free-range, pastured, happy hens that, when their time had come, were slaughtered out of sight of the rest of the flock. 

When I was very little, my parents shipped my sister and I off for a month long summer holiday to Gear Farm in Helston, Cornwall. It was here that I endured what at first felt like abandonment but turned out to be a most edifying exposure to farming life. It was rustic. There was no running hot water so we had a washbowl in our bedroom and once a week we bathed in a tin bath in the front sitting room. The only flush toilet was outside. At night if we needed to pee we used under-the-bed chamber pots. The only in-house entertainment was a piano, which is where the family and farmhands gathered in the evening for a sing-along. My all-time favourite was our rendition of a Doris Day song ‘Que Sera Sera’, which to a little girl full of imagination and uncertainty seemed to resonate. Come to think of it, the lyrics still hold good! 

It was a simple but good life. To be woken up very early in the morning to the whinnying of a majestic shire horse stood immediately below my bedroom window, helping to herd the cows from field to farm and back again for their twice-daily milking, hand-collecting fresh, warm eggs from straw filled nests in purpose-made wooden henhouses, walking through fields of ripening wheat, gathering pure white field mushrooms ankle-deep in morning dew, peacefully watching a sow suckling her piglets. And, on the dark side, taking care to avoid the padlocked shed that housed the farm’s very large and vocal bull, lying in bed listening to the sound of a chicken trying to escape having it’s neck wrung and the squeals of terrified pigs being forced onto the slaughter truck. After all these years, I have still not managed to come to terms with the variance between life and death. 

Accordingly, at Primal Plate the vast majority of our meals are vegetarian. However, we do still occasionally eat organic, grass-fed meat, which I also buy to make into healthy, raw pet food for my cat Sushi. An occasional treat for us, a Perfect Roast Chicken is probably what most people think of as the best meal in the world!

I’ve avoided all the ‘faff and fiddle' that many classic roast chicken recipes call for, so you don’t need to be a seasoned cook to bring a perfectly roasted chicken to the table in all it’s golden glory. In fact it’s so easy to cook, it almost beggars belief. However, please don’t be cheapskate when buying chicken. Honour the bird you’re about to eat - and yourself - by paying extra for free-range, pastured and preferably organic, then follow the instructions step-by-step for the best roast chicken you’ve ever tasted.

Finally, there’s nothing much more useful to have in your refrigerator than a cold roast chicken. I like to pile juicy bite-sized pieces of cold roast chicken mixed with lemony mayonnaise, crunchy celery, fresh tarragon and crisp lettuce leaves between slices of grain-free bread to make the most deliciously satisfying sandwiches to take on a picnic with a bottle of chilled champagne. Simply add English strawberries and cream for the ultimate celebration of summer.

Hot or cold, I guarantee that once you’ve learned how to roast a chicken to finger-licking perfection, it’ll be a friend for life!  

Perfect Roast Chicken (Serves 4)

Ingredients

1 organic onion, halved

2 organic carrots, cut into chunks

1 free-range, organic chicken about 1.5 kg / 3lb 5oz

40g grass-fed butter, softened

Celtic sea salt

freshly ground black pepper

1 lemon, pricked all over with the point of a sharp knife & microwaved for 30 seconds

small bunch thyme - optional


Instructions

Take the chicken out of the refrigerator at least 30-45 minutes before you want to cook it to allow it to come to room temperature. 

Remove any plastic packaging and stand the chicken on a plate lined with paper-towel. Pat the chicken dry - inside and out - using more paper towels. N.B. Do not rinse under the tap, the chicken needs to be really dry for its skin to crisp up to a beautiful golden-brown.

Heat the oven to 190℃ (175℃ fan) 375℉ / Gas mark 5. Have a shelf ready in the middle of the oven without any shelves above it.

Scatter the vegetables over the base of a roasting dish that fits the chicken snugly (see photograph).

Season the underside of the chicken (its back) and inside the cavity with salt and pepper, then stuff the cavity with the lemon and thyme, if using. 

Sit the chicken on top of the vegetables and smother it all over with the butter. Then, liberally season it on the outside with a generous amount of sea salt and a good grinding of black pepper. 

Place in the oven and leave, undisturbed, for 1 hr 20 mins – this will give you a perfectly roasted, crispy-skinned chicken. 

To check, pierce the thigh with a skewer and the juices should run clear.

Remove the cooked chicken from the oven and carefully lift the chicken onto a dish or board to rest for at least 15-20 mins. As you lift the chicken, let any juices from the chicken pour out of the cavity into the roasting dish - you can use this to make delicious gravy, soups and sauces. 


Carbohydrate 0g Protein 70g - per serving

Cold roast chicken with tarragon mayonnaise and crispy lettuce between our Grain-Free Bread

Cold roast chicken with tarragon mayonnaise and crispy lettuce between our Grain-Free Bread

Or serve warm roast chicken with a simple salad and our Fast & Easy Vinaigrette 

Or serve warm roast chicken with a simple salad and our Fast & Easy Vinaigrette 


Lemon Courgetti With Summer Vegetables & Tomato Salad

by Susan Smith in , ,


Celebrate summer, when it shows up, with an ‘Italian-style’ meal of healthy, seasonal deliciousness. The shops are filled with a cheap and plentiful supply of courgettes in July and August, so now is the time to make them into the brilliant, low-carb, pasta substitute popularly dubbed “courgetti”. This fresh, healthy and surprisingly substantial dish accompanied by a selection of the most vibrant of summer fruits - sweet tomatoes - is an amazingly flavourful way to enjoy a taste of Italy without the high-starch hit you get from eating regular pasta.  

My eldest daughter Elizabeth provided the inspiration for Primal Plate's tomato salad recipe. Last weekend she served up something very similar at an impromptu family BBQ and it tasted so fresh and looked so colourful that I was reminded how versatile a simply prepared and beautifully presented plate of tomatoes can be. This salad is a great way to lighten-up all manner of dishes, or perhaps to eat on its own with some fresh goat's cheese with grain-free bread to mop up the juices.

Quick, light and super-easy to make, this lovely combo is my idea of summer on a plate!

Ingredients - for the Lemon Courgetti with Summer Vegetables

300ml organic double cream

1 organic lemon, juice and finely grated zest

80g organic full-fat cream cheese

100g Parmesan-style cheese, finely grated

200g frozen peas

200g frozen baby broad beans

200g fresh asparagus tips

4 medium-large, firm, flat (not curved) chunky courgettes - size and shape matters!

small bunch of basil

sea salt and black pepper


Ingredients - for the Tomato Salad

600g ripe vine tomatoes - for interest and sheer good looks, choose from a selection of red or yellow cherry tomatoes, heirloom golden-orange, red and green vine tomatoes, baby plum tomatoes or the beautiful red and green Tigerella varieties

2 tbsp organic cold-pressed olive oil

2 tsp best-quality Balsmanic of Modena vinegar

sea salt and freshly ground black pepper

fresh basil leaves - to decorate

Instructions

Boil a kettle-full of fresh water. Pre-heat 4 individual pasta bowls.

Measure the frozen peas and broad beans into two separate heat-proof jugs or bowls. Pour the boiling water from the kettle equally over the peas and broad beans and allow to stand until they’re defrosted. 

Prepare the courgettes by washing them and spiralising into long thin spaghetti-like shreds - alternatively, this can be done with a knife by cutting them into long, thin strips.

Drain the defrosted peas through a sieve and tip them into a clean bowl. When the broad beans have cooled down, drain them too before popping them out of their tough outer skins between your finger and thumb straight into the bowl with the peas. 

Trim the bottom of the asparagus tips - it’s not necessary, but I also like to peel the bottom third of the stems with a potato peeler. Boil a second kettle of water.

Heat the cream with the lemon zest in a medium-large saucepan over a medium heat until it comes to the boil. Turn the heat down to simmer and continue cooking for 3 minutes. Cover and set aside.

Meanwhile, pour the boiling water into the bottom of a steamer, then put the asparagus tips into the steamer basket, cover and steam for just 1 minute. Remove the asparagus tips from the steamer with a slotted spoon into a bowl of cold water (or put into a sieve and run under the cold tap) to ‘set’ their bright green colour. Drain and dry on kitchen paper. Cut the asparagus into 3 centimetre pieces (or in half) and then add them to the bowl of peas and broad beans.

Reserve 4 sprigs of basil then strip the leaves off the rest of the basil stems and tear them into small pieces. Set aside.

Whisk the cream cheese, 80g of Parmesan and 30ml of lemon juice into the lemon infused cream and then over a medium heat bring the sauce back to just below boiling point. Taste, then season with sea salt and a good grinding of black pepper. Taste again and add a little more lemon juice if you think it needs it. 

Add the asparagus, broad beans and peas to the cream sauce and then over a low/medium heat, allow the vegetables to gently warm through - make sure the sauce gets nice and hot but don't let it boil.

Bring the water in the steamer back to the boil, add the courgetti to the steamer basket, cover and steam for just 1½ minutes - no longer. They need to cook just long enough to lose their raw-edge and get hot but not so long that they become limp and soggy. 

Immediately tip the courgetti out of the steamer basket onto a dry, clean tea-towel. Wrap them up in the tea towel to absorb as much water as possible.

Divide the drained courgetti equally between the 4 pre-heated serving dishes. Stir the torn basil leaves into the cream sauce and vegetables then ladle or spoon this on top of the courgetti - distributing the vegetables and sauce evenly. Sprinkle the rest of the grated Parmesan-style cheese over each serving and finish with a good grinding of black pepper and a sprig of fresh basil.

Serve immediately with tomato salad.   


Instructions - to make Tomato Salad

No need to peel or remove the seeds from the tomatoes. Wash and slice the larger tomatoes, removing the core at the stem end by cutting out a small ‘v’ at the centre of the bigger slices with the point of a small, sharp knife. Halve the cherry tomatoes.

Layer all the tomatoes attractively on a large platter. Lightly season with sea salt and then drizzle over the olive oil and balsamic vinegar. Add a grinding of freshly ground black pepper and decorate with green and/or purple basil leaves. 

Serve at room temperature for a simply delicious way to enjoy all the nutritional benefits of sweet, fragrant tomatoes. Yum!

Notes

If you prefer, you can substitute the frozen vegetables with 500 grams each of fresh peas and broad beans (weight before podding). Pod them, then cook in boiling water (or steam) for 3 minutes before draining well and adding to the cream sauce to keep warm. 


Carbohydrate 14g Protein 19g - per serving of lemon courgetti with summer vegetables

Carbohydrate 7g Protein 1g - per serving of tomato salad


Flourless Lemon & Raspberry Swiss Roll

by Susan Smith in


I have to say, this light and airy, low-carb, grain-free, refined sugar-free and fat-free Swiss roll cake mix is probably the best Primal/Paleo cake I’ve ever made! Rightly so, because I made it for my daughter Sarah’s birthday on 4th July, and she is most definitely worth it. 

The night before her birthday, I was slightly panicked as to how I was going to bake a birthday surprise at such short notice. I’d bought in a stack of fresh summer fruits - just in case I could conjure up something fabulous - but the idea for this impressive looking, light-as-a-feather cake didn’t come to me until about ten 'sleep-hours' before Sarah was due to come over the following morning to unwrap her presents.

Baking an impromptu, untried, made-up recipe for a special occasion isn’t normally my bag, but since only cake will do when there’s a birthday to celebrate I got up early the next morning with my fingers crossed. I am so glad I did. This beautiful cake is not nearly as daunting to make as it looks and the finished result is so light in texture and tastes so fresh that it cannot fail to delight anyone lucky enough to share it. In fact, it is so good, four of us couldn’t restrain ourselves from eating the whole cake in one sitting. Furthermore, as Sarah’s elder sister hadn’t been there for the birthday party itself, it was a great excuse to bake two of these cakes on consecutive days! Once you try this light and lovely treat, you’ll understand why we find this delicious lemon and raspberry Swiss roll totally irresistible.

On the face of it, I should probably consider myself ‘caked-out’ for now, however the truth is, I’m actually motivated to seek out more people whose birthday is imminent! As there’s nothing unhealthy about this Flourless Lemon & Raspberry Swiss Roll, you really don’t need an excuse to indulge. If you love someone enough to want to bake them cake, this one’s gorgeous good looks and lemony, raspberry goodness is all you need to impress.

Flourless Lemon & Raspberry Swiss Roll (makes 12 slices)

Ingredients - for the Swiss roll

4 large organic free-range eggs, separated

40g Sukrin:1 granulated sweetener

40g organic ‘runny’ honey (I actually used raw unpasteurised honey and gently heated it to make it runny)

Zest of 1 organic lemon, finely grated

75g organic ground almonds                            

25g organic tiger nut flour

½ tsp baking powder

1 tbsp Sukrin icing sugar - for dusting top of cake


Ingredients - for the raspberry sauce

150g fresh raspberries

75g no added sugar raspberry spread


Ingredients - for the lemon cream

125ml organic double cream

1 tbsp Sukrin icing sugar

Zest of 1 organic lemon, finely grated


Instructions

Butter and line a 22.5 cm x 32.5 cm (approx. 9” x 13”) Swiss roll tin with non-stick baking paper. 

Preheat the oven to 180°C / 350℉ / Gas mark 4

Sift the tiger nut flour and baking powder together into a bowl and then add the ground almonds. Stir to combine.

If using ‘set’ honey, place in a small saucepan over a very gentle heat until it liquefies. Take off the heat and allow to cool down for a couple of minutes.

In a medium/large bowl, whisk the egg whites until stiff. In a separate large bowl, whisk the egg yolks, the lemon zest, Sukrin:1 and 'runny' honey until light, airy and mousse-like i.e. very pale and thick – this will take about 3 minutes using an electric whisk on high speed.

Stir the ground almonds and tiger nut flour into the egg yolk and lemon zest mixture. 

With a rubber spatula, gently fold in the egg whites, a third at a time, until completely mixed in.

Pour the mixture out onto the lined baking tray and bake for 10-15 minutes until golden, firm and springy (mine took exactly 13 minutes).

Remove from the oven and leave in the tray to cool, covered with another piece of baking paper and a damp tea towel.

To make the raspberry sauce: In a small saucepan set over a low heat, cook 75g fresh raspberries with the raspberry spread. Bring to a gentle simmer, then using the back of a fork, crush the raspberries down into a sauce. Take off the heat and set aside to allow the sauce to cool down completely.

To make the lemon cream: Whip the cream with 1 tablespoon of Sukrin icing sugar and the lemon zest until almost thick i.e. stiff but still speadable. Cover and keep in the refrigerator until you’re ready to assemble the cake. Cut the remaining raspberries in half.

When the cake is cool, remove the tea towel and parchment paper and lay them down flat onto a work surface - with the non-stick paper sat on top of the tea towel. 

Generously dust the top of the sponge with Sukrin icing sugar then flip it out onto the parchment paper with one of the short edges facing you. Carefully peel the baking parchment off the cake.

With a small sharp knife score a line 2 centimetres in from the short edge nearest to you - making sure you only cut about halfway through the depth of the sponge. 

Next, spread the raspberry sauce all over the top of the cake to within about 2 centimetres of the edge. Then layer the whipped lemon cream on top of that - again leaving a 2 cm edge all the way around. Finally, dot the raspberry halves evenly on top of the cream. 

Start rolling the cake up tightly from the short end where you scored a line. Using the parchment paper to help you, keep rolling tightly until you get to the end. Carefully lift the Swiss roll onto a plate with the seam side down.

Chill for 30 minutes before serving.


Notes

Aside from Sukrin’s stevia/erythritol sweetener, the best natural alternative sweetener for baking is organic maple syrup because it is not chemically affected by heat. However, whilst testing this cake recipe out I didn’t want to risk maple syrup’s distinctive taste coming through, so I chose to use honey.

Using half honey and half Sukrin:1 to sweeten this delicate sponge minimises the potential aftertaste when using stevia alone. Whilst the vast majority of honey available in the shops has already been subjected to heat - so it makes no difference whether you decide to heat it or cook with it at home - this is not true of Na’vi’s wonderful, raw, unpasteurised honey. Heating Na’vi’s honey is sacrilege! It destroys many of its beneficial effects, killing off its ‘superfood’ status. If you’re going to buy Na’vi honey - and I recommend that you do - simply enjoy its health-giving benefits spooned straight from the jar. It was Hobson’s choice that I used it for my cake because it’s the only honey I ever keep in my store cupboard! 


Carbohydrates 8g Protein 4g - per slice


Mediterranean Sauce With Sea Bream

by Susan Smith in , , ,


Whilst Britain voted to leave the EU last Friday we are still inseparably European. I for one am proud to celebrate the fact with this brilliantly versatile, sunshiny flavoured, fresh-tasting Mediterranean Sauce that goes with just about everything. Marvellous with organic grass-fed steak, tender-cooked chicken breast, fresh fish or vegetables this hearty tomato and sweet pepper sauce with black olives, baby capers and fresh oregano cannot fail to transport you to sunny Provence. We love it.

I don’t know who to credit this recipe to. Although I found it at Delia Online, on this website it states that the recipe is taken from A Year In My Kitchen by Skye Gingell. No matter, Primal Plate has tried and tested this recipe several times over and it’s a really healthy, speedy, elegant-looking dish that can be on the table within forty-five minutes. I have increased the quantities of some ingredients, which I think makes for a better balance of flavours and also a more generous portion of vegetables.  

As with the original recipe, I chose to showcase this Mediterranean sauce with fresh sea bream but it can also deliver a glorious Primal vegetarian feast served with roasted cauliflower and lemon-herb dressing dolloped over - please see Notes below.

Summer sun here we come!

Mediterranean Sauce With Sea Bream (Serves 2)

Ingredients

2 whole sea bream, weighing 300g -352g each, de-scaled and gutted (get the fishmonger to do this for you)

1-2 tbsp extra virgin olive oil

Celtic sea salt and freshly milled black pepper

2 shallots, peeled and finely chopped

1 medium/large yellow pepper, de-seeded and sliced lengthways into strips

300g large organic vine tomatoes, skinned and chopped (see Note below)

1 heaped tablespoon fresh oregano, finely chopped  

30g pitted black olives (I used Kalamata), cut into slivers

1 heaped tablespoon baby capers, rinsed and dried

1 heaped tablespoon organic tomato puree

75g organic cherry vine tomatoes, unpeeled but cut into halves

Curly leaf parsley - to garnish


Instructions

Pre-heat the oven to 190℃ / 375℉ / Gas mark 5

Boil a kettle of water.

Wipe the fish with some kitchen paper, then make 3 diagonal cuts across the fish (on both sides) and brush lightly all over with a little olive oil. Season inside and out with sea salt and freshly milled black pepper.

Place the fish on a flat baking tray lined with non-stick foil and transfer to the centre of the pre-heated oven for 15-20 minutes.

Meanwhile, heat the olive oil in a deep sauté pan over a medium/low heat. Add the shallots and gently cook with the pan lid on for a couple of minutes. Add the yellow pepper strips to the pan then cover and continue to soften the vegetables over a medium heat for another 5 minutes.

Add the chopped tomatoes, tomato puree, olives, capers and oregano. Stir everything together, then season with sea salt and freshly milled black pepper. 

Simmer gently with the pan lid half-on / half off for a further 10 minutes, stirring occasionally. 

Add the cherry tomato halves - gently stirring them into the rest of the sauce - then turn the heat down to its lowest setting and continue cooking for a minute or so until the cherry tomatoes are just warmed through and retaining their shape i.e. not collapsed.

To serve, place the fish onto two warm serving plates and spoon the sauce alongside. Garnish with a sprig or two of fresh parsley, if liked.  

For vegetarians and vegans, the Mediterranean Sauce also goes well with roasted cauliflower, served here with lemon-herb dressing 

For vegetarians and vegans, the Mediterranean Sauce also goes well with roasted cauliflower, served here with lemon-herb dressing 

Notes

To skin the tomatoes, use the pointy end of a sharp knife to prick the tomatoes all over several times. Put them into a heatproof bowl and cover in boiling water. Leave them for about 25- 35 seconds - no longer or they’ll start to cook - then using a slotted spoon lift them directly into a bowl of ice-cold water. Remove from the cold water and peel the skins off before proceeding with the recipe.

For simplicity’s sake, the vegetarian version of this recipe, Mediterranean Sauce With Roasted Cauliflower and Lemon-Herb Olive Oil Dressing will feature as a separate Primal Plate blog post soon.


Carbohydrates 12g Protein 69g - per serving


Asparagus Loaf

by Susan Smith in , ,


There’s been a seismic shift in my life situation over the past few weeks - and yes, it’s been every bit as horrible as it sounds. All self-care has gone out of the window and I’ve thrown my despairing food-blogging hands up in the air more than once because there has been no time for me to be creative. Nevertheless, with just a few more days left to get your hands on the last of the English Asparagus - the notoriously short season starts on St. George’s Day and ends on 21st June - I was determined to blog one of my all time favourite asparagus recipes. 

Thankfully, not much original thought was required. I’ve borrowed this recipe straight out of Rose Elliot’s book ‘The New Vegetarian Cookbook’ - although I’ve more than doubled the amount of ingredients than the original recipe calls for, because it just doesn’t make enough of this delicious savoury loaf to satisfy my greed for English asparagus.

If I wasn’t strictly Primal, I would most enjoy eating a couple of slices of this asparagus loaf for a lazy lunch in the garden on a warm summer’s afternoon, with a few Jersey Royal potatoes, homemade mayo, a fresh leaf salad and a glass of ice-cold wine. My food fantasy aside - and the fact that so far this year there’s been precious little summer weather to speak of - mangetout peas and some crisp lettuce will do just as nicely in place of potatoes for a lovely Primal-inspired summer dinner party dish. Alternatively, cut the loaf into tasty, canapés-sized mouthfuls to serve with drinks, transport to a glamorous picnic, or serve as a delicious vegetarian option as part of a buffet party spread. I think Asparagus Loaf is very, very delicious - anywhere, anytime, any place. 

Asparagus Loaf (serves 6)

Ingredients

1 medium onion, peeled and grated

225g Parmesan or Vegetarian Parmesan-style Cheese (I used Gran Moravia)

225g organic ground almonds (I bulk buy ground almonds online here)

4 large organic eggs

285ml single cream (I actually used 250ml organic double cream and made up the quantity with filtered water)

sea salt and freshly ground black pepper

freshly-grated nutmeg (I used about ⅓ of a whole nutmeg)

750g green asparagus (at least 30 decent-sized asparagus spears)

Sprigs of organic watercress - to garnish


Instructions

Boil a kettle of water. 

Set the oven to 190℃ / 375℉ / Gas mark 5

Snap the ends off the asparagus spears and using a potato peeler trim off the bottom third of the spears to make sure that all the tough part has been removed - you should end up with about 325-350 grams of trimmed asparagus.

Pour the boiling water from the kettle into a large pan. Put the trimmed asparagus into a steamer basket set over the boiling water, put the pan lid on and steam the asparagus for 3 minutes. Drain, refresh under cold water, drain well again and set aside. 

Grease a 2lb loaf tin with melted butter and line with a long strip of baking parchment to cover the base and short-end sides.

In a large bowl, mix together the grated onion, cheese, ground almonds, eggs and cream.

Season with sea salt (about a teaspoon), a generous grinding of black pepper and the nutmeg.  

Put a layer of this nut mixture into the base of the loaf tin, then neatly arrange a layer of asparagus spears on top. Continue in layers like this until all the ingredients are used up, ending with the nut mixture. 

Bake for 60-70 minutes, until risen and firm in the centre.

Cool completely in the tin, then slip a knife around the sides and carefully turn out onto a plate.

Strip off the paper. Cut into slices. Arrange the slices on a plate - or individual plates - and garnish with watercress.


Notes

It’s well worth taking the time to arrange the asparagus spears neatly into the loaf tin. 

You’ll end up with 4 layers of the nut mixture and 3 layers of asparagus spears in your loaf tin, so try to split your ingredients evenly upfront. When baking this for the blog, I threatened to run out of the nut mixture for the final layer. From experience I know that If the top nut layer is too thin, when the loaf is cut into slices it will tend to break off. Annoyingly, I also ended up 2 asparagus spears short, which then had to be steamed separately! 

Season carefully as Parmesan cheese tends to be salty.

If you’re making canapés - makes about 48 - cut the slices neatly again into thirds.

Although leftovers keep well in a sealed container in the fridge, if the size of this loaf is too much for your needs, simply halve the ingredients and bake in a 1lb loaf tin for 45-60 minutes. 


Carbohydrates 11g Protein 28g - per serving


Lucky's Nut Truffles

by Susan Smith in ,


As I write this blog I’m sat at the end of my hallway with my computer balanced on top of a pile of books, hemmed in by displaced furniture and various bits of office paraphernalia (phase 3 of our annual home improvement and re-decoration schedule has been going on for what seems an interminable 4 weeks already) whilst my man stands next to me with his computer resting on a still unwrapped furniture delivery, trying to research plant variants that have sprouted in our garden, which we don’t recognise.

We’re not green-fingered, but we do like to try and make sense of our green space without destroying all life within it. You only have to look up to see that we’re unusual in this respect. It seems that the majority of people are hell-bent on ‘managing’ nature, particularly when it comes down to so-called tree maintenance a.k.a. the ceaseless year-round topping, lopping and felling of trees. Question: When is a tree not a tree? Answer: When some idiot has butchered all its magnificent branches back to stubs and spindly, finger-like projections have grown in place of the beautiful tree-shaped canopy that once was…or cut it down completely to an ugly stump. 

Stupid is as stupid does. I’m convinced the obsessive compulsion to mess with trees is a form of egocentric behaviour that satisfies man's craving for power and control. With big tool in hand - I mean chain-saw - I believe the power rush they get from hacking, sawing and destroying a living entity is an addiction that feeds on itself. Not only do they spoil the look of the trees that still stand, the resulting pitiful, topped and disfigured specimens are left with open wounds that are vulnerable to attack from invading pathogens (fungi and bacteria). Cutting back, thinning out and removing branches destroys a tree’s natural defences - the tree bark that protects the underlying tree tissue. It also threatens its life support system - the loss of leaves that are every tree’s source of food. Exposed to the sun, the cuts are in effect death wounds and the removal of a large percentage of leaf-bearing branches, starvation.

If a starving tree has enough energy, it will send out multiple shoots beneath the cuts to try and replace its leaves as quickly as possible. These new shoots will never be as strong as the original branch they emerge from and can easily snap off even years after they’ve grown back to the size that the tree was before it was attacked. Furthermore, trees can’t heal - they try to defend themselves by closing off their wounds with a tough, woody substance called wound wood. A tree’s ability to seal off its wounds depends on many variables; its age, species, health and vigour, the size and shape of the wound and the time of year. If a tree can’t respond quickly to its injury it falls prey to rot, insect infestation and wood decay, which in turn leads to a loss of vitality and vigour that results in the tree’s inevitable decline, dieback and structural failure.

It is of course a cunning way for tree cutters to future-proof their industry. If you didn’t need the services of a tree surgeon before, you most certainly will when your decayed and dying trees become a health and safety issue for you and your neighbours!

Despite all the ugliness surrounding them, people still have embedded in their sub-conscious that regular tree felling and pruning is both necessary and good. "It lets in more light; it prevents tree root damage to property; it stops the mess trees create (have they not heard of a broom?); wet leaves are dangerous; tall trees block TV/Sky/Broadband reception; it spoils my view; I can’t see the sky (!); I need the space for off-road parking…" are just some of the excuses given. Then there are the unqualified tree surgeons stalking the neighbourhood for mature trees that they can cash-in on, knocking on doors and persuading homeowners that their trees are an imminent threat unless they are cut-back. I give them short thrift, but many folk are convinced.

What these people don’t seem to know or appreciate is:

  • Trees give us oxygen and oxygen helps us breathe - a mature tree in season produces as much oxygen as ten people inhale in a year!
  • Trees give birds and animals shelter so if you cut them down you’re messing up their homes.
  • Trees help clear the air of heat and pollutant gases. 
  • Trees clean the soil - trees filter dangerous chemicals and pollutants out of the soil, which helps assure our food security. 
  • Trees absorb carbon dioxide and help stop global warming.
  • Trees help conserve rain (to prevent drought) and reduce the likelihood of flooding. They fight soil erosion by protecting the soil from surface flooding - binding soil to sloping land with their roots.
  • Trees help control noise pollution.
  • Trees mask ugliness and keep unsightly structures from view.  
  • Trees save energy. In winter they act as wind breaks - breaking the force of cold, blustery winds and reducing the cost of heating your home. In summer, strategically planted trees around your home shield your property from UV rays and reduce the need for air conditioning.
  • Trees give us food - e.g. nuts and fruits.
  • Trees improve human health and well-being. As well as offering cooling shade and protecting us from the sun’s harsh rays, they are aesthetically pleasing to look at. Full of life, strong and magnificent, their beauty is more than skin deep. Exposure to trees and nature calms the mind and uplifts the soul. Being in a natural environment surrounded by trees can lower blood pressure and heart rate. Hospital patients who have a view of trees from their window heal quicker, take less drugs and have fewer post surgical complications than those who don’t. Even babies born to mothers that live near to trees are less likely to be underweight. 
  • Trees increase property values significantly - they not only beautify your property and the surrounding area, there is less fear and violence in well-planted, green spaces than there is in and around homes in barren neighbourhoods. Houses surrounded by trees sell for 15-25 percent higher than houses with no trees. 

Since trees do so much to benefit humans, we think it’s best to leave them alone to do their job. No radical pruning of healthy trees is required or allowed! Our reward is a semi-wild garden that nature has developed into something quite Disney-like. As well as owls, doves, pigeons, innumerable songbirds, hedgehogs, mice, frogs, bats, the occasional pheasant seeking refuge from the local Sunday shoot, and a hungry female sparrowhawk that knows for sure there are rich pickings to be had, we live harmoniously alongside a small army of grey squirrels that are accidentally planting more trees.

Because humans have destroyed so much of the natural landscape, squirrels have been forced to adapt to a more urban environment to survive. Grey squirrels have adapted more successfully than their red squirrel counterparts, but that doesn’t excuse the widespread racism against grey squirrels, which vilifies them with exaggerated claims that they damage/kill trees by bark stripping and excuses the culling of them because, according to urban myth, grey squirrels are deemed pests that destroy property and cause a decline in red squirrel populations. As with the obsession for tree-pruning, it’s all a load of twaddle. Both red and grey squirrels strip tree bark to build their dreys (squirrel nests) and to get to the underlying wood as a source of nutrition when times are hard but, unlike human crime against trees, the damage they cause is minimal and it doesn’t kill the trees. Here are the facts about the demise of red squirrels and, as you might expect, it’s mostly down to humans!

Given that the natural habitat of squirrels is now disappearing at a rate of knots, they make their dreys in any tree-like structure they can find. Four years ago, around the time our next door neighbour cut down an entire copse of eighteen mature trees, one beautiful, dedicated, mamma squirrel sought shelter on our roof under the solar panels, where she built her drey and tried to raise her kittens (baby squirrels). Sadly, it was not meant to be. Somehow, mum sustained a fatal injury to her back and later that day (Friday 13th April 2012) two kittens fell out of their nest and slid straight off the roof - three storeys high - directly onto the solid concrete path outside our back door. What to do? Tiny, helpless and with their eyes still closed, we had no choice but to take on the immediate squirrel care challenge in front of us! 

In the first few weeks of life, baby squirrels don’t do much more than eat, sleep and grow. However, it wasn’t long before our two little boys became gorgeous handfuls of wriggly, noisy, messiness that took over our lives completely. Active during daylight hours, they lived right next to my desk in our home office. Despite the immense parental responsibilities thrust upon us, we soon discovered what a life-affirming joy these intelligent, industrious, characterful and acrobatic critters are. With the help and support of Clarissa Summers we loved and cherished little Kipp and Lucky 24/7, until they were about six months old and ready to be released back into the wild. Our boys may be long gone, but our love and respect for squirrels lives on.

Whether chasing each other from tree branch to tree branch, jumping around in the tops of our trees, sitting perfectly still in the classic squirrel pose with their tail arched over their back, pausing in front of us to munch on a nut or cheekily peering through the window to get our attention, squirrels are without doubt the cutest, most entertaining of all the wildlife species living in our garden, and we happily pay the price to secure their allegiance. Not only do we make executive-style squirrel boxes to keep them warm and safe, we’re also their most reliable food source - namely, an all-year-round supply of best-quality walnuts (their favourite), hazelnuts and, when in-season, acorns too. It’s part of a deliberate plan. The squirrels have learned how to exploit our generosity by approaching us with charming gestures that signal their need for more nuts, and we know that large quantities of these will be stored in the ground. As squirrels don’t always remember where they’ve buried their nuts, there’s always the potential for some of their cache to take root and grow into new trees.

Helping squirrels survive and thrive in captivity very much depends on what you feed them. As well as whole nuts, fruit and veggies, I used to make my two boys nutritious seed and nut balls that helped them grow strong and kept them noisily bouncing around their cage for hours. It seems timely that today’s recipe for Lucky’s Nut Truffles (no prizes for guessing why I’ve called them that) are an energy ball equivalent for humans. These blissful little bombs of goodness mix protein, vitamins, fibre, minerals and essential fats and are a chocolatey, nutty delight to enjoy any time you need an energy boost. Sweetly satisfying and sustaining, Lucky’s Nut Truffles are ideal for a pre or post workout snack, yet still dainty enough for some after dinner indulgence. Incredibly moreish, I suggest you squirrel away a plentiful stash for yourself in the refrigerator, where they could (but I predict won’t!) last a couple of weeks.

Lucky’s Nut Truffles (make about 22)

Ingredients

100g organic raw walnuts

100g organic raw hazelnuts, unskinned

15g raw cacao powder

100g Medjool dates, pitted (about 6)

1 ½ shots (60 ml) freshly brewed espresso-strength coffee

1 tbsp smooth almond butter

3 tbsp coconut butter

2 tsp organic ground cinnamon

2 drops organic liquid stevia

2 tsp pure vanilla extract

50g organic shredded coconut, for coating

Instructions

Pre-heat the oven to 180℃ / 350℉ / Gas mark 4. 

Put the pitted dates into a bowl and pour over the hot coffee. Set aside.

Place the walnuts and hazelnuts together on a baking tray and toast for 8-9 minutes. 

Place the shredded coconut on a separate baking sheet and toast at the same temperature for 5-6 minutes, or until a deep golden brown. Leave on the tray to cool.

Tip the toasted nuts - it doesn’t matter if they’re still warm - into a food processor bowl and blitz until finely chopped. Don’t allow all the walnuts and hazelnuts to become totally smooth as some slightly larger, crunchy pieces in the mix adds texture. Empty the ground nuts into a bowl and set aside.

Add the dates, coffee, cacao powder, almond and coconut butters, ground cinnamon, vanilla extract and liquid stevia to the now empty processor bowl (no need to wash it first) and process until the mixture clumps together into a sticky, gooey paste. You may need to scrape down the sides of the bowl a couple of times to ensure an even mix.

Add the toasted nuts to the paste and pulse everything together until the nuts are evenly distributed.

Using a dessertspoon, scoop the dough into individual bite-sized portions (approximately 17g each) and roll anti-clockwise between the palms of your hands into smooth, round balls.

To finish, roll the truffles in the toasted coconut. 


Carbohydrate 6g Protein 2g - per truffle