Torn Mozzarella and Peppers

by Susan Smith in ,


As predicted, while I grapple with the gargantuan task of becoming a certified health coach, assisting Mirror Imaging at the height of the wedding season and simultaneously checking-out old tenants and finding new ones, I have virtually no time to develop new recipes for this blog. Indeed any attempt to write my blog is secondary to cooking our daily meal and getting enough exercise. Hence, I’ve gotta keep things quick and easy.

It’s a blessing. My brain cells are getting enough of a work-out with coursework and exams so I’ll keep to the point of Primal Plate, which is to simply feature delicious recipes that help you transition from being a carb-dependent sugar-burner to a fat burning beast.

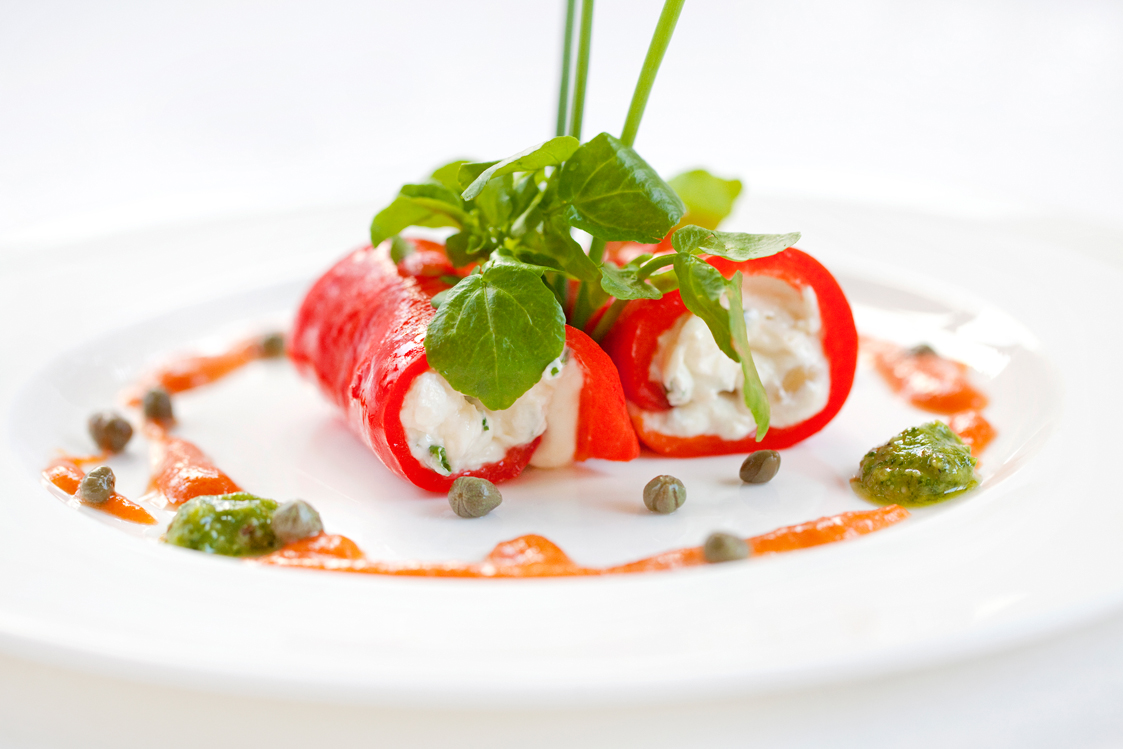
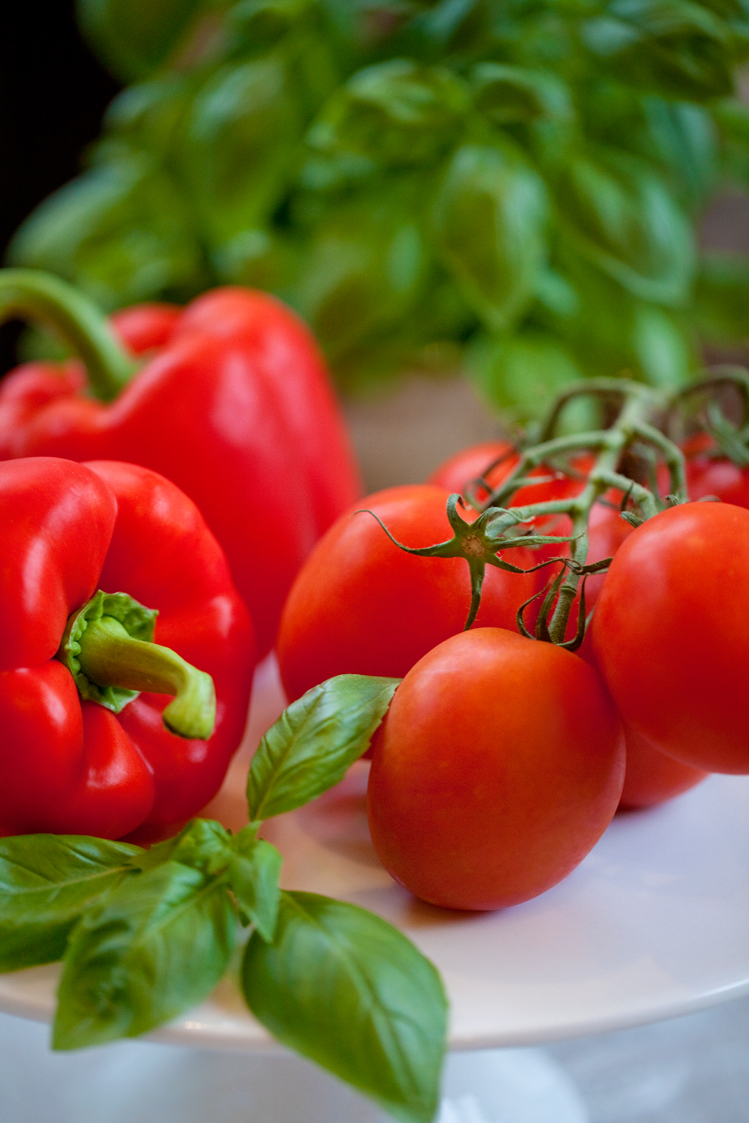
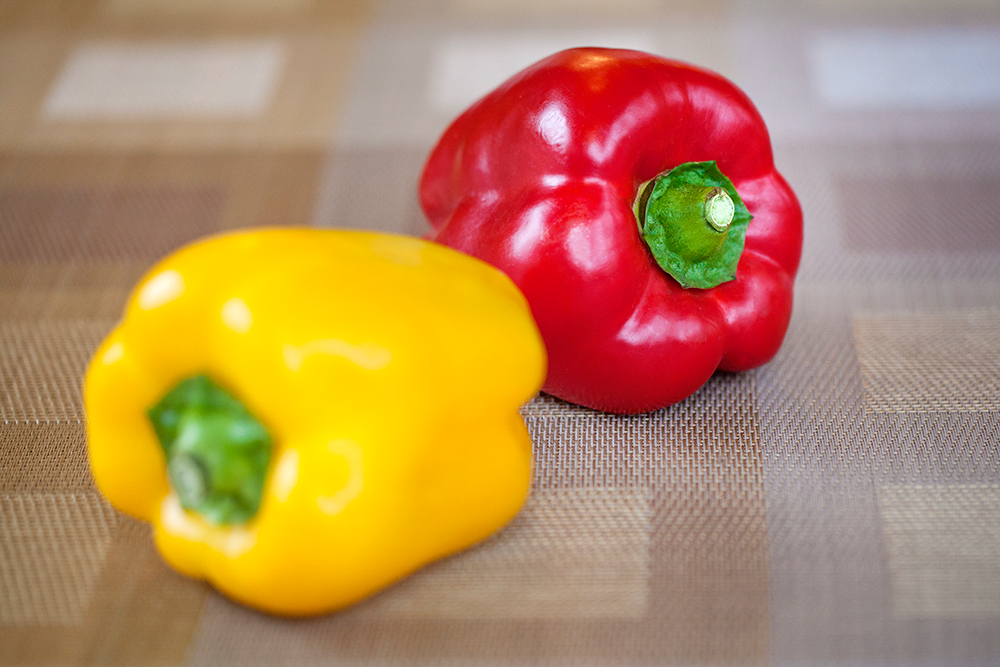
Here’s one such recipe taken from Jill Dupleix’s book, appropriately titled: ‘Very Simple Food’. Torn Mozzarella and Peppers is like a bottomless pizza that sings out ‘Mediterranean’. With more than its fair share of vitamins and minerals - the brightly coloured peppers are a give away - this warm salad relies heavily on the best ingredients you can find. Fresh buffalo mozzarella is heavenly and its soft creaminess pairs beautifully with the slight crunchiness of warm, sweet peppers.

This gorgeous salad only takes minutes to make and can be served either on its own or as a light main course accompanied by crispy Keto Bread Rolls, still warm from the oven.

The easiest meal in the world to prepare and so very healthy and tasty to boot, Torn Mozzarella and Peppers is a yummy, Primal, low-carb winner. I think you’ll enjoy.

peppers.jpg

Torn Mozzarella and Peppers (serves 4)

Ingredients

2 organic sweet red peppers

2 organic sweet yellow peppers 

2 tbsp organic extra virgin olive oil

Himalayan pink salt

Freshly ground organic black pepper

2 tbsp organic flat leaf parsley

2 organic fresh mozzarella balls (convenient for me to buy weekly with my Riverford order but it’s cheaper from Waitrose!)


Instructions

Holding the peppers upright, cut the sides away from the core and seeds, then cut each piece into 1cm squares.

In a saucepan, combine the peppers with the olive oil, salt and pepper and stew gently over a low heat for 10-15 minutes without allowing the peppers to fry or brown. 

Remove from the heat and allow to cool until barely warm.

Set out 4 shallow serving bowls or plates and using a slotted spoon, divide the peppers equally between the plates, saving the cooking juices/oil left in the bottom of the pan.

Drain the mozzarella and pat dry with kitchen roll. Tear the mozzarella into small pieces with your fingers (I don’t discard the thick skin as the original recipe advises - it’s all good!) then distribute evenly between the plates, randomly dotting it over the peppers.

Tear the parsley leaves into shreds with your fingers and scatter on top of the mozzarella. 

Drizzle with the reserved oil to serve.

peppers ingredients.jpg

Notes

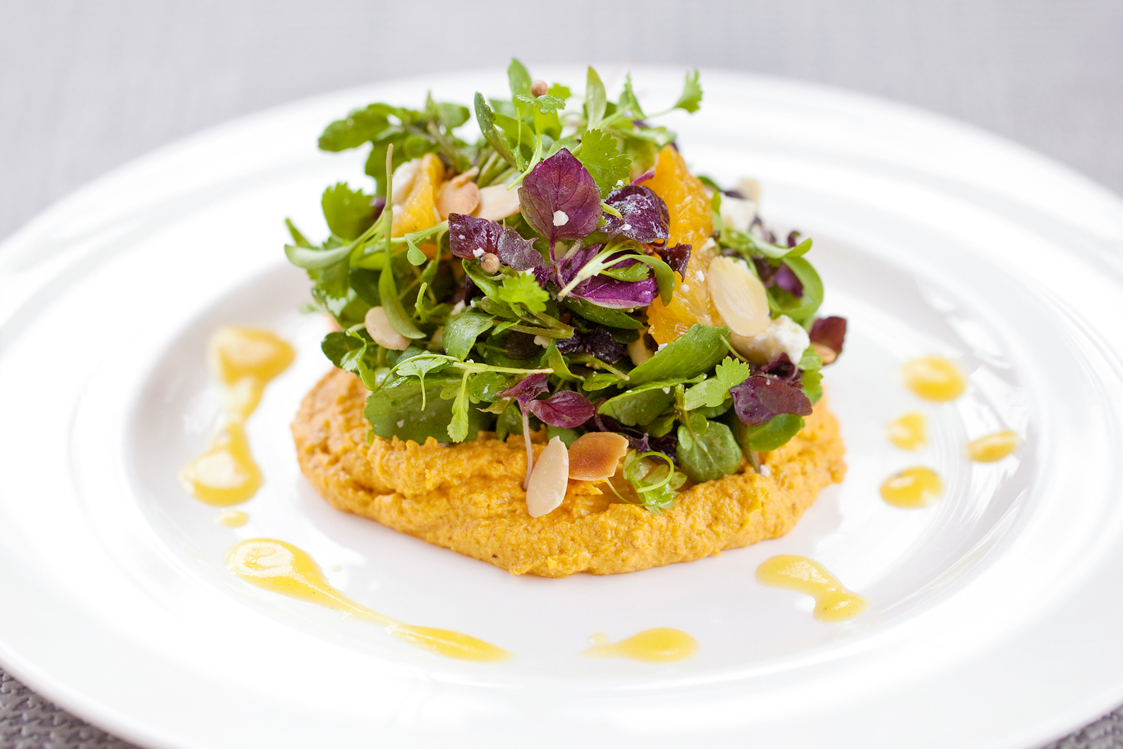
This recipe is a great example of how eating low-carb doesn’t mean eating no carbs. You easily consume plenty of carbohydrates (glucose forming food) for your body’s needs when you eat lots of fresh, organic vegetables grown above ground, small amounts of fresh fruit, nuts and seeds. A high-carbohydrate, high insulin-producing diet is pro-inflammatory, immune suppressing, and hormone balance disrupting, which increases the risk of assorted health problems and serious disease.

Interestingly, the total amount of glucose dissolved into the bloodstream in a healthy non-diabetic is only about a teaspoon, or five grams. Exceeding that level quickly becomes toxic; fall much below that and you will pass out. 

It takes approximately 21 days to lessen your reliance on external sources of carbohydrates and become efficient at fat and ketone burning. If you want to be strong, slim, disease and wrinkle free for longer than most people believe possible, limit your carbohydrate intake to less than 150 grams per day. 


Fat 24g Protein 11g Carbohydrate 13g - per serving

sweet pepper recipe.jpg

Happiness Soup

by Susan Smith in , , , ,


Here in the East Midlands you wouldn’t know we’re halfway through summer already. So much anticipation of balmy weather, so many disappointingly grey days. As a cook, I look forward to an abundance of seasonal summer produce that can be simply prepared and eaten outside. As part of team Mirror Imaging, we look to the skies for our most epic wedding shots and, as someone who hasn’t been on holiday for more than sixteen years, I am feeling bereft of summer sun this year. There’s no point in complaining, when summer doesn't deliver on its promise, it’s time to cook up the sunshine yourself.

For most people, yellow is a happy colour so it’s no accident that this bright, cheerful, sunshine-yellow, lemony broth has been entitled Happiness Soup. The inspiration and indeed its name is borrowed from Nigella’s recipe as featured in her book Nigella Summer. All I had to do was tweak the original version to make it grain-free and low-carbohydrate as well as something beautiful to behold. 

Easy to make and as gloriously golden-yellow as the midday sun, this light and lovely soup not only raises the spirits, it’s clean, fresh, citrus and anise flavour perks up the appetite too. 

If it doesn’t give you something to smile about on a dismal summer’s day, I don’t know what will!

Happiness Soup (Serves 4)

Ingredients

1 small organic onion, finely chopped

500 grams yellow courgette        

zest & juice of 1 organic lemon

40g organic butter (or for vegans 3 tbsp olive oil)

1 tsp turmeric

800 ml vegetable stock (or for non-vegetarians chicken stock) - see note below        

1 small cauliflower, florets only

Celtic sea salt

3-4 sprigs fresh tarragon, leaves only, finely chopped

Freshly ground black pepper


Instructions

The courgettes do not need to be peeled. Simply wash and trim the ends off before slicing them into 5mm (⅛ of an inch) rounds and then finely dicing them into very small confetti-like cubes. 

To make cauliflower ‘rice’, cut off the florets - you don’t need any of the stem - then blitz the florets in a food processor for about 30 seconds until it comes together into a powdery cauliflower ‘snow’. 

Melt the butter in a large saucepan over a medium/low heat. With the pan lid on, gently sweat the finely chopped onion in the butter for 8 minutes until soft and translucent but not coloured. 

Add the diced courgettes and the lemon zest to the pan and stir to coat. Cover with a circle of greaseproof paper (cut to fit the pan), put the pan lid back on, then cook on a gentle heat for about 5 minutes, stirring occasionally, until they've slightly softened.

Stir in the turmeric, the stock and 40ml of the lemon juice and then drop in the cauliflower ‘rice’. Cook, uncovered, for 6 minutes, or just until the courgettes and cauliflower ‘rice’ are tender. Taste for seasoning. Add a little more salt and lemon juice if it needs it. 

Leave to cool slightly before serving, then ladle into 4 pre-warmed soup bowls before adding a generous sprinkling of chopped tarragon on top of each bowl and a grinding of black pepper, if liked.


Notes

This soup is best eaten warm rather than hot.

For vegetable stock, I generally make up some Marigold vegetable bouillon concentrate with freshly filtered water. I then strain it - as I did here- to remove any re-hydrated bits of veg that would otherwise spoil the clean, good looks of my finished sauce or soup. Use homemade vegetable stock, if you prefer. 

For non-vegetarians, a chicken stock made from freshly filtered water and the concentrated juices leftover from roasting a chicken will add extra depth and flavour to the soup. 


Carbohydrate 12g Protein 5g - per serving


Caramelised Onion Soup With Gruyere

by Susan Smith in , ,


Who can resist a simple, savoury broth with melting cheese? Not me! Last week Sarah succumbed to a nasty cold virus so I upped the ante on her intake of vitamins and minerals by replacing our usual pre-dinner glass of wine with either a green smoothie or a comforting bowl of fresh vegetable soup.

Sarah was never a big fan of onion soup until I persuaded her to try this healthy, restorative, Primal variation of traditional French onion soup - no crouton, but still lots of cheese on top of caramelised onions sat in a deeply flavoured golden broth, with just a touch of apple brandy for medicinal purposes. Good call! I told Sarah there is great healing power in onions (it’s true!), though neither of us are willing to eat our onions raw and I think she would have definitely drawn the line at using halved raw onions as air purifiers (reputedly, they kill off airborne germs/bacteria), or more bizarrely, sticking one inside her sock at night to pull the toxins from her body to help her heal! Instead, I settled on making her this delicious soup. 

Apart from slicing what seems to be a copious amount of onions - trust me, four large onions isn’t too many because they melt down to a quarter of their original volume during cooking - there’s very little ‘hands-on’ time involved in making this soup. True, it can take up to 45 minutes of slowly, slowly sweating the onions down in butter to tease out their natural sweetness and to caramelise them into a deep mahogany-brown, meltingly-soft conglomeration of intensely flavoured oniony goodness but, apart from the occasional stir, they can be more or less left alone to do their thing whilst you attend to other matters.  

Caramelised Onion Soup With Gruyere is much healthier than French onion soup because it doesn’t have the classic bread crouton submerged in it. And, whether you’re feeling under the weather or not, it’s also a lot easier to eat when you don’t have to chase unwieldy pieces of soggy bread around your bowl with a spoon! Tastewise, this simple yet sophisticated soup loses nothing in translation. Sweet, succulent and intensely umami, it’s a surefire recipe for success. 

So, don’t wait to catch a cold. This fabulous soup is a cheap, low-carb, health-boosting food that goes way beyond the curative powers of onions. Deeply flavoursome, without any of raw onion’s lingering pungency (I do so hate the smell of onion/garlic breath!), it’s a heart-warming bowl of soft, sweet loveliness incapable of offending anyone. What’s not to love? I hope you will enjoy it as much as Sarah did. 

Caramelised Onion Soup With Gruyere (Serves 4)

Ingredients

4 large organic onions, very finely sliced (I used this mandolin slicer - a bit more expensive to buy, but worth every penny)

50g organic unsalted butter

1 tsp organic raw coconut palm sugar

40ml Calvados (apple brandy)

1 litre well-flavoured stock 

1 bay leaf

2 tbsp fresh thyme, leaves only

1 tbsp organic tamari (I used Clearspring)

sea salt and freshly ground black pepper

handful of fresh parsley, very finely chopped - to serve

80g Gruyere, finely grated (or vegetarian alternative, see notes below)


Instructions

Melt the butter in a large pan. Add the sliced onions, sprinkle over the coconut palm sugar and add a small pinch of sea salt. Stir well to ensure the onions are evenly doused in the butter, then cover with the pan lid and sweat down very gently over a low heat for 20-25 minutes, stirring occasionally, until the onions are soft and translucent, but not browned.

Turn the heat up to medium and continue cooking for a further 15-20 minutes, stirring from time to time, until the onions are deep golden-brown, caramelised and sticky.  

Turn the heat up to high. Add the apple brandy and continue cooking 1-2 minutes more until the liquid is reduced and the alcohol has evaporated. 

Pour in the stock then add the tamari, bay leaf and thyme and bring to the boil. Check the seasoning, adding a little more sea salt, if required.

As soon as the broth has reached boiling point, turn the heat down to low and simmer the soup, uncovered, for 20 minutes. At the end of the cooking time, discard the bay leaf.

Ladle the onion soup into four pre-warmed bowls, dividing it equally between them. 

Sprinkle with the grated Gruyere and finish with a grinding of black pepper and the chopped parsley. Serve piping hot. 


Notes

The stock I used on this occasion was a nutritious, homemade chicken bone broth made from the carcass of an organic chicken I’d previously cut up to make pet food for my cat Sushi. Waste not, want not! However, if you’re strictly vegetarian, or don’t have any bone broth, it will still taste good with a simple stock made from freshly filtered water and organic vegetable bouillon powder.

Gruyere D.O.P. is the preferred cheese for making the classic garnish of cheese-topped croutons for French onion soup for good reason - it melts beautifully and has a deep, intense, nutty flavour. For non-vegetarians, Gruyere is the perfect accompaniment to Caramelised Onion Soup. 

Followers of the Paleo diet will enjoy Caramelised Onion Soup without any cheese, whilst strict vegetarians will want to substitute a cheese that isn’t made with animal rennet. For vegetarians I recommend using tasty, tangy, Parmesan-style Gran Moravia or a strong-tasting, organic, vegetarian-friendly Cheddar instead of Gruyere. 


Carbohydrate 10g Protein 8g - per serving


Carrot And Coriander Roulade

by Susan Smith in , ,


Recently my world has been turned upside down because my sixteen year old cat, seemingly at death’s door a few days ago, was, according to the vet, most likely suffering from kidney failure. I had thought she was going to live forever - well at least make The Guinness Book Of Records for being the most long-lived cat - but it seems I was deluding myself. 

To be fair, it wasn’t just wishful thinking. Along with her brothers and sisters, she’d been abandoned by her mother at birth. When I found her at just six weeks old she’d been locked inside a filthy shed, was suffering from a respiratory condition and was barely alive. Lady luck was smiling on her that day (in retrospect I wish I had taken all five kittens away with me) because from the moment she fearfully clung to me, pitifully mewing, her heart racing ten-to-the-dozen, she’s been treated royally - like the princess she is. Named Sushi, because I was determined to only feed her a raw food diet from the get-go, she has never eaten a single meal of pet food in her life. To read more about foods that make your cat and dog sick read the shocking truth here

In the Primal Plate household, we live by the maxim “Let food be thy medicine and medicine be thy food.” But it seems that even feeding my cat human-grade wild salmon, raw organic lamb, pork, chicken, egg yolks and raw grass-fed milk wasn't enough to stave off the progressive symptoms of disease associated with ageing. Following last week’s panic, when Sushi was so violently ill that I thought she must have been poisoned, I dug deeper still into the dietary requirements of felines. Only to discover that my best efforts to date have fallen short of her nutritional needs.  

Firstly, since there are no bones in pre-packed supermarket minced meat and I can’t purchase a domestic grinding machine in the UK to grind up bones at home, she’s consistently been deprived of calcium. I never connected the now obvious dot that as minced meat in supermarkets is intended for human consumption, it’s assumed it will always be cooked before eating. The larger surface area of ground-up meat means it’s more vulnerable to bacteria growth - not a problem for humans, since cooking kills off any harmful bacteria - but if contaminated meat is fed raw to your pet it can cause serious gastrointestinal upset.

I also suspect Sushi’s diet was lacking adequate amounts of taurine - an essential amino acid that’s a vital supplement for ageing animals and humans (vegetarians in particular, please take note!) - because I never added offal (specifically, raw chicken hearts, which are rich in taurine and raw liver) to her meat. Also, down to my sheer laziness, I failed to ‘dress’ her dinners with a daily dose of vitamins and minerals (I use Arthrydex).

One week later, with some back-up help from raw cat food supplier PurrForm to get me over the ‘hump’, my kitty’s dietary shortcomings have now been resolved. It cost £80 for a meat grinder (to make our own range of raw, organic pet food), £79 for extra food supplements (Vitamin E, Vitamin B, Taurine and Wild Salmon Omega 3 oil) plus the time and effort to make our own calcium supplement with powdered eggshells! However, this is nothing compared to the vet bills I was quoted for an initial blood test and diagnosis. As for the lifetime’s medication and regular check-ups that the vet thought was inevitable going forward into the future? In my view, unless it’s an absolute emergency, most human beings and animals seem to fare better without medical intervention. It seems that Hippocrates is right on point. Today, Sushi has never been more alive and full of the joys of Spring!  

Spirits lifted, I can now focus on what we’ll be eating for our Easter celebration lunch! Carrot And Coriander Roulade is a savoury carrot cake recipe that I’ve borrowed from the Vegetarian Good Housekeeping Institute’s Cookery Club book by Linda Yewdall (Ebury Press 1994).

Stylish and sustaining, it makes an interesting low-carb, protein-packed starter. The carrot roulade is rolled around a tasty, cream cheese filling flavoured with fresh herbs and coriander. Served with a mixed leaf and herb salad it’s like springtime on a plate. 

Wishing you all a happy, healthy Easter!

Carrot And Coriander Roulade (Serves 4-6)

Ingredients - for the roulade

50g organic butter

450g organic carrots, coarsely grated (I do this in a food processor to save time)

4 large eggs, separated

1 tbsp chopped fresh coriander leaves

sea salt and freshly ground black pepper


Ingredients - for the filling

175g full-fat soft cream cheese

1 tbsp chopped dill

1 tbsp chopped flat leaf parsley

1 tbsp chopped chives

1 tbsp chopped coriander leaves

2-3 tbsp crème fraîche

sea salt and freshly ground pepper, to taste


Ingredients - to serve

Assorted salad leaves

Herb sprigs such as dill, chervil or parsley 

Instructions

Pre-heat the oven to 200℃ / 400℉ / Gas mark 6

Line a 30cm x 20cm (12 x 8 inch) Swiss roll tin with non-stick baking parchment.

Coarsely grate the carrots using a grating disc in a food processor, or by hand.

Melt the butter in a pan, add the carrots and cook gently, stirring frequently, for 5 minutes or until slightly coloured. Transfer to a bowl, allow to cool slightly, then add the egg yolks and coriander and beat well. Season to taste with salt and pepper. 

Whisk the egg whites in a bowl until firm peaks form, then stir 2 tablespoons into the carrot mixture to lighten it. Using a metal tablespoon, carefully fold in the rest of the egg whites.

Spread the mixture evenly in the prepared tin and bake in the oven for 10-15 minutes until risen and firm to the touch. 

Turn out onto a sheet of non-stick baking parchment, cover with a clean, damp cloth and allow to cool.

Meanwhile, prepare the filling. Put the soft cheese in a bowl. Using a fork, mix in the chopped herbs (dill, parsley, chives, coriander) and enough crème fraîche to yield a smooth, spreading consistency. Taste and adjust the seasoning if necessary.

Remove the cloth from the roulade. Spread evenly with the filling, leaving a 1 cm (½ inch) border all round. With the short side facing you, carefully roll-up from this short side, using the paper to help.

To serve, cut the roulade into slices and arrange on individual plates with the salad leaves and herbs. 


Notes

If the idea of rolling up the roulade fazes you, bake the mixture in two loose-bottomed 8 cm (7 inch) sandwich tins instead. Turn out and cool on a wire rack, then sandwich together with the filling.

I’m very lucky to have an award-winning farm shop called Maxey’s close-by. They supply local restaurants with delicate micro leaves and kindly let me have my pick when I want something posh to garnish Primal Plate dishes with. On this occasion, I used baby coriander, amaranth leaves and edible flowers for some extra Easter prettiness! 


Carbohydrate 8g Protein 8g - per serving (total 6 servings)


Cream of Cauliflower Soup

by Susan Smith in , , ,


Back in the 1960s, for one brief year, I attended catering college. During our daily student briefings, prior to lunch service in the college’s public restaurant, I learned culinary French. For example, today’s recipe for Cream of Cauliflower Soup would have appeared on the restaurant menu as Crème Dubarry. 

It’s funny how half a century later the words ‘Crème Dubarry’ kept haunting me when, due to an oversight, I’d defrosted too much milk. A glut of defrosted milk taking up too much fridge space is not a good thing, so I knew I needed to conjure up a ‘cream of something’ soup and do it quickly. A foray into my second fridge (I have one solely dedicated to storing fresh fruit and vegetables!) revealed an organic cauliflower and a couple of leeks left over from last week’s food shop. Clearly my subconscious was trying to tell me something, because at this point cream of cauliflower soup was a foregone conclusion! And, since I really like the story of how cauliflower soup came to be known as Crème Dubarry, so was today’s blog post.

Madame du Barry was a very beautiful, highly desirable courtesan - a high-class prostitute to the men of the French court - before officially becoming King Louis XV’s last mistress. Later she lost her head during the French Revolution and was guillotined in December 1793. Cauliflower was first introduced to the French court during Louis XV reign and having tasted it boiled in stock, flavoured with nutmeg and served with melted butter, the king liked it so much that he dedicated it to his mistress Mme. du Barry. It is said that if she was ever served anything other than cauliflower soup for a starter, she would send it away and demand that it be replaced. Subsequently, cauliflower soup became known as Crème Madame du Barry and, given its origins, it is a veritable ‘upper-class’ soup, to say the least! 

Silky smooth, milky-sweet, almost nutty flavoured, this elegant soup is destined to become another Primal Pronto classic. For a special occasion it can be garnished with sautéed wild mushrooms, pan-fried king prawns or a poached egg, but for a family meal it really is a lovely, luxurious soup that’s best kept simple with a drizzle of melted butter and a dusting of fresh nutmeg. Since it was this simple pairing of nutmeg and butter with cauliflower that so impressed King Louis XV and popularised it in France, I hope it will impress you too!

To make a meal of this soup you need something more that can hold its own against cauliflower’s potency and nuttiness. I thought Cheddar Muffins might do the trick, and they did. Spread with butter and still warm from the oven, Primal Plate’s cheesy, savoury muffins with their ‘crusty’ tops are a cross between a bread roll (they don’t fall to pieces when you spread cold butter on them) and a muffin. Just the thing if you’re on a low-carb diet and haven’t figured out how to satiate your appetite without a slab of bread with your soup. I’ll be posting the recipe soon!

Cream of Cauliflower Soup (Serves 6)

Ingredients

1 medium/large cauliflower, stalks discarded and florets broken into small pieces (about 450g prepared weight)

2-3 medium leeks, white part only, finely sliced (about 165g prepared weight)

20g butter

2 tbsp olive oil

600ml vegetable stock (made with freshly boiled filtered water and 2½ tsp organic Marigold Vegetable Bouillon powder)

500ml full-fat milk

1 bay leaf - optional

sea salt 

freshly ground white pepper

50g raw cashews

100ml double cream

a little melted butter, freshly grated nutmeg and single parsley leaves. to garnish


Instructions

Put the cauliflower florets and leeks into a large saucepan with the butter and the olive oil. 

Gently heat the contents of the pan, stirring the vegetables around in the melting butter and oil until they are evenly coated and they start to sizzle. 

Cover with a lid and sweat over a low heat for about 10 to 15 minutes, stirring from time to time. At the end of this cooking time, the vegetables should be softened but not browned.

Pour in the stock and bring to the boil, then pour in the milk and return gently to a boil. Turn down the heat, season to taste and simmer, uncovered, for 10 minutes.

Take the pan off the heat and add the cashews. Leave to stand for a further 10 minutes - the hot soup will help soften the raw cashews.

Add the cream (if using) then blend everything together in a food processor or blender. 

Pass the puréed soup through a fine metal sieve into a clean pan. Taste and adjust the seasoning if necessary.

When you’re ready to serve the soup, gently re-heat to just below boiling point, stirring occasionally. 

Ladle the hot soup into individual warmed bowls, then spoon or drizzle a little melted butter on top, dust with grated nutmeg and add a parsley leaf to each bowl. 


Notes

If preparing ahead, cool, cover and chill for up to a day.

Primarily a vegetarian, I am in a constant state of flux trying to achieve a balance between fulfilling my nutritional needs (organic, raw milk and cheese is an excellent source of Omega-3, calcium and protein) and pacifying my sensibility towards animals (the cruelty involved in the dairy industry per se breaks my heart). Gentle souls and vegans rejoice! I made a second batch of Cream Of Cauliflower Soup using just almond milk instead of cow’s milk and cream. And, because the flavour profiles of cauliflower and almonds have a natural affinity, it turns out that the finished soup was equally as creamy and delicious as when it was made with full-fat dairy milk and cream! 

However, this does necessitate making your own almond milk before making the soup. I do not recommend shop-bought almond milk that’s been industrially-processed and loaded with stabilisers, emuslifiers, thickeners and sugar! Meanwhile, for all cow’s milk naysayers, the environmental ravages of siphoning off water in California for their almond crops isn’t boding well for the planet either! I don’t pretend to have all the answers!

If you do eat dairy and are not up for making your own nut milk, please seek out the best quality cow’s milk you can buy. By the best, I mean milk that’s good for you, has been ethically produced and is environmentally-sustainable. At Primal Plate we don’t consider purchasing cheap milk from abused cows an option. The cheap, mass-produced, heat-treated (pasteurised) stuff found on supermarkets shelves is not a nutritious health-giving food, furthermore animal welfare is ignored and the environmental cost is too high. 

I buy my milk online from Gazegill Organics’s happy cows because there is simply is no substitute for clean, full-fat, organic, grass-fed, raw milk. The more expensive price you have to pay for real milk is worth every penny. It contains all it’s vital nutrients, tastes more rich and creamy and behaves differently to the watery substance that passes for milk in supermarket chiller cabinets. For months Sarah complained that her chocolate banana milk shakes (made with organic pasteurised milk purchased from a supermarket) didn’t come out nearly as thick and creamy as my Raw Chocolate Banana Milkshake. When I finally realised what was going on, I substituted some of my supply of raw milk for her pasteurised milk and…Voila! No more thin milkshakes! Remember, pasteurisation not only destroys harmful germs but kills off useful bacteria and a high percentage of vital nutrients too. It also makes the calcium contained in raw milk insoluble, so there’s little point in feeding it to your kids to build strong bones!

Then there’s the horrific reality of mass milk production - one of the most exploitative and cruellest industries in Britain today. Sad cows, housed en masse in concrete confinement feeding centres, fed an unnatural diet of corn, soy and other grains that their bodies aren’t designed to eat. Overfed, over-milked and kept alive on a chemical cocktail of hormones and antibiotics, they are pushed to their limits 24/7. When these poor animals are finally worn-out - literally milked-dry of their profit potential by humans - they are dispatched to the abattoir, where their vastly shortened, miserable lives end violently. I have to ask myself, who in hell wants to drink this stuff?

Meanwhile, the oldest, luckiest, milk-producing cow on Gazegilll Organics farm, where she has access to 16 acres all year round and a diet that's kept as natural as possible, is twenty-one years old already! How fabulous is that?  As consumers, we have a choice. Please do yourself and farm animals a favour. Only support dairy farmers that produce organic, grass-fed milk from cows that are treated with this much love and respect. Thank you.  

Carbohydrate 13g Protein 6g - per serving


Red Pepper Rolls with Goat’s Cheese

by Susan Smith in , ,


Make a statement with this bright red and green Christmas Day starter of Red Pepper Rolls With Goat’s Cheese that looks like Christmas on a plate! Tasty and nutrient dense, I think the red pepper rolls are a luxed-up vegetarian version of smoked salmon! Though brought together with a goat’s cheese filling, a fresh tomato vinaigrette, basil pesto and watercress, I suspect this fresh-tasting, light introduction to the main event will do you more good!

Packed with the great flavours of Provence, these delicious red pepper rolls seem to hark back to warmer days. But for now, open a bottle of chilled Champagne or a crisp, grassy, Marlborough Sauvignon to cut through the flavour of the goat’s cheese, and you have a fantastic festive beginning to your foodie celebrations. 

As with the rest of Primal Plate’s vegetarian Christmas day menu, most of the preparation for this dish can be done in advance of the big day. Then just before you sit down to eat, simply bring the different components together on pure white porcelain plates. Absolutely stunning to look at, this light and flavourful starter will still leave plenty of room for what is to follow.  

Red Pepper Rolls With Goat’s Cheese (serves 4)

Ingredients - for the pepper rolls 

4 red Romano peppers (the long, pointy ones!)

140g full-fat, soft, vegetarian goat’s cheese, without rind (I used Rosary Goat’s Milk Cheese)

2 tbsp extra virgin olive oil

1 tbsp chopped fresh chives

20g pine nuts, toasted

Freshly ground black pepper

1 tbsp Nonpareille capers, well rinsed - to garnish

Watercress sprigs, washed - to garnish

Whole fresh chives - to garnish


Ingredients - for the tomato vinaigrette

120g ripe tomatoes, chopped

2 tbsp red wine vinegar

2 tbsp low sugar tomato ketchup

1 tsp tomato paste

4 tbsp extra-virgin olive oil

sea salt and freshly ground pepper, to taste

1-2 drops liquid stevia (alternatively, ½ - 1 tsp maple syrup), to taste - optional


Ingredients - for the basil pesto

50g fresh basil leaves

25g vegetarian Parmesan-style cheese

25g pine nuts, very lightly toasted (in a dry frying pan over a low heat)

4-6 tbsp extra virgin olive oil (just enough to bind everything together into a thick, slushy sauce) 

1 small squeeze of fresh lemon juice - optional (but it helps the basil to keep its green colour)

sea salt and freshly ground black pepper, to taste


Instructions for the red peppers and cheese filling

Pre-heat a grill to High. Line a large flat baking sheet or the grill pan with a non-stick baking mat or non-stick aluminium foil.

Cut the peppers in half lengthways, then remove the stalk end, seeds and any white stringy bits. 

Place the pepper halves cut side down - skin side up - on the baking tray and grill fairly close to the heat source for about 6 minutes, or until their skins blister and start to blacken. 

Remove from the grill. Lay a sheet of cling-film over the top of the peppers and allow to cool completely.

Meanwhile, in a bowl mix the goat's cheese and olive oil together with a fork until softened. Add the chopped chives, pine kernels and season with pepper. Set aside.

Carefully peel the cold peppers and place skinned side down onto a large clean plate.

If you're working in advance, the peppers and cheese can now be covered and refrigerated until needed.

Instructions - to make the basil pesto 

The easiest way to make pesto is to process the basil, cheese, toasted pine nuts and 4 tablespoons of olive oil in a food processor or blender - or use a hand-held stick blender - until it comes together into a thick, smooth, fragrant, bright-green sauce (scraping down the sides of the bowl as required). 

Tip the mixture into a bowl, stir in an extra tablespoon or two of olive oil if you think more is needed to make an oozy consistency, then season the pesto to taste with salt and pepper, adding a small squeeze of lemon juice, if liked.

Alternatively, you can pound the ingredients together in a pestle and mortar, gradually adding the olive oil until it is the right consistency.

Cover and refrigerate until needed.


Instructions - to make the tomato vinaigrette

Blend all the ingredients in a small food processor or blender, or with a hand-held stick blender, for 30 seconds until fully amalgamated.

Strain through a fine sieve into a small bowl. Taste and adjust seasoning to taste, then cover and refrigerate until needed.


Instructions - to assemble the dish

When you’re ready to serve the pepper rolls, lay the peppers out onto a cutting board - trim off any straggly edges, if necessary. 

Fill with the goat’s cheese mixture - about 1 generous tablespoon per pepper half. Spread the mixture evenly along the length of the peppers, leaving about 5mm clearance around the edges. Roll each half up into a neat roll.

Arrange the pepper rolls on individual plates. Garnish with sprigs of fresh watercress and whole chives (see picture). Drizzle the tomato vinaigrette around the edges of the plates and add 3 to 4 small dollops of the basil pesto. Finally, randomly scatter a few of the capers over and around. 

Serve with aplomb! Wowzers!  You’ve surpassed yourself!


Notes

The pesto will keep 3-5 days in a sealed jar in a fridge - it’s best to cover its surface with a little more olive oil if storing for more than a couple of days.

The tomato vinaigrette will keep for 2-4 days, in a sealed jar in a fridge. 


Roasted Squash Soup

by Susan Smith in , , ,


Autumn delivers an incredible array of squash, pumpkins and gourds, so what better way to celebrate the season than to come in out of the cold to a steaming bowl of glorious golden-orange Roasted Squash Soup? 

Creamy, with a distinct flavour and delicate sweetness, it contains neither cream or sweetener. It is comforting, delicious and vegan. You can serve it as it is but it’s even lovelier topped with toasted pumpkin seeds and sprigs of fresh thyme.

I’ve included this recipe in the Primal Pronto section of the blog because although the squash takes about 45 minutes to roast, the ingredients list is short and it’s such an easy soup to make. Basically, the squash roasts in the oven whilst you unhurriedly fry-off an onion and boil a kettle of water. Then all that’s left to do when the squash is cooked, is to spoon its flesh into a blender with water and vegetable bouillon powder and whizz to velvety smooth perfection.

Roasted Squash Soup (in mugs), Vegetarian sausages with Autumn Coleslaw (recipe coming soon) and Primal Pronto Energy Bars are the perfect outdoor grub to eat around the bonfire with family and friends to help make your Guy Fawke’s celebration a night to remember. 

Roasted Squash Soup (serves 4)

Ingredients

1 medium-sized organic squash (I used onion squash but if you can’t get hold of one use butternut squash instead)

1 large onion, finely chopped

2-3 tbsp olive oil

1.2 litres water

1 tbsp Marigold organic vegetable bouillon powder

2 tbsp pumpkin seeds

4 sprigs of fresh thyme


Instructions

Boil a kettle of fresh water. 

Pre-heat the oven to 190℃  375 ℉ Gas mark 5

Cut the top end off the onion squash then cut down lengthways into 4 quarters. Scoop out the seeds and fibres (discard these) then put the quarters of squash skin-side down on to a baking tray. 

Brush the cut surfaces with olive oil and roast in the pre-heated oven for about 45 minutes, or until the squash in soft. 

Whilst the squash is cooking heat 1 tablespoon of olive oil in a saucepan over a gentle heat. Add the onion, cover and cook gently for about 8 minutes until it is soft and just starting to brown. 

Add 1 litre of hot water from the kettle and the bouillon powder to the pan, bring to a simmer, then cover and take off the heat. 

When the squash is cooked, scoop out the flesh into a blender or food processor (discarding the skin) along with the onion/vegetable stock. Puree together until velvety and smooth.  

Tip the puréed soup through a metal strainer into a clean pan. At this stage, you can stir in in a little more water to make a consistency that’s pleasing to you. Season to taste with sea salt and pepper and gently heat through.

Meanwhile, heat a splash of olive oil in a small non-stick frying pan set over a moderate heat and fry the pumpkin seeds for 1-2 minutes until just toasted. Tip the pumpkin seeds onto a plate lined with piece of kitchen paper.

Serve the hot soup in 4 warmed bowls with the toasted pumpkin seeds and thyme sprigs on top of each bowl. 


Carbohydrate 22g Protein 3g - per serving

An array of homegrown squashes make a beautiful Autumnal display. Image courtesy of Mirror Imaging Photography

An array of homegrown squashes make a beautiful Autumnal display. Image courtesy of Mirror Imaging Photography


Roasted Red Pepper & Tomato Soup

by Susan Smith in , , , , ,


In our neck of the woods (North Nottinghamshire, UK) I’m fed-up with waiting for summer to arrive. As far as I’m concerned, 14℃ day-time temperatures don’t hack it at the end of July. Recently, I’ve even resorted to taking a hot water bottle to bed! 

I don’t know whether it’s symptomatic of global warming or personal stress levels at the height of the wedding season that’s to blame (Mirror Imaging is my second day job) but I’ve felt unseasonably cold for this time of year. Meanwhile, Sarah’s been threatening a sore throat for the past week. This means that whether the weather fails to get any warmer, or is actually getting colder, a bowl of bright-red Roasted Pepper and Tomato Soup is just the thing to improve our disposition.

Peppers and tomatoes hail from warmer Mediterranean climes - the very thought makes me feel more cheery - and are incredibly healthy, being stacked with vitamins and minerals, so they’re perfect for staving off a cold.

So, if we can’t just dive into summer this year, at least we can pretend by bringing a little bit of sunshine into cooler summer days with this great tasting soup. Roasting the peppers and tomatoes really gives a delicious depth of flavour to the end result. Simple to make and gorgeous to look at, I can say with absolute conviction, “Eat soup, be happy!”

Meanwhile, I’m really hoping for a hot and sunny August.

Roasted Red Pepper & Tomato Soup is a vibrant red colour - serve with a drizzle of cream and some shredded fresh basil leaves for a simple but impressive garnish.

Roasted Red Pepper & Tomato Soup is a vibrant red colour - serve with a drizzle of cream and some shredded fresh basil leaves for a simple but impressive garnish.

Roasted Red Pepper & Tomato Soup (V) (Serves 4)

Ingredients

500g ripe plum tomatoes, halved

2 red peppers, halved, de-seeded and chopped into smallish pieces

1 onion, quartered

2-3 sprigs of fresh thyme, leaves only

2 tbsp of olive oil

1 heaped tbsp organic Marigold vegetable bouillon powder

900ml water, freshly boiled water

1 tbsp organic tomato paste

Sea salt and freshly ground black pepper

2-3 drops liquid stevia - optional

To finish:

Double cream

Fresh basil leaves, finely shredded  


Instructions

Pre-heat the oven to 220℃ / 425℉ / Gas mark 7

Place the tomatoes, peppers, onion and thyme into a large mixing bowl, drizzle over the olive oil and season with salt and pepper. Mix everything together well so that the vegetables are evenly coated in oil, then tip onto a large non-stick baking tray in a single layer and roast in the oven for 20-25 minutes, until wilted and slightly charred all over. 

Meanwhile, make a vegetable stock with the bouillon powder and freshly boiled water.

Transfer the roasted vegetables to a large saucepan, cover with the vegetable stock and add the tomato puree. Cook over a moderate heat for 15 minutes. Take off the heat and allow to cool down for 5 minutes before proceeding to the next step.

Ladle the contents of the pan into a blender container (you will need to do this in several batches), then blitz until completely smooth. 

As you go, strain each batch of blended soup through a fine sieve into a clean pan. 

After the final batch of soup has been strained, adjust the seasoning (if it tastes a little acidic, add 2-3 drops of liquid stevia) then re-heat to just below boiling point.

Pour the hot soup into 4 warmed bowls, add a swirl of cream and sprinkle with shredded basil. 


Notes:

Crumbled feta cheese sprinkled on top of the soup just before serving, is a tasty alternative to cream.

I suppose it’s sods law that the minute I decide to blog a hot soup recipe, the weather forecast for this weekend is that Summer 2015 is back on. If so, Roasted Pepper & Tomato Soup is a lovely soup to take on a picnic!


Carbohydrate 15g  Protein 3g - per serving

Sweet red peppers and ripe, juicy vine tomatoes are the basis for this delicious soup.

Sweet red peppers and ripe, juicy vine tomatoes are the basis for this delicious soup.


Carrot Hummus With Orange & Feta Salad

by Susan Smith in , , , ,


Primal eating and lifestyle principles are trail-blazing strategies that can transform human beings from fat and flabby to lean and toned, from lethargic to energised, and from a degenerative diseased state to optimum health. I for one, am totally sold! 

However, in my opinion, the basic premise of Primal eating, which is to eat real food e.g. farm to table grass-fed livestock and vegetables grown in organic soil, and to avoid sugar, grains, unhealthy fats and beans/legumes, isn’t far enough removed from the deeply ingrained (forgive the pun) idea that the ideal meal consists of a big hunk of meat with a smaller side of vegetables. 

In my view, this has more to do with fulfilling an emotional need (for greed) than it is about satisfying the body’s physical requirements. It doesn’t take into account the moral dilemma of what it can actually mean (untold suffering of animals and the destruction of environment) for us to continue eating disproportionate amounts of meat, fish, seafood and dairy. 

For this reason, Primal Plate would like to propose a paradigm shift in people’s thinking. I believe now is the time for us to learn how to structure meals around a higher proportion of vegetables to animal protein. My role is to encourage a change in eating habits by offering vegetarian-friendly recipe ideas that defy expectations, and hopefully inspire you to cook and eat more ecologically produced food.

I have to say, there are many challenges to overcome when combining Primal principles with my leaning-towards-vegetarian hedonistic tendencies! I’ve come a long way with Grain-free Scones, Chocolate Cake, Shortbread, Souffléd Cauliflower with Gruyère Cheese Sauce and Meat-Free Cottage Pie, but there are so many classic vegetarian recipes that are seemingly off-limits because they contain potato, pasta, rice, corn, beans and other legumes (*see note below). Which slightly miffs me, because I used to consider traditional hummus and crudités a really healthy snack. Furthermore, my fennel and lemon risotto and vegetable chilli were always comfortingly delicious, and there are still times when I could kill for a buttery baked potato or homemade chips! 

Necessity being the mother of invention, this recipe for a chickpea-free Carrot Hummus with Orange and Feta Salad conforms to the ‘no legumes’ rule, but happily places proper-tasting hummus well and truly back on the Primal menu. Inspired by Hugh Fearnley-Whittingstall’s carrot hummus in River Cottage Veg Everyday! and Maria Elia’s houmous and feta salad in The Modern Vegetarian, this colourful starter or light lunch is a play on textures and flavours that delivers on every level. Creamy carrot hummus combines with salty feta, juicy oranges, crunchy almonds and tasty, visually delightful leaves, to create an explosion of tastes that holds your interest right up until the last forkful. 

I think that this mélange of healthy vegetation would be further enhanced by sitting the whole arrangement on top of some spicy carrot pancakes à la Maria Elia style (Primal recipe still to be devised and tested!) for a gorgeously ‘green’, ethically sound main meal. To my mind, this sustainable ‘veggies come first’ approach to fine dining is the start of the future of food. It is my intention that Primal Plate will help make the transition a truly pleasurable one for Primal orientated carnivores, pescetarians and vegetarians alike.

Carrot Hummus With Orange & Feta Salad (V) (Serves 4)

Ingredients - for the carrot hummus

1 tsp cumin seeds

1 tsp coriander seeds

4-5 tablespoons olive oil

1 tsp raw clear honey

500g (1lb 2oz) organic carrots, peeled (prepped weight about 460g/1lb)

Juice of 1 organic lemon

3 tbsp smooth almond butter

2 tbsp raw organic sesame tahini

Sea salt and freshly ground black pepper


Ingredients - for the salad

Bunch of watercress, thick stems removed

1 organic orange, peel and pith removed, cut into segments

25g (1oz) shiso (or any micro) sprouts

25g (1oz) coriander sprouts (or coriander leaf)

12 mint leaves, torn

50g (2oz) alfalfa shoots

25g (1oz) flaked organic almonds

50g (2oz) organic feta cheese, crumbled


Ingredients - for the vinaigrette

2 tsp Dijon mustard

1 tsp raw clear honey

3½ tbsp raw cider vinegar

100ml (3½ fl oz) organic olive oil

Sea salt and freshly ground black pepper


Instructions - for the carrot hummus

Pre-heat the oven to 200℃ / ℉ / Gas mark 6

In a small dry frying pan over a medium heat, toast the cumin and coriander seeds until they’re fragrant - this only takes about a minute, do not let them scorch! Tip into a pestle and mortar (or use a small bowl and the end of a rolling pin) and grind to a fine-ish powder. 

In a large bowl whisk 4 tablespoons of olive oil with the honey and toasted spices.

Cut the carrots into 4-5 cm (about 2”) chunks and add to the dressing. Season with salt and pepper and toss to coat. Tip into a small roasting tin and roast for 35 minutes (turn the carrots over halfway through the cooking time).

Remove from the oven and allow to cool slightly. Then scrape everything into a food processor (or use a hand-held blender). Add the lemon juice, the almond butter and tahini and blitz to a smooth puree (you may need to scrape down the sides of the bowl once or twice as you go).

Taste to check the seasoning and texture. If necessary, add a little more lemon juice, olive oil or salt and pepper and blend again to incorporate well. Refrigerate until required. 


Instructions - for the vinaigrette

Find a clean recycled glass jar (or plastic food container) with well-fitting lid, add the vinaigrette ingredients to your chosen container in the order listed above. 

Secure the lid tightly, then shake the contents vigorously. Taste and adjust the seasoning if necessary. 

Before serving, shake again then drizzle or spoon the vinaigrette directly from the jar on to your salad as needed (it’s best to do this incrementally, as you want your salad nicely dressed not drowned!)


Instructions - to make the salad and assemble the dish

In a medium sized mixing bowl, loosely combine all the salad ingredients together. Add 1-2 tablespoons of the dressing and gently toss everything together so the salad is evenly coated (I prefer to do this with my hands so I don’t bruise the leaves or break up the individual ingredients too much).

Spoon the hummus onto 4 individual serving plates, and pile the salad evenly on top, making sure you can still see the hummus underneath. 

Drizzle a little more of the dressing around the outside of the plate and serve immediately.  


Notes:

The carrot hummus, vinaigrette and toasted almonds can all be prepared well in advance, making this an ideal starter for entertaining.

The hummus will keep refrigerated in an airtight container for up to a week. The vinaigrette will store at room temperature for several days.

The hummus would also make a great sandwich filling (only in Grain-Free Sandwich Bread, of course!) - I’d add grated raw carrot and watercress for a really tasty, wholesome vegan sandwich and probably crumbled feta too, for the rest of us.

Tracking down shiso sprouts and other micro leaves, especially if you live in the sticks, isn’t easy! To find your nearest supplier, go to Westlands and click on ‘Where to get our products’. I got really lucky because I just happened to ask at the counter of a local ‘foodie’ farm shop if they ever stocked such a thing. To my astonishment they had the most fantastic range behind the counter (for local chefs) and they kindly let me have free choice out of about eight different varieties. Thanks Maxeys Farm Shop, I shall be back for more this weekend!

* Whilst peas and green beans are, strictly speaking, legumes, they are okay to eat as part of the Primal lifestyle because they’re eaten when they’re young and fresh - not dried. Naturally lower in lectins and phytates than dried varieties, both peas and green beans are simple to cook (which further reduces/de-activates any toxicity) and are very easily digested. In addition, the carbohydrate content of both fresh peas and green beans is also much lower than that of dried peas and beans. 


Carbohydrate 23g Protein 9g - per portion


Classic Prawn Cocktail

by Susan Smith in , , , ,


I think I was lucky to have lived my teenage years in the swinging sixties. For me, it was a most exciting ‘happening’ time to be alive. Everything was in a state flux and turmoil. Fashion - forget the mini skirt - Sarah listened in disbelief the other day when I told her that topless dresses went mainstream! Music - ‘Love Me Do’ took the world (and me), by storm. The pill (Yipee!), women’s liberation (what the heck happened to that as a concept?) and not least, the sexual revolution.  

It all just freaked my poor dad out, and there were several times when he threatened to make me a Ward of Court! Actually, I was a rebel, but in a good cause! We both survived the tsunami-style disruption and I quickly gained my freedom and learned to stand on my own two feet. To my credit (or perhaps my Dad’s), I was never promiscuous or took drugs.  

Other fond memories of the 1960s are mainly food related. Back then, asking friends around for dinner was the norm and almost every Saturday night I was hosting a dinner party. Served alongside a Steak Diane, Beef Wellington, Duck a l’Orange or Coq au Vin, the Prawn Cocktail and a bottle of Mateus Rosé somehow epitomised the dizzy pink heights of our culinary sophistication!

It’s good to reminisce and, since I am so reminded, I thought that I would revive the ubiquitous prawn cocktail as a classic retro introduction to last Sunday’s lunch. It was Gary Rhodes that said “In my opinion, delicious food is created when you get the very best ingredients you can find and do as little to them as possible” No more is this so than when you’re trying to locate decent-tasting prawns - is it only me that thinks farmed Asian king prawns taste of absolutely nothing? 

But, besides flavour, there are even more important considerations - facts that will (or should) make you sit up and take notice. Please take the time to read the article The VERY Unsavoury Truth About Prawn Cocktail (yuk!) and watch Revealed: Asian Slave Labour Producing Prawns for Supermarkets in US, UK. Then decide…

As with today’s food industry in general, ethically and sustainably sourced prawns are increasingly difficult to come by. And unfortunately, that means my ‘Is it okay to eat?’ list seems to be being shrinking by the day! Whilst this is one more good cause to carry around inside my head (visit Environmental Justice Foundation), how much more ‘diddle, swindle and plunder’ involving torture, slavery, the degradation of the oceans, the environment and your health can you tolerate? In this instance, only CP Foods, supermarket shareholders and a handful of corrupt slave drivers profit. My hope is that the Information Age and ‘people power’ will soon put an end to it.

For now, I’ve done my homework and opted for MSC certified Marks & Spencer extra large cooked Greenland prawns for this recipe. Although I gasped at the price (£7 for 350g bag), I was rewarded with sweet, nutty prawns that tasted just like they used to. With the addition of diced avocado, a generous squeeze of lemon and the crunch of some finely chopped celery, this classic starter is made even better. I think it looks fresher and eats lighter than a typical 1960s prawn cocktail, which as I remember it, all too often sank beneath the weight of an over-zealous smothering of Marie Rose sauce!

However, properly made with quality ingredients this quick and delicious little salad is perfect for a spring or summer lunchtime starter.

Classic Prawn Cocktail (Serves 4)

Ingredients 

350g frozen cooked cold water prawns, defrosted

6 tablespoons good quality mayonnaise - preferably homemade

2 tablespoons organic tomato ketchup (I used Mr Organic)

2 organic little gem lettuce hearts, finely sliced

2 sticks of celery, finely chopped

1 avocado, finely diced

2 tbsp of lemon juice

Cayenne pepper

Slim bunch of chives, finely chopped - to serve. I actually used celery micro leaves instead - simply because I had them in the fridge and they look so cheffy!


Instructions:

Mix together the mayonnaise, tomato ketchup and prawns in a bowl. Stir in the chopped celery and season with cayenne.

Halve the avocado, remove the stone, then peel. Chop into small dice, then toss in lemon juice to stop it discolouring. Add half of the avocado dice to the prawn mixture and stir in lightly.

Shred the lettuce finely and transfer to 4 glasses or serving plates. Divide the prawn mixture equally between them, piling it on top of the lettuce but leaving some of the greenery on show.

Spoon the remaining avocado on top and around, garnish with chopped chives and serve immediately.


Notes:

If you want large raw ‘king’ prawns for cooking, look out for organic or Madagascan tiger prawns. The only country from which you can currently buy certified organic tiger prawns is Ecuador. They are stocked by Waitrose.

The Marine Stewardship Council (MSC) label is also a sign that prawns have been farmed sustainably. 


Carbohydrate 4g Protein 13g


Pea & Mint Soup

by Susan Smith in , , , , ,


I love soup…always have.

My mother left home when I was five years old, which meant my father was left to raise myself and my two siblings alone. He was a good dad and I am grateful that my upbringing was more male orientated than most. It can’t have been easy. Although my sister and I were away at boarding school during the week, we were at home at the weekends and during long school holidays. Meanwhile, my older brother stayed home and proved to be a perpetual sword in Dad’s side!

The upside of a world-weary, though infinitely refined, gentleman having to cope with the demands of running his own business and bringing three children up ‘on his tod’, was that every Easter, summer and Christmas we spent our holidays in grand seaside hotels and were often taken out to eat at the best restaurants.

As a little girl trying to contend with making intelligent choices from oversized á la carte menus, I frequently got into trouble! Much to my dad’s irritation (though he kindly never vetoed my decision), soup and bread rolls spread lavishly with butter, was always my preferred ‘appetiser’. Consequently, I was always full-up before the main course arrived, which meant my father paying full whack for half-eaten food!

It’s obvious what the problem was…soup and bread IS (especially for small tummies) a nutritious, warming and satisfying meal in and of itself!

As a parent, I can now appreciate how wise my dad was to graciously accept my mistake and not disrupt my eating pleasure no matter how wasteful the learning process! The upshot is, sixty years later, here I am writing about a love for soup!

The making of soup is probably as old as cooking itself. Originally known as sop, which referred to a liquid broth for dipping bread into, soup-making is basically the art of combining ingredients together in one pot to create a filling, nutritious and easily digested meal.

As I discovered at a very early age, soup can be one of the most satisfying of foods, but it can also be a modern, colourful and adventurous introduction to a meal - especially if you forego grain-laden bread!

Pea & Mint might sound like an English summer soup but not when Bird’s Eye frozen peas are available all year round it’s not! In fact, because frozen peas enable this soup to be cooked so quickly they’re all the better for retaining its brilliant green colour and natural taste.

It’s a delightfully simple soup to make, which should take no longer than 15 minutes hands-on time, so please give it a go and post your comments below. I look forward to your feedback.

Pea & Mint Soup (V) (Serves 4)

Ingredients

1 medium-sized leek (about 175g unprepared weight), top green part discarded, 2 outer layers removed, finely sliced 

1 medium onion (about 55g unpeeled weight), finely chopped

750ml (26 fl oz) vegetable stock (made with water and 4 level tsp Marigold organic vegetable bouillon powder) 

450g (1lb) frozen peas

15g (½oz) fresh mint leaves

150ml (5fl oz) single cream

Sea salt and freshly ground black pepper 

A little extra cream, fresh pea shoots or chopped mint, to serve


Instructions

Fill and boil a kettle with 750ml fresh cold water. Make a stock with the bouillon powder and boiling water and pour into a large saucepan.

Bring the stock back to the boil, then add the chopped leeks and onions. Simmer for 3-4 minutes.

Add the frozen peas and mint leaves and bring back to the boil. Simmer for 1-2 minutes.

Take the pan off the heat and add the single cream. 

Ladle the soup into a food processor or blender and blitz until completely smooth.

Pour back into a clean pan and season with sea salt (about 1 tsp or to taste) and a good grinding of black pepper. Re-heat the soup until it is really hot (just below boiling point)

Divide the soup between four bowls , swirl a teaspoon of cream on the top of each and decorate with pea shoots or chopped mint. Serve immediately. 


Carbohydrate 12g Protein 8g


Wild Smoked Salmon & Prawn Pâté

by Susan Smith in , , ,


The deliciously deep rosy colour of this Wild Smoked Salmon & Prawn Pâté with its soft texture and sweet flavours that hint of the sea, is food to fall in love with. Quick and easy to make, it is a truly indulgent starter for any special occasion.

Spread it lavishly on slices of crisp crostini (see the recipe for perfect crostini here) and serve with a glass of chilled Champagne and I think you could literally have your lover eating out of your hand!

I specifically chose wild Alaskan smoked salmon for this recipe because by going wild you get a firmer less fatty fish with a natural intense colour. Besides, it just doesn’t seem very loving to feed my man farmed fish that’s been fed on pellets containing antibiotics, growth hormones and artificial colour!

To make this seafood pate even more luxurious (and a little less salty) I combined the smoked salmon with some big juicy Canadian cold water prawns.

If this little number doesn’t impress your Valentine, I don’t know what will!

Wild Smoked Salmon & Prawn Pâté (Serves 2)

Ingredients

50g (2oz) wild Alaskan smoked salmon 

25g (1oz) large Canadian cold water prawns, defrosted

100g (3½oz) full-fat soft cream cheese

50g (2oz) unsalted butter, melted and cooled

½ small lemon, juiced

Large pinch cayenne pepper

2 lemon slices

8 whole prawns, defrosted

Flat leaf parsley 


Instructions

Cut the salmon and the prawns into small pieces (I used kitchen scissors). Place the salmon and prawns in a blender with the cream cheese, melted butter, cayenne pepper and lemon juice.

Pulse the ingredients until mixed together well but not completely smooth - you need to retain a little texture. Taste the pâté and add a little more lemon juice if needed.

Spoon the mixture into two small ramekin dishes. Level the surface, cover with cling film and chill for 2 hours.

When you’re ready to serve, cut a thin slice from a whole lemon, cut it into two halves (remove any pips) then slice each half from its centre to the rind (don’t cut through the rind) then turn both ends in opposite directions to make a ‘twist’ and place one lemon twist on top of each pâté. Arrange two prawns on each side of the lemon slices (4 prawns per person) and garnish both with a small sprig of flat leaf parsley.


Notes

Wrapped tightly in cling film, this pâté will keep for for several days stored in a refrigerator.

Don’t add any salt as the smoked salmon has enough salt to sufficiently flavour the pâté without.

If you don't have time or don't feel confident enough to make crostini, whole red Belgian chicory leaves are a fresh and flavourful accompaniment to the pâté. They're also virtually carb-free and the pale red leaves look very pretty!

You could also add some finely chopped fresh chives or dill to this pâté but I much prefer its unadulterated rosy pink colour. For the same reason, I used cayenne pepper rather than freshly ground black pepper because I think black flecks running through the mix would spoil its appearance. 


Carbohydrate 2g Protein 10g - per portion


Simply Salad

by Susan Smith in , , , ,


I’ve heard that professional chefs can always tell the calibre of a prospective new member of their brigade by getting them to cook scrambled eggs. Personally, I feel that putting together a nicely dressed bowl of fresh salad leaves might reveal a whole lot more.

It’s no use pretending that lifeless, pre-washed salad leaves (often rinsed in a chlorine wash and then handled by multiple pairs of hands and preserved with a blast of gas before being bagged!) or the familiar shrink-wrapped iceberg lettuce is going to cut it, if you want to make a decent salad.

Nothing compares to truly fresh salad leaves, so start with the freshest greens you can find, preferably organically grown. Find whole lettuce that has a ‘just-picked’ appearance such as romaine or little gem, or a head of leaves like soft, tender English lettuce or green, red, bronze oak leaf lettuce.

Build your salad from there by adding a variety of other salad greens. Perhaps some mild tender mâche (lambs lettuce), rocket, bright peppery watercress (ideally bought by the bunch) or in winter, chicories. Add to these some young sweet ‘living’ leaves, pea shoots, fresh growing herbs or mustard and cress.

Packed with essential nutrients and virtually carb-free, a generous daily portion of raw healthy salad greens is the most gratifying accompaniment to any meal. In my view, a perfect tossed green salad that’s well balanced and well dressed is also the hallmark of a great cook.

Simply Salad (V)

Ingredients - Salad

This isn’t so much of a recipe with pre-determined ingredients as it is a general guide to salad making. Primarily let the season, what's looking at it’s best and what you fancy determine your choice. If you’re willing to shop and cook in a way that nourishes your body and satisfies your soul, the possibilities are endless!

The only proviso is that for a tossed green salad, keep it simple - it really doesn’t need anything more than a well-balanced classic French Dressing.

Alternatively, you can create your own ‘house’ salad by adding a riotous colour of different fruits and vegetables, together with your favourite dressing.

When you’re trying to judge portion sizes, allow a large rounded handful of green leaves per person (my hands are small, so it’s more like both hands cupped together!)

The salad pictured here was a mixture of Romaine and Little Gem lettuce hearts, wafer thin slices of fennel, wild rocket, watercress, red and white Belgian chicories, thinly sliced red and yellow peppers, Sundream vine tomatoes, flat leaf parsley and avocado.

Ingredients - For the French dressing

120ml (4½ fl oz) olive oil (I used half organic cold pressed olive oil and half organic cold pressed avocado oil)

40ml (1 ½ fl oz) organic raw apple cider vinegar

1 tsp sea salt

Freshly ground black pepper

1 tsp Dijon mustard

1 tsp clear ‘runny’ raw organic honey, or maple syrup


Instructions

First make the vinaigrette dressing. Mix the vinegar, sea salt, pepper, honey and mustard together in a medium sized bowl and give it a good whisk. Add the oil a small dash at a time, whisking well between each addition. Continue adding the oil until it is all amalgamated into vinaigrette. Check and adjust the seasoning if necessary (if it tastes a little tart, a single drop of liquid Stevia will help compensate).

Remove the base of the stalk and any roots attached to your lettuce together with any tough, yellowing or damaged outside leaves. If the leaves are small, leave them whole. Larger leaves should be torn along their central rib into bite-sized pieces. Remove any thick stalks from the likes of fresh watercress or spinach.

Many leafy salad greens are grown in sandy soil so to avoid grit ending up in your salad, you’ll need to wash them well. Fill a sink or large soaking bowl full of cold water then gently submerge and swish the leaves around in the water to dislodge any dirt. Handle your leaves lightly, if they get bent small cracks on the surface will cause them to wilt.

When lifting them out of the sink or soaking bowl, don’t just grab them. Spread your hands out underneath the leaves in the water and gently lift them out using your loosely splayed fingers to support them. Lay them out on a clean tea towel and gently pat dry with paper towels.

A salad spinner makes light work of washing and drying. I bought the older model of the iconic OXO Good Grips salad spinner several years ago and it’s an invaluable kitchen-aid that spin dries salad leaves and herbs in seconds without bruising them. First, fill the bowl of the spinner with cold water and submerge the leaves in the spinner basket into the water. Gently swish around in the water to allow any sand to drop through the basket into the bottom of the bowl. Repeat several times with fresh clean water until there’s no sand left in the bottom of the bowl. Pour away the last batch of water then simply put spinner lid on and pump several times to dry. Don’t go mad with the spinning action or you might crush the leaves. Just give it a couple of good spins, then rearrange the leaves, drain the bowl and spin again. Don’t over-fill the spinner basket either, it’s best to spin the leaves in batches rather than cram too much in.

Arrange the dry leaves prettily in a bowl (much larger than you think you need if you intend to dress your salad) together with any other salad ingredients you’re using  Cover and keep chilled until you’re ready to serve.

Just before you want to serve your salad, add a few tablespoons of your chosen dressing to the bowl then gently turn the salad over and around with your hands (you can use a couple of large spoons, if you prefer) until everything is evenly and lightly coated in the dressing. Serve immediately.

Notes

Don't overdo the dressing on your salad. You want just enough vinaigrette to lightly and evenly coat the leaves rather than drown them out - too much dressing will simply make them go unpleasantly soggy.


Grilled Goats Cheese & Beetroot Salad

by Susan Smith in , , , ,


My first awakening to Chèvre Blanc goat’s cheeses’ melting, bubbly, golden goodness dates back to the early 1990’s, when we discovered a brilliant bustling French brasserie in Covent Garden called Le Palais Du Jardin (now closed). At the time, they served a salad of this fresh-tasting meltingly soft cheese with slices of poached pear and a balsamic dressing. 

The lively tang of goat's cheese served hot from the grill works equally well here with the earthy sweetness of beetroot, the peppery freshness of rocket (or watercress) and the piquancy of a simple vinaigrette. The whole dish coming together to great effect with the addition of some freshly chopped chives. I really like the contrast between the warm richness of cheese and cool vegetables.

The pink beetroot makes this salad as pretty as it is inviting. Since the 90’s, toasted goat’s cheese has become an enduring favourite for both vegetarians and non-vegetarians alike. We had it today for a light lunch, but I also like to serve it as a starter to impress hungry dinner guests, which it always does! 

Grilled Goats Cheese & Beetroot Salad (V) (Serves 4)

Ingredients - For the salad

4 x 100g (3½ oz) Chèvre Blanc goat’s cheese (I like Waitrose’s Mild Chèvre Blanc)  

250g (9oz) ready-cooked organic beetroot, without vinegar

70g (2½oz) bag of rocket, washed and picked over


Ingredients - For the vinaigrette dressing

120ml (4½ fl oz) olive oil (I used half organic cold pressed olive oil and half organic cold pressed avocado oil)

40ml (1 ½ fl oz) organic raw apple cider vinegar

1 tsp sea salt

Freshly ground black pepper

1 tsp Dijon mustard

1 tsp clear ‘runny’ raw organic honey, or maple syrup

1 tbsp fresh chives, chopped  


Instructions

Pre-heat the grill to high. 

First make the vinaigrette dressing. Mix the vinegar, sea salt, pepper, honey and mustard together in a medium sized bowl and give it a good whisk. Add the oil a small dash at a time, whisking well between each addition. Continue adding the oil until it is all amalgamated into vinaigrette. Check and adjust the seasoning if necessary (if it tastes a little tart, a single drop of liquid Stevia will help compensate). Alternatively, make my Fast & Easy Vinaigrette and shake in a lidded container.

Set aside 6 tablespoons of the vinaigrette dressing until you’re ready to serve the salad.

Thinly slice the beetroot (a mandoline slicer gives the quickest and neatest result).

Lay the beetroot slices so they overlap each other to form a circle in the centre of four plates. Drizzle a teaspoon of vinaigrette over each beetroot circle - keeping the plate clean. 

Line a baking tray or your wire grill rack with some non-stick foil. Place the goats' cheese rounds onto a baking sheet and place under the grill (about 3-4 inches from the heat) for 4-5 minutes, or until the cheese has melted and turning golden brown.

Whilst the goat’s cheese is grilling, lightly dress the rocket leaves in a tablespoon of vinaigrette in a medium bowl. Divide the dressed salad leaves between the four plates piling it up neatly on top of the beetroot.

When the cheese is ready, place one in the middle of each plate on top of the dressed leaves.

Add the chives to the remainder of the dressing and drizzle around the outside of each plate.


Notes:

For this recipe, you require slices of Chèvre Blanc goat’s cheese about 2.5 - 3cm thickness, rind-on, cut from a log. 

Keep the goat’s cheese rounds refrigerated in their original wrapping until you’re ready to grill them. You do not want them to disintegrate into a messy ‘pool’ before they’ve had chance to brown!

I’ve used the classic 3 parts oil to 1 part vinegar for this vinaigrette but you can adjust amounts according to your taste. If the finished vinaigrette tastes too tart, try adding more oil (or a drop of liquid Stevia); if it tastes too greasy, add a little more vinegar (or lemon juice). As an alternative to hand-whisked french dressing, make a vinaigrette by putting all the ingredients into a lidded jar and then shake the whole lot vigorously together until they’re combined, adding the chives afterwards. See my recipe for Fast & Easy Vinaigrette.

Store the unused vinaigrette in a lidded container for future use. It will happily keep at room temperature for several days without spoiling, although it will eventually separate - in this case, just re-whisk or give it a good shake before using.


Carbohydrate 7g Protein 21g - per serving


Leek, Stilton & Walnut Stuffed Mushrooms

by Susan Smith in , , , ,


There is something so British about leeks in winter. I love their green sweet oniony softness, juxtaposed against the salty tang of blue Stilton cheese and the savoury earthiness of mushrooms. This is a happily vegetarian dish that’s as deeply umami flavoured as a beef steak and as warm and soothing as my Celtic sheepskin house boots!

It’s also a doddle to prepare.

Leek, Stilton & Walnut Stuffed Mushrooms (Serves 1 as a main course or 2 as an appetiser) (V)

Ingredients

2 large Portabello mushrooms (approximately 80g each)
1tbsp olive oil
1 medium to large leek (about 89g prepared weight), washed and thinly sliced
15g butter
30g walnuts, chopped or broken into smallish pieces
50g Stilton cheese, cut into small dice
40g creme fraiche
Sea salt and freshly ground black pepper

Instructions

Pre-heat the oven to 200℃, gas mark 6

Wipe the mushrooms with a damp paper towel and remove the bottom of the stalk with a small sharp knife so it’s level with the gills.

Place the mushrooms stalk side up on a silicon baking mat (or a sheet of non-stick foil) on a baking tray. Brush with olive oil and season with salt and pepper

Cook in the pre-heated oven for about 6 minutes, or until the natural mushroom juices just start to appear on the surface of the mushroom. Take out of the oven and set aside.

In a lidded frying pan, melt the butter over a moderate heat. When it is foaming add the sliced leeks. Give the leeks a good stir to make sure they are evenly coated in the butter, then put the lid on the pan and gently cook the leeks for 5 minutes until they are soft but not coloured.

Take the frying pan off the heat and add the walnuts, the creme fraiche and the Stilton cheese to the leeks. Mix everything together well. Season with a pinch of salt (don’t go overboard as Stilton cheese is already quite salty) and a generous grinding of black pepper. Stir again and re-check the seasoning.

Divide the stuffing equally between the mushrooms (don’t worry about piling it too high, the mixture is quite well-behaved and won’t collapse in the heat of the oven).

Bake the stuffed mushrooms in the oven for a further 10 minutes until they are heated through and turning golden on the surface.

Serve immediately with a simple watercress or rocket salad, perhaps dressed with a little walnut oil and the finest balsamic vinegar you can find.

Yum!


Notes:

Without the walnuts, the creamy leek and mushroom sauce would make a delicious accompaniment to grilled chicken or steak

This recipe easily adapts to feeding more or less people by increasing or reducing the ingredients proportionately.


Carbohydrate 10g Protein 12g - per stuffed mushroom


Cream Of Celery Soup

by Susan Smith in , , , ,


Eaten raw, the crunchy, nutty-sweet flavour of fresh celery hearts can brighten up many a salad or, cut lengthways into sticks, offer a refreshing hand-to-mouth snack when loaded up with a creamy dip. 

However, I think celery really comes into it’s own when it’s cooked and transformed into something altogether more stylish, such as silky smooth celery soup. 

This Cream of Celery Soup is intensely savoury and the very thing to keep out the winter chill. Using the outer stems from a large head of Cook’s Celery stripped bare of fibrous stringy bits, this sophisticated soup is the prettiest shade of pale apple green and so unctuous that if you closed your eyes, you could be forgiven for thinking you’re eating a cream of chicken soup rather than vegetables!

I buy whole heads of celery because I prefer to prepare it myself. I use the outer stalks for cooking and the more tender inner stalks for eating raw. Usually, I buy organic celery for flavour but for this recipe I purchased some Limited Selection Cook’s Celery from Waitrose because it looked so fresh and green and, as the packaging said ‘grown for flavour’, there was no reason not to! 

Celery is thought to have a calming effect on the central nervous system and to promote a good night’s sleep, so this soup might be just the right thing for a light supper. It works equally well for lunch, a heart warming snack or as a starter for an elegant dinner party.

Cream Of Celery Soup (4 servings) (V)

Ingredients

1 large leek, cleaned and finely sliced

1 medium onion, finely chopped

600g (6 cups) celery stalks, chopped 

40g (3 tbsp) butter

600 ml (2½ cups) vegetable stock (made with Marigold Organic Bouillon Powder)

200 ml (⅞ cup) whole milk

60 ml (¼ cup) double cream

½ tsp nutmeg

1-2 tsp sea salt and freshly milled black pepper


Instructions

In a large pan melt the butter over a low heat.

To clean the leeks, trim the roots and inedible parts off the leek, then slit it up one side and fan it out under a running cold tap to make sure there's no soil left lurking between the leaves. Cut it in half lengthways, then in half again before slicing it across into thin pieces.

To prepare the celery, cut the top and bottom off the celery sticks, wash off any dirt, then thinly peel off any stringy bits from the outside of the stalks with a potato peeler before chopping into smallish pieces

When you've chopped the celery, onion and leeks, add them to the pan. Stir well, to evenly coat the vegetables with butter, then cover them with a circle of baking parchment or greaseproof paper - make sure the paper reaches the sides of the pan and push it down so it sits directly on top of the vegetables (this helps to keep the steam in, so the vegetables are less likely to brown) Cook very gently for about 15 minutes until the vegetables are translucent and soft. Do not let them brown.

Add the vegetable stock. Bring to simmering point, cover once more and cook gently for a further 10 minutes, or until the vegetables are really tender. Take the pan off the heat and add the milk. 

Puree the soup by blending it in batches, then return to the pan and stir in the cream. Season with salt, pepper and freshly grated nutmeg.

Bring the soup back to the boil. Re-check the seasoning and adjust if necessary.

Just before serving, roughly chop the reserved celery leaves and sprinkle on top of the soup. 


Carbohydrate 16g Protein 4g - per serving


Tangy Mushroom Crostini

by Susan Smith in , , ,


One of my best childhood memories was foraging for mushrooms with my Dad. Both field mushrooms and my father’s favourite, field blewitts, with their blue-lilac stems that we often found clumped together in ‘fairy rings’, used to be quite common in the pastureland and meadows of yesteryear. However, for me, nothing quite beat the excitement of finding pure white domes of edible goodness peaking out from under dew-laden grass, even if it meant the occasional slug finding it’s way inside my shoe! We even called our family cat “Gilly” because his fur was an unusual pinkish brown - almost the exact colour of the gills of a young mushroom.

 Chemical spraying and loss of habitat has all but destroyed the opportunity to discover, cook and enjoy the more flavourful wild mushrooms and most people now rely on cultivated mushrooms found on supermarket shelves instead. I suppose there is some compensation for the less than mushroomy flavour of cultivated mushrooms insofar that, alongside the more common white or chestnut varieties, more exotic looking fungi, Oyster, Shitake, Enoki, Crimini, Portabello and Beech Mushrooms, are all readily available too.

To add more flavour to sauces and soups, you can reconstitute dried mushrooms by soaking or simmering them in water before adding them to your chosen dish. For Vegetarians, the umami deliciousness of mushrooms can help fill the savoury flavour gap of vegetables and other non-animal based foods. Mushrooms are also officially recognised as a Superfood. Hence I reasoned that the next two Primal Plate recipes should both be for mushrooms on toast!

To prepare, don’t peel or soak mushrooms. If you soak mushrooms they absorb the water like a sponge and will then turn mushy when cooked. A quick light rinse under the tap is okay but ideally, if they’re not too grubby, simply cut off the bottoms of the stems and wipe them clean with a damp paper towel. Many herbs work well with earthy flavour of mushrooms but I particularly like the grassy accent of anise (tarragon) and parsley.

Tangy Mushroom Crostini is first up. This is an elegant interpretation of mushrooms on toast, suitable for entertaining. Coming soon... Creamy Mushrooms on Toast is more down-to-earth and makes for a relaxed breakfast, light lunch or filling snack at anytime.

Tangy Mushroom Crostini (Makes 8) (V)

Ingredients

1-2 day old refrigerated Grain-Free Bread, cut into 8 thin slices (no more than ½ cm thick)

4 tbsp olive oil

15g (1 tbsp) organic butter

225g (2 cups) mushrooms, wiped. I used a selection of chopped chestnut mushrooms and exotic mushrooms, either chopped or hand-teared into individual fronds.

1 tbsp brandy

1 generous tsp Dijon mustard

160ml (⅔ cups) crème fraiche

Sea salt and freshly ground black pepper

Handful of flat leaf parsley, finely chopped


Instructions

Pre-heat oven to 200℃ Gas Mark 6

Brush the bread slices on both sides with 2 tablespoons of olive oil. Put the slices of on a baking sheet - actually, I prefer to use the wire rack of my oven grill to get lovely looking professional griddle stripes!

Bake for 12-15 minutes until golden brown. Allow to cool.

Heat the remaining oil together with the butter in a large non-stick frying pan.

Cook the mushrooms for 4 minutes over a high heat until golden.

Add brandy and cook for a few seconds more. Remove from the heat.

Mix the mustard and crème fraiche together and stir into the mushrooms. Season well with salt and pepper.

Spoon the mushrooms onto the crostini and sprinkle with parsley


Carbohydrate 5g Protein 3g - per crostini