Nutty Parsnip Gratin

by Susan Smith in , ,


I am fully “living life on the veg” courtesy of Riverford Organics, and I could not be happier with my regular supply of the freshest, tastiest organic produce that they deliver every Friday straight to my door. An absolutely brilliant service!

Notwithstanding my new-found addiction to drinking a large glass of freshly pressed juice every day - which I’m convinced is far more life enhancing than the proverbial ‘apple a day’ that’s reputed to ‘keep the doctor away’ - I’m having a ball creating new recipes from a plethora of organic fruit and vegetables that you can never reliably find on supermarket shelves.

Because eating Primal is what my close family prefers, we never succumb to eating white potatoes or even compensate very often with other high-carb root vegetables. However, last week I couldn’t resist ordering some new season parsnips for inclusion in my weekly Riverford box of goodies. When they arrived, I thought I’d go all out and make a main meal of them.

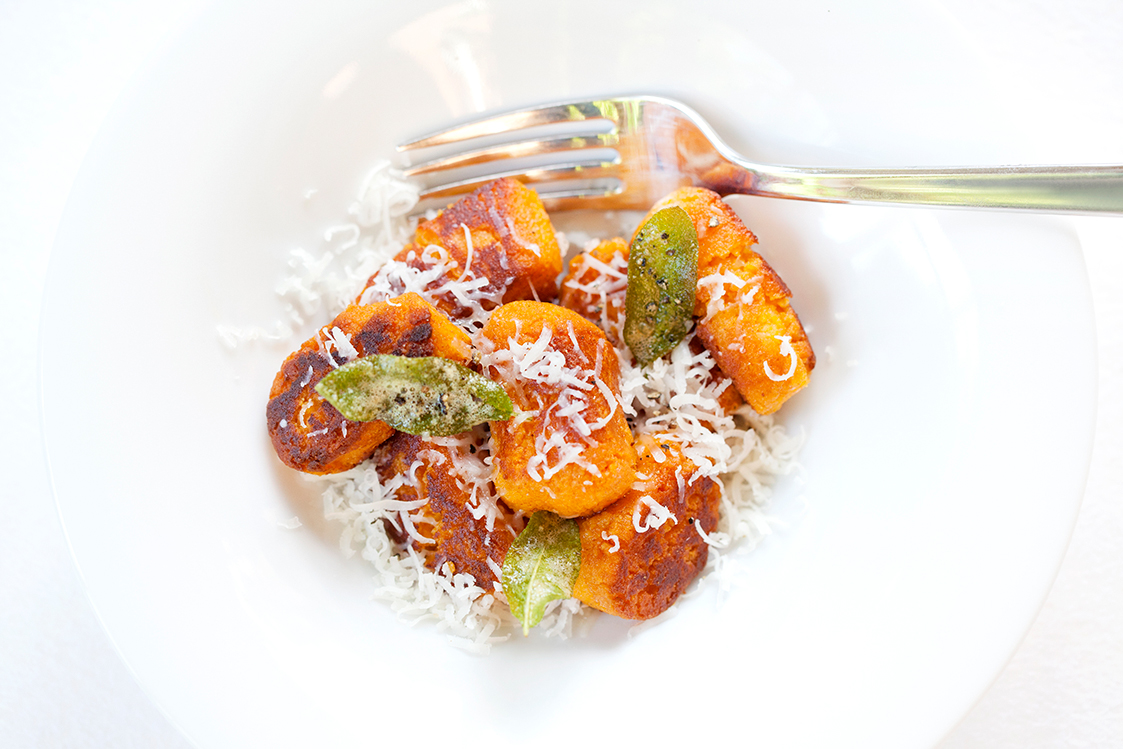
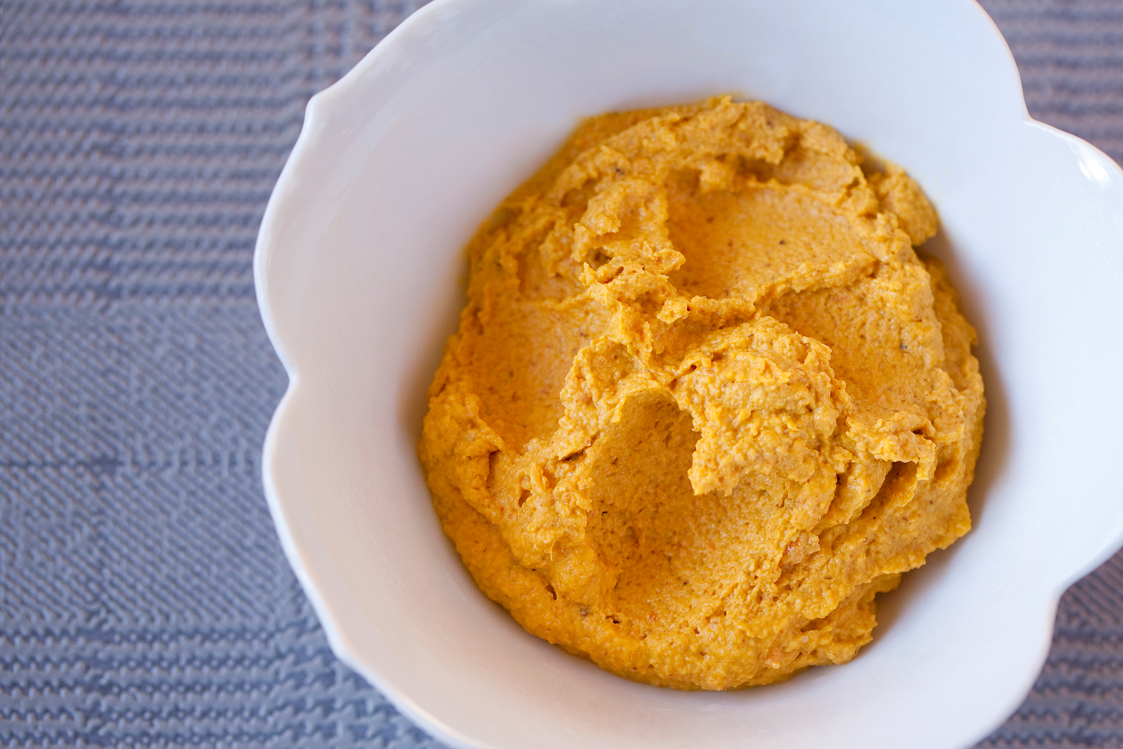
Totally delicious, this creamy Nutty Parsnip Gratin has a gorgeous sweet spiciness about it that pairs beautifully with salty Parmesan cheese and crunchy roasted hazelnuts. In fact, I think I’ve succeeded in elevating the humble parsnip to giddying new heights with this dish! Let’s just say, when you dive in with your fork you might not even recognise that you’re eating parsnips - it’s just the most perfectly balanced, tasty, autumnal meal that ticks all those cold-weather comfort food cravings without a potato or grain in sight. How good is that? 

Nutty Parsnip Gratin (serves 3-4)

Ingredients

500g organic parsnips (trimmed and peeled weight of approximately 3 large parsnips)

2 large organic shallots

300ml organic whole milk 

125ml organic double cream

1 dsp fresh rosemary leaves, finely chopped (about 2 decent sprigs of rosemary)

1 tsp English mustard

¼ tsp organic nutmeg, freshly grated 

1 tsp Celtic sea salt

80g Parmesan cheese (I used Gran Moravia vegetarian Parmesan-style hard cheese), finely grated

50g organic roasted, blanched hazelnuts, chopped

40g organic ground almonds

15g organic unsalted butter

Freshly ground organic black pepper


Instructions

Pre-heat the oven to 200℃ / 400℉ / Gas mark 6

Peel and finely slice the parsnips lengthways into 2-3mm thick strips using a mandolin. If the parsnips are large, first cut them in half across the middle, then cut the top half into quarters and using a vegetable peeler, trim away the fibrous core before slicing.

Peel the shallots and still using the mandolin, slice them very finely.

In a large, wide, lidded sauté pan heat the milk to scalding point (just below boiling) then add the parsnip and shallot slices, pressing them down into the milk (the vegetables won’t be completely covered at this stage).

Cover and cook over a medium-low heat for 4 minutes until the parsnips are soft but not broken up. Tip: Gently stir the vegetables around after 2 minutes to ensure that everything cooks evenly. Take off the heat and set aside.

In a medium-sized bowl, mix together the cream, rosemary, mustard, nutmeg and salt, then stir in half the grated cheese. Pour the mixture over the parsnips and shallots and gently combine everything together. Tip into a gratin dish, press down with the back of a spoon and level off the top.

In a small bowl mix together the rest of the cheese, ground almonds, chopped hazelnuts and a good grating of freshly ground black pepper. Scatter evenly on top of the parsnip mixture.

Dot all over with small pieces of cold butter and bake the gratin for 30 minutes until lovely-bubbly, crisp and golden.

Eat and enjoy.

Notes

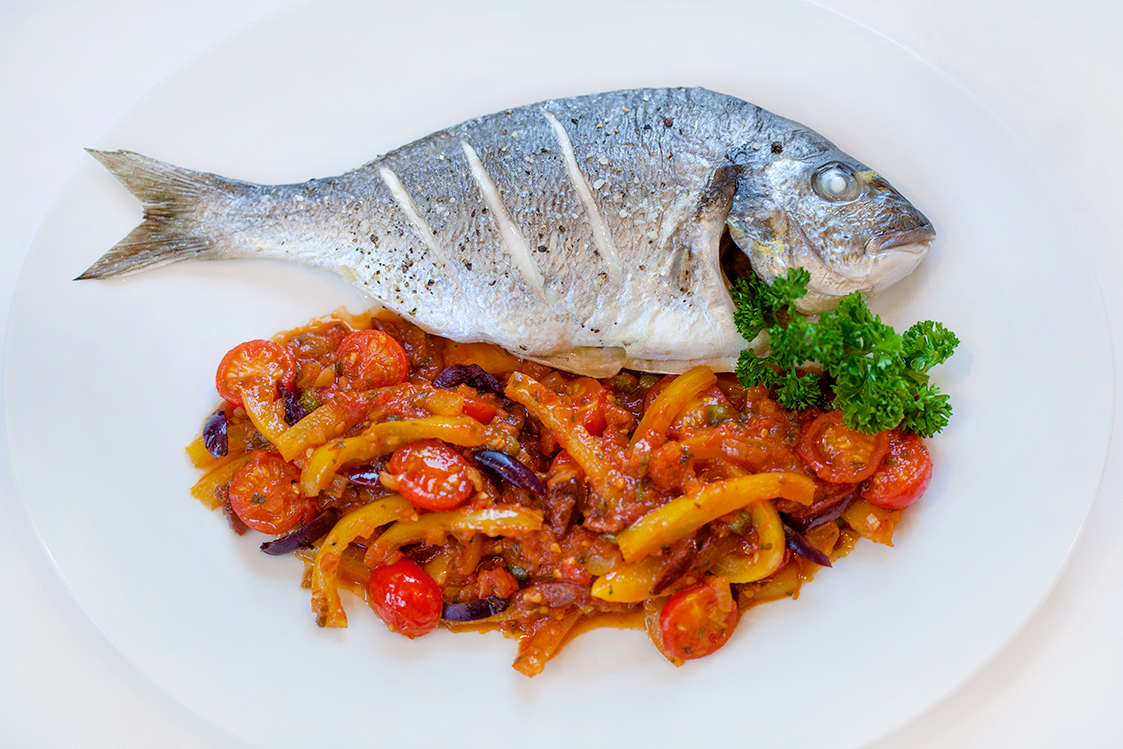
Nutty Parsnip Gratin tastes special enough to serve as a vegetarian main course with all the trimmings on Christmas Day. It’s also a brilliant make-ahead vegetable side dish for carnivores - I imagine that served alongside something meaty, it would be an absolute winner.

It doesn’t matter so much for this recipe because you’re boiling the milk anyway, but because it’s kinder to cows and much healthier for humans, I only ever buy whole milk that’s raw and organic from Gazegill Organics This is what they say:

Here at Emma’s Dairy we believe that cows should have the freedom to roam, grazing our pastures and producing raw organic milk that is naturally high in omega 3. Our cows produce a natural amount of milk and are not intensified in any way to produce more, thats why our milk is rich in butterfat and protein. We do not homogenise our milk but believe that in leaving a cream line you can enjoy simply put an un-tampered with natural product that is full of natures best, we also offer raw organic milk and pasteurised milk as well as cream and offer UK wide delivery, we hope you enjoy it.” 


Carbohydrate 31g Protein 15g - per serving


Sweet Potato Gnocchi With Sage Butter & Goats Cheese

by Susan Smith in , ,


Good news for all Primal/Paleo enthusiasts who still crave potatoes. Today’s blog post for sweet potato gnocchi offers all that’s best about the much-loved spud - golden and crisp on the outside, soft and fluffy on the inside - without going off-piste. These delicious little pillows of potato-like perfection have the heart of soft, light-tasting mashed potato and the soul of crispy, caramelised, umami-flavoured chips.

Sweet potatoes offer a healthier, lower-starch alternative to other potato varieties, but here I’ve tamed down their sweetness and cancelled out their higher water content with primal-friendly ingredients to mimic the taste and texture of regular potatoes. As a cook, there have been many occasions when I’ve thought that only potato can properly complete a meal that’s lacking the comfort and pleasure of something satisfyingly starchy. No longer. These sweet potato gnocchi have the density and depth of flavour I’ve been missing and are the perfect potato substitute for any meal crying out for chips, mash, roasties or croquettes. 

However, I think today’s recipe for Sweet Potato Gnocchi With Sage Butter & Goat’s Cheese is at its best presented as a gratifyingly simple, vegetarian main course. With just enough sweetness from the gnocchi to complement the saltiness of strong-tasting goat’s Cheddar, it’s a combo that’s so tasty you won’t even think about reaching for the ketchup! Also, these beauties are a brilliant dinner-party starter or, piled onto a platter with freshly grated goat’s Cheddar and crispy fried sage leaves scattered over, they will blow your guests away when handed around as a hot savoury canapé to accompany drinks. 

Unlike traditional gnocchi that’s made from regular potato and refined wheat flour, Primal Plate gnocchi are grain-free, potato-free and gluten-free too. They may require a little effort to make but the pre-cooked and cooled gnocchi ‘sausages’ can be stored, still in their cling-film wrapping, for up to 2 days before being cut into gnocchi-sized pillows and quickly fried off in butter. Finally, without compromise, my appetite for potato is satiated!

Sweet Potato Gnocchi With Sage Butter & Goats Cheese (Serves 6)

Ingredients

750g organic sweet potatoes (should yield about 500-550g sweet potato puree)

1 organic egg yolk, lightly beaten

200g organic ground almonds

50g Sukrin organic coconut flour

50g organic arrowroot powder

1½ tsp Celtic sea salt

100g full-fat organic soft cheese

40g organic butter

18 fresh sage leaves

100g Quicke's Goat Cheddar (I purchased this from Waitrose's deli counter) or Parmesan-style cheese, freshly grated - to serve

Freshly ground black pepper - to serve


Instructions

Pre-heat oven to 180°C / 350℉ / Gas mark 4

Place the sweet potatoes on a baking tray and bake for 45-60 minutes (depending on their size) until completely cooked through.

Remove the potatoes from the oven and whilst they’re still hot cut them in half, then scoop out the centres of each. Pass the sweet potato flesh through a fine sieve into a large bowl. Discard the skins.

Add the ground almonds, coconut flour, arrowroot powder, cream cheese, egg yolk and sea salt to the sieved sweet potatoes and mix everything together well. 

Cover and chill for 20-30 minutes in a refrigerator.

Bring a wide, deep pan of water to boil.

Divide the cooled gnocchi mixture into manageable portions (about 200g each). Roll each portion out between cling film into a 2 cm (¾ inch) thick long sausage. Twist the ends of the cling film together tightly then cook each sausage for 6 minutes in the boiling water.

At the end of the cooking time, remove the gnocchi sausage from the boiling water with the aid of two spatulas and lay each one down in an ice-cold water bath to cool down.

Once cool, remove the cling film and slice each sausage into little gnocchi ‘pillows’ i.e. about 2.5cm (1 inch) long pieces. Cover and keep chilled. N.B. They can be stored for up to 2 days in a refrigerator.

When you’re ready to eat, heat 40g grass-fed butter in a large frying pan set over a medium heat. Do not let the pan get too hot - you want the butter to foam, not burn. Sizzle the sage leaves for 1 minute, then remove from the pan and set aside. 

Top left: Gnocchi rolled into cling wrapped  'sausages'. Top right: Blanching in simmering water (put the lid on). Bottom left: In the ice cold water bath. Bottom right: Chopping the chilled Gnocchi 

Top left: Gnocchi rolled into cling wrapped  'sausages'. Top right: Blanching in simmering water (put the lid on). Bottom left: In the ice cold water bath. Bottom right: Chopping the chilled Gnocchi 

Now add the gnocchi pillows to the pan and fry them in the sage-infused butter until golden on the outside and light and fluffy in the centre. Depending on how many people you’re feeding, you may have to do this in several batches. N.B. It’s important that you don’t overcrowd the pan and if the butter starts to burn, clean the pan out and start afresh with more butter. When the gnocchi are nice and golden on all sides, lift them onto a warm plate lined with kitchen paper.

Serve the gnocchi hot with a generous amount of grated goat’s Cheddar sprinkled over and a good grinding of fresh black pepper. Garnish with the crispy sage leaves.


Carbohydrate 29g Protein 13g - per serving


Mediterranean Sauce With Sea Bream

by Susan Smith in , , ,


Whilst Britain voted to leave the EU last Friday we are still inseparably European. I for one am proud to celebrate the fact with this brilliantly versatile, sunshiny flavoured, fresh-tasting Mediterranean Sauce that goes with just about everything. Marvellous with organic grass-fed steak, tender-cooked chicken breast, fresh fish or vegetables this hearty tomato and sweet pepper sauce with black olives, baby capers and fresh oregano cannot fail to transport you to sunny Provence. We love it.

I don’t know who to credit this recipe to. Although I found it at Delia Online, on this website it states that the recipe is taken from A Year In My Kitchen by Skye Gingell. No matter, Primal Plate has tried and tested this recipe several times over and it’s a really healthy, speedy, elegant-looking dish that can be on the table within forty-five minutes. I have increased the quantities of some ingredients, which I think makes for a better balance of flavours and also a more generous portion of vegetables.  

As with the original recipe, I chose to showcase this Mediterranean sauce with fresh sea bream but it can also deliver a glorious Primal vegetarian feast served with roasted cauliflower and lemon-herb dressing dolloped over - please see Notes below.

Summer sun here we come!

Mediterranean Sauce With Sea Bream (Serves 2)

Ingredients

2 whole sea bream, weighing 300g -352g each, de-scaled and gutted (get the fishmonger to do this for you)

1-2 tbsp extra virgin olive oil

Celtic sea salt and freshly milled black pepper

2 shallots, peeled and finely chopped

1 medium/large yellow pepper, de-seeded and sliced lengthways into strips

300g large organic vine tomatoes, skinned and chopped (see Note below)

1 heaped tablespoon fresh oregano, finely chopped  

30g pitted black olives (I used Kalamata), cut into slivers

1 heaped tablespoon baby capers, rinsed and dried

1 heaped tablespoon organic tomato puree

75g organic cherry vine tomatoes, unpeeled but cut into halves

Curly leaf parsley - to garnish


Instructions

Pre-heat the oven to 190℃ / 375℉ / Gas mark 5

Boil a kettle of water.

Wipe the fish with some kitchen paper, then make 3 diagonal cuts across the fish (on both sides) and brush lightly all over with a little olive oil. Season inside and out with sea salt and freshly milled black pepper.

Place the fish on a flat baking tray lined with non-stick foil and transfer to the centre of the pre-heated oven for 15-20 minutes.

Meanwhile, heat the olive oil in a deep sauté pan over a medium/low heat. Add the shallots and gently cook with the pan lid on for a couple of minutes. Add the yellow pepper strips to the pan then cover and continue to soften the vegetables over a medium heat for another 5 minutes.

Add the chopped tomatoes, tomato puree, olives, capers and oregano. Stir everything together, then season with sea salt and freshly milled black pepper. 

Simmer gently with the pan lid half-on / half off for a further 10 minutes, stirring occasionally. 

Add the cherry tomato halves - gently stirring them into the rest of the sauce - then turn the heat down to its lowest setting and continue cooking for a minute or so until the cherry tomatoes are just warmed through and retaining their shape i.e. not collapsed.

To serve, place the fish onto two warm serving plates and spoon the sauce alongside. Garnish with a sprig or two of fresh parsley, if liked.  

For vegetarians and vegans, the Mediterranean Sauce also goes well with roasted cauliflower, served here with lemon-herb dressing 

For vegetarians and vegans, the Mediterranean Sauce also goes well with roasted cauliflower, served here with lemon-herb dressing 

Notes

To skin the tomatoes, use the pointy end of a sharp knife to prick the tomatoes all over several times. Put them into a heatproof bowl and cover in boiling water. Leave them for about 25- 35 seconds - no longer or they’ll start to cook - then using a slotted spoon lift them directly into a bowl of ice-cold water. Remove from the cold water and peel the skins off before proceeding with the recipe.

For simplicity’s sake, the vegetarian version of this recipe, Mediterranean Sauce With Roasted Cauliflower and Lemon-Herb Olive Oil Dressing will feature as a separate Primal Plate blog post soon.


Carbohydrates 12g Protein 69g - per serving


Primal Pronto Drop Scones

by Susan Smith in , , ,


Light, versatile and so quick to make, these little fluffy cushions of loveliness can be served with either sweet or savoury dishes whenever you fancy something bready to eat. I like them for breakfast - either topped with a little raw honey, maple syrup, fresh berries or 100% fruit spread - though my real ‘soft-spot’ is for old fashioned marmalade, because it brings back memories of my childhood. 

Sent off to boarding school at five years old, I could never seem to get enough food to eat! It was here that I was introduced to Robertson’s Golden Shred marmalade with their (now politically incorrect) Golliwog branding, which included beautifully made enamel brooches to collect and pin to the lapel of my school blazer. Overly sweet and unsophisticated it may have been, but back then, much like Paddington Bear, marmalade was my hunger monster’s saviour! 

School breakfasts were usually our choice of pre-packaged cereal (Sugar Puffs for me please!) followed by plates stacked high with yesterday’s scantily ‘buttered’ (with Stork margarine, I fear), pre-sliced white bread. It seemed to me that magic marmalade could transform these half-stale offerings into something rather nice that temporarily filled me up. Teatimes were similarly skewed in favour of high carb foods. Bread with jam or chocolate spread, a banana and soft, sticky buns - the sort topped with glacé white icing. We didn’t mind! These are sweet treats as far as children are concerned and, for me, also a real source of comfort that helped me deal with the stress of being away from home.

Unfortunately, overloaded with wheat, gluten and sugar, young children are particularly vulnerable to tummy bloating, clogged-up systems and chronic constipation. Our guardians must have had an inkling because every morning they would check to see if we were ‘regular’ by keeping a 'poo log'! The ‘little me’ thought it most prudent to try and save face when asked the question, so I’d always answer in the affirmative. Unfortunately, I didn’t realise that no amount of toilet paper rammed down the loo would disguise the fact if I’d lied! I’d only know I’d been rumbled when I was given All-Bran for breakfast instead of my favourite cereal. My blushes weren’t spared either. An uninteresting bowl of roughage foisted on a child lets everyone know where their bowels are at. I was embarrassed and ashamed - as if it was my fault! Scarred by this early life experience, I was still eating what I thought was a mandatory bowl of All-Bran every morning up until my thirty-eighth birthday! 

Being regularly fed massive amounts of refined, processed, high carbohydrate foods not only caused my digestive discomfort, but also nagging hunger too. I was part of an experimental dietary disaster promulgated by the food industry in collusion with public health advisers, which in my view was, and still is, tantamount to child abuse because… 

Normally when you eat some food your blood sugar goes up and your insulin levels rise to get the nutrients into your body cells. Once this work is done, your blood sugar goes back to normal. All is as it should be and you’ll only get hungry again when you need more energy. However, when you eat certain foods that contain a lot of sugar and carbohydrates, your blood sugar sky-rockets. In response, your body releases inordinately high amounts of insulin to get the sugar inside your cells. Once your blood sugar spikes, the excess insulin, which is far more than your body needs, continues affecting your blood sugar way and beyond just normalising it. Consequently, your blood sugar continues to plummet much lower than it’s supposed to. At which point, your brain then tells you you’re still hungry! Unbelievably, as a child, in an attempt to satisfy these constant hunger cravings I resorted to eating Germolene after dormitory lights out! By the time I was eleven I was, unsurprisingly, quite porky!

Fast forward almost sixty years, and today’s recipe for Primal Pronto Drop Scones served with orange fruit spread is my idea of heaven. This is bread and marmalade revisited in satisfyingly good taste with no nasty consequences. As warm and as soft as a hug, these high protein, low-carb, nutritious Primal Pronto Drop Scones a.k.a Scotch pancakes served straight from the pan, showcase all the comfort factor of freshly baked or toasted bread with the crunch of pumpkin seeds. Grain-free and gluten-free, and loaded up with tangy, low-carb, organic orange ‘marmalade’ served with a plentiful supply of freshly brewed coffee, they are one of the things I most love about being a grown-up. Oh, and they are really filling too!  

Primal Pronto Drop Scones (make about 16)

Ingredients

150 g organic ground almonds

50 g organic tiger nut flour

2 tbsp organic coconut flour               

2 tsp baking powder

½ tsp sea salt

250 ml raw organic full-fat milk (or homemade, unsweetened almond milk)

3 eggs, beaten 

30 ml organic tiger nut oil (or coconut oil, melted)

2 drops organic liquid stevia

50 g organic pumpkin seeds

1 tbsp organic tiger nut oil (or coconut oil) - for frying

Instructions

In a large bowl, combine the ground almonds, tiger nut flour, coconut flour, baking powder and sea salt together with a whisk.

Measure out the milk into a jug then add the beaten eggs, liquid stevia, and tiger nut oil.

Make a well in the centre of the dry ingredients and slowly pour in the wet ingredients, whisking the mixture as you go. Keep whisking until the mixture becomes a thick, but still pourable, smooth batter - no lumps please! 

Set aside for a minute or two to allow the coconut flour to fully thicken out the mixture. If the batter then seems too thick to pour thickly from a spoon or ladle, add a little filtered water. When you’re satisfied that the batter is of a thick ‘dropping’ consistency, stir in the pumpkin seeds. 

Place a smidge of oil in a large, shallow non-stick frying pan and set over a medium heat. When hot (takes about 2 minutes), spoon small pools (heaped tablespoons) of the batter into the pan, spacing them well apart - no more than 2 or 3 pancakes at a time - making each pancake about 6 centimetres (2.5 inches) in diameter. 

Cook for about 1½ - 2 minutes until the underside is golden brown, then using a flexible, thin-edged silicon spatula to help you, carefully turn them over and cook for 1½ - 2 minutes on the reverse side. 

Turn onto warmed plates and serve immediately with either no-added-sugar 100% fruit spread, fruit puree, fresh berries, a drizzle of honey or maple syrup. 


Notes

Primal Pronto Drop Scones are every bit as good served alongside a cooked breakfast, a bowl of soup, or curry. Alternatively, spread lavishly with savoury toppings e.g. Carrot Hummus or a feisty tomato and avocado salsa for a filling snack or starter. Or, make them into small ‘blini-sized’ canapés and serve with drinks.  

Whilst these drop scones are very quick and easy to make, you may find you need to cook several batches before you get fully acquainted with the optimum temperature (medium/low not medium/high) and exact cooking times (keep checking their doneness' after 1½ minutes) to get them light, fluffy and perfectly golden on both sides. N.B. Let the drop scones firm up just enough for you to turn them over without the uncooked batter running off the top surface when you do. It takes a little practice!  


Carbohydrate 3g Protein 4g - per pancake


Cheddar Muffins

by Susan Smith in , , , , ,


Tasty, filling and sustaining, these yummy Cheddar Muffins are a high-protein, low-carbohydrate viable alternative to bread and the perfect accompaniment to soup. So perfect, that soup need no longer be relegated to starter or snack status but can sit proudly at lunch or dinner as the main event. The fact is that these bread-like Cheddar Muffins pack enough nutritional oomph to turn every veggie soup into a satisfying meal. 

But don’t stop there. Their ‘breadiness' invites you to slice them through and fill them like a sandwich. They also toast beautifully - you only need to toast their cut side - before serving with scrambled eggs, creamy mushrooms, cheese and tomato or any other toast topper that takes your fancy. 

I like them best of all when they’re still warm from the oven and spread with generous amounts of grass-fed butter. A veritable nutritional powerhouse of goodness, it appeals to the child in me to split them in half horizontally (like a scone), then eat the all the bottom halves before slowing-down to savour the warm, golden, crunchy, deliciousness of their cheesy toppings. If you’re craving comfort food, Cheddar Muffins can be on the table in 40 minutes - with satisfaction guaranteed.  

Cheddar Muffins (Makes about 10)

IngredientsMakes 10

75g unsalted butter, melted

150g ground almonds

50g coconut flour

2 tsp baking powder

1 tsp sea salt

1 tsp paprika

freshly ground black pepper

4 large eggs, beaten

6 tbsp diluted milk (50/50 with filtered water)

125g organic vegetarian Cheddar cheese, finely grated

30g vegetarian parmesan-style cheese, finely grated

Instructions

Pre-heat the oven to 200℃ (fan) / 400℉ / Gas mark 6 and line a muffin tray with 10 large paper cases.

In a small saucepan melt the butter over a very low heat. Take the pan off the heat and allow the butter to cool slightly.   

In a large bowl mix together the ground almonds, coconut flour, baking powder, salt, paprika and black pepper. Add the grated Cheddar and combine well with a fork.

Add the melted butter, the beaten eggs & the diluted milk to the dry ingredients and continue to mix everything together well with a fork until a thick batter is formed.

Spoon the batter into the muffin cases (about 65-70g mixture per muffin) - for speed I use a self-releasing ice cream scoop - then lightly press the mixture down evenly into the paper cases with the back of a fork.  

Sprinkle over the grated Parmesan-style cheese, dividing it equally between the muffins and bake in the oven for 25 minutes (I turn the muffin tray around halfway through the cooking time to ensure even browning). 

Best served still warm from the oven.


Notes

Whilst I recommend these muffins are served warm fresh from the oven, they do have a tendency to vexingly stick to their paper cases until they’ve gone cold. If you don’t want the hassle of scraping remnants of muffin off their paper cases with a teaspoon, use non-stick tulip wrap muffin cases instead. 

Carbohydrate 7g Protein 14g - per muffin


Make Ahead Christmas Vegetables

by Susan Smith in ,


On Christmas Day this year I don’t intend spending more than an hour of ‘hands-on’ time in the kitchen. Nevertheless, I want it to be our most delicious Christmas ever and, as much as I can know, completely cruelty-free (oh my, the dairy industry is so tricky!) 

This means much of our vegetarian food celebration has to be planned-ahead and cooked-ahead. So far so good. Writing a food blog certainly helps focus the mind! The Horchata Ice Cream is already in the freezer and by this weekend the Cranberry Sauce, Mince Pies, Port Wine Gravy and today’s recipe for Spiced Red Cabbage will all be done. I then have four days left to pre-prepare the ingredients for the starter, make the Cheese Cocktail Biscuits and assemble the Parsnip, Cranberry and Chestnut Loaf. 

Which leaves me just about enough time to blog the starter of Red Pepper Rolls With Goat’s Cheese and the dessert of Mincemeat Stuffed Baked Apples before D-day (recipes coming soon). If you’re still with me, my Christmas cooking schedule is in the Notes section below!

Meanwhile let’s get cracking on the veg. Spiced Red Cabbage and Brussels Sprouts are classic Christmas fare (red and green at this time of year is good) and both are easy, make-ahead vegetables. 

Spiced Red Cabbage (Serves 6-8)

Spiced Red Cabbage is another easy-going Christmassy recipe that can be made in advance and reheated. Perfect! 

A mixed spice combination - typically, a mixture of allspice, cinnamon, nutmeg, mace, cloves, coriander and ginger - is generally used for sweet baking such as in cakes and biscuits. It’s the sweet warmth of these spices in autumnal-inspired baked goods that invite us to gear up to the prospect of winter, and are a timely reminder of Christmas recipes to come. 

In this savoury recipe, it’s all about the interplay between sweet and sour. A wonderful mix of slow-cooked cabbage’s slight mustardy-flavour combined with the sweet, warming notes of pungent spices, the fruitiness of apples with a touch of sweetness and the sour of vinegar. Get it right and spicy braised red cabbage is one heck of a useful side dish to complement the rest of your Christmas table.

Spicy Red Cabbage doesn’t take very long to prepare; then it can be left alone to do its ‘thing’ for 1½ hours of gentle cooking. It also keeps warm without spoiling. 

This recipe actually improves with age, so it’s almost better to make it now and freeze for later. Alternatively, make it a couple of days before Christmas and store in the refrigerator. 


Ingredients

I small red cabbage (about 750g)

1 red onion, finely chopped

2 medium Bramley apples (or use Cox’s or Granny Smith’s)

zest 1 organic orange

1 tsp mixed spice

40g Sukrin Gold

sea salt and freshly ground black pepper

2 tbsp raw cider vinegar

150ml pure, no added sugar apple juice or still dry cider (I used Coldpress Granny Smith Apple Juice)

25g butter

Orange rind (without the white pith), cut into very fine strips - optional


Instructions

Peel the outer leaves from the cabbage and discard. Cut the cabbage into quarters and remove the core. Slice thinly into shreds (I used a mandolin)

Finely chop the onion. Using a fine grater, remove the zest from the orange. Peel, core and chop the apples. 

Arrange a layer of cabbage on the bottom of a large deep pan. Add a layer of onion, apple, orange zest, mixed spice, Sukrin Gold, sea salt and black pepper. Continue layering the ingredients in this way until they are all used up.

Finally, pour over the vinegar and apple juice (or cider) and dot with the butter. 

Bring to the boil, then turn the heat down to very low, cover with a tight fitting lid and allow to gently simmer for 90 minutes until tender. 

Brussels Sprouts

I’ve never had a problem with Brussels sprouts. In fact the opposite is true. When they’re In season (October through to March), I actually crave them and can happily scoff up to a dozen in one sitting. In fact, I don’t even bother weighing out Brussels sprouts in the supermarket. I simply count how many people are joining me for dinner and for each of them select 10-12 of the smallest, tightest, firmest, fresh-green sprouts I can find - though it can sometimes take ages to locate the perfect ones! If it turns out that there aren’t enough that measure up, I’ll just put them all back and choose a different vegetable for dinner! However, when they’re perfectly formed, these bright green, marble-sized globes of goodness, cooked to retain a bit of ‘bite’ and liberally doused in melted butter (sprouts love butter!) and freshly ground black pepper, are the quintessential Christmas vegetable. 

Surely the reason that beautiful Brussels sprouts have been so reviled is because many people were forced to eat stinky, soggy, bitter-tasting, ‘overblown’ sprouts as children. But there is a way to turn these mini ‘cabbages’ into desirable vegetables…don’t overcook them! 

Cooked quickly and al denté (still slightly firm to bite into), Brussels sprouts hold on to their healthy, green credentials. Overcooked, they’re really quite unpleasant - soggy, smelly and khaki-yellow - with a taste reminiscent of rotten eggs! 

Let’s not go there. My way of cooking Brussels sprouts without tears is:

  • Choose small, compact, ones - no bigger than an inch across and all the same size.
  • Take off the outer leaves (only if they’re damaged or discoloured) and trim the stalk ends. To ensure fast, even cooking, use a small sharp knife to cut a small shallow cross in the stalk end - some say it’s not necessary, but I always do!
  • Bring a large pan of salted water to the boil. Steam or boil the Brussels for 5 to 10 minutes - or perhaps only 4 minutes if they’re very tiny - with the pan lid on. After 5 minutes, check their progress by inserting the point of a small sharp knife into one of the Brussels (or just eat one if you think it’s cooked!). If they’re still too hard, you’ll need to keep checking them every 1-2 minutes until they’re done. Whatever you do, do not allow them to overcook
  • Brussels sprouts are cooked properly when they’re still bright green, have a little bit of resistance when you insert the tip of a sharp knife into them but can still be easily cut through without falling apart. If you’re taste-testing one, it should feel firm between your teeth when you first bite into it, but hot all the way through, and fully tender. If in doubt, they’re better slightly undercooked!
  • If you’re eating them straight away: drain well, then tip them into a warm serving dish with a generous knob of butter and a good grinding of fresh black pepper. 
  • If you’re preparing them in advance of your meal: drain the cooked Brussels then immediately plunge them into ice cold water to stop the cooking process (or continuously run cold water directly from the tap over them until they’re cold). This will set their bright green colour. When cold, drain well, cover with cling film and set aside.
  • To re-heat: put a large knob of butter and 2 tablespoon of water info a large frying pan. Set the pan over a medium heat. As soon as the butter starts to melt and the water bubbles to a simmer, throw in the Brussels and spread out into a single layer. Stir, shake, or agitate the contents of the pan for a couple of minutes until the water has evaporated and the Brussels are heated through and glazed in butter. Do not overcook! Season with freshly ground black pepper and serve immediately.

Bright Christmas green, fresh-tasting and good for you - what could you possibly not love?

Notes

The Spiced Red Cabbage can be stored in a refrigerator for 2-3 days or in the freezer for up to 1 month, then gently re-heated in a pan or microwaved. 

There’s a sort of rule for prettying-up a finished dish…if it’s gone in it, it should go on it! So if you want to ‘fancy-pants’ up the presentation of your Spiced Red Cabbage, use a vegetable peeler to remove long strips of orange peel from half an organic orange, then cut into very fine slivers with a small sharp paring knife and blanch in a pan of boiling water for 30 seconds. Refresh in cold water, then drain and dry on paper kitchen roll before arranging on top. Nice, but not necessary.    

Brussels sprouts stay fresher for longer if you buy them on the ‘wand’ they grow on, although you’ll only get very small ones at the top (you want small because they taste sweeter than their big brothers!)

Steaming is the easiest method of cooking Brussels sprouts because when you’re regularly having to check their degree of ‘doneness’ you don’t want to be chasing one around a pan of boiling hot water trying to stab it with a fork i.e. they’re safely and conveniently sat in the top of a steamer and easily accessible! 

Christmas is one of the rare occasions when I might use my microwave to re-heat vegetables because there’s not enough room on the hob. Prepare the Brussels in advance as directed above (cooking, blanching, draining) then tip the Brussels directly into a microwave-proof serving dish. Dot with butter, season with black pepper then cover with cling film. Don’t chill, they’ll be perfectly okay for a couple of hours at room temperature. When you’re ready to serve them, pierce the cling film covering the sprouts a couple of times to allow steam to escape, then microwave on High for about 45 - 60 seconds until piping hot. Be careful not to overcook them or burn yourself when removing the cling film - also don’t put one straight into your mouth to test! Instead, cut one of the Brussels sprouts in half on a chopping board to make sure they’re heated all the way through. If they need a little extra time, continue microwaving in 10 second cycles until really hot. 

My Christmas 2015 cooking schedule looks like this:  

2 weeks before: 

Make Horchata Ice Cream and Spiced Red Cabbage - freeze.

1 week before: 

Make Mincemeat (for mince pies & stuffed apples) and Cranberry Orange Relish - refrigerate

3-5 days before: 

Make Port Wine Sauce, Cheese Cocktail Biscuits and Mince Pies - refrigerate the gravy, store the biscuits, freeze the mince pies - to be topped and cooked on Xmas day (if required)

2 days before:

Prepare (skin) the red peppers, toast the pine kernels, make the tomato vinaigrette and basil pesto - refrigerate

Prep the Brussels sprouts - store in a freezer bag in the fridge

Christmas Eve: 

Defrost the mince pies

Make the crumble-topping for the mince pies and bake (or leave until tomorrow?)

Make Parsnip Cranberry & Chestnut Loaf - refrigerate

Defrost red cabbage

Make celeriac puree

Christmas Day: 

Cook the nut loaf

Bring cranberry sauce back to room temperature

Cream the goat’s cheese and assemble red pepper rolls

Decorate the red pepper rolls immediately before serving

Re-heat the spiced cabbage

Re-heat celeriac puree

Re-heat the gravy

Cook the Brussels sprouts

Make the sage butter

Pretty-up the nut loaf - decorate with sage, parsley and cranberries

Core and stuff the apples and bake


Vegetarian Sausages, Creamy Cauliflower Mash and Red Wine & Onion Gravy

by Susan Smith in , , ,


The Brits love sausages. Grilled or fried to perfection, and piled on top of creamy ‘mash’ and slathered in onion gravy, or put to bed in a soft pillowy bread roll with tomato ketchup - sausages taste great! As a teenager, I certainly thought so. Every Sunday night a crowd of us would leave our church youth club and walk into town to catch the bus home. There was a burger stand next to my bus stop that sold what we thought were the most delicious hot sausage ‘cobs’  (a Northern English word for bread rolls) with HP sauce. Myself and my boyfriend, who always walked me to my bus stop before crossing town to catch his own bus home, would shelter together in a shop doorway, like young lovers do, to eat our late night feast before saying a long and wistful goodbye prior to my return to weekly boarding school. My father too always prided himself on buying ‘proper’ fresh sausages from a traditional butcher and would travel 25 miles across the county of Nottinghamshire for the privilege. Whilst nothing like the mass-produced muck that you find on today’s supermarket chiller shelves, my dad probably didn’t realise that sausages per se are one of the oldest processed foods in history and, despite their reputation for tasting good, most sausage-making is almost certainly best done behind closed doors!

Although sausages are currently making a comeback with the consumption of them soaring, producers bulk out their sausages with scraps, fat, cereal, chemical preservatives and water. In my view, it’s high time for a sausage re-think. I don’t want sausages packed out with cereal and other nasties and I don’t want to cause farm animals immeasurable suffering just so I can eat them. Notwithstanding the risks to our health, if you’re a pig, any mention of sausage is never going to be a good idea!

The highlight of many a British BBQ, a cooked English breakfast, or a child’s favourite meal of sausage and baked beans, I think it is perhaps more the walk down memory lane that’s responsible for our adult sausage cravings, rather than the reality of what they are and where they come from. But there is a kinder and healthier way to satisfy our desire.

Today’s blog post features no ordinary ‘bangers and mash’. It is a no-meat, grain-free, potato-free, alternative to this great British staple, which is nonetheless every bit as comforting and tasty as the original and, most importantly, looks just like people think ‘sausage and mash’ should!

For taste and texture these cheesy veggie sausages are as close to their meat counterparts as ‘damn it’ is to swearing! Plus, they cook like a dream (see note below) because they don’t spit and splutter like ‘bangers’ do. Fabulous with low-carb creamy cauliflower mash and served with a deeply satisfying vegetarian red wine and onion gravy, it is the best transition to autumnal comfort food that you could ever hope for. 

Vegetarian Sausages (Makes 12 large sausages - allow 2 sausages per serving)

Ingredients

600g vegetarian Lancashire cheese, crumbled or grated (I coarsely grated mine in a food processor)

4 large spring onions, finely chopped

165g organic ground almonds

20g organic milled flaxseed

15g green banana flour

1 tbsp Marigold organic bouillon powder

2 tbsp fresh thyme leaves, finely chopped

2 tbsp fresh flat leaf parsley, finely chopped

3 large organic eggs, lightly beaten 

Sea salt (about 1½ tsp) and freshly ground black pepper (about ¾ tsp)

Olive oil - for frying


Instructions

Put the grated cheese, spring onions, ground almonds, ground flaxseed, banana flour, bouillon powder and herbs into a large mixing bowl and mix everything together well. 

Add the beaten eggs and a generous amount of seasoning, then using a fork or your hand bring the mixture together so it binds into a soft cheesy dough-like consistency. 

Cover the bowl with cling film and set aside to chill in the refrigerator for a couple of hours.

When the sausage mixture is thoroughly chilled, form into 12 large sausages - about 7.5cm (3”) long, weighing approximately 85g each.

Pour a large glug of olive oil into a large non-stick frying pan and set it over a high heat until the oil is really hot. When the surface of the oil starts to shimmer shallow-fry the sausages until deep golden brown and crispy on all sides, about 5-6 minutes. Drain the cooked sausages on paper kitchen paper. 

Serve hot with the creamy cauliflower mash, red wine & onion gravy and peas for a low-carb, vegetarian ‘twist’ on a favourite British classic. 


Red Wine & Onion Gravy (Serves 4)

Ingredients

1 tbsp olive oil

2 large onions, finely chopped

1 tsp coconut palm sugar

1 tbsp green banana flour

200ml vegetable stock, made with 1dsp Marigold organic vegetable bouillon powder

200ml red wine

1 tbsp Clearspring tamari (soy sauce)

1 fresh bay leaf

Sea salt and freshly ground black pepper


Instructions

Heat the olive oil over medium-high heat in a large pan. Add the onion and coconut palm sugar to the pan, then cover and cook, stirring occasionally, for 4 minutes or until beginning to brown. Reduce the heat to medium/low and continue to cook with the pan lid on for another 15 minutes, stirring from time to time, until the onion is deep golden brown.

Add the banana flour and stir over the heat for another minute to incorporate, then gradually stir in the stock and wine. 

Bring to the boil, stirring continuously until the sauce has thickened, then turn the heat back down to low.

Add the tamari and taste check. Season with a very little sea salt (only if you think it needs it) and some freshly ground pepper 

Add the bay leaf (or thyme sprig) and gently simmer for another 20 minutes. Remove the bay leaf.

Serve this intensely flavoursome gravy really hot with sausages and other vegetarian savoury dishes. 


Creamy Cauliflower Mash (Serves 4)

Ingredients

1 large head of cauliflower, trimmed and cut into florets

1 fresh bay leaf

100g full-fat soft cream cheese (I used Longley Farm)

Generous pinch of freshly grated nutmeg 

Sea salt and freshly grated black pepper


Instructions

Boil a kettle of water.

Place the cauliflower in the top half of a steamer with the bay leaf tucked in-between the florets. 

Pour the boiling water from the kettle into the bottom half of the steamer, add some sea salt then bring back to the boil. Steam the cauliflower with the pan lid on for about 8 minutes, until it is cooked through.

Tip or spoon the cauliflower into a large bowl and allow it to cool down for a couple of minutes - this will let the steam evaporate and make for a drier mash. Remove the bay leaf. 

Using a stick blender or food processor, whizz the cauliflower into a rough puree. Add the salt, pepper, nutmeg and cream cheese then briefly process again into a creamy mash consistency.

Put the cauliflower mash into a clean pan and gently re-heat, stirring from time to time so it doesn’t catch on the bottom of the pan. 

Serve hot as a delicious low-carb alternative to mashed potato.   


Notes

Keep the formed ‘sausages’ really cold (in a refrigerator) until you’re ready to start cooking them. This will ensure that they stay sausage-shaped in the cooking process i.e. cook to a crispy exterior before the cheese gets a chance to melt and they become misshapen. For the same reason, it is important not to overcrowd the pan because this lowers the temperature of the oil. You want your sausages to fry quickly in the hot oil, not semi-steam, which can cause them to ‘squidge' out of shape as you’re turning them over in the pan (also causing them to absorb more oil).  

The uncooked sausage mixture will keep for several days in a refrigerator. With this recipe being hot-off-the-press I haven’t tried freezing it yet but I think that would probably work too.

If it looks like a sausage, tastes like a sausage and behaves like a sausage it probably IS going to be mistaken for a non-vegetarian sausage! Apart from the difference in colour when you bite into them (pale gold cheese colour rather than cooked-meat-grey) I’d defy anyone to distinguish the difference between these veggie sausages and meat ones, especially when cold. Cooked leftovers, eaten next day straight from the fridge, still had their crispy exterior intact and tasted so ‘porky’ I was genuinely gob-smacked! Which means I’ve also developed a brand new picnic food to go, which is an absolute god-send for when Sarah and I are doing full-day weddings on the move #happy

If you want a smooth gravy i.e. without onion bits,  strain through a fine sieve into a clean pan before re-heating and serving.

If you think the finished gravy is a little too thick just add more water to thin it out to your liking.

I used steamed cauliflower to create a creamy ‘mash’ that’s very similar to - albeit a lighter, low-carb version of - mashed potatoes. Sweet potatoes, carrots, celeriac, swedes, parsnips and turnips - either alone or in combination - all make a good alternative to potato mash. Just be wary of stacking up the carbohydrates when you eat the sweeter root vegetables i.e. parsnips and sweet potatoes.


Carbohydrates 11g Protein 40g - 2 sausages per serving

Carbohydrates 13g Protein 1g - per serving of gravy

Carbohydrates 12g Protein 6g - per serving of creamy cauliflower mash


Primal Naan Bread

by Susan Smith in , , , ,


Following on from last week’s blog post, we’ve recently been going through a spicy phase at our house. We love curry, which is a good thing because for the past week we’ve been eating it most days whilst I tried to figure out how to make the perfect grain-free naan bread accompaniment. Happily (actually I am ecstatic!), Primal Plate has cracked the code for a grain-free naan bread that looks and tastes as close to an authentic Indian flatbread as you can get, without using traditional ingredients.

I had to go from memory when developing this recipe because with rice, legumes and grains all off-limits, I’ve not eaten out at an Indian restaurant or had an Indian ‘take-away’, for a very long time. I always remember the best naan being soft, chewy and subtly sweet, so my first thoughts turned to tiger nut flour, which I knew would give my naan a slight sweetness, without adding sugar. 

Traditionally, naan is made from plain wheat flour and leavened with yeast before baking. To get the taste, smell and texture of traditional naan it seemed important that the raising agent for my naan was also yeast, although I wasn’t certain whether this was a Paleo/Primal-approved ingredient or not. Consulting Mark’s Daily Apple, I discovered that if you drink wine or beer, the type of yeast used to make both is the same as the yeast used for bread making. And, assuming you’re not yeast sensitive, there are some nutritional benefits to eating it, especially if you avoid animal products. As a primal, vegetarian wine drinker, I concluded yeast was good to go! 

For the rest of the recipe I got my inspiration from the queen of Indian cuisine, Madhu Jaffrey. However, when refined wheat flour, the primary ingredient of naan bread isn’t an option, I had to find alternative ingredients and put them together in just the right amounts so that my naan bread would look and taste like the real deal.

To be honest, my first attempt included a high proportion of green banana flour (a brilliant source of resistant starch, which is one of the best foods to feed our good gut bacteria) but it turned out almost exactly like wholewheat pitta bread instead (another recipe for another day). For naan, I wanted it to be altogether softer and fluffier.

Substituting ground almonds for banana flour and changing the ratio of ingredients finally did the trick. The virtually no-need-to-knead dough rose better (doubled in size at the first proving), looked like I’d used plain flour rather than whole-wheat (more naan-like) and had the desired soft, fluffy texture I was looking for.

It was another ‘Eureka!” moment in my Primal cook’s career. I am still totally amazed that each new recipe I attempt to develop with the same handful of ingredients - albeit in differing amounts - can be transformed into an endless variety of grain-free, refined sugar-free cakes, breads, biscuits, scones and pancakes that look and taste no different to those made with conventional ingredients like wheat flour and sugar. 

If you're trying to lose weight and eat low-carb please be aware that these naan are extremely moreish! They’re lovely as an occasional treat, but don’t go overboard. Although a well known supermarket’s plain naan has 50% more grams of carbohydrate than Primal Plate’s naan bread, I have in fact gained 2 pounds this week, which I can only attribute to multiple testing of this recipe. It was worth it!

PRIMAL NAAN BREAD (Makes 3 decent-sized naan)

Ingredients

75ml hand hot milk            

1 tsp raw organic liquid honey                

5g (about 1 heaped tsp) dried active yeast

150g tapioca flour

20g coconut flour

30g tiger nut flour

1½ tsp baking powder                    

¾ tsp xanthan gum

50g ground almonds

½ tsp tsp sea salt    

1 tbsp olive oil + ¼ tsp for greasing            

50ml yogurt, beaten

1 medium egg, lightly beaten

1 tbsp butter or ghee, melted - for brushing        


Instructions

Gently warm 75ml milk to ‘blood’ temperature with the honey. Put the milk/honey in a bowl. Add the yeast. Stir to mix. Set aside for 15-20 minutes or until the yeast has dissolved and the mixture is frothy.

Meanwhile, sift the tapioca, coconut, tiger nut flours, baking powder and xanthan gum into a large bowl. Add the ground almonds and sea salt and make a well in the centre. 

In a separate bowl, combine the beaten egg, olive oil and yogurt, then pour it into the well, along with the bubbling yeast mixture. Gradually bring the mixture together with a fork then gently knead with your hand for a few minutes until it forms a soft, smooth ball of dough.

Pour ¼ tsp oil into a medium/large bowl and roll the ball of dough in it. Cover the bowl with cling film and set aside for 1-1½ hours in a warmish place until doubled in size. (I heat my oven to 40℃, then switch it off and put the covered bowl of dough in the closed oven to prove).

Tip the proofed dough out of the bowl onto a work surface then briefly knead again. Divide the dough into three equal balls. Lightly cover with cling film and set aside whilst you melt the butter or ghee in a small saucepan over a low heat. 

Heat a heavy non-stick frying pan over a high heat for 5 minutes or so and put the oven on low. 

Meanwhile, gently flatten each of the balls between two sheets of cling film then lightly roll or press into a tear-shaped naan, about 25cm long and 13cm wide at its widest point and slightly thicker around the edge. Keep lightly covered until you’re ready to cook them. 

Put the naan into the hot frying pan (no oil is needed) and cook until it starts to puff up and is tinged brown in patches (about 1-2 minutes), then using a flat bladed spatula flip the naan over and cook the other side until that too is patched with brown (another 1-2 minutes). Turn it back over one final time and cook for about another 30 seconds or so until cooked through and there are no doughy bits remaining.

Brush the cooked naan with the melted butter or ghee and put in the warm oven whilst you make the other flatbread(s). Serve with curry. 


Notes

If the dough seems too sticky when you’re trying to knead it, add more tapioca flour - a very little at a time - only just enough so that the dough leaves the sides of the bowl and isn’t sticking to your fingers.

You may have guessed that I regularly cook for three people (hence a recipe for three naan). For a family of four or more, simply double the ingredients to make six. Alternatively, divide the existing dough recipe into four balls to make the finished naan smaller.  

We struggled trying to determine the best and simplest way to cook the naan - or at least that was our excuse to keep taste-testing them! As well as cooking them on top of the hob, they can be baked in a super-hot oven for 5 minutes. Firstly, pre-heat a heavy baking sheet in an oven set to its highest temperature. Literally, ’slap’ each prepared naan down onto the hot baking sheet. It will puff up. Bake for 2½ minutes then turn over and continue cooking for a further 2-2½ minutes. Wrap each naan in a clean tea-towel and keep warm whilst you make the rest in the same way. 

Naan bread cooked in the oven will turn out more evenly golden but not quite as soft and chewy as when cooked on top of the stove in a frying pan. We finally all agreed that the pan-cooked ones had the ‘edge’ i.e. looked and tasted the most authentic. 


Carbohydrate 52g  Protein 8g - per serving

Grain-free, gluten-free Primal Naan Bread is the perfect sharing bread to eat with curries and Indian food, shown here with Cauliflower & Mushroom Curry

Grain-free, gluten-free Primal Naan Bread is the perfect sharing bread to eat with curries and Indian food, shown here with Cauliflower & Mushroom Curry


Griddled Asparagus & Tomato with Pecorino with Parmesan Crusted Chicken / Twice-Baked Cheese Soufflés

by Susan Smith in , , , , , , ,


There’s a debate going on in our household. A sort of ‘Daddy or Chips?’ to-ing and fro-ing. Sarah thinks I should feature more meat recipes on Primal Plate’s blog and I’m not finding any reason to do so. In fact, the opposite is true - I am not interested in promoting meat consumption.

Mass cruelty is going on, and millions of factory-farmed chickens, pigs and cows are suffering the consequences, without any encouragement from me. Most people don’t want to know how the food they eat arrives on their plate, because if they become fully aware of the heartrending, unmerciful, intense farming methods, kept ‘under wraps’ by agribusiness and food advertising agencies, natural empathy will force them to change their eating habits, or at least make them willing to pay the extra price for compassionately and ethically reared farm animals. I have a solution. If you think you can’t afford to buy organic, free-range, grass-fed meat, stop eating meat! Or, if you must eat it, save it for special occasions when you are happy to pay a little more for the privilege.

So now my intention is clear, I can indulge Sarah and look to those people who like to draw attention to the fact that meat is most often missing on Primal Plate’s blog. Today’s post should make the point admirably. 

Griddled Asparagus & Tomato with Pecorino is a fresh, light-bite that’s been slightly modified from an original Waitrose recipe. More than a cold salad but not quite a hot dinner, this dish captures all the flavours of summer with the minimum of fuss. With the exception of griddling the asparagus spears (which only takes about 6-8 minutes) everything else can be pre-prepared and quickly assembled when you’re ready to eat. 

It’s delicious with Parmesan Crusted Chicken (buy your chicken here) assuming you’ve taken on board the importance of provenance - but here’s the thing, it’s twice as good (and a lot more convenient to serve) teamed with Twice-Baked Cheese Soufflés (recipe adapted from Rose Elliot’s book Vegetarian Four Seasons).

This is my sort of food - tasty soft pillows of all-protein goodness, topped with golden, crunchy, cheese - and no animal suffering in the making thereof! When it comes to deciding which is more enticing to eat, I think the photographs here say it for me!

Still, I’ve included the recipes for both chicken and soufflés, so you have the choice. However, I entreat you to please stop supporting the horrors of intensive animal farming by paying the extra money for free-range, outdoor bred, organic chicken - without exception. Thank you.

Griddled Asparagus & Tomato with Pecorino (V - see note below) (Serves 2-4)

Ingredients

250g tomatoes, halved (I used Pome dei Moro)

500g asparagus, trimmed

Fast and easy vinaigrette

30g pine nuts, toasted

25g pack fresh basil, shredded if leaves are large, or left whole if small

30g Pecorino, Parmesan or Twineham Grange cheese, finely grated


Instructions

Pre-heat the oven to 150 ℃ / 300℉ / Gas mark 3

Arrange tomato halves in a single layer on a baking sheet lined with non-stick baking parchment . Cook in the pre-heated oven for up to 1 hour. N.B. Because oven temperatures can vary considerably, check the tomatoes progress after 45 minutes - they should be semi-collapsed, semi-dried and slightly caramelised when they’re done - definitely not scorched! Remove from the oven and set aside.

Gently toast pine nuts in a small dry frying pan over a low heat until golden - watch like a hawk, don’t let them burn!

Make the fast and easy vinaigrette. Set aside.

Wash asparagus, drain and dry. Snap off the bottom of the spears and peel the lower third with a potato peeler. Drizzle the prepared asparagus with olive oil, coating them evenly, then season with salt and pepper and set aside. 

Just before you’re ready to serve, heat a griddle pan to hot. Cook the asparagus in a single layer until lightly charred and tender (takes about 5-8 minutes)

Arrange the cooked asparagus on a large serving plate, scatter with the tomatoes. Drizzle generously with the vinaigrette then top with pine nuts, shredded basil leaves and grated cheese…in that order.

Parmesan Crusted Chicken (Serves 2) 

2 skinless, boneless chicken breasts 

1 egg white, lightly beaten

60g Parmesan cheese, finely grated

A generous grinding of freshly ground black pepper

1 tbsp Clearspring organic sunflower frying oil


Instructions

Pre-heat the oven to 200℃. 

Combine freshly ground black pepper with grated Parmesan.

Dip each chicken fillet into the beaten egg white and then firmly press the chicken into the combined Parmesan and black pepper.

Heat the oil in a non-stick oven-proof frying pan over a medium heat. When it is hot, cook the chicken for 3-4 minutes on each side until golden brown. Do not be tempted to move the chicken around the pan - it will be crispier if you leave it alone. 

Put the frying pan into the pre-heated oven for a further 8-10 minutes until cooked through. N.B. if you’re not sure if it’s completely cooked, cut through the middle of one of the chicken fillets with a sharp knife and check.

Remove from the oven and allow to rest for 3 minutes before serving. 


Twice-Baked Cheese Soufflés (V) (Makes 8 soufflés - serves 4 for a main course, 8 as a starter) 

Ingredients

Butter for greasing 

8 tbsp ready-grated Parmesan cheese

225g full fat cream cheese (I used Longley Farm)

4 large egg yolks, lightly beaten

150g Gruyere cheese, finely grated

5 large egg whites

Sea salt

Freshly ground black pepper


Instructions

Pre-heat the oven to 180℃ / 350℉ / Gas mark 4. Boil a kettle of water.

Generously grease 8 ramekin dishes, then sprinkle the insides with 4 tablespoons of the ready-grated Parmesan.

Put the cream cheese into a large bowl and mash with a fork until it’s smooth. Gradually mix in the egg yolks, then add half the grated Gruyere. Season with sea salt and black pepper. 

In a separate bowl whisk the egg whites with a clean grease-free whisk (preferably electric if you’re not feeling energetic) until they stand in soft peaks.

Stir one tablespoon of the whisked egg whites into the egg yolk mixture to loosen it, then using a metal tablespoon gently fold in the rest of the egg whites.

Spoon the mixture into the ramekins to come level with the top, but don’t pile it up any higher.

Stand the filled ramekins in a roasting tin, pour the boiling water round to come halfway up the sides and bake for 15 to 20 minutes or until they are risen and set.

Remove from the oven and allow to get cold - they’ll sink a bit. Loosen the edges and turn them out. It’s easiest to turn them out into the palm of one hand, then transfer them to an ovenproof dish.

Sprinkle with the remaining Gruyere cheese, then with the rest of the Parmesan cheese. 

They can now wait until you’re ready to bake them. Then, pre-heat the oven to 200℃ / 425℉ / Gas mark 7.

Bake them for 15-20 minutes or until they are puffed up and golden brown.

Serve immediately.

Notes

It’s impossible to make Pecorino or Parmesan cheese without using animal rennet, so they are not suitable for vegetarians. Twineham Grange cheese is made with a vegetarian rennet in place of the animal rennet and is the only cheese of its type to be Vegetarian Society Approved. For more information click here.

Twice-baked cheese soufflés are excellent for a special brunch served alongside slices of wild smoked salmon and accompanied by a glass of freshly squeezed orange and pink grapefruit juice. They can even be made and frozen in their dish, ready to be quickly defrosted and baked.  

The cooking times for chicken breast fillets depend on their size and thickness so I have allowed some latitude in my timings. Try to ensure that both fillets are the same weight so you’re not juggling around with different timings for each. Ultimately, you have to use your discretion but, if in doubt, nothing will spoil if you cut one open, just to make sure it’s nicely cooked all the way through.


Carbohydrate 6g Protein 8g - per serving of Griddled Asparagus & Tomato with Pecorino/Twineham Grange cheese

Carbohydrate 0g Protein 44g - per serving of Parmesan Crusted Chicken

Carbohydrate 2g Protein 28g - per main course serving of 2x individual Twice-Baked Cheese Soufflés (1g carbohydrate 14g protein - per soufflé)


Thai Spiced Aubergine Curry with Cauliflower Rice

by Susan Smith in , , ,


I met one of my oldest friends last week. We go back nearly thirty years, I think. I don’t see her that often, but when I do, it’s as if it’s just a continuum of the time before - even if our last meeting was months, or even years, ago. I love this woman’s courage, directness and no-nonsense attitude to life. Turns out, we’ve both lost a significant amount of weight recently, so obviously our respective weight-reduction diet plans were up for discussion and comparison. Her low-fat / low-calorie / high-nutrient Slimmer’s World diet (by which method she has lost four stone!) is almost the exact opposite of my high-fat / low-carbohydrate / Primal diet that doesn’t give a hoot about counting calories (though it’s still nutrient dense).

It’s a sure-fire thing that Primal Plate has nothing to offer my friend in terms of optimising a weight-loss maintenance plan because she’s doing brilliantly already, thank you very much! What I do know is that you cannot combine Primal eating (no-grains, low-carbohydrate) with a low-fat diet because you’d find yourself in a dietary hell of restricted food choices and no energy. And vice versa. The natural consequence of a high fat, high carbohydrate diet and a sedentary lifestyle is an increasingly fat and unhealthy body. In this context, today’s obesity and type-2 diabetes epidemic is the norm.  

It appears dietary guidelines for weight loss are still polarised between low-fat / high-carbohydrate (including grains, potatoes and wholemeal bread) and high-fat / low-carbohydrate (your source of energy comes from healthy dietary fat like cheese, grass-fed meat, butter and cream). So, the message is, unless you do insane amounts of exercise, you really can’t combine both diets and stay at your optimum weight! Whatever you’ve been conditioned to believe, there is mounting scientific evidence that proves fat, particularly saturated fat (butter, cheese, meat and cream), isn’t the enemy. In fact, it may be high carbohydrates that are more dangerous. Hence, Primal Plate recipes answer the need for comfort food that could be mistaken for carbohydrate-rich meals.

Whilst putting the world to rights, as only sixty-something sagacious women can, I mentioned my inclination towards vegetarian food and my friend went on to tell me how tricky she found cooking for her son and girlfriend, who are both vegan. It was then a light went on inside my head. To make Primal Plate blog more relevant to her, why not develop a low-carbohydrate, Primal (no grains, no pulses, no legumes) easy-to-cook vegan recipe? And with that thought, Thai Spiced Aubergine Curry with Cauliflower Rice was created.

The first time I made this dish, the result was such a pleasant surprise! The aubergine transforms itself into a sort of ‘vegetarian meat’ that absorbs the curry spices and fresh lime juice well, and perfectly blends with creamy coconut milk into an amalgam of sweet-sour, meltingly soft, spicy curry perfection. 

The trick to cooking aubergine is to cook it thoroughly - in this instance, first cutting it into smallish pieces and frying in coconut oil until it’s evenly brown on all sides, then lightly braising in the sauce until it’s unctuously soft and velvety. Low-carbohydrate, grain-free, cauliflower ‘rice’ does a brilliant job of soaking up all the delectable juices and voilà - a healthy, flavoursome vegan meal that is seriously yum!   

You’ll need a food processor to make the Cauliflower Rice.

Thai Spiced Aubergine Curry with Cauliflower Rice (Serves 4)

Ingredients - for the aubergine curry

3 medium aubergines (about 750g (1lb 10oz) total weight)

3 tbsp organic coconut oil

1 large onion, finely chopped

2.5cm (1in) piece root ginger, finely chopped

4 tsp red Thai curry paste (I use Barts)

1 tbsp raw organic coconut sugar

1 lime, juiced

1 tbsp tamari

Sea salt

Freshly ground black pepper

300ml (10½ fl oz) cold water

2 x 400g (14oz) cans full-fat coconut milk

15g (½oz) basil leaves, finely shredded

60g (2oz) raw cashews

1tsp olive oil


Instructions 

Heat 1 teaspoon of olive oil in a small frying pan and slowly toast the cashews over a low heat until they are golden. Allow them to cool on a plate lined with kitchen paper. When cool, use a sharp knife to chop them into smallish pieces. Set aside.

Meanwhile, clean the aubergines with a damp kitchen towel, cut off the stalk end then cut the flesh into small (2cm) cubes.

Heat the coconut oil in a large frying pan over a medium-high heat then add the chopped onion and ginger and cook for 2-3 minutes until softened. 

Add the aubergine cubes and fry, turning over from time to time, until everything is a deep golden brown on all sides. This takes about 10 minutes so keep your eye on it to make sure the mixture browns evenly and doesn’t burn.

Add the curry paste to the pan and cook for a further minute. Then add the coconut sugar, the lime juice, the tamari, sea salt, freshly ground black pepper and the cold water. Bring to the boil, then reduce the heat to gentle simmer and continue to cook for 15 minutes or until the liquid has reduced to about a third of its original volume. 

Stir in the coconut milk and continue to cook gently for another 5 minutes.

Taste to check the seasoning, then serve with shredded basil and toasted cashews scattered over and steamed Cauliflower Rice.

Cauliflower Rice (V) (Serves 4)

Ingredients

1 large head of cauliflower, preferably organic

1-2 fresh bay leaf (optional)


Instructions

Boil a kettle of water.

Wash and dry a large head of cauliflower. Cut off the florets only (you don’t need the stem). Blitz the florets in a food processor for about 30 seconds until it comes together into a powdery cauliflower ‘snow’. 

Tip the cauliflower into the top of a steamer and tuck a couple of bay leaves into the cauliflower, if you have them. Pour the boiling water from the kettle into the bottom of the steamer, cover and steam for 3-4 minutes (do not cook any longer than this - the ‘grains’ of cauliflower should stay separate, not reduce to wet mush!)

Drain well and serve immediately with Thai Spiced Aubergine Curry


Notes:

There’s no need to salt the aubergines for this recipe, or indeed for any recipe calling for aubergine now that the bitterness has been bred out of modern varieties. When it comes to Mellanzane Parmigiana I still do, mainly out of force of habit, which just harks back to the time when I used to fry the aubergine slices in olive oil prior to assembling the dish and, unless they were pre-salted, the amount of olive oil they absorbed was alarming!


Carbohydrate 28g Protein 13g - per serving of aubergine curry with cauliflower rice


Stir-Fried Masala Chicken with Crash Hot Bombay Sweet Potatoes and Coriander & Mint Chutney

by Susan Smith in , , ,


I lost my mojo with regard to writing more recipes for the BBQ this past week, because when the weather turns cold, wet and windy, I really don’t want to eat outside thank you. This means the Halloumi & Vegetable Skewers promised in my last blog post will just have to wait, because I’m now more in the mood for something hot and spicy, like Stir-Fried Masala Chicken.

A packet of organic chicken thighs left too long in the fridge was actually intended for Sushi (my cat), but ended up being far too near its sell-by date for her to deign to eat them! Feeling under some obligation not to waste good food, Stir-Fried Masala Chicken just had to be! Accompanied by Crash Hot Bombay Sweet Potatoes, some baby salad leaves and a fresh, green, zingy, Coriander & Mint Chutney it has the cheer-up factor of spring with a little bit of heat for comfort. An all round winner I’d say, especially as Sushi got some fresh organic chicken breasts to compensate for her loss!

If you’re thinking “Is it okay to drink a lager/beer/cider with my curry when you’re following the Primal diet?” the answer is that none of these alcoholic drinks are strictly Primal (they also contain about 10-15 grams of carbohydrate per glass). However, an occasional, gluten-free, ‘light’ beer or lager (only 3-6 grams carbohydrate a glass) can be considered a bit of a ‘cheat’ and is obviously better for you than regular beers and lagers. 

Anyway, I’m off on a tangent because the drink shown in the picture below (just above Notes) is not alcoholic. It is a deliciously different and refreshing drink made from Thorncroft Detox Cordial  and San Pellegrino Sparkling Mineral Water. Having no artificial flavours or preservatives, no refined sugar and being a great detox to boot, this is how I manage to drink my full quotient of water every day! As a bonus for cider lovers, if you add 1-2 tablespoons of raw, organic apple cider vinegar (also recommended for detox and cleansing) you'll end up with a non-alcoholic cider that not only tastes good, but does you good!  

For ease, I have kept the recipes for the Stir-Fried Masala Chicken, Crash Hot Bombay Sweet Potatoes and Coriander & Mint Chutney separate. However, these dishes brought together on one plate work brilliantly. For those of us committed to a low-carbohydrate, grain-free Primal/Paleo diet, it’s safe to say that the rest of you can keep your traditional naan bread accompaniment, because when compared to this flavourful made-in-curry-heaven combination, it won’t even come close!

To help you avoid any last-minute kitchen frenzy, the Coriander & Mint Chutney can be stored in the refrigerator for a few days, the sweet potatoes can be part-cooked, spiced and 'oven-ready' for a final roasting and the chicken sliced, all in advance. Then, with a pre-heated oven on standby, dinner can be on the table within half an hour or so.

Ingredients - for the  Stir-Fried Masala Chicken (Serves 3)

4 tbsp olive oil

1 onion, finely chopped 

1-2 green chillies, finely chopped

1 tsp (about 2.5cm / 1inch piece) fresh ginger, peeled and finely grated

½ tsp ground coriander

½ tsp ground cumin

1 tsp organic curry powder (or garam masala)

1 tsp Marigold organic bouillon powder

6 x free-range, organic chicken thigh fillets, trimmed and cut into bite sized pieces / strips (alternatively, 2 organic chicken breasts, cut into strips)

2 tsp organic tomato puree

Sea salt and freshly ground black pepper

Baby green or mixed leaf salad, to serve


Instructions

Heat the olive oil in a large frying pan over a moderate heat.  Add the onion and fry for 2-3 minutes until softened. Add the chillies and continue to fry for another 3-4 minutes until the mixture begins to turn golden brown.

Add the grated ginger, bouillon powder, curry powder (or garam masala), coriander and cumin to the pan. Stir until well combined and continue cooking for 2 more minutes until the mixture is thick and fragrant (take care that it doesn’t burn).

Stir in the tomato puree, then add the chicken to the pan. Season with salt and pepper and over a medium/high heat dry-fry for 4-5 minutes, stirring continuously until the chicken is cooked through and a deep reddish brown. Taste and adjust the seasoning if necessary.

Serve immediately with baby green leaf salad. 


Ingredients - for the Crash Hot Bombay Sweet Potatoes (Serves 3)

700g Organic Sweet Potatoes

4 tbsp olive oil

1 tsp black mustard seeds

½ tsp dried chilli flakes

1 tsp turmeric

Sea salt

Freshly ground black pepper


Instructions

Pre-heat the oven to 250℃ / 480℉ / Gas mark 9. Boil a kettle of water.

Peel the sweet potatoes then cut them into approx 2.5cm x 5cm (1in x 2in) pieces and put into the top half of a steamer.

Pour the boiling water from the kettle into the bottom of the steamer, cover with the pan lid and cook the sweet potatoes for 8-10 minutes until just tender (test with a skewer, they should just give without too much resistance). Don’t let them go too soft. Remove from the heat, drain well and set aside to steam dry. 

Meanwhile heat the oil in a large frying pan. Check that the oil is hot enough by adding a sprinkling of mustard seeds (they should pop when it is) then add the rest of the mustard seeds, the chilli flakes, the turmeric and a large pinch of salt. Fry for 1 minute until the spices are well combined and fragrant. 

Tip the sweet potatoes into the pan, give everything a good stir so that they are well coated in the oil, spices and mustard seeds then take the pan off the heat. Using a potato masher, squash and flatten the sweet potatoes down to about half their original size. You’re aiming for a coarsely crushed mixture that'll provide lots of crispy, roasted edges after blasting in the oven. 

Tip the spiced crushed sweet potatoes onto a large non-stick baking tray and season well with salt and freshly ground black pepper.

Bake on the top shelf of the oven for 20-25 minutes until crisp and golden. 

Serve hot with Stir-Fried Masala Chicken. 


Ingredients- for Coriander & Mint Chutney (Serves 4-6)

100g (4oz) bunch fresh coriander, rinsed and dried (I use an OXO salad spinner)

20g fresh mint, stalks removed

2 long green chillies, finely chopped

15g fresh ginger, peeled and finely grated (about 1 tsp, grated)

½ large lime or ½ medium lemon, juiced (about 30ml / 1 fl.oz juice)

1-2 drop(s) liquid stevia

Sea salt, to taste

250g organic Greek yogurt


Instructions

Place the coriander, chillies, grated ginger, lime or lemon juice, a single drop of liquid stevia and a generous pinch of sea salt into a food processor or blender. Whizz together into a smooth, thick puree. 

Add the coriander mixture to the yogurt. Taste and adjust seasoning and/or add another single drop of liquid stevia, if you think it needs it.

Serve as an accompaniment to Stir-Fried Masala Chicken, Crash Hot Bombay Sweet Potatoes and a baby green or mixed leaf leaf salad. 

Notes:

Although the recipes for Stir-Fried Masala Chicken and Crash Hot Bombay Sweet Potatoes serve 3 people, Sarah reckons she can never have too much! Therefore, I suggest that if youve only got two mouths to feed (and youre both hungry), don’t reduce the quantity of ingredients but rather knock yourself out and eat the lot! Just remember, if you're trying to lose weight, you’re loading up the carbs when you eat sweet potatoes!

Skinless chicken breasts are easier to prepare than chicken thighs because there’s no fat or sinew to remove prior to cutting them into strips. Eversfield Organic Farm is Soil Association Approved, deliver nationwide and has won many awards for their organic grass-fed meat from Compassion in World Farming, Food and Drink Devon and Great Taste. They’ve also had many recommendations from top food chiefs and writers and I am now about to add Primal Plate Blog to the list! If you eat a Primal or Paleo diet you will know that only organic, pastured meat is recommended, so this is your one-stop shop for the best fresh meat and poultry you can buy. 

Sweet potatoes are strong sources of beta-carotene, manganese, and copper. A small one has 22g carbs and 3g fibre, making it the perfect post-workout snack. They’re also Primal/Paleo and a lot tastier than a bland white potato (which isn’t!). In this Primal Plate recipe, they perfectly balance out the heat of the Masala Stir-fried Chicken and the fresh, green tang of the Coriander & Mint Chutney. Truly delicious!

Coriander & Mint Chutney, whilst obviously the perfect condiment for an Indian dish, also makes an utterly moreish dip for crudités and other finger-licking goodies. I’ve even recently used it as a dipping sauce for the first-of-the-season English steamed asparagus. My advice would be, never let a bunch of fresh coriander go to waste in your fridge - make some fresh coriander chutney with it instead - once tasted, you just can’t seem to get enough!


Carbohydrate 5g Protein 36g - per serving of Stir-Fried  Masala Chicken 

Carbohydrate 51g Protein 3g - per serving of Crash Hot Bombay Sweet Potatoes 

Carbohydrate 4g Protein 2g - per serving of Coriander & Mint Chutney 


Primal Carrot Hummus

by Susan Smith in , ,


This delicious Primal-friendly carrot hummus (without a chickpea in sight!) is just right for a light lunch or snack with crudités, served as part of a mezze (a selection of small dishes), as a sandwich filling or, as we ate it last night, simply dolloped on top of a sweet potato, goats cheese and spinach frittata.

It will keep covered in a refrigerator for up to a week. 

Primal Carrot Hummus (V)

Ingredients

1 tsp cumin seeds

1 tsp coriander seeds

6 tablespoons olive oil

1 tsp raw clear honey

500g (1lb 2oz) organic carrots, peeled (prepped weight about 460g/1lb)

Juice of 1 organic lemon

3 tbsp smooth almond butter

2 tbsp raw organic sesame tahini

Sea salt and freshly ground black pepper


Instructions

Pre-heat the oven to 200℃ / ℉ / Gas mark 6

In a small dry frying pan (i.e. do not add oil) over a medium heat, toast the cumin and coriander seeds until they’re fragrant - this only takes about a minute, do not let them scorch! Tip into a pestle and mortar (or use a small bowl and the end of a rolling pin) and grind to a fine-ish powder. 

In a large bowl whisk 4 tablespoons of olive oil with the honey and toasted spices.

Cut the carrots into 4-5 cm (about 2”) chunks and add to the dressing. Season with salt and pepper and toss to coat. Tip into a small roasting tin and roast for 35 minutes. 

Remove from the oven and allow to cool slightly. Then scrape everything into a food processor (or use a hand-held blender) Add the lemon juice, the almond butter and tahini with the remaining 2 tablespoons of olive oil and blitz to a smooth puree. 

Taste, adjust the seasoning and blend again to incorporate if necessary. 

Refrigerate until required. 


Ratatouille with Roast Cod and Parmesan Crisps

by Susan Smith in , , , , , ,


In my book, ratatouille made from multi-coloured Mediterranean vegetables is probably one of the best vegetarian meals ever invented!

I was first introduced to this classic dish in the 1960’s through A Book of Mediterranean Food by Elizabeth David. Up until then, fresh, sun-ripened ingredients such as aubergine, courgettes and bell peppers were relatively unheard of, and virtually impossible to source in the UK. Thankfully, food shopping has come a long way since then!

Originally, an ancient French peasant dish made from coarsely chopped fresh summer vegetables (the word ratatouille comes from the French touiller, which means to stir), this iconic vegetable stew made from onions, tomatoes, courgettes, sweet peppers and aubergines is now an all-year-round favourite - although in the depths of winter I think you would be well advised to use tinned plum tomatoes instead of the seemingly non-existent fresh ripe ones!

There are numerous modern interpretations of this dish but it seems to me that this simple version, which is made on top of the stove rather than in the oven, is the most authentic and thus ratatouille at its basic best. I’ve loosely based it on Raymond Blanc’s recipe in Cooking For Friends.

For this blog post, I’ve suggested taking ratatouille into dinner party territory by partnering it with Roast Cod and Parmesan Crisps - although, as French peasants obviously knew, it is equally good for every day eating. Keep it simple, serve with our grain-free bread still warm from the oven and a salad for a main course, or as a side dish. It really comes into its own served cold the next day too. I also like to use it in ratatouille omelette. In fact, serve it hot, serve it cold, serve it any way you like! This low carb medley of vegetable goodness will remind you of summer. 

Ratatouille (V) with Roast Cod and Parmesan Crisps (Serves 4)

Ingredients - for the ratatouille 

50ml (2fl oz) extra virgin olive oil

25g (1oz) butter

150g (5oz) onion, finely chopped

1 large red pepper

1 large yellow pepper

1 medium aubergine

1 large courgette

2 ripe plum tomatoes (I used Mr Organic tinned plum tomatoes)

1 sprig of fresh thyme, leaves only

Sea salt and freshly ground black pepper


Instructions

Cut the stalk end off the aubergine then cut it into 1cm (½ inch) dice. Layer the aubergine dice into a colander liberally sprinkling them with salt as you go. Put a plate underneath the colander (to catch the juices) and another plate on top, weighted down with something heavy (I use a kettle filled with water) Set aside to drain for 30 minutes.

Meanwhile, cut the top and bottom off the courgette and remove the stalks and seeds from the peppers. Cut all the vegetables (courgette, peppers and tomatoes) into 1cm (½ inch) dice. Keep the vegetables separate at this stage. If you’re using tinned tomatoes remove any core, skin or daggy bits before roughly dicing.

In a large deep frying/sauté pan heat the oil and butter together over a medium heat. Add the finely chopped onion and thyme leaves to the pan and cook for 5 minutes, stirring from time to time. Do not let the onion brown.

Dry the aubergine on paper kitchen towel, then add the aubergine and pepper dice to the onion and cook for a further 5 minutes.

Meanwhile, boil 1 litre (1¾ pints) water in a kettle. Pour the boiling water into a separate pan, add some salt then blanch the diced courgettes for 3 minutes. Drain and refresh under cold water.

Add the courgettes to the rest of the vegetables and cook for another 5 minutes until they are turning golden, then add the tomatoes. Give everything a good stir, cover with a lid and continue to cook for a further 10 minutes until all the vegetables are meltingly tender. 

Taste, then  season with sea salt and freshly ground pepper.


Ingredients - for the roast cod

4 x 225g (8oz) sustainably sourced cod fillets, skinned

1 tbsp Clearspring organic sunflower frying oil

15g (½ oz) unsalted butter

Sea salt & freshly ground black pepper

Lemon juice, to serve


Instructions

Preheat oven to 200℃/ 400℉/ Gas mark 6. Skin and bone the cod fillets (if this hasn’t already been done for you by your fishmonger).

Heat the oil and butter together in a large non-stick frying pan over a medium heat. When the butter has stopped foaming place the cod fillets into the pan, presentation side down i.e. skinned side uppermost.

Pan fry the fish until lightly browned (about 5 minutes). Season with salt and pepper.

Carefully turn the fish fillets over and transfer to a non-stick baking tray (now skinned side down) and cook in the oven for 8-10 minutes.

Finish with a little more sea salt and a squeeze of lemon juice. 


Ingredients - for the Parmesan crisps (makes 8) 

150g freshly grated Parmesan cheese


Instructions

Preheat oven to 200℃/400℉/Gas mark 6 

Place a 7cm ring or cutter onto a large non-stick baking tray.

Sprinkle 2-3 teaspoons of Parmesan into the middle of the ring and use your fingers or the back of a spoon to compact the cheese down. 

Remove the cutter and repeat - leaving sufficient space in-between so that the crisps don’t merge into each other when cooking.

Cook for 4-6 minutes or until lightly golden. Remove from oven and allow to cool completely on the baking tray. 

Remove from the tray with a palette knife and store in an airtight container. 

Use within 7 days. 


Notes

It is always best to get organised by preparing all the ingredients listed in a recipe before you actually launch into cooking or bringing everything together. Professional chefs call this “mise en place” (putting in place) and it is a very effective way of staying on top of the situation when you’re cooking at home too. 

The ratatouille and the Parmesan crisps can be prepared well in advance - several days ahead, if needs be!

You can re-heat the ratatouille or serve it cold as an hors d’oeuvre.

Parmesan crisps are also great served as no-carb nibbles with pre-dinner drinks.


Carbohydrate 15g Protein 4g - per serving of ratatouille

Carbohydrate 1g Protein 38g - per serving of cod

Carbohydrate 0g Protein 12g - per parmesan crisp


Sweet Potato Chips with Homemade Mayonnaise

by Susan Smith in , , , ,


I like the convenience of always having a jar of good quality mayonnaise in my refrigerator. Unfortunately, even the best organic mayonnaise I can buy has corn syrup, corn starch and agave syrup in its line-up of ingredients. So, as far as eating a Primal diet is concerned, it doesn’t cut the mustard.

However, if you commit to making your own mayo, there’s still the problem of deciding what is the healthiest and the best-tasting oil to use. The choice is bewildering!

For health reasons I’d choose an organic, unrefined, cold-pressed oil such as extra virgin olive oil, avocado oil or macadamia oil. Unrefined oil, which usually means the oil is cold-pressed (mechanically extracted by pressure rather than heat) is much better for you because it retains all its nutrients and flavour.

On the other hand, for the non-overpowering taste and pale look of shop-bought mayonnaise, a refined oil would produce something that’s much more like Hellman’s, which is what most people think is the ‘real deal’ of mayonnaise.

The issue is, I do not want to use refined oils in my cooking because the likes of rapeseed oil (90% of the world’s rapeseed crop is genetically modified!), canola oil (canola oil is extracted from rapeseed), rice-bran, grape-seed, sunflower or pure and light olive oils are subjected to chemical solvents, de-gumming and neutralisation (doesn’t even sound healthy does it?) and this processing removes some of the oil's nutrients and essential fatty acids, as well as their natural flavour and colour.

Consequently, when it came to making mayonnaise for this blog post I found myself having a “Daddy or chips?” moment!

I’ve previously tried making mayonnaise using the best quality organic cold-pressed olive oil (the classic ingredient used for making homemade mayo) and believe me it tastes downright nasty! Its flavour profile is just far too bitter and overpowering for a salad dressing, to be lathered on top of a sandwich, to make a self-respecting egg mayonnaise or as a complement to chicken, meat or fish and, as far as I’m concerned, it would be absolutely ruinous to chips!

I’ve also tried avocado oil, which wasn’t much better. Furthermore, both unrefined olive and avocado oils impart a dark greenish hue to the finished mayonnaise, which I find unattractive. I really just want my mayo a pale-ish golden colour, please!

I still have a bottle of macadamia nut oil waiting in the wings, but for now I’ve decided it’s just a bit too pricey for another culinary mistake, so I decided to use a hybrid version of cold-pressed organic sunflower oil today and…whoop-de-doo-da! Third time lucky!

The reason the Primal community usually tries to avoid sunflower seeds and sunflower seed oil is because they are really high in omega 6 oil. Not that there’s anything wrong with this per se, it’s just that most people are already into omega-6 fat overload (especially if they eat grains and grain fed meat) so the healthy balance between omega 3-6-9 fatty acids, which should be in the ration of 2-1-1 is all out of kilter with good health.

But wait, not all sunflower oil is high in omega-6. There is an alternative high-oleic sunflower oil that’s organic, cold pressed, very stable at high temperatures (as in, suitable for deep fat frying) and has the same monounsaturated fat found in olive oil and your very own adipose tissue. It’s totally tasteless too, which makes it a really good oil for Primal mayonnaise.

So now you know what all the fuss is about, please try this recipe at least once in order to appreciate its enticing balance of velvety smoothness and precisely seasoned piquancy. This homemade mayonnaise can only ever make a Chicken Salad Sandwich (recipe coming soon) or in this case, Sweet Potato Chips even nicer! I promise you, shop-bought mayo doesn’t come anywhere close to the real thing.

Sweet Potato Chips with Homemade Mayonnaise (V) (Serves 4)

Ingredients - for the sweet potato chips

4 orange-fleshed organic sweet potatoes

2 tbsp organic extra virgin olive oil (or Clearspring organic sunflower frying oil)

Celtic sea salt


Instructions

Pre-heat the oven to 200℃ / 400 ℉ / Gas mark 6

Cut the sweet potatoes into even-sized chunky chips (thick wedges) 

Put the chips into a large bowl with the olive oil and sea salt, mix thoroughly together with your hands so that the chips are evenly coated in the oil and salt.

Spread the sweet potato chips out onto a lipped baking tray in a single layer. Roast in the oven for 20 minutes, then take the tray out of the oven and turn the chips over to ensure even browning. Return to the oven for a further 10 to 15 minutes until they are nicely crisp and brown.

Remove from the oven, and tip on to plate lined with a paper towel. Sprinkle over a little more sea salt, if liked and serve immediately with homemade mayonnaise.


Ingredients - for the mayonnaise

2 large organic egg yolks

Sea salt and freshly ground black pepper

1 tsp raw cider vinegar 

½ tsp English mustard powder

240ml Clearspring organic sunflower frying oil

10ml organic extra virgin olive oil

1-2 drops liquid steviaoptional

Lemon juice or extra vinegar, to taste

1-2 tbsp warm water to thin down, if liked


Instructions

Make sure that all the ingredients are at room temperature before starting.

Combine the oils in a drip-free jug.

Whisk the egg yolks, salt, pepper, mustard power and cider vinegar in a bowl for a a minute or so. 

Gradually and slowly start to add the oil to the egg yolk mixture a drop at a time, keep whisking all the time after each addition of oil to ensure it is properly incorporated before adding more oil. Do not try to rush things at this stage otherwise the mayonnaise will split. Keep adding the oil drop by drop. As the mixture thickens, you can then start to add it more quickly. 

By the time all the oil is added you will have a thick stable mayonnaise that holds its shape. Taste it, adding more salt and pepper, mustard, lemon juice or vinegar and a drop of liquid stevia, only if you think it needs it. You can also add other flavourings such as chopped herbs. If you would prefer a thinner mayonnaise, add a little warm water (1-2 tablespoons) as well. 

Keep the mayo refrigerated until you’re ready to eat it. 


Notes

This quantity of mayonnaise makes enough for 8 people. Halve the recipe if this is too much for your family to get through within 3 days - it needs to be eaten within that time due to the inclusion of raw eggs. 

In spite of us being in the midst of a 21st century obesity epidemic, many people still believe conventional wisdom, which says calorie counting and a low-fat diet is the key to weight loss. The reality is, if you’re trying to lose weight and stay that way, it’s sugar in all its forms that you need to seriously restrict, not healthy fats. 

Remember, essential fatty acids are just that. They are ’essential’ because the body needs them, it can’t make them and they must be obtained from the food you eat, so please don’t try to omit healthy fats from your diet. It’s worth noting that unrefined oils, such as Coconut Oil, is 100% fat but is said to aid in weight loss! 

I personally take daily supplements of fish and butter oil to ensure I get enough of the omega-3 fatty acids. These are associated with many health benefits including protection from heart disease and stroke. New studies are identifying potential benefits for a wide range of other conditions including cancer, inflammatory bowel disease and other autoimmune diseases such as lupus and rheumatoid arthritis.


Carbohydrate 21g Protein 4 g - per sweet potato (100g weight)

Carbohydrate 2g Protein 4g -  per serving of mayonnaise


Souffléd Cauliflower with Gruyère Cheese Sauce

by Susan Smith in , , , , ,


Back in the 1970’s, due to a lack of money and much to my husband’s irritation, cauliflower cheese, along with jacket potato and tuna bean salad used to be the mainstay of our diet. It was the repetitive appearance of cauliflower cheese that offended him the most. We’re not together now but I do wonder if he’s carried his grudge against cauliflower with him for the past thirty-five years!

If so, it would be a pity because today’s recipe for Souffléd Cauliflower with Gruyere Cheese Sauce is a far cry from the boiled cauliflower with the flour-based béchamel cheese sauce of our yesteryears, which I confess (too late as far as my ex is concerned!) was a truly monotonous thing to eat no matter how liberally I attempted to mask it in cheesiness.

This no-grain, low-carb version is really an elegant deconstruction of boring old cauliflower cheese that I think is simply brilliant as an imaginative vegetarian main course or as an accompaniment to fish, chicken or meat. It’s amazing what a little bit of height and lightness can do for cauliflower jaded appetites and with the silky-smooth Gruyere cheese sauce poured over, it’s totally transformed into something enticingly delish.

Do not be intimidated by the thought of making a soufflé - they’re really not as difficult or as temperamental as you might think. You’ll need a 6-inch diameter top (No.2 size) soufflé dish for this recipe. 

Souffléd Cauliflower with Gruyère Cheese Sauce (V) (Serves 4)

Ingredients - for souffléd cauliflower

I medium size cauliflower

1 fresh bay leaf - optional

10g-15g (½oz) ground almonds and softened butter (for souffle dish)

Grain-free béchamel sauce (made with 30g/1oz of butter, 20g/¾oz ground almonds, 1 tsp arrowroot powder, ¼ tsp dry English mustard powder, 142ml/¼ pint milk)

Sea salt and freshly ground black pepper

3 large egg yolks 

4 large egg whites

1 tbsp ready-grated Parmesan (for dusting)


Ingredients - for Gruyère cheese sauce

250ml (8fl oz) créme fraîche

125g (4½oz) Gruyère cheese, finely grated (I used the Co-op’s Truly Irresistible Premier Cru Gruyère cheese - it is the best Gruyère I’ve ever tasted!)

½ tsp Dijon mustard


Instructions

Pre-heat the oven to 190℃ / 375℉ / Gas mark 5. Boil a kettle of water.

Butter the soufflé dish and dust with the ground almonds. To allow the soufflé to rise above the dish, tie a deep band of non-stick baking parchment or greaseproof paper around the outside of the dish to come 2-3 inches higher than the top of the dish.

Cut the florets off the head of cauliflower - you don’t need much stalk so just use the florets. Put the florets in a single layer in the top of a steamer, sprinkle over with salt and tuck the bay leaf in-between. Pour the boiling water from the kettle into the bottom half of the steamer and steam the florets until they’re tender (about 7 minutes).

Refresh the cauliflower in cold running water, remove the bay leaf (if used) then drain well and tip the cauliflower on to a clean tea towel to dry. Pulse the cauliflower in a food processor into a puree (alternatively, push the cauliflower through a strainer). Put the cauliflower puree into a bowl.

Prepare the béchamel sauce. In a medium pan set over a low to moderate heat melt the butter, when the butter is melted add the ground almonds, the mustard and arrowroot powders and stir everything together really well.

Keep stirring continuously whilst you gradually add the milk to the pan a little at a time. Make sure after each addition of milk that it is evenly and smoothly incorporated into the butter and flour mix before adding more milk. When all the milk has been added to the pan, bring the sauce up to the boil to allow it to thicken - continuously stirring until it does.

Take the pan off the heat and mix the béchamel sauce in with the cauliflower. Season well with salt and freshly ground black pepper.

Separate the egg yolks and whites. Thoroughly beat the yolks and add them to the cauliflower mixture. With a clean whisk whip the egg whites to a firm snow.

Using a large metal spoon, quickly fold a third of the egg whites into the cauliflower mixture to loosen it, then gently fold in the rest of the egg whites being very careful not to knock the air out of the mixture.

Turn into the prepared soufflé dish, dust with the Parmesan cheese and stand it on the centre shelf of the oven. Bake for about 30-35 minutes until it is well risen and brown. The soufflé should be a little soft in the centre.

Whilst the soufflé is baking, prepare the Gruyère cheese sauce. Heat the creme fraiche in a saucepan without letting it boil. Add the cheese and Dijon mustard and whisk continuously until the cheese melts.

Remove the pan from the heat and set the sauce to one side until you need it.

Just before the soufflé is ready, gently re-heat the sauce and tip into a warm sauceboat.

When the soufflé is cooked, serve it immediately with the Gruyère cheese sauce handed separately. 


Carbohydrate 12g Protein 12g  - per serving of souffléd cauliflower

Carbohydrate 1g Protein 10g - per serving of Gruyere cheese sauce


Simply Salad

by Susan Smith in , , , ,


I’ve heard that professional chefs can always tell the calibre of a prospective new member of their brigade by getting them to cook scrambled eggs. Personally, I feel that putting together a nicely dressed bowl of fresh salad leaves might reveal a whole lot more.

It’s no use pretending that lifeless, pre-washed salad leaves (often rinsed in a chlorine wash and then handled by multiple pairs of hands and preserved with a blast of gas before being bagged!) or the familiar shrink-wrapped iceberg lettuce is going to cut it, if you want to make a decent salad.

Nothing compares to truly fresh salad leaves, so start with the freshest greens you can find, preferably organically grown. Find whole lettuce that has a ‘just-picked’ appearance such as romaine or little gem, or a head of leaves like soft, tender English lettuce or green, red, bronze oak leaf lettuce.

Build your salad from there by adding a variety of other salad greens. Perhaps some mild tender mâche (lambs lettuce), rocket, bright peppery watercress (ideally bought by the bunch) or in winter, chicories. Add to these some young sweet ‘living’ leaves, pea shoots, fresh growing herbs or mustard and cress.

Packed with essential nutrients and virtually carb-free, a generous daily portion of raw healthy salad greens is the most gratifying accompaniment to any meal. In my view, a perfect tossed green salad that’s well balanced and well dressed is also the hallmark of a great cook.

Simply Salad (V)

Ingredients - Salad

This isn’t so much of a recipe with pre-determined ingredients as it is a general guide to salad making. Primarily let the season, what's looking at it’s best and what you fancy determine your choice. If you’re willing to shop and cook in a way that nourishes your body and satisfies your soul, the possibilities are endless!

The only proviso is that for a tossed green salad, keep it simple - it really doesn’t need anything more than a well-balanced classic French Dressing.

Alternatively, you can create your own ‘house’ salad by adding a riotous colour of different fruits and vegetables, together with your favourite dressing.

When you’re trying to judge portion sizes, allow a large rounded handful of green leaves per person (my hands are small, so it’s more like both hands cupped together!)

The salad pictured here was a mixture of Romaine and Little Gem lettuce hearts, wafer thin slices of fennel, wild rocket, watercress, red and white Belgian chicories, thinly sliced red and yellow peppers, Sundream vine tomatoes, flat leaf parsley and avocado.

Ingredients - For the French dressing

120ml (4½ fl oz) olive oil (I used half organic cold pressed olive oil and half organic cold pressed avocado oil)

40ml (1 ½ fl oz) organic raw apple cider vinegar

1 tsp sea salt

Freshly ground black pepper

1 tsp Dijon mustard

1 tsp clear ‘runny’ raw organic honey, or maple syrup


Instructions

First make the vinaigrette dressing. Mix the vinegar, sea salt, pepper, honey and mustard together in a medium sized bowl and give it a good whisk. Add the oil a small dash at a time, whisking well between each addition. Continue adding the oil until it is all amalgamated into vinaigrette. Check and adjust the seasoning if necessary (if it tastes a little tart, a single drop of liquid Stevia will help compensate).

Remove the base of the stalk and any roots attached to your lettuce together with any tough, yellowing or damaged outside leaves. If the leaves are small, leave them whole. Larger leaves should be torn along their central rib into bite-sized pieces. Remove any thick stalks from the likes of fresh watercress or spinach.

Many leafy salad greens are grown in sandy soil so to avoid grit ending up in your salad, you’ll need to wash them well. Fill a sink or large soaking bowl full of cold water then gently submerge and swish the leaves around in the water to dislodge any dirt. Handle your leaves lightly, if they get bent small cracks on the surface will cause them to wilt.

When lifting them out of the sink or soaking bowl, don’t just grab them. Spread your hands out underneath the leaves in the water and gently lift them out using your loosely splayed fingers to support them. Lay them out on a clean tea towel and gently pat dry with paper towels.

A salad spinner makes light work of washing and drying. I bought the older model of the iconic OXO Good Grips salad spinner several years ago and it’s an invaluable kitchen-aid that spin dries salad leaves and herbs in seconds without bruising them. First, fill the bowl of the spinner with cold water and submerge the leaves in the spinner basket into the water. Gently swish around in the water to allow any sand to drop through the basket into the bottom of the bowl. Repeat several times with fresh clean water until there’s no sand left in the bottom of the bowl. Pour away the last batch of water then simply put spinner lid on and pump several times to dry. Don’t go mad with the spinning action or you might crush the leaves. Just give it a couple of good spins, then rearrange the leaves, drain the bowl and spin again. Don’t over-fill the spinner basket either, it’s best to spin the leaves in batches rather than cram too much in.

Arrange the dry leaves prettily in a bowl (much larger than you think you need if you intend to dress your salad) together with any other salad ingredients you’re using  Cover and keep chilled until you’re ready to serve.

Just before you want to serve your salad, add a few tablespoons of your chosen dressing to the bowl then gently turn the salad over and around with your hands (you can use a couple of large spoons, if you prefer) until everything is evenly and lightly coated in the dressing. Serve immediately.

Notes

Don't overdo the dressing on your salad. You want just enough vinaigrette to lightly and evenly coat the leaves rather than drown them out - too much dressing will simply make them go unpleasantly soggy.