Cauliflower Cheese Soufflé

by Susan Smith in


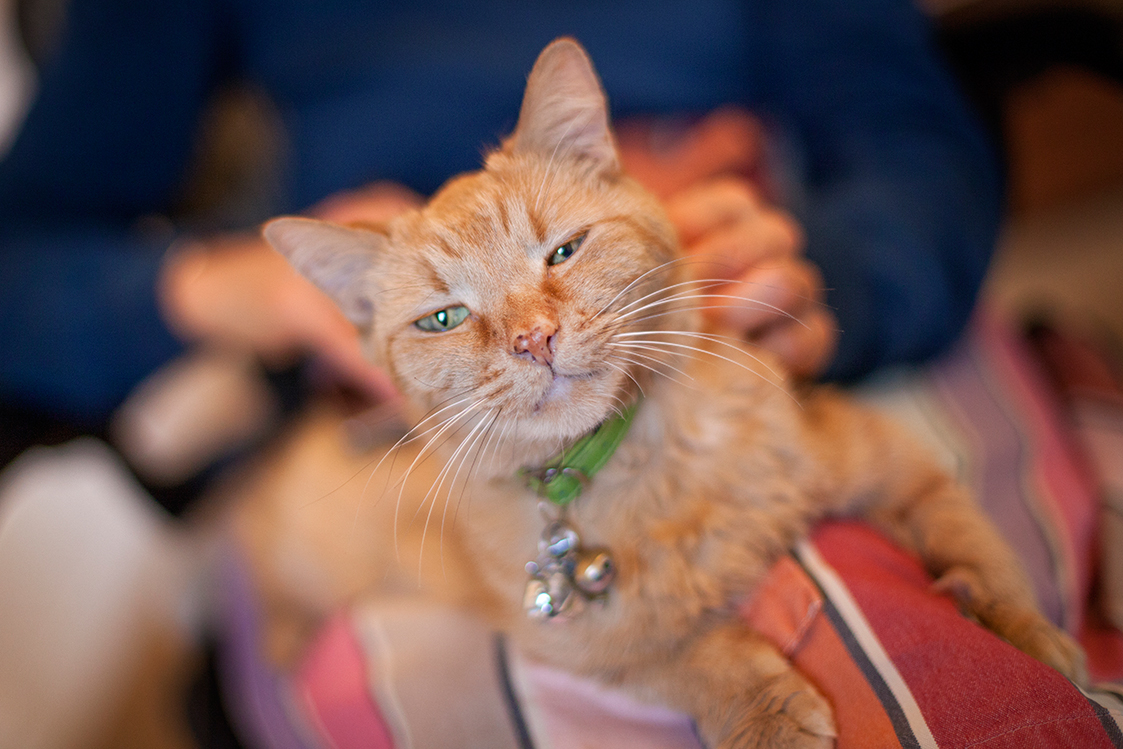
It’s two months since Sushi my cat lost another of her nine lives. It seemed to us she was at death’s door when we ventured out during ‘lockdown’ to take her to the vets. We may have overreacted because aside from diagnosing her with a urinary infection and constipation so bad it was suggested she might have to be put under anaesthetic to unblock her, the vet thought Sushi was the healthiest looking twenty-one year old cat she’s ever seen! It’s all in the name ‘Sushi’, or rather her diet. She’s called Sushi because the day we rescued her as an abandoned, farm-yard kitten, I vowed I would only feed her wild fish and raw, organic meat… never commercial cat food.

Almost three years to the day, we’d taken Sushi to a different vet for the very same reason. She’d stopped eating for five days or so and was badly constipated. I’d only asked them about giving her an enema but, after a brief examination, the vet advised Sushi wasn’t constipated; she most likely had cancer; she was too sick for us to take her home; and because of her age, we should agree there and then to her being euthanized. You’re kidding me! As if any of this was going to happen on my watch! Instead we took Sushi home and under the guidance of our current vet, administered the enema ourselves. A somewhat intimidating veterinary procedure, but it worked!

By the time we’d remedied Sushi’s most pressing health issue she was already half-starved, so I enticed her back to eating again with Lily’s Kitchen organic chicken dinner, which she rather gratifyingly scarfed down. Witnessing her initial enthusiasm was such a relief that from then on I convinced myself that wet, organic commercial cat food would be a healthy adjunct to my raw, homemade offerings that might be deficient in ‘essential-for-cat’ nutrients… taurine for one. It was also a pain trying to stay on top of all the boning-out, chopping, grinding and kitty-cat portioning. And, as with all convenience food, once you’ve decided on one exception to your ‘eat real food’ rule, you can easily succumb to others. In Sushi’s case, I told myself that very small quantities of no-grain (albeit non-organic) kibble would do no harm and in fact it might even be good for Sushi’s teeth if I supplemented her diet with something to crunch down on.

Rationalising the problem away is what most humans resort to when they want an excuse for why their behaviour does not tally with their previous stated values and beliefs. I’ve known for a long time that ageing cats are susceptible to kidney disease and the worst thing you can do is to feed them dry food. So although we only fed Sushi miniscule portions of biccies as a treat, it all went horribly wrong when she suddenly became addicted to a new bag of chicken-flavoured kibble that I recently purchased. Long story short… a week before her last visit to the vet, she refused to eat almost everything we put in front of her unless it came with a generous side of kibble.

No more! A quick check online reminds me why dry food is so unhealthy and unsafe for our pets. The upshot is, Sushi’s health has (yet again) been radically transformed within a week of us reverting back to only feeding her a diet fit for human consumption. She now gets first bags on the freshest, organic, grass-fed meats whilst John and I get by with cooking and eating her rejects! To avoid our human diet becoming too meat heavy, I try to ensure that every meat-eating day is followed by a day of eating vegetarian.

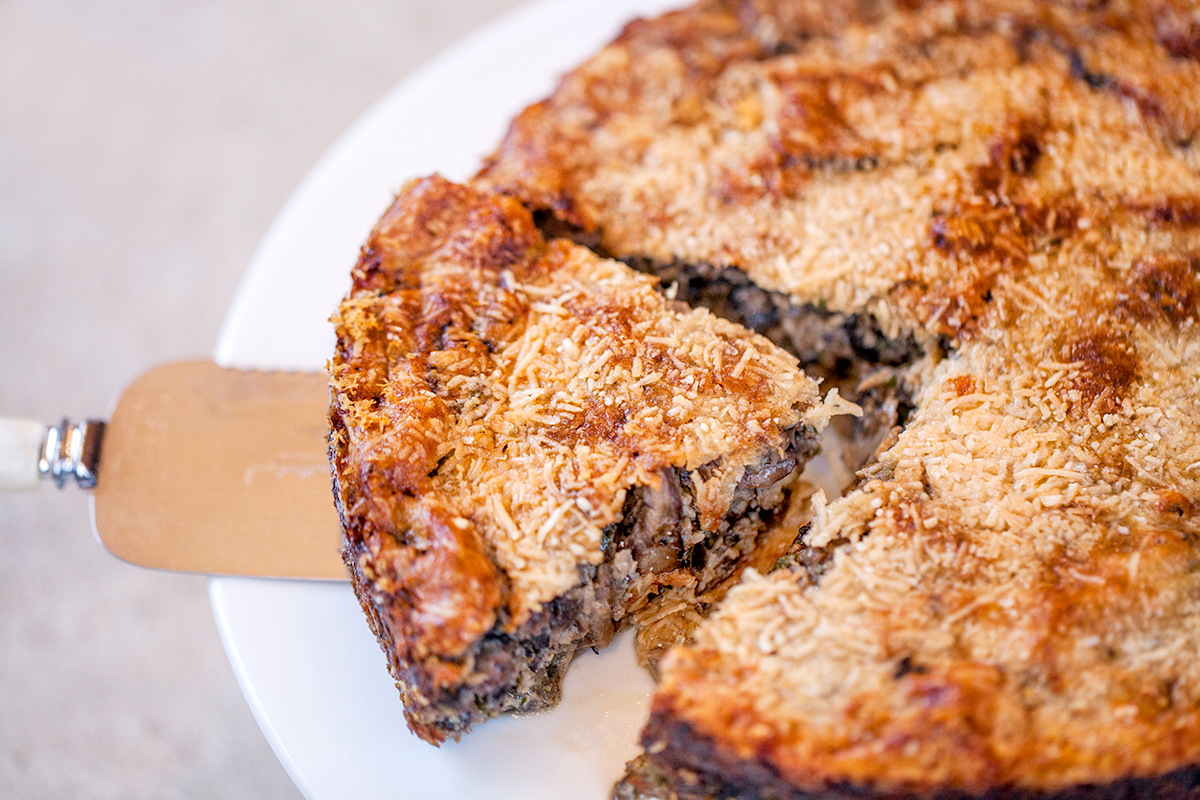
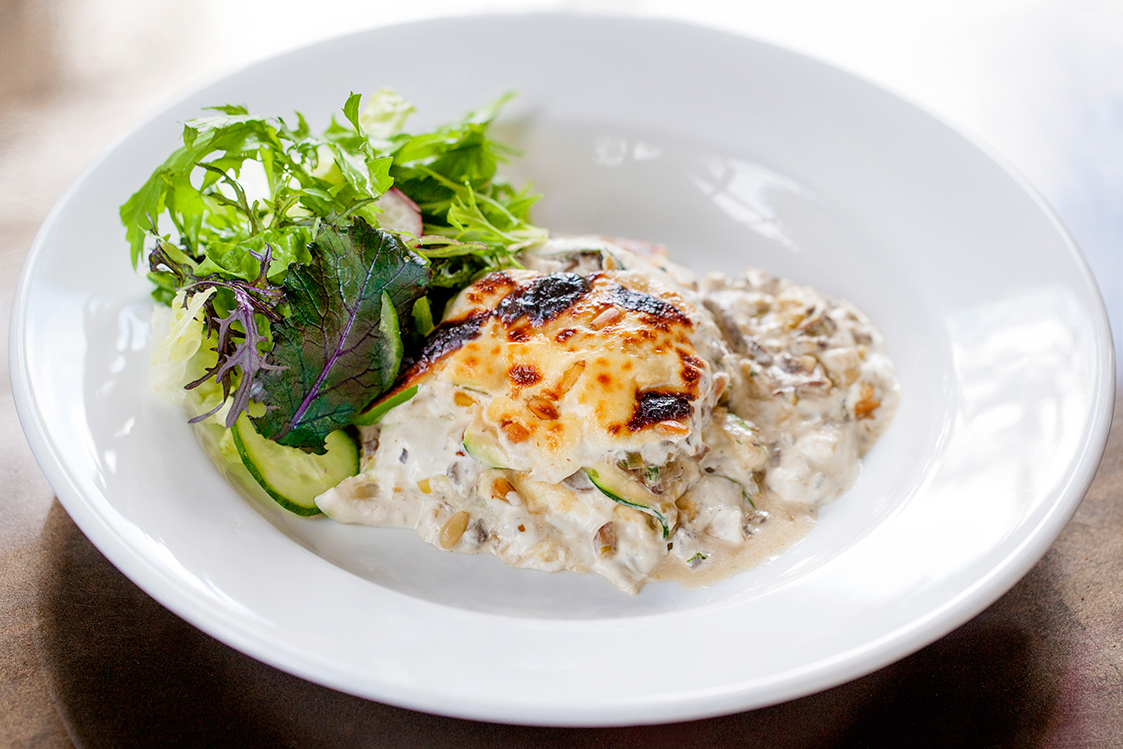
When it comes to cooking a vegetarian meal that’s tasty - very tasty indeed - this Cauliflower Cheese Soufflé has it all. The combination of light-as-air, lemony freshness, nutty sweet cauliflower and deeply satisfying, baked golden cheesiness (who doesn’t like scraping crozzely bits off the sides of the dish with a spoon?) means that whenever I can get my hands on an organic cauliflower during these unusual times, this delicious Souffléd Cauliflower Cheese for supper is a foregone conclusion.

Cauliflower Cheese Souffle ingredients.jpg

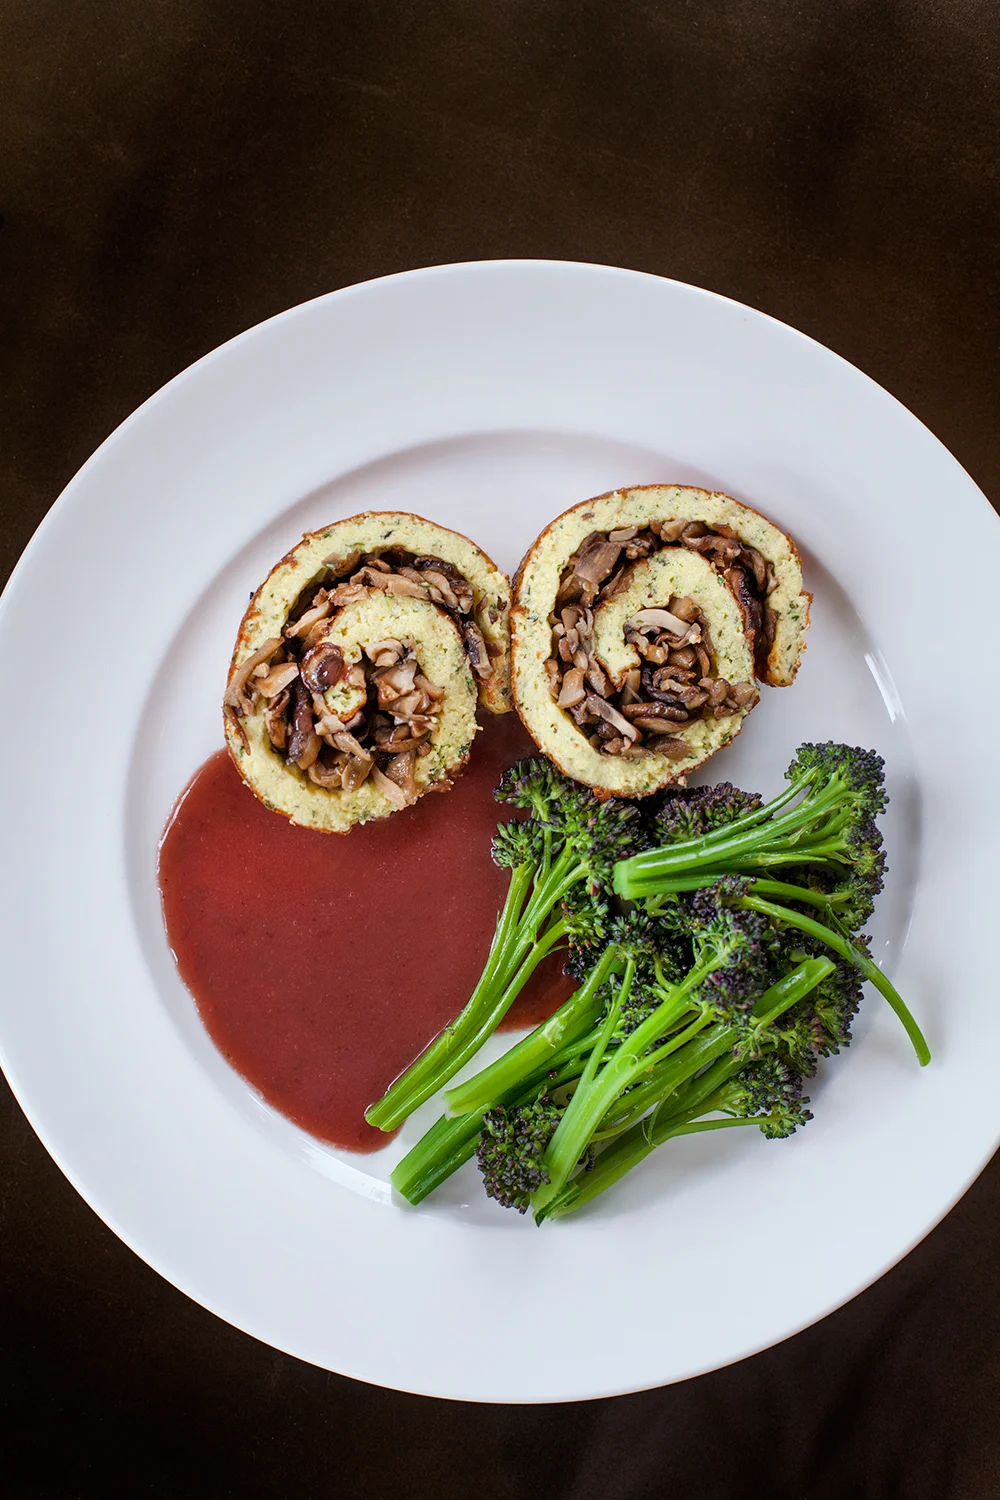
Suitable for an everyday main meal or as a vegetable accompaniment to grilled steak, chop or a portion of chicken, even if your budget won’t stretch to buying organic, cauliflower is one of the safer vegetables to eat in terms of minimising your exposure to toxic pesticides. Good news if you’re looking for a simple-to-prepare, very low carb, healthy, vegetarian meal that need never be off the menu.

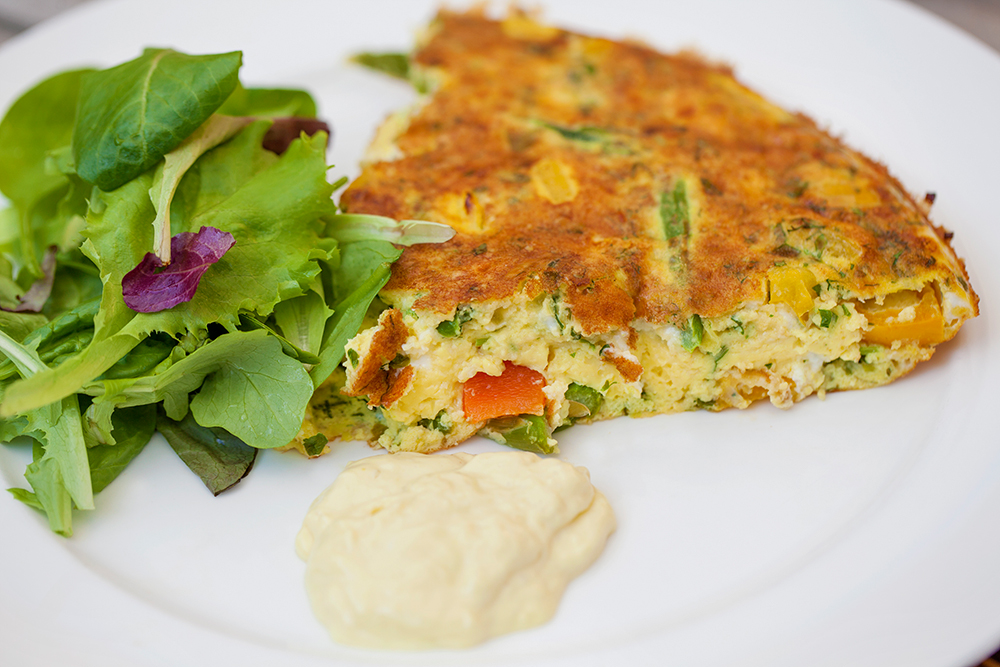
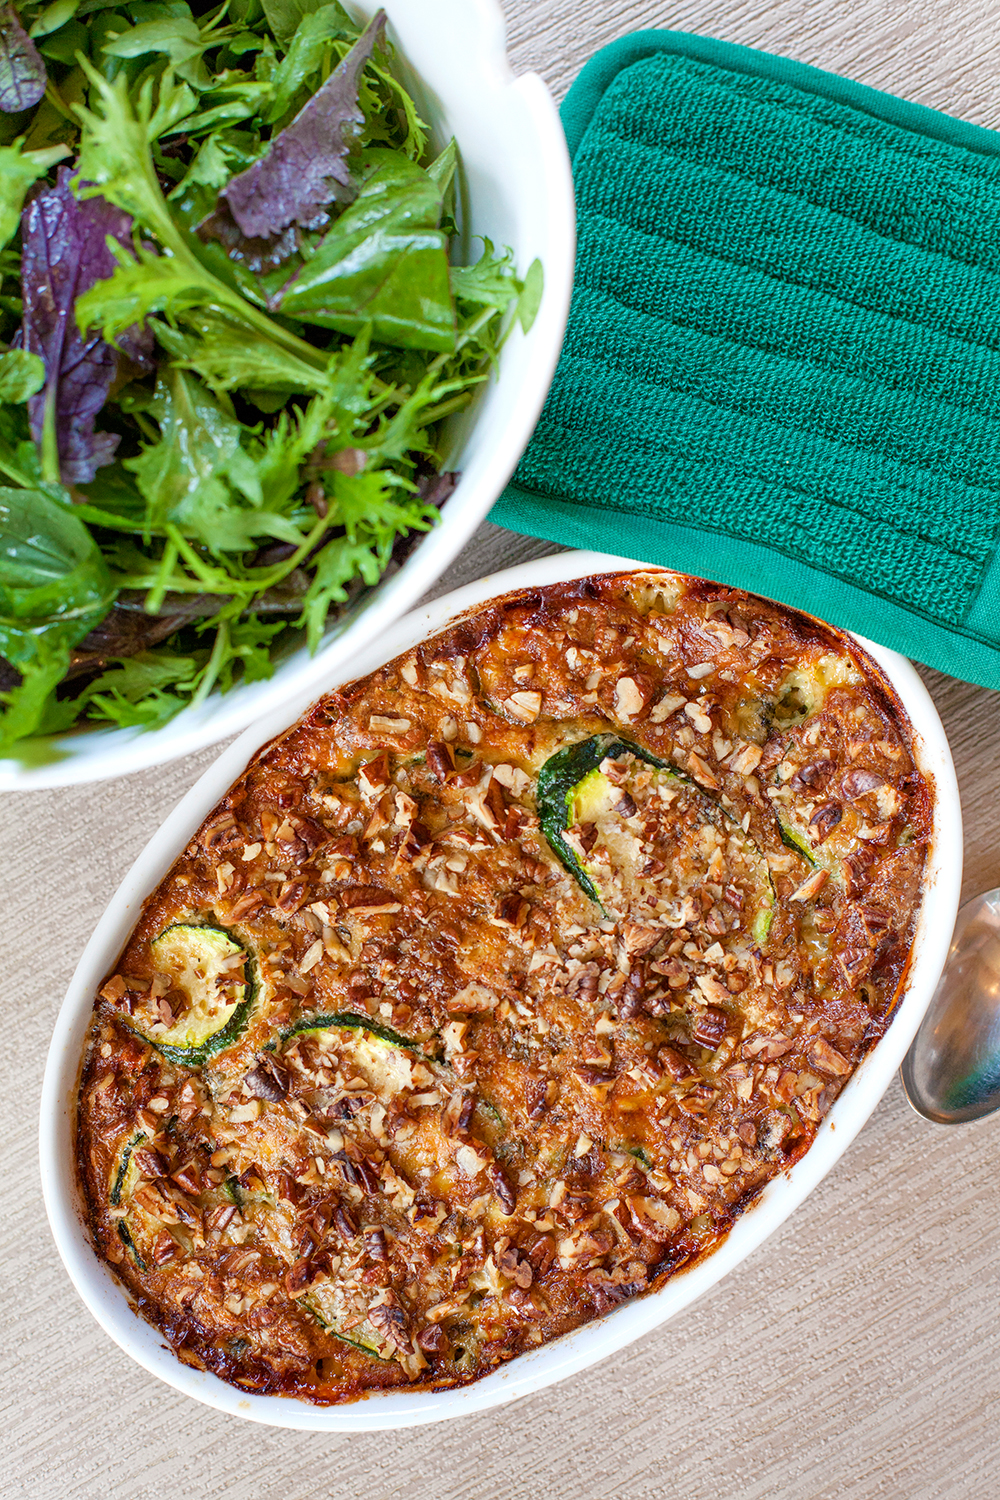
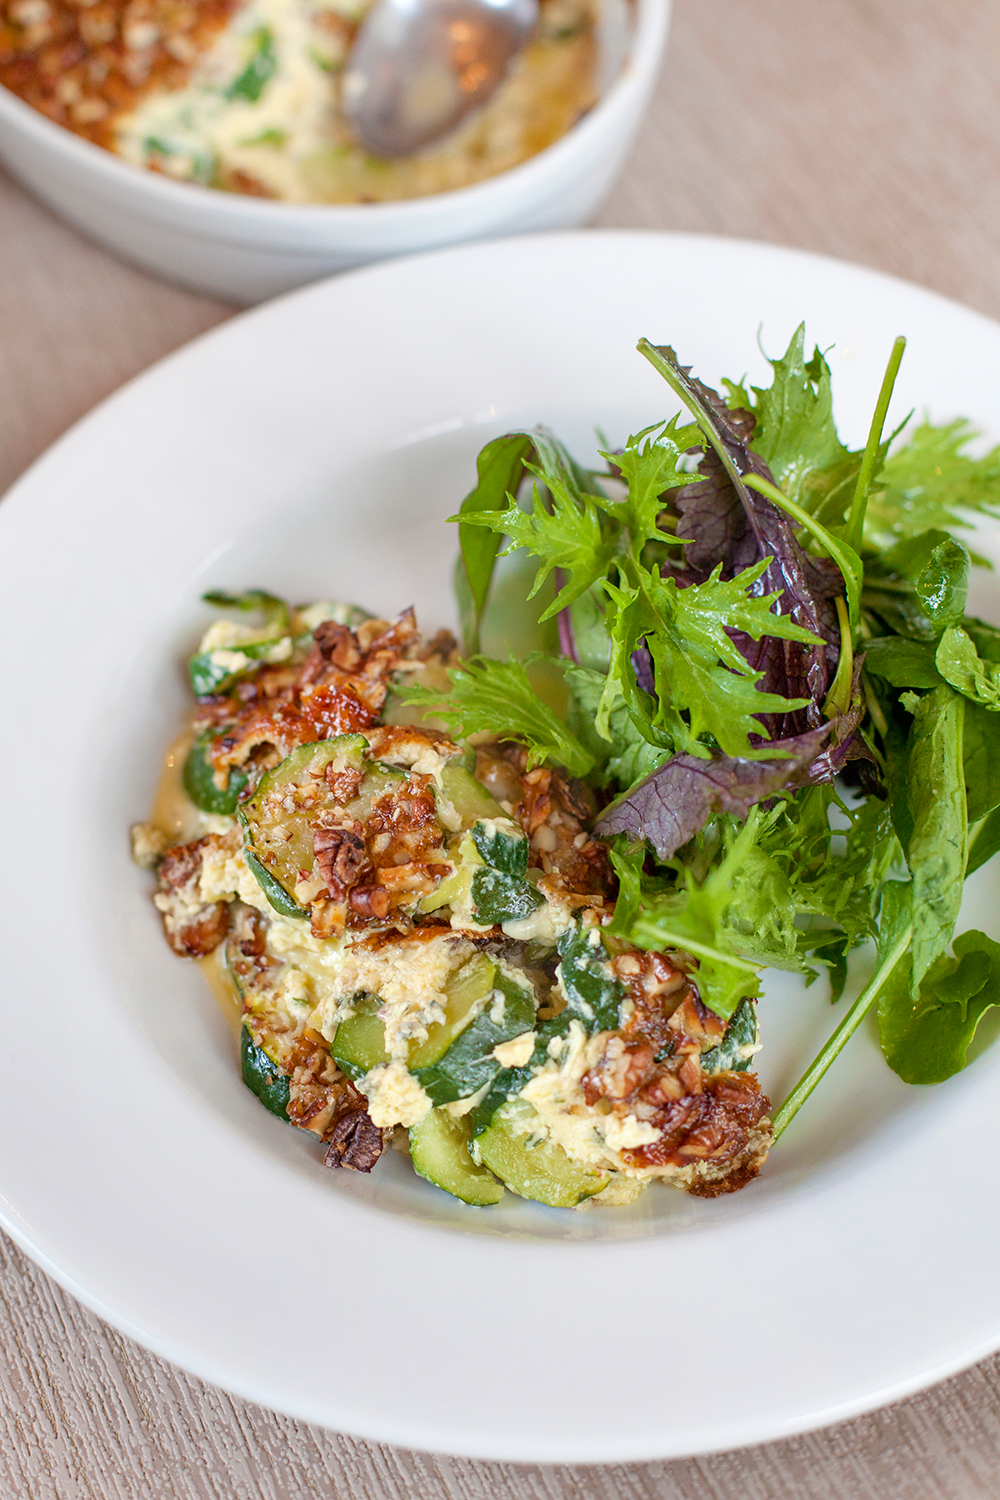
We think Cauliflower Cheese Soufflé goes best with a dressed green salad and sliced tomatoes.

Cauliflower Cheese Souffle plated.jpg

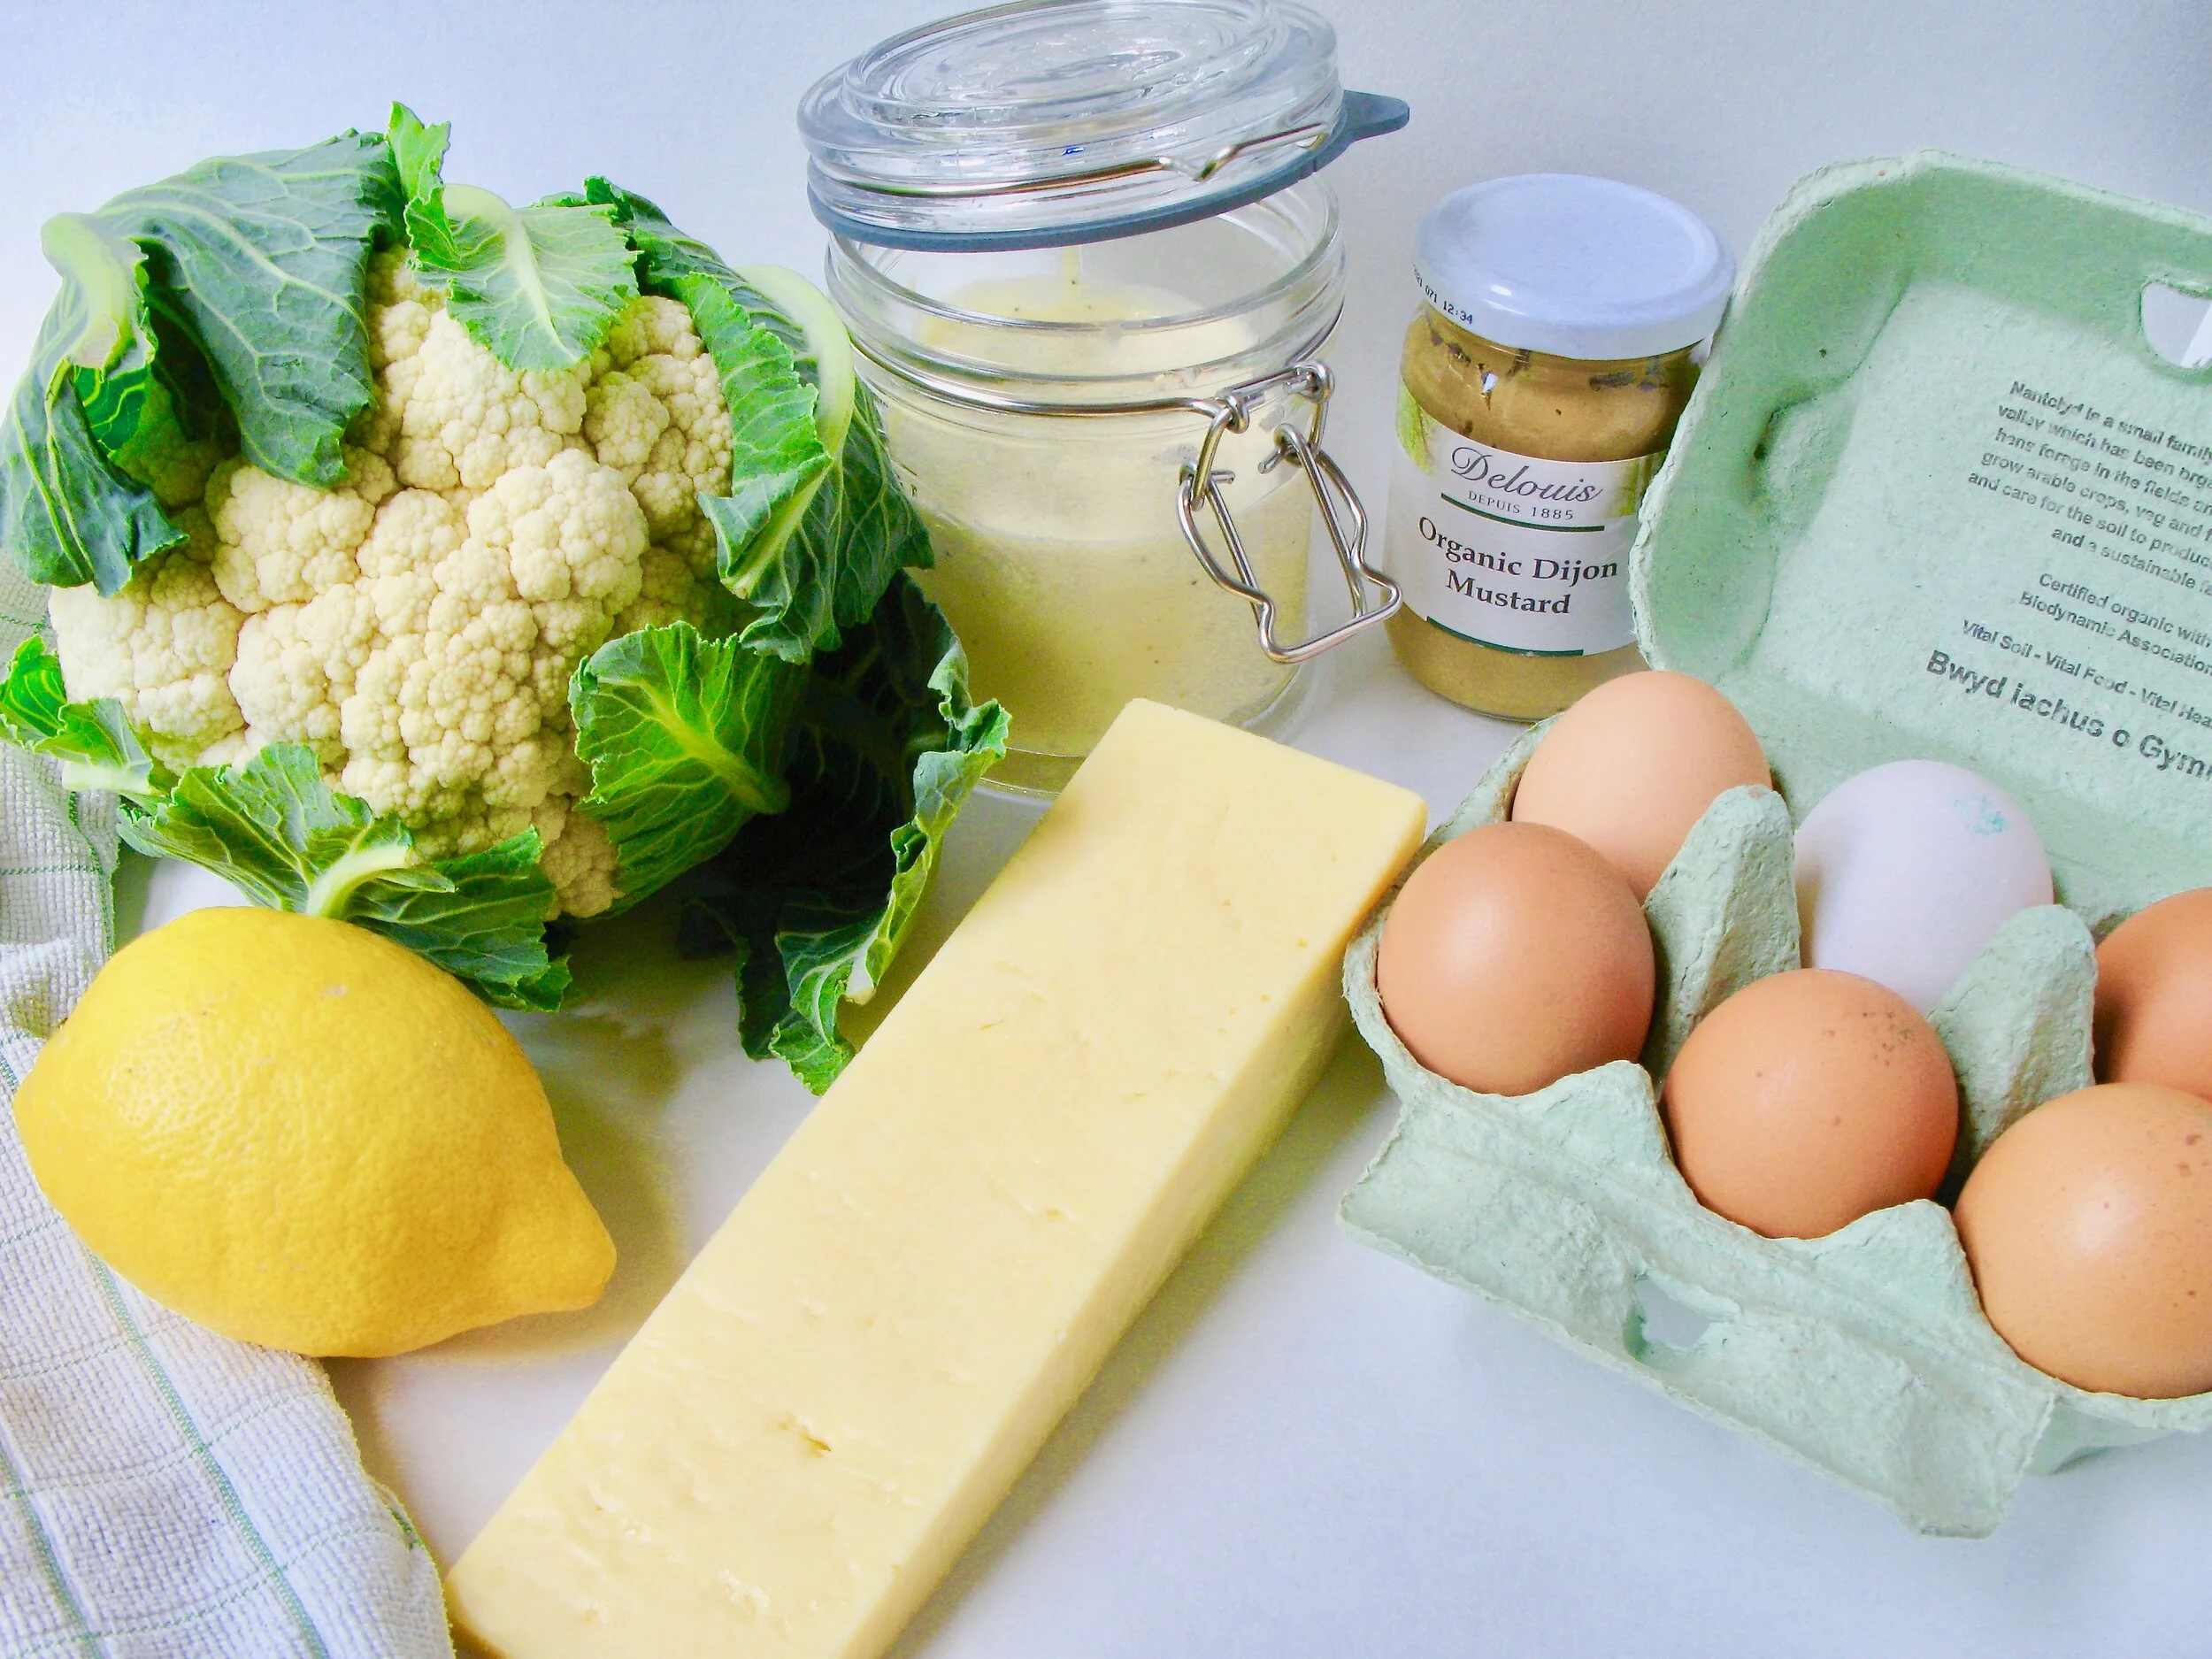
Cauliflower Cheese Soufflé (serves 4)

Ingredients

450g organic cauliflower florets

50g organic butter

150g thick, preferably homemade, organic mayonnaise

15g organic Dijon mustard

finely grated rind of 1 organic lemon

6 large organic eggs, separated

175g organic Cheddar cheese, grated

1 tsp Himalayan pink salt

a generous grinding of organic black pepper

Instructions

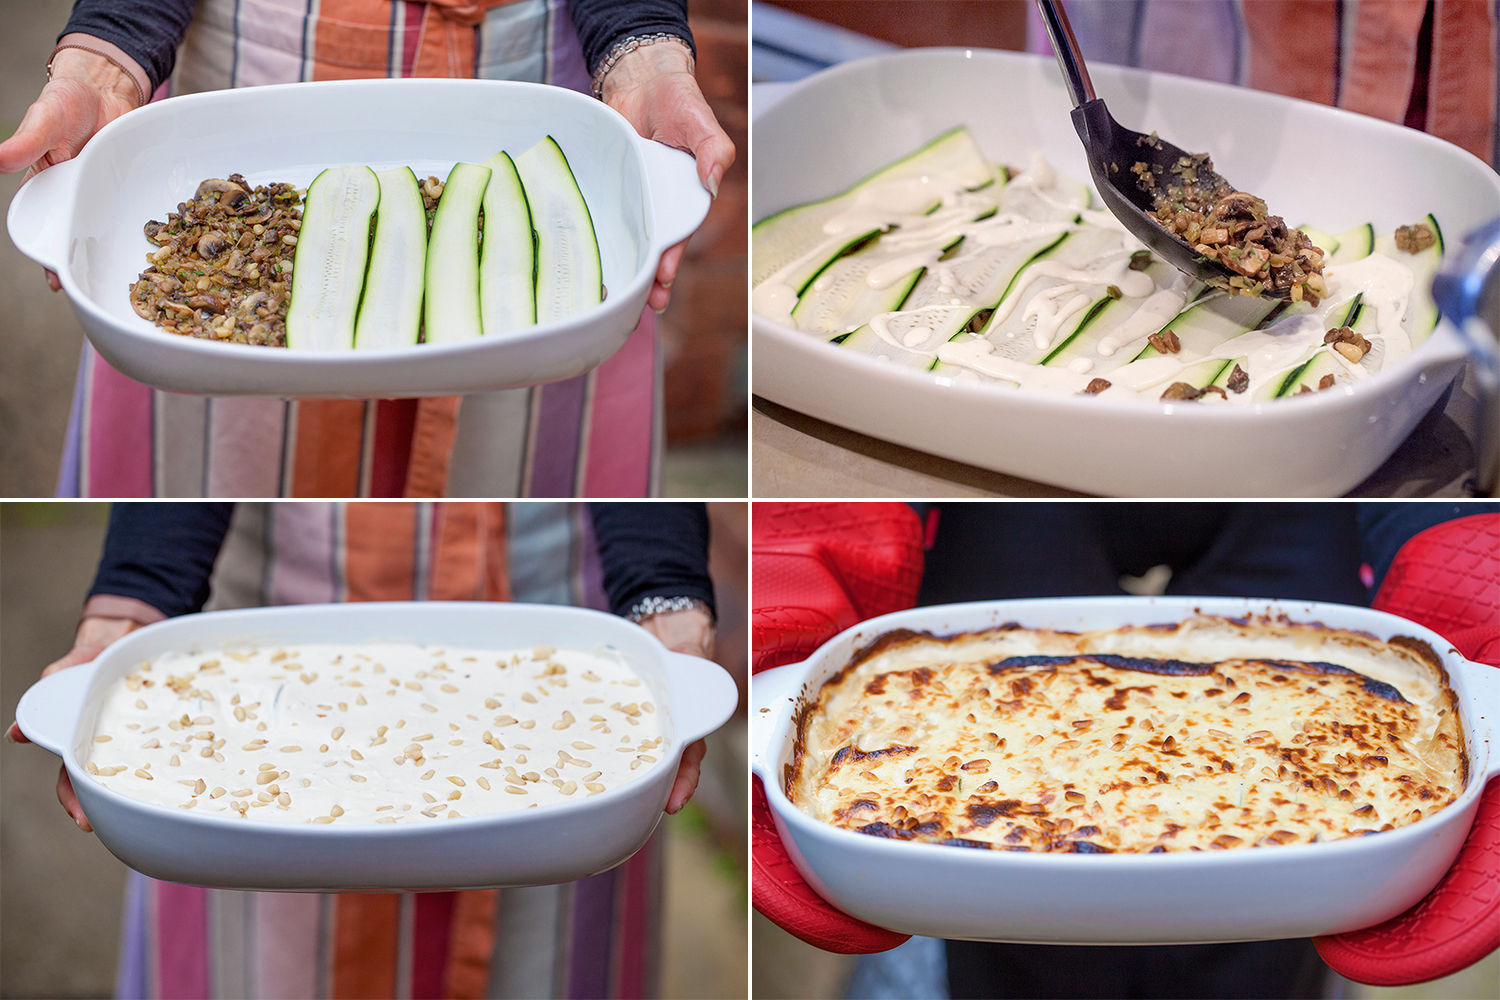
Cook the cauliflower florets in boiling salted water for about 5 minutes or alternatively, put the florets in a steamer basket set over a pan of salted boiling water and lightly steam for a similar amount of time - they should retain their crispness. Drain well.

Butter a shallow gratin or ovenproof dish and place the drained florets in a single layer in the bottom.

Pre-heat the oven to 190℃ / 375℉/ Gas mark 5

Put the mayonnaise, Dijon mustard, lemon rind and salt and pepper in a medium bowl, stir in the egg yolks and 100g of the grated cheese.

In a separate bowl, using an electric whisk, beat the egg whites until stiff.

With a large metal spoon or spatula, carefully fold the egg whites into the mayonnaise mixture.

Spoon the mixture evenly over the cauliflower and sprinkle the remaining cheese on top.

Bake in the preheated oven for 25 minutes until risen and golden.

Serve immediately.

Cauliflower Cheese Souffle baked.jpg

Notes

Leftovers can be stored in a sealed glass container in the refrigerator and re-heated for about 15 minutes at 190℃ without spoiling, which is to say it will rise again!

I like to serve the reheated soufflé as part of a tapas-style meal with a selection of Spanish charcuterie, Manchego or thinly sliced Parmesan cheese, buffalo mozzarella, black and green olives, caper berries with their stems intact and thin slices of toasted keto bread.

Fat 62g Protein 22g Carb 6g - per serving


Roasted Portabella Mushrooms With Leeks, Pine Nuts & Halloumi

by Susan Smith in


Allow me to introduce you to Portabello mushrooms, which are basically a chestnut mushroom that has been allowed to grow to full maturity. What you’re left with is a dense, meaty texture and an intensely deep mushroom flavour. Delish! Plus, the Portabello’s large, saucer-like base allows it to be used in a variety of ways, such as stuffed, baked, grilled or even barbecued.

In my view, Portabellas are one of the best veggie substitutes for meat when you’re in a hurry and fancy something cheap and vegetarian. Low-carb and easily digested, they are a natural source of plant-based protein and contain many essential nutrients and disease-fighting antioxidants and phytonutrients to boost health and combat inflammation.

Some other vegetarian pairings that enhance Portabella’s meaty-textured earthiness are grilled goats cheese on a base of black olive tapenade; chopped pecans with celery and blue cheese and creamy, scrambled eggs topped with a sprinkling of fresh tarragon or chives. All are healthy, flavour-packed and quick-to-make but I think today’s recipe for golden, crunchy, Roasted Portabella Mushrooms With Leeks, Pine Nuts & Halloumi wins hands down as a stand-alone meal when served with a bag of organic salad leaves dressed with a drizzle of Balsamic.

Roasted Portabella Mushrooms With Leeks, Pine Nuts & Halloumi is a version of Sabrina Ghayour’s tapas recipe of similar name that features in her book ‘Feasts’. I’ve made more of a meal of them by adding leeks, toasting the pine nuts and using a tad more halloumi and butter than the original recipe states. N.B. They don’t take as long to bake as Sabrina suggests! Also, try to select Portabella mushrooms with upturned edges - not flat ones - so that the generous amount of filling I specify here doesn’t spill out during the cooking process.

Real, nutrient-dense food provided by nature and on the table in less than an hour…bring it on.

stuffed mushroom keto recipes.jpg

Roasted Portabella Mushrooms With Leeks, Pine Nuts & Halloumi (serves 4)

Ingredients

8 large organic Portobello mushrooms

400g organic leeks, finely chopped

80g organic pine nuts, lightly toasted

80g organic unsalted butter, softened

a small bunch of fresh, organic coriander, very finely chopped

150g halloumi cheese, coarsely grated

Himalayan pink salt

Freshly ground organic black pepper

stuffed mushrooms keto recipe.jpg

Instructions

Heat a large frying or sauté pan over a medium heat. When it is hot add 1 tablespoon of the butter and the chopped leeks to the pan, stir together well so that the leeks are evenly coated in butter.

Cover the pan and gently cook for about 8-10 minutes or until the leeks are meltingly soft but not coloured. Set aside to cool.

In a separate frying pan set over a low heat, gently toast the pine nuts until golden. Set aside to cool.

Pre-heat the oven to 220℃. Line a large baking tray with non-stick foil and/or baking paper (I use both).

Clean the mushrooms with dampened kitchen paper then cut their stalks level with the gills. Place the mushrooms, gills uppermost, onto the prepared baking tray.

In a medium bowl, combine the remaining butter, halloumi, coriander, cooked and cooled leeks and pine nuts together, then season to taste with salt and pepper.

stuffed mushroom keto recipe.jpg

Divide the mixture evenly between the mushrooms - using a spoon to pile one portion into the centre of each mushroom and to press it down well into the base.

Bake for 20-25 minutes until nicely browned, then serve immediately.

Notes:

For a vegetarian feast, try serving delicious Roasted Portabella Mushrooms With Leeks, Pine Nuts & Halloumi with a quick and easy to make, fresh herb omelette. If you don’t know how to make perfect omelettes, I’ll share my secret in my next post!

stuffed mushroom keto recipe ideas.jpg

Celerisotto With Asparagus & Lemon

by Susan Smith in


Celeriac may appear to be just an ugly, unpromising, root vegetable but its inner beauty is revealed when transformed into low-carb, silky-smooth, creamy, risotto. This Celerisotto With Asparagus & Lemon has recently become one of our favourite vegetarian keto meals - the perfect, what-to-eat, comfort food during a spell of indecisive early summer weather, which felt more like October than June.

Strictly speaking, I could have done with posting this recipe several weeks ago because the organic celeriac I’d been purchasing from Abel & Cole up until the beginning of June, is no longer available. Also, the short English asparagus season will soon be over. It’s good to Eat The Seasons but unfortunately this means I’ll be waiting until next September to buy the new season’s celeriac to make a different kind of celerisotto…perhaps replacing asparagus and lemon with autumnal mushrooms and whisky.

Whatever my food preferences, banging the drum about the importance of eating seasonal, organic food generally seems to fall on deaf ears. The number one reason to choose organic food is to avoid pesticide exposure. Not only do these chemicals threaten the environment, they’re also proven to pose a very clear and direct risk to human health. The cancer-causing, Glyphosate-based weed killer Roundup has been found in virtually every food commonly sold and consumed, so we should all take steps to protect ourselves from it. Even so, the vast majority of people are still unwilling, or sometimes unable, to pay the extra cost for organic food and they don’t give a second thought to the thousands of air miles it takes for asparagus to be flown-in from South America.

So, taking a pragmatic approach to the fact that conventionally grown celeriac and asparagus are available in supermarkets all year round, I’ve decided to go-ahead and feature this recipe for Celerisotto With Asparagus & Lemon sooner rather than later. At least then you don’t have to wait to enjoy the gastronomic delights of this quick and easy, supper ‘superstar’ in your quest to eat healthy and low-carb.

celeriac risotto keto recipe.jpg

It came as quite a shock to us that risotto made from ‘grains’ of celeriac has all the taste and texture of traditional Italian-style risotto. Who knew? Turns out you don’t need any help from arborio or other short-grain rice to achieve that classic, creamy texture. Celeriac ‘rice’ holds its shape without turning to mush and softens down into creamy deliciousness with the help of full-fat cheese and double cream. Increasing healthy fat consumption whilst severely restricting carbohydrates is a good thing; it’s eating too many high-starch processed grains that add the padding.

In fact it’s fat that makes this dish a surprisingly satiating and totally delicious vegetarian meal. We think it’s best served with crunchy, tangy, featherlight Parmesan Crisps and lightly-dressed mixed salad leaves. However, if you want to ‘fill your boots’ and take this grain-free risotto to the next level, try topping it with a poached egg, slices of roasted chicken, a lightly cooked wild salmon fillet or some crispy shards of salty prosciutto to offset its creaminess. Yum!

All in all, an extremely versatile, easy and convincing addition to a low-carb cook’s repertoire. As with many Primal Plate keto recipes, Celerisotto With Asparagus & Lemon is another healthy, comfort food that doesn’t taste like it’s healthy. Serve it up to family and friends and they’ll think you’re a genius. 

Celerisotto With Asparagus & Lemon (serves 4)

Ingredients

40g organic grass-fed ghee

2 medium-sized celeriac, peeled, cubed and pulsed in a food processor in 3-4 second blasts for 12-15 times until it becomes like grains of rice

400g organic asparagus, trimmed and cut into 1 inch pieces on the diagonal

2 organic leeks, finely sliced

100ml organic chicken stock (I make my own chicken bone broth)

50g organic full-fat soft ‘cream’ cheese

50g organic Parmesan Reggiano or vegetarian Parmesan-style cheese, finely grated

4 tbsp organic double cream

Large organic lemon, zest only

Large handful of organic herbs e.g. parsley, tarragon, mint, coriander, basil, finely chopped

To serve:

Parmesan crisps - optional

Fresh sprigs of organic chervil or dill

vegetables.jpg

Instructions

In a large frying or sauté pan, gently fry the leeks in the melted ghee for 5 minutes until soft but not coloured

Meanwhile, blanch the asparagus pieces for 1-3 minutes (depending on thickness) in a pan of boiling water, then immediately plunge into ice cold water to set green colour; drain and dry on kitchen paper.

Add the celeriac ‘rice’ to leeks with the chicken stock and stir-fry for about 6-8 mins until soft.

Add the asparagus to the pan and cook for a couple of minutes more until warmed through.

Stir in the cream, cream cheese, lemon zest and chopped herbs.

Continue to cook until piping hot.

Serve immediately with Parmesan Crisps and fresh green salad leaves.


Notes

Click here for how to make Parmesan Crisps.

If you don’t have 15 minutes to make Parmesan Crisps, some organic rocket leaves lightly dressed with vinaigrette and tossed together with a spoonful of finely grated Parmesan will suffice!

Fat 20g Protein 8g Carbohydrate 18g - per serving

celeriac recipe.jpg

Wild Mushroom Torte

by Susan Smith in


With the winter festivities over, I’m maxed out on animal protein.

As delicious as our low-carb, festive feasting was, which included a side of organic salmon, a saddle of wild venison and a Riverford XXL chicken the size of a small turkey (too much already!), in my opinion, the best meal to grace our table was this vegetarian Wild Mushroom Torte.

wild mushroom torte.jpg

I know, I know. I should’ve posted this recipe before now, but in the final week before Christmas I suddenly realised that the foraged wild mushrooms that Abel & Cole thoughtfully supplied throughout the autumn months, were no longer available. Nevertheless, after all my careful menu planning, I wasn’t about to change my mind about having a Wild Mushroom Torte for Boxing Day lunch.

With just five delivery days left until Christmas Eve, I tracked down the brilliant Wild About Mushrooms, ordered some dried morels and chanterelles and kept my fingers crossed that they’d arrive in time. They did. Furthermore, when they were reconstituted their wild mushroom ‘perfume’ was just as, if not more fragrant than, fresh wild mushrooms.

wild mushrooms.jpg

Combining wild mushrooms for their perfume and concentrated flavour and cultivated mushrooms for texture (any type of mushroom that you fancy, and your purse will allow) makes this Wild Mushroom Torte the most delicious-tasting, vegetarian main course you can imagine. I served mine with lime-glazed parsnips, curly kale and a gravy enriched with the broth from the rehydrated mushrooms and it was divine!

Whilst my fellow diners and I are a sample size of just three people, for what it’s worth, we all feel significantly better - lighter in body and mind - when our meals are low-carb, high-fat and centred around a plateful of vegetables.

You wouldn’t guess this from the OTT seasonal animal protein extravaganza listed above, but my love for animals means I regret having to eat them at all. I choose to do so because clearly humans are genetically programmed for optimal functioning from a diet that includes meat.

When ancient humans first created the tools and developed the skill to hunt down some carefully selected prey - antelope, wildebeest, bison - our species, hungry for a dense, protein-rich source of energy, got a taste for meat. To our half-starved ancestors, the sight of a large animal being dragged back to camp for the benefit of the tribe would signal a time to ‘party’ and gorge themselves silly on meat. But this wasn’t a daily occurrence. Afterwards, they would not eat any protein again until the next kill…which could be days, weeks, or months.

Unfortunately, without taking a much needed rest from consuming protein, most Primal/Paleo fans who favour eating unlimited amounts of pastured meat because, to their mind, it’s the real ancestral deal, may find that their diet won’t cut it for long-term health. Eating way too much protein, particularly animal protein, is no better, and in fact, potentially worse than eating pasta and bread regularly. 

The same applies to people on a ketogenic diet, who believe that all they have to do to lose weight is cut the carbs and replace them with massive amounts of cheese, eggs, butter, bacon and fatty cuts of beef, pork and lamb. An excess of protein in the diet contributes to excess calories.

Surplus protein morphs into sugar inside the body and raises insulin levels. Insulin is the fat depositing hormone that ushers excess blood sugar into your fat cells for future storage and voilà, you start to gain weight.

Not too much difference between that and a diet filled with bread, pasta, potatoes and rice!

It’s almost a universal problem for those of us unwilling to eschew all animal protein for a plate of carb-laden grains, potatoes, beans and legumes (did you know that 46% of the world’s diabetics live in India, where many Hindus avoid meat?) that we inevitably end up eating far more meat than is good for us.

Since it is too tedious and stressful for me to try and work out a daily macronutrient dietary analysis of the delicious Primal foods my family eats, my rather lenient-minded cook’s solution is to encourage us all to engage in 16-20 hours of intermittent fasting every day, to eat relatively small amounts of meat or fish two or three times weekly and, for the rest of the time, make sure all our meals centre around high fat with lots of colourful, high-fibre plant-based elements rather than the usual carbohydrate or protein heavy meals that most people depend on.

I’ve not yet mentioned that if the meat you’re eating isn’t organic and the animal it came from was grain-fed, which all cheap meat raised in commercial feeding lots is, then you are actually eating the same grains and/or soy beans that the animal ate when it was alive. Furthermore, these cereals most likely came from GM crops grown with Glyphosate and other mad, man-made, toxic chemicals. You need to know there is such a thing as Glyphosate Induced Obesity, which applies to everyone who continues to eat ‘cheap’ highly processed and chemically laden food, whether it be fruits, vegetables, grains, legumes vegetable seed oils or from animals born and bred on a cocktail of chemicals. 

A further disturbing reason to avoid red meat, or at least eat significantly less of it, is that the flesh of cattle, pigs and sheep contains a sugar molecule called Neu5Gc, which, unlike most other mammals, humans cannot synthesise. A shout out here for Dr. Gundry’s book ‘The Plant Paradox’ (and my sister Wendy, who gifted me this brilliant, informative read!). According to Dr, Gundry, every time humans eat the flesh of beef, pork and lamb - grass fed or not - it triggers an immune response that can cause chronic inflammation, which is a known contributor to cancer, diabetes and heart disease. All things taken into consideration, eating too much meat is not just unhealthy, it’s really unhealthy. 

Now I know we’d all be better off eating less meat, I shall be re-focusing my efforts on finding more nutrient-rich, plant-based, ketogenic recipes to share with you on this blog. These won’t include much fruit. Because whilst there’s an ongoing debate about whether or not an excess of protein kicks you out of ketosis, it has to be said that fructose - the copious amounts of fruit sugar contained in apples, bananas, grapes, pears and especially the exotic fruits you've been told are “healthy” - most certainly will. 

When I first started writing this blog, it was a massive overdose of multiple fruit and vegetable smoothies that put my immune system on red-alert, causing acute systemic inflammation and a skin rash that wouldn’t go away. Subsequently, I thought I’d sussed out the perfect anti-inflammatory diet, until my last birthday, when a celebratory meal at a restaurant caused me to have another severe allergic reaction. It’s taken four months of paying close attention to my gut health, noticing how my body responds to different foods and implementing more elegant lifestyle choices (less wine; more sleep!) to repair the damage that I can directly attribute to just one savoury meal. 

Whenever you eat food prepared by someone that’s not on your dietary wavelength, e.g. profit-led restaurants and high street food chains, you’re vulnerable. My recent experience told me that even a single meal can push you towards metabolic mayhem, which if repeated often enough, can lead to diseases such as obesity, atherosclerosis and type 2 diabetes. Staying-in to eat together seems a much nicer way to have fun!

If you’re planning to make 2019 the year you take back control of your health by opting for a life-enhancing diet that quickly burns-off excess body fat, reverses the symptoms of chronic disease and helps you to stay slim, strong and fit forever (well, almost forever!) please subscribe to Primal Plate’s blog for delicious, inspirational recipes and the latest nutritional research that will show you the why, when and what foods to eat to achieve your goal.

In the meantime, the best food-related new year’s resolution you can make is to eat real food. Essentially, this means you, someone you love or someone you’re willing to pay, cooks for you at home. 

Start with the joy of cooking this Wild Mushroom Torte, which is a slightly modified version of Annie Bell’s recipe in Gorgeous Greens. Preparing the mushrooms takes quite a bit of time, but you’ll find the end result so very tasty and worthy of the effort that you may never want to eat restaurant food again! 

mushroom torte vegetarian recipe.jpg

Wild Mushroom Torte (serves 4-6)

Ingredients

50g organic butter

4 tablespoons organic extra virgin olive oil

160g organic Parmesan, finely grated

3 organic shallots, peeled and finely chopped

800g mixture of wild and organic cultivated mushrooms, trimmed and finely sliced

Himalayan Pink salt (or use sea salt)

Organic black pepper, freshly ground

150ml organic double cream

3 tbsp organic fresh curly-leaved parsley, finely chopped

 a generous pinch of organic nutmeg, freshly grated

2 large organic eggs, plus 1 large egg yolk, lightly beaten together to combine

Instructions 

Liberally butter a 20 x 7 cm spring form cake tin, line the base with a circle of non-stick paper, butter the paper and dust the tin all over with some of the grated Parmesan.

Pre-heat the oven to 190℃ fan/210℃ / 400℉ / Gas mark 6.

You will need to cook the mushrooms in about 4 batches as follows:

Heat ¼ of the remaining butter with 1 tablespoon of olive oil in a large frying pan until hot and foaming, add the shallots to the pan and fry until softened but not browned.

Add your first ¼ of mushrooms to the pan, stir to combine with the oil and shallots, then continue to fry, stirring from time to time, until the mushrooms have softened and the mixture is starting to colour. Tip: When you add the mushrooms to the pan, leave them alone for the first 45-60 seconds to allow them to slightly caramelise on the base of the pan before moving them around.

When the first batch of mushrooms are almost ready, season with salt and pepper and then tip into a large mixing bowl. 

Re-heat the frying pan with a ⅓ of the remaining butter and another tablespoon of olive oil before adding your second batch of mushrooms and cooking them in the same way.

Repeat with remainder of the mushrooms.

When all the mushrooms are cooked, transfer half of them into the bowl of a food processor and pulse to a textured puree. Combine this puree with the rest of the mushrooms.

Stir in the cream, parsley, eggs and half the remaining Parmesan. Add the grated nutmeg and some seasoning to taste.

Tip the mixture into the prepared tin, levelling it out on top. Scatter the remaining Parmesan over evenly and bake for 35-40 minutes until golden on the surface and set.

Allow the torte to rest for 10-15 minutes before running a knife around the sides of the pan and removing its collar.

Serve in wedges.

mushroom torte veggie recipe.jpg

Notes:

About 30g of dried mushrooms equates to 100g of fresh when they’re rehydrated. I use approximately 25% of wild mushrooms to 75% of cultivated for this recipe.

Strict vegetarians cannot eat Parmesan Reggiano but can use this Italian Parmesan-style vegetarian cheese instead.

To get ahead, pre-prepare the cake tin and the ingredients up to, and including, cooking and pureeing the mushrooms. When you’re ready to bake the torte, just combine the mushrooms with the rest of the ingredients before proceeding with rest of the recipe.

The cooked torte keeps well in a refrigerator for several days. I think the best way to use up leftovers is to loosely wrap remaining slices of torte in tin foil before re-heating in a moderately hot oven (approx. 195℃) for 15 minutes. Served hot with a couple of crispy-bottomed fried eggs is pure keto indulgence! 

Fat 61g  Protein 26g Carbohydrate 4g - per serving

vegetarian cooking wild mushroom torte.jpg

Cheddar & Feta Frittata

by Susan Smith in , ,


I should be old enough to know better, but after weeks of ignoring nagging voices telling me Primal Plate must be “GDPR-ready” before 25 May 2018, I finally succumbed to the general confusion by sending out an email to all our blog subscribers, which essentially promised to unsubscribe them by default! Oh, how I despise bureaucracy. Does anyone else recall the ridiculous, government-led Y2K millennium bug scaremongering that told us to prepare for the worst? It was all for naught. And what about the TPS (telephone preference service) that supposedly allows residential phone users to register their wish to opt-out of receiving cold calls? In the nineteen years since we signed up it hasn’t made a jot of difference to the number of nuisance calls we receive. Whilst I agree it’s a good thing to have control over who holds my personal information and for what purpose, I think the hoo-ha and perceived threat of this latest EU legislation is just another sledge hammer to crack a nut. The fact is that data protection enforcement has been extremely lax to date and although, in theory, fines of £500k can be imposed on anyone found flouting the law, I‘m willing to bet no-one will be around to successfully police it. Rant over. If you’re reading this blog, I’m happy you’re still with us and my apologies for last week’s needless attempts to put right your current subscription status, which was never wrong to begin with.

If fathoming out GDPR cost me two days of my life this week, yesterday was a complete wipe-out. I was quietly doing my usual morning face-cleansing ritual in front of my magnifying mirror when to my horror, I sat and watched my right eye - as if in slow motion - fill up with blood! No warning, no obvious reason, no pain, no loss of vision but hell’s teeth, it was frightening! Feeling too faint and too scared to go online to investigate, I was left in a state of shock. Was my brain seeping blood? Was I about to have a stroke? Was my bloodied eye permanently damaged? I had never seen or heard of anyone suffering a trauma as unexpected and dramatic-looking before, so when my husband told me I’d had a subconjunctival haemorrhage and it was completely benign, I was both thankful and relieved. Nevertheless, I took it as a warning to slow down and rest. As someone who can accurately be described as health obsessed, it’s humbling to know I’m not always on point.  I share my experience with you because I believe that stress was the most likely cause of my eye ‘pop’. It’s a reminder that the true “price of anything is the amount of life you exchange for it” (saith Henry David Thoreau). From now on I will be more selective!

In the spirit of ‘rest and restore’, I’ve turned to Sabrina Ghayour’s book entitled Feast for today’s recipe for Cheddar & Feta Frittata. A frittata is such a cheap, quick and easy, low-carb, keto meal to prepare and you can use almost any combination of seasonal vegetables with the eggs and cheese and have dinner on the table within half an hour. If I’m feeling really lazy, I don’t even bother with a salad accompaniment. I segment the sizzling frittata still in its pan and simply serve wedges of it with a glass of wine. There are lots of different frittata combos that we enjoy - leeks and blue cheese is another winner - but for now this Cheddar & Feta Frittata with peppers, fresh herbs and chilli should get you into the frittata groove.

spanish omelette.jpg

Cheddar & Feta Frittata (serves 4)

Ingredients

1 tbsp organic ghee organic olive oil or macadamia nut oil

1 organic red pepper

1 organic green pepper

4 organic spring onions, cut into very thin slices from root to tip

200g organic feta cheese, roughly crumbled into 1 cm chunks

100g organic strong Cheddar cheese, grated

4 organic dried chillies, crushed in a pestle and mortar (or organic chilli flakes - milder than whole bird eye chillies - to taste)

10g fresh organic dill, finely chopped

10g fresh organic coriander, finely chopped

8 large organic eggs

Himalayan pink salt or Celtic sea salt, to taste

Freshly ground organic black pepper, to taste

Instructions

Wash the peppers, halve lengthwise and remove the stems, seeds and membranes, then cut into 1 cm strips and finally into 1cm dice.

Place the ghee (or oil) into a large, non-stick ovenproof frying pan and set over a medium-high heat. 

spanish omelette prep1.jpg

When the oil is hot, add the peppers and stir fry for 2-3 minutes until softened, but not coloured. Set aside to cool.

Meanwhile crack the eggs into a medium-large bowl and beat together well. Mix in the spring onions, feta, Cheddar, crushed chilli/chilli flakes, dill and coriander.

Add the cooked and cooled pepper pieces to the eggs and mix again.

spanish omelette prep.jpg

Set the frying pan back over a medium heat - add a little more ghee/oil if you think it needs it. 

When the pan is hot, tip the egg mixture into the pan, spreading the contents out evenly with a wooden spoon. 

Cover the pan with a lid or stainless steel splatter guard and leave the frittata to cook on the top of the stove for 6-8 minutes or until the edges have set.  

Meanwhile, preheat the grill to High.

Remove the pan lid and place the frittata under the hot grill. Cook until golden brown and sizzling hot.

Check to see that the eggs are cooked through by inserting a knife into the centre of the frittata. If they’re still runny, put back under the grill for 1-2 minutes more until they’ve firmed up completely.

Slice and serve straight from the pan.

spanish omelette serving .jpg

Notes:

You will see from the photos that I ring the changes with whatever vegetables I have to hand. I’ve added lightly steamed rainbow chard to one of the frittatas and lightly steamed English asparagus to another. I could equally be tempted to throw in a couple of handfuls of baby spinach. The more green veggies the better, just don’t overcook them before adding to the eggs.

Leftovers are great served at room temperature.

Fat 36g Protein 31g Carbohydrates 3g - per serving

spanish omelette serving.jpg

Celeriac Terrine With Red Pepper Sauce

by Susan Smith in , , ,


I was slowly but surely getting through the training programme to become a qualified health coach until I was recently stopped in my tracks. Last week I received an email announcing “numerous coursework and program updates” that were being rolled out now and later this year. Gees! They don’t mean maybe. The volume of coursework has increased by a hefty 60% and I can’t now move on through the 16 original lessons and exams unless I first go back and then sequentially complete each of the new business building tasks interspersed between them. It’s not easy being forced to switch between academia and creative writing on demand - I simply don’t have the time or headspace for both - and last week’s task, which was to write ‘my story’, overwhelmed me. Firstly, who cares what trials and tribulations I’ve suffered? Secondly, it seems if anyone does, it’s me! I found wading through the timeline of my life and reliving the experience extremely upsetting. So today, I’m taking some welcome time out to write this blog. For sanity’s sake, I have to loosen my grip on my study work and let go of my original intention to be an accredited health coach before the end of the year. After all, there are so many other things I have to do. 

Without the support of my husband, who steps into the domestic breach every time he finds me glued to my computer, I would have given up completely. Economy of effort is where it’s at and Celeriac Terrine With Red Pepper Sauce is one of those meals that John can prepare single-handedly so that we’re still well fed even when I’m overly committed to tasks beyond the kitchen table. Celeriac Terrine With Red Pepper Sauce makes an impressive vegetarian meal for six people. Since there are only three of us to feed, that means enough leftovers to slice-up cold several days later, which you can then generously top with more cheese before reheating in the oven for 15 minutes and gently warming through the leftover red pepper sauce on the hob. Alternatively, the terrine eats equally well cold with homemade mayonnaise and salad leaves, preceded by a delicious creamy, hot tomato and red pepper soup that’s simply thrown together in minutes by combining the leftover red pepper sauce with a bottle of Abel & Coles cherry tomato passata and a generous dollop of double cream. Voilà, two nutritious, keto-inspired meals for the price of one! 

celeriac terrine recipe.jpg

Celeriac, otherwise known as celery root, is a bit of a culinary life saver when you’re living a low-carb lifestyle. Although a root vegetable, celeriac isn’t nearly as starchy as potatoes (potatoes contain over twice as many net carbohydrates) so it’s really useful for making mash, chips, gratins and soups - watercress soup thickened with celeriac instead of potato is even better. High in dietary fibre and loaded with vitamins and minerals for maintaining good health, this recipe totally transforms celeriac from its reputation as the gnarly hobbit of the vegetable world into a very elegant looking, make-ahead main course for entertaining, or a much more appetisingly colourful, meat-free alternative to a family roast.

celeriac organic vegetable.jpg

A long-standing favourite of ours, this recipe is taken from the Winter section of Rose Elliot’s book ‘Vegetarian Four Seasons’. However, while I can still buy organic celeriac in May, I make no apology for enjoying it in Spring! It’s simply delicious food, whenever!

Celeriac Terrine With Red Pepper Sauce (Serves 6)

Ingredients - for the celeriac terrine

700g organic celeriac

25g organic butter

125g organic strong Cheddar cheese, grated

25g freshly grated organic Parmesan or organic vegetarian Parmesan-style cheese 

4 tbsp snipped organic chives

3 organic eggs

Himalayan pink salt or Celtic sea salt

Freshly ground organic black pepper

Organic cherry tomatoes and fresh chives - to garnish 


Ingredients - for the red pepper sauce

2 tbsp organic olive oil or macadamia nut oil

2 organic onions, finely sliced

2 organic red peppers

150ml vegetable stock

Himalayan pink salt or Celtic sea salt

Freshly ground organic black pepper

15g cold organic unsalted butter, cut into small pieces

celeriac terrine.jpg

Instructions

Pre-heat the oven to 160℃ / 325 ℉ / Gas mark 3

Grease and line a 450g / 1lb loaf tin with a piece of non-stick parchment paper to cover the base and extend up the short sides. Grease again.

Boil a kettle of freshly filtered water.

Peel the celeriac and cut into even-sized 2cm chunks.

Pour the boiling water from the kettle into the base of a steamer. Place the celeriac into the top of the steamer and cook for about 12-15 minutes, or until the celeriac is tender.

Lift the celeriac out of the steamer and drain well before tipping into a bowl - the water in the bottom of the steamer makes wonderful stock.

Add the butter to the celeriac and mash, but don’t puree because some texture is good in this dish. Mix in the grated Cheddar and Parmesan cheeses, the chives, eggs and salt and pepper to taste.

Spoon the mixture into the prepared tin and level the top. Bake for about 50 minutes or until the terrine feels firm to the touch, is golden-brown and a skewer inserted in the middle comes out clean.

While the terrine is baking make the red pepper sauce. Heat the oil in a large saucepan, put in the onions and cook over a gentle heat with the pan lid on for about 10 minutes until the onions are softened but not browned.

Meanwhile, wash the peppers and cut into rough pieces - there’s no need to remove the seeds because the sauce will be strained.

Add the peppers to the onions, cover the pan again and cook gently for a further 5 minutes.

Pour in the stock. Cover and simmer for about 10 minutes or until the peppers are tender.

Liquidise the sauce, strain into a clean saucepan and season to taste.

When the terrine is cooked, remove from the oven and allow to stand for 5 minutes or so before slipping a knife around the edges to loosen, then turn it out onto a warm plate.

Garnish the terrine with halved cherry tomatoes, sprigs of parsley and small strips of chives.

Just before serving, bring the pepper sauce to the boil. Take off the heat and whisk in the cold butter, a little at a time, to make the sauce glossy. 

Serve the sauce with the terrine and some lightly cooked broccoli or other green vegetables. 


Fat 22g Protein 14g Carbohydrate 11g - per serving

celeriac terrine pepper sauce.jpg

Courgette & Blue Stilton Gratin

by Susan Smith in ,


Our lives are pretty hectic nowadays, so recently my focus has been on creating healthy meals that can quickly be pulled together after work. Although other commitments mean I’ve not been able to post as many recipes on this blog as I’d like, the beat goes on. You’d have to come to my home on a weekday to see that even when I barely have time to sneeze, I have dozens of fast and easy recipes (still yet to share) for nutritious meals that are easily prepared and cooked within an hour.

This past week I’ve been helping Sarah with Mirror Imaging meetings, collaborating on a designer catwalk and prosecco party for what promises to be the East Midland’s wedding event of the year, cooking real food every day (even if it’s just soup and sandwiches), creating new recipes, writing my blog, playing catch-up with my finances (not least with tenants threatening non payment of rent!) and spending many hours online researching yet another kitty-related health scare when my cat Sushi, now in her eighteenth year, stopped eating for 5 days. Turns out, she was suffering with a troublesome tooth. This is the fourth time in the past 2 years that our feisty feline has been spared the doom and gloom of a more serious prognosis and my heartfelt thanks goes to her brilliant, kind-hearted vet, who deftly removed the damn thing with minimum fuss and distress to both Sushi and I. When cats of more than 10 years old get ill, the spectre of chronic kidney disease (CKD) seems to continually rear its ugly head, so the offending tooth was pulled out without anaesthetic or pain relief. Sushi and I were very brave! 

Because our puss-cat has always been afforded the status of a family member (in my view, you should never keep a pet if s/he isn’t) her needs are our highest priority. Caring for her when she’s in crisis takes a lot of time and loving dedication. It’s when you’re multi-tasking and knackered that easy-to-prepare food, which comforts and revives is a godsend. Courgette & Blue Stilton Gratin does the job perfectly. Simply serve with lightly dressed salad leaves for minimum effort.

Although this gratin does require a little forethought prior to making - you need to degorge the courgettes (sprinkle with salt to draw out their water content) for at least half-an-hour before assembling the dish - it’s a simple and quick meal for busy people to cook at the end of a working day. Unfortunately, you can’t skip the salting process because if you do, you’ll end up with curdled custard sat in a pool of excess liquid. Just breathe and pour yourself a glass of wine while you wait. Or do what I do when I’m working away from home…call your partner and ask them to do this part of the food prep ahead of time. If he remembers to open a bottle of red wine to let it breathe so I’m handed a glass the minute I walk through the door, it’s all good. It then only takes 10 minutes to assemble the dish and get it in the oven.

Cream, eggs and tangy blue cheese topped with crunchy toasted pecans is a luxurious, vegetarian, ketogenic meal that reminds me of Christmas. An all-in-one dish to include in your healthy eating repertoire at any time of the year - high in healthy grass-fed cream, butter and cheese makes food taste better and you feel more satisfied - it’s a shopper’s delight in the countdown to Christmas. It’s also an indulgent, low-carb, vegetarian main course to serve with traditional festive accompaniments for those of us that don’t want, or would like to take a break from, all the meaty fare on offer at Christmas.

Thankfully, 'meat-free' no longer applies to Sushi. With painful tooth extracted, she’ll be looking forward to chowing down on turkey!

courgette stilton bake.jpg

Courgette & Blue Stilton Gratin (Serves 3)

Ingredients

3 medium-large (approx 600g) organic courgettes

Pure Himalayan fine salt

200g organic blue stilton cheese

2 tbsp organic fresh thyme leaves

3 large organic eggs

300ml organic double cream 

Pinch of organic nutmeg, freshly grated 

Organic black pepper, freshly ground

50g organic pecan nuts, roughly chopped

ingredients.jpg

Instructions

Wash, trim and dry the courgettes. Using a sharp knife or mandolin, slice the courgettes diagonally into 6-8 mm thick ovals. Season with salt and leave them in a sieve or colander set over a bowl, to remove excess water (i.e. degorge) for 30 minutes to 1 hour.

Whilst the courgettes are degorging, cut the Stilton cheese into small cubes. Set aside. Put the thyme leaves and chopped pecans into two separate bowls.

Place the eggs, double cream, grated nutmeg and pepper into a large jug and lightly whisk until combined. You can add a pinch of salt, but season cautiously because the cheese will already be quite salty.

Pre-heat the oven to 200℃ / 400℉ / Gas mark 6

Dry the courgette slices thoroughly between two clean tea towels and/or dab them dry with paper kitchen roll.

Lay one-third of the courgette slices evenly in the base of an ovenproof (gratin) dish. Add one-third of the cheese, dotting it around the dish. Sprinkle over half the thyme leaves. 

step by step recipe.jpg

Repeat with a second layer of courgette slices, cheese and thyme leaves, then finish with a third layer of courgettes and finally the remaining cheese.

Give the egg mixture a quick stir and pour evenly into the dish. Scatter over the chopped pecans.

Cook in the oven for 35 minutes until the egg custard is set. 

Remove from the oven and let the gratin stand for 5 minutes before serving.


Fat 96g Protein 30g Carbohydrate 7g

primal recipes.jpg

Courgette Leek Mushroom & Pine Kernel Lasagna

by Susan Smith in ,


Fancy some Italianesque indulgence that comforts and fills you up like a proper, creamy pasta dish does but without any pasta, grains or cheese? Look no further. You wouldn’t know that this very clever Courgette Leek Mushroom & Pine Kernel Lasagna wasn’t the real deal unless I told you so.

Many people reject the hoo-ha of subscribing to a home-cooked, organic, low-carb diet and thereby default to eating agrichemical-ridden fruit, vegetables, grains, sugar, factory farmed animal-centric aberrations and other bona fide junk because they simply can’t be arsed. What’s worse is these same people attack my dietary preferences and erroneously label me the “weirdo”. They have no idea how liberating it is to eat plentifully for pleasure without getting fat and sick. I wish I could persuade them…  

A LCHF diet combined with exercise and intermittent fasting turns back the clock on most aspects of ageing, including an ever expanding waistline that comes from eating high carbohydrate, sugary, processed and/or low-fat diet foods. Excess body fat tends to creep up on you exponentially in middle-age, which is also the time you’re likely to find that your knees have finally given up on trying to help you outrun your fork. Kate Moss was slated for saying so, but “nothing tastes as good as skinny feels” has more than a grain of truth in it, especially when counting chemicals not calories is the priority. A low carb diet needs to be high in fat to fuel your energy needs and because fat tastes so good - think fat bombs - there’s none of the dietary deprivation associated with calorie counting.  

Based on the latest, scientifically proven nutritional principles, Primal Plate recipes are a wonderful, practical guide to eating for health. Admittedly, organic ingredients do cost more but if you want to be on the right side of healthy and you’re on a budget the advice is: Cook from scratch, eat less meat, buy seasonal, grow your own and know the ‘Dirty Dozen’ and ‘Clean Fifteen’

In my experience, whether you’re vegetarian, vegan or primal, there are socially negative consequences for being selective about your food and drink. You may have to sacrifice eating out at what used to be your favourite restaurants and come to terms with being a Billy no mates. No matter, when it comes to making intelligent food choices, the law of consequences will demonstrate soon enough that the proof of the pudding was in the eating.  There’s no time like the present to choose healthy!

Meanwhile, as today’s recipe for Courgette Leek Mushroom & Pine Kernel Lasagna shows, if you can’t beat ‘em you can at least give the impression of joining them. This is food to share when you’re not hanging out with like-minded low-carbers (aside from my immediate family, did I ever?). A hearty, savoury pasta dish layered up with a classic creamy bechamel sauce is, according to the masses, the epitome of relaxed party food so this gorgeous lasagna that I’ve adapted from a Jackie Le Tissier recipe in Food Combining For Vegetarians, easily slips under the radar.

Served with a generous glass of red wine and a crisp, garden-fresh salad, this amazebells grain-free and meat-free lasagna creates a warm and friendly Italian vibe that invites you to sit back and watch the most intransigent dining companion make the unconscious but very healthy transition from high carbohydrates to high fat, without being any the wiser. High five me!

I think it’s the perfect recipe to bring family and friends together for a relaxed, non-segregated meal. Now that’s what I call community spirit!

Courgette Leek Mushroom & Pine Kernel Lasagna (Serves 4)

Ingredients 

2 tbsp organic cold-pressed virgin olive oil

450g organic leeks, very finely chopped

250g organic mushrooms, very finely chopped

250g organic mushrooms, finely sliced

40g organic pine kernels

3 tbsp fresh organic marjoram leaves, finely chopped (if you can’t find marjoram use 2 tbsp oregano leaves instead)

1 tbsp organic tamari soy sauce

¼ tsp freshly grated organic nutmeg

sea salt and black pepper

2 large organic courgettes (or 3 medium plump ones), ends cut off and sliced lengthways into 3mm slices (best done on a mandolin) 

Topping

4 tbsp pine kernels 


Ingredients - for the pine kernel sauce

40g organic grass-fed butter

100g organic ground almonds

150ml organic double cream 

450ml freshly filtered water

100g organic pine kernels

sea salt and black pepper


Instructions

Pre-heat the oven to 200℃ / 400℉ / Gas mark 6

Heat the oil in a large sauté pan and cook the leeks covered over a medium-low heat for 10 minutes.

Add the sliced and chopped mushrooms, the pine kernels, tamari and marjoram and cook uncovered over a medium-high heat for a further 5-6 minutes, or until the liquid released by the mushrooms has evaporated. 

Remove the pan from the heat and season with the nutmeg, sea salt and black pepper. Set aside whilst you prepare the pine kernel sauce.

To make the pine kernel sauce: Dilute the cream with the filtered water by mixing the two together in a glass measuring jug. 

Melt the butter in a large saucepan over a medium heat and then stir in the ground almonds to make a ‘roux’.

Gradually add half the diluted cream to the roux, stirring constantly as you go until the mixture comes together and is free of lumps. Tip the mixture into a blender, then add the rest of the diluted cream and the pine kernels and whizz everything together until you have a smooth, creamy white sauce.

Tip the contents of the blender back into the saucepan, return the pan to the heat and bring to a gentle boil stirring continuously until the sauce thickens - this may take a while. If the sauce seems too thick, add an extra tablespoon of filtered water to thin it out slightly.

Remove the pan from the heat and season with salt and black pepper.

To assemble the lasagna: Place a layer of the mushroom, leek and pine nut mixture in the base of a deep, square or rectangular oven-proof dish. Top with a layer of courgette slices to cover completely, and then add a little of the sauce.

Repeat these layers twice more, leaving enough sauce to finish with a thick layer. 

Sprinkle the surface with 4 tbsps of pine kernels.

Bake for 40 minutes until golden brown and tender. 

Bring the dish to the table and serve with a crisp green and/or tomato and basil salad.

Notes 

If you’d like the lasagna to be more browned on top, you can finish the dish under the grill. N.B. You’ll need to watch it like a hawk as pine nuts swiftly turn from golden brown to scorched under direct heat. 

If you have a Vitamix or similar high powered machine, you can thicken the sauce in the blender by letting the machine continue to run for an extra 3-4 minutes or so i.e. you can omit transferring the sauce back into a saucepan to thicken it. The reason I choose to transfer the sauce mixture back in to a saucepan and thicken it by hand is because it’s less time consuming than trying to get all the finished sauce from around the base and blades of a Vitamix container!   


72g fat 20g protein 15g carbohydrate - per serving


Cheddar, Herb & Mushroom Roulade With Red Wine Sauce

by Susan Smith in ,


Less than two weeks ago I was boasting that Sushi our cat was in rude health, yet last week she suffered a six-day near death experience, which left us stressed-out and frantic with worry. Forgive my indulgence, but this is a cautionary tale that applies to anyone who solely relies on medical opinion and interventions as a strategy for health and healing. It seems to me that physicians should not get paid on the number of sick patients they treat but rather on the number of people (or animals) on their books that actually enjoy good health.

When a vet tells you to seriously consider euthanising your 17-year old cat because “You have a very, very poorly animal” that’s "too sick to go home", what would you do? It is at a times like these it pays to be contrarian. I’d only taken Sushi to the Minster Vets because three days earlier she’d suddenly stopped eating and was straining to use her litter tray. I’d even phoned them beforehand to explain my cat seemed to be constipated and to ask if they would give her an enema. As far as I was concerned, this was the only medical intervention required. 

According to the vet, I was wrong. After a brief physical examination, we were told that Sushi wasn’t seriously backed-up, but rather her intestine and colon were very thickened and inflamed and there was a distinct possibility that a cancerous tumour was the cause of the blockage. It still looked and smelt like ‘poo’ to me, but the vet made no attempt to clean-up Sushi’s backside and rejected giving her an enema because it would further dehydrate a cat suffering from kidney disease. Pardon? How do we know that she is? Furthermore, an X-ray might not show up a tumour so they’d need to perform an endoscopy, which had to be done under general anaesthetic. However, this might endanger Sushi's life because thirty per cent of cats her age do have kidney disease and undergoing a general anaesthetic can cause complete organ failure. Brilliant! If we didn’t want Sushi to suffer needlessly, euthanasia was, on the face of it, our best option. Naturally, I asked for a blood test to be done straight away to establish whether Sushi had kidney disease or not but was told: “Mum and dad can’t stay” for this procedure and we would have to leave Sushi with them.

In tears, I told the vet I couldn’t make a decision whilst in a state of shock and that if we were to agree to her killing our cat, we would need time to say our goodbyes. Not satisfied with this, the vet volunteered to leave the room for a few minutes, presumably so we could come to a more ‘reasoned’ decision in private. She needn’t have bothered, my mind was made up…if Sushi was going to die, it would be at home in my arms. Right on cue, the most horrendous howling of some poor creature that had been previously dispatched by it’s owner into the Minster’s veterinary care emanated from behind scenes to let me know with absolute certainty I needed to get us the hell out of there.  

The next 24 hours were an emotional roller coaster, not least because I knew we’d have to clean Sushi up and administer the enema ourselves. Nevertheless, I did have one ace up my sleeve. I’d just agreed to a new 10-year Lease on our old office premises and its change of use to a small veterinary practice. I managed to track down the vet that is going to be running the practice when it opens in a couple of months time and she was able to reassure me that the symptoms and events as I described them over the phone didn’t sound like Sushi was anything like at death’s door as far as she was concerned. She arranged to do a home visit the next day. 

Meanwhile, it took three of us to sort out Sushi’s nether regions. “Don’t try this yourself at home” applies to giving your feisty cat an enema and then some!  It’s a highly intimidating, emotionally charged procedure for both you and your cat! Three enemas later (organic coconut oil melted to blood temperature) Sushi had started to show more interest in grooming herself and the fragrance of coconut oil rather than poo pervaded the air as she was able to walk with her tail held high (a sign of confidence and contentment), rather than down at floor level, as if in an attempt to cover up her indignity.  

When the vet arrived the next day, Sushi had not eaten for four days nor had she had any success in the litter tray, but at least she was clean and ready for inspection. This is when drugs come into their own. Two injections later - one as an appetite stimulant and the other to get things moving along - Sushi started to come back to life. Life lesson: Never get stuck in your opinions. 

In desperation the day before, I had decided to contact Lily’s Kitchen to enquire about their organic cat food because it seemed it would be easier to persuade Sushi to eat something soft and pâté-like in texture than it would raw meat. I also bought her some probiotics to support healthy gut bacteria and intended to add a pinch of organic pysillium husk to her meals for extra fibre. At the time, I didn’t even know if Sushi would ever eat again. Lily’s Kitchen, sensing my distress, had sent complimentary samples of their cat food to me first class. Anyway, within three quarters of an hour of the vet leaving, Sushi was tucking into Lily’s Organic Chicken Dinner with relish. 

The next day Sushi passed something resembling a small, hard rock - the obvious cause of her discomfort - and within the hour everything was functioning normally again. Never have you seen more rejoicing over poo! Sushi now appears to enjoy Lily’s Kitchen dinners more than my lovingly prepared, fresh, organic meat - even with probiotic powder and pysilium husk added. Who am I to argue? Today, she is lively, chirrupy and content. Her coat is like silk and her breath as ‘fresh as a daisy’. Thank God, when it comes to taking responsibility for my family’s health, I fear the medics conditioning and stupidity more than I fear their disapproval! Some people might call it perverse, but my innate refusal to kowtow to a seemingly higher authority has again and again proven to be a lifesaver. Above all, I am so very grateful to Charlotte, Sushi’s new personal ‘physician’, who will hopefully help navigate us through any future cat crisis and who I think should be nominated for a ‘Vet With Heart’ award. Her professionalism together with her extremely gentle ‘first do no harm’ owner-empowering attitude to veterinary care, is a rare and precious find for any animal lover. When the Animal Doctor officially opens for business, Primal Plate will be celebrating the fact by baking this gorgeous girl a cake to show our appreciation. Local pet owners might want to take note.

Sushi fully recovered, enjoying being brushed!

Sushi fully recovered, enjoying being brushed!

Meanwhile, with Easter Sunday just around the corner, I am thinking about what we’re going to eat for our lunch. Today’s recipes for Cheddar, Herb & Mushroom Roulade with Red Wine Sauce are both taken from Rose Elliot’s book The Classic Vegetarian - although you’ll have to keep flicking between pages 34-37, 94 and 121 for instructions to cook. To help, I’ve brought both recipes together in one place for easy reference.

This is what I call ‘dinner party’ food. Just right for when you want something extra special for family and friends. To make things easy on yourself, cook the roulade in advance, then wrap it in tin foil and warm through in a hot oven for 15 minutes just before you want to serve it. Purple sprouting broccoli is my vegetable of choice. It’s a springtime seasonal star that’s just perfect with Cheddar, Herb & Mushroom Roulade with Red Wine Sauce because its dark green purplish hue sits so beautifully on the plate alongside the deep ruby red colour of the wine sauce. A truly elegant and impressive dish that’s every bit as tasty as a traditional Easter Sunday lunch but without a little lamb having to lose its legs. 

After the events of the past week do I need reminding that animals have a right to life and love as much as humans? No I do not! With this delicious festive meal, I wish everyone a happy, peaceful, vegetarian Easter.

vegetarian recipes primal plate.jpg

Cheddar, Herb & Mushroom Roulade With Red Wine Sauce (Serves 4)

Ingredients - for the roulade

Butter and very finely grated dry vegetarian Parmesan-style cheese for coating the base of the tin

60g organic full-fat soft ‘cream’ cheese

150ml organic single cream

4 large organic eggs, separated

200g organic Cheddar cheese, grated

3 tbsp of organic fresh herbs such as thyme, oregano and parsley

Sea salt and freshly ground black pepper

Freshly grated vegetarian Parmesan-style cheese to garnish, optional


Ingredients - for the mushroom filling

40g butter

600g mushrooms, cleaned and thinly sliced (I used a variety of organic & exotic mushrooms e.g. Chestnut, Shitake, Crimini, Enoki, Oyster and Beech) 

Sea salt and freshly ground black pepper 

Ingredients - for the red wine sauce

80g butter

2 organic shallots, finely chopped

2 tsps fresh thyme leaves, finely chopped

300ml red wine

45ml (3 tbsp) port, or other fortified wine

½ tsp vegetable bouillon powder

sea salt and freshly ground black pepper


Instructions to make the roulade

Pre heat the oven to 200℃ / 400 ℉ / Gas mark 6

Line a 22 x 12cm Swiss roll tin with nonstick paper. Grease the paper lightly with butter and sprinkle with the very finely grated Parmesan-style cheese.

Put the cream cheese into a large bowl, add the cream and mix until smooth. Beat in the eggs yolks one by one. Finally, stir in the grated cheese and the herbs and season to taste.

In a separate grease-free bowl, whisk the egg whites until stiff - but not so dry that you can slice them.

Gently fold the egg whites into the cheese mixture using a large metal spoon or a rubber spatula.

Pour the cheese and egg white mixture into the prepared tin, smoothing it to the edges. Tip: If you bang the tin down firmly onto a hard, flat surface this will help the mixture settle down evenly into the tin.

Bake until risen and just firm in the centre: 12 - 15 minutes.

Place a piece of nonstick paper large enough for the roulade onto a work surface close to the oven. Sprinkle it with vegetarian Parmesan-style cheese. 

Take the roulade to of the oven and turn it out, face side down onto the paper with a short side facing you. Peel the nonstick paper that was used to line the tin from the top of the roulade.

Allow the roulade to become cool to the touch before covering with the mushroom filling and rolling up. 


Instructions - to make the mushroom filling

Melt the butter in a large deep sauté or frying pan over a medium heat. 

Add the mushrooms and cook, stirring occasionally, until the mushrooms are tender and the liquid has evaporated: 12 - 15 minutes. Season to taste. 


Instructions to assemble the roulade

Cover the roulade base with the mushrooms and roll up as follows:

Spread the mushrooms over the base, leaving a border of about 1cm (½ inch) all round to make the roulade easier to roll.

Starting from a short side, firmly roll up the roulade - use the paper to help lift the base ‘up-and-over’ as you roll it.

Place the roulade with the seam underneath so it cannot unravel. Trim the ends if desired (I don’t bother) and sprinkle the top with more grated Parmesan-style cheese. 

The roulade may be served at once or reheated later (to reheat, see instructions below). 

Instructions - to reheat the roulade

Wrap in nonstick tin foil and place in a preheated oven (160℃ / 325℉ / gas mark 3) for 15 minutes.

Serve hot with red wine sauce. 


Instructions - to make the red wine sauce

Melt half the butter in a medium sized saucepan over a moderate heat and put the rest of the butter in the refrigerator.

Add the shallots and thyme to the pan, cover and cook for 5 minutes.

Add the wine, port wine and bouillon powder and season well. Bring to the boil. Cook until reduced by half. 

Meanwhile, cut the rest of the chilled butter into small pieces.

Strain the reduced sauce through a fine metal sieve into a small clean saucepan. Cover and set aside. 

Just before serving, bring the sauce back to boiling point, then take the pan off the heat and whisk in the cold butter, a little at a time, to make the sauce glossy. 

Serve immediately with the Cheddar, Herb & Mushroom Roulade.


Carbohydrate 13g Protein 25g - per serving of roulade with red wine sauce


Nut Roast

by Susan Smith in ,


2017 began in much the same way that 2016 ended… assisting Mirror Imaging with two back-to-back winter weddings and spending the rest of January up to my neck in legalese and paperwork. True, for the sake of our health and wellbeing I do still spend quality time in the kitchen devising good things to eat, but actually getting around to photographing the end result and writing up the recipes to share on Primal Plate’s blog has, over the past month, been a stretch too far. Sorry. 

With the start of the new year and a couple of pounds gained, I turned my attention away from the meaty feasts (organic and pasture-fed, no less) that we’d enjoyed over Christmas and reignited my appreciation for all things vegetarian. I know that generally nutloaf gets a bad press - at least with non-vegetarians - but I kid you not, this fabulously flavoursome Nut Roast could knock most meat dinners into a cocked hat. Healthy and chock-full of protein from an abundance of nuts, this Nut Roast has all the savoury heartiness of meat without the heaviness. Plus, it packs more taste, it costs less to make, it looks better on the plate and you can prepare it in advance. Served with my mouthwatering vegetarian gravy (recipe coming soon) that Sarah thought was so tasty it must have made with homemade chicken stock, some seasonal oca roasted with thyme (the nearest low-carbohydrate equivalent to roast potatoes) and tender stem broccoli, this low-carb, Primal, vegetarian meal is so good it verges on the genius.  

It’s equally delicious served cold with salad. 

Nut Roast (Serves 6)

Ingredients

50g raw organic pecans 

50g raw organic Brazil nuts 

50g blanched organic almonds

2 tbsp raw organic pumpkin seeds 

25g organic unsalted butter

3 large organic shallots, peeled and finely chopped

150g organic chestnut mushrooms, coarsely chopped 

50g raw organic cashews, coarsely chopped 

2 tbsp organic smooth almond butter

2 tsp Marmite

100g organic strong cheddar cheese - finely grated

3 tbsp organic parsley, finely chopped

1½ tbsp organic sage, finely chopped

400g tin organic chopped tomatoes, well drained

2 organic medium eggs, beaten

1 dsp Sukrin organic coconut flour

Celtic sea salt

Freshly ground organic black pepper

Organic watercress or chopped parsley to serve

Organic oca are part of the yam family and look a little like radishes when raw. When roasted in the oven they make a fantastic low-carb potato substitute, close in favour and texture to roast new potatoes.

Organic oca are part of the yam family and look a little like radishes when raw. When roasted in the oven they make a fantastic low-carb potato substitute, close in favour and texture to roast new potatoes.

Instructions

Melt 10g of the butter over a very low heat (or in a microwave). Grease a 400g /1lb loaf tin with the melted butter before lining with a long strip of non-stick baking parchment to cover the base and narrow sides of the tin. Grease the baking parchment too. 

Toast the pecans, Brazil nuts, blanched almonds and pumpkin seeds in a large frying pan over a low heat until nicely golden. 

Take the pan off the heat and allow the nuts/seeds to cool slightly, then whizz in a food processor until finely chopped.

Pre-heat oven to 190℃ / ℉ / Gas mark

Melt the remaining 15g of butter in a small frying pan and gently cook the chopped shallots for about 3-4 minutes until soft and beginning to turn golden. Add the chopped mushrooms to the pan and continue to cook for a further 5 minutes, stirring occasionally.

In a large bowl, combine the toasted ground nut mixture with the cooked shallots and mushrooms and the rest of the ingredients. Season with sea salt and black pepper and mix together well. 

Spoon into the prepared loaf tin and level off the top. Cover with a piece of buttered non-stick foil.

Cook for 45 minutes or until a skewer inserted in the middle comes out clean. Remove the tin foil - if the top isn’t evenly browned pop the nut loaf back into the oven, uncovered, for a further 5-10 minutes.

Cool for 15 minutes in the tin before loosening around the edges with a small knife and carefully turning out onto a warm serving plate. Peel away the parchment paper and cut into slices.


Carbohydrate 12g Protein 15g - per serving


Nutty Parsnip Gratin

by Susan Smith in , ,


I am fully “living life on the veg” courtesy of Riverford Organics, and I could not be happier with my regular supply of the freshest, tastiest organic produce that they deliver every Friday straight to my door. An absolutely brilliant service!

Notwithstanding my new-found addiction to drinking a large glass of freshly pressed juice every day - which I’m convinced is far more life enhancing than the proverbial ‘apple a day’ that’s reputed to ‘keep the doctor away’ - I’m having a ball creating new recipes from a plethora of organic fruit and vegetables that you can never reliably find on supermarket shelves.

Because eating Primal is what my close family prefers, we never succumb to eating white potatoes or even compensate very often with other high-carb root vegetables. However, last week I couldn’t resist ordering some new season parsnips for inclusion in my weekly Riverford box of goodies. When they arrived, I thought I’d go all out and make a main meal of them.

Totally delicious, this creamy Nutty Parsnip Gratin has a gorgeous sweet spiciness about it that pairs beautifully with salty Parmesan cheese and crunchy roasted hazelnuts. In fact, I think I’ve succeeded in elevating the humble parsnip to giddying new heights with this dish! Let’s just say, when you dive in with your fork you might not even recognise that you’re eating parsnips - it’s just the most perfectly balanced, tasty, autumnal meal that ticks all those cold-weather comfort food cravings without a potato or grain in sight. How good is that? 

Nutty Parsnip Gratin (serves 3-4)

Ingredients

500g organic parsnips (trimmed and peeled weight of approximately 3 large parsnips)

2 large organic shallots

300ml organic whole milk 

125ml organic double cream

1 dsp fresh rosemary leaves, finely chopped (about 2 decent sprigs of rosemary)

1 tsp English mustard

¼ tsp organic nutmeg, freshly grated 

1 tsp Celtic sea salt

80g Parmesan cheese (I used Gran Moravia vegetarian Parmesan-style hard cheese), finely grated

50g organic roasted, blanched hazelnuts, chopped

40g organic ground almonds

15g organic unsalted butter

Freshly ground organic black pepper


Instructions

Pre-heat the oven to 200℃ / 400℉ / Gas mark 6

Peel and finely slice the parsnips lengthways into 2-3mm thick strips using a mandolin. If the parsnips are large, first cut them in half across the middle, then cut the top half into quarters and using a vegetable peeler, trim away the fibrous core before slicing.

Peel the shallots and still using the mandolin, slice them very finely.

In a large, wide, lidded sauté pan heat the milk to scalding point (just below boiling) then add the parsnip and shallot slices, pressing them down into the milk (the vegetables won’t be completely covered at this stage).

Cover and cook over a medium-low heat for 4 minutes until the parsnips are soft but not broken up. Tip: Gently stir the vegetables around after 2 minutes to ensure that everything cooks evenly. Take off the heat and set aside.

In a medium-sized bowl, mix together the cream, rosemary, mustard, nutmeg and salt, then stir in half the grated cheese. Pour the mixture over the parsnips and shallots and gently combine everything together. Tip into a gratin dish, press down with the back of a spoon and level off the top.

In a small bowl mix together the rest of the cheese, ground almonds, chopped hazelnuts and a good grating of freshly ground black pepper. Scatter evenly on top of the parsnip mixture.

Dot all over with small pieces of cold butter and bake the gratin for 30 minutes until lovely-bubbly, crisp and golden.

Eat and enjoy.

Notes

Nutty Parsnip Gratin tastes special enough to serve as a vegetarian main course with all the trimmings on Christmas Day. It’s also a brilliant make-ahead vegetable side dish for carnivores - I imagine that served alongside something meaty, it would be an absolute winner.

It doesn’t matter so much for this recipe because you’re boiling the milk anyway, but because it’s kinder to cows and much healthier for humans, I only ever buy whole milk that’s raw and organic from Gazegill Organics This is what they say:

Here at Emma’s Dairy we believe that cows should have the freedom to roam, grazing our pastures and producing raw organic milk that is naturally high in omega 3. Our cows produce a natural amount of milk and are not intensified in any way to produce more, thats why our milk is rich in butterfat and protein. We do not homogenise our milk but believe that in leaving a cream line you can enjoy simply put an un-tampered with natural product that is full of natures best, we also offer raw organic milk and pasteurised milk as well as cream and offer UK wide delivery, we hope you enjoy it.” 


Carbohydrate 31g Protein 15g - per serving


Courgette Polpette

by Susan Smith in ,


I’ve rifled today’s recipe for Courgette Polpette (the Italian name for meatballs, which you pronounce pohl / PET / teh) from Hugh Fearnley Whittingstall’s River Cottage Baby and Toddler Cookbook. He in turn, adapted his recipe from the Italian cookery writer Ursula Ferrigno.

Unabashed, Primal Plate has adjusted the recipe again to convert it into very tasty, grain-free, low-carb finger food for grown-ups and children alike. Sarah and I have trialled these on the run between venues at Mirror Imaging weddings over the past two weekends and, it’s official, we both think these vegetarian nuggets of goodness are picnic fare extraodinaire! Piled into individual lunch boxes alongside sweet, organic cherry tomatoes and cubes of feta cheese, with a bamboo stick to spear them directly into our hungry mouths, it is the most delicious and sustaining, no-mess, packed lunch I’ve ever eaten!  

Easy to make and really, really yummy, these little nibbles would also be great served-up as canapés or as a vegetarian main course served straight out of the oven with homemade tomato sauce. Alternatively, serve them hot, warm or cold with a fresh Tomato Salad and/or our Speedy Seedy No-Grain Soda Bread.

In addition to being healthy and Paleo/Primal friendly, Courgette Polpette are a fantastic way to use up a glut of home-grown courgettes. In fact, if you don’t own an allotment, this is the time of year to make friends with someone who does! Demand for these moreish morsels could well outstrip the seemingly endless bounty of easy-to-grow courgettes that beleaguers most gardeners at the height of the growing season, which just happens to be now. 

In fact, I could happily eat Courgette Polpette ad infinitum for breakfast, lunch or supper. They will keep for several days in the refrigerator and as a stand-by treat for summertime get-togethers - and for busy wedding photographers - they’re an absolute winner. 

Courgette Polpette (makes about 24)

Ingredients

2 tbsp olive oil

2 organic shallots, finely chopped 

500g organic courgettes, cut into small dice

Grated zest of an organic lemon

1 medium organic egg, lightly beaten

30g finely grated parmesan-style cheese (or other well-flavoured hard cheese)

½ ball of vegetarian mozzarella, drained, dried and cut into small dice

50g organic pine nuts, lightly toasted

100g organic ground almonds

1 tbsp Sukrin reduced-fat coconut flour

1-2 tbsp chopped parsley

Sea salt and freshly ground black pepper

Olive oil or melted butter - for greasing

Instructions

Line a large baking sheet with non-stick tin foil and then brush over the surface of the foil with a little olive oil or melted butter.

Heat the oven to 200C / 390F/ Gas mark 6.

Dice the courgettes and chop the shallots. 

Whilst you’re preparing the vegetables, lightly toast the pine nuts in a small dry frying pan over a low heat - keep your eye on them, they can quickly turn from golden to burnt! When they're lightly toasted, take the pan off the heat and set aside to cool.

Heat 2 tablespoons of olive oil in a large frying pan over medium heat. Add the shallots and cook for 2-3 minutes until soft but not browned. Add the courgettes to the pan and continue to fry over a medium heat for a further 10-12 minutes until tender and golden. Drain on kitchen paper and set aside to cool. 

In a large bowl, combine the cooled courgette mixture with the rest of the ingredients, season well, then form into small balls the size of a walnut (you’ll need approximately 25g for each polpetta). 

Place on the baking sheet and bake for 15 minutes, until golden brown. 

Serve hot, warm or cold.


Carbohydrate 13g Protein 15g - per serving (approx. 2g carbohydrate per polpetta)


Happiness Soup

by Susan Smith in , , , ,


Here in the East Midlands you wouldn’t know we’re halfway through summer already. So much anticipation of balmy weather, so many disappointingly grey days. As a cook, I look forward to an abundance of seasonal summer produce that can be simply prepared and eaten outside. As part of team Mirror Imaging, we look to the skies for our most epic wedding shots and, as someone who hasn’t been on holiday for more than sixteen years, I am feeling bereft of summer sun this year. There’s no point in complaining, when summer doesn't deliver on its promise, it’s time to cook up the sunshine yourself.

For most people, yellow is a happy colour so it’s no accident that this bright, cheerful, sunshine-yellow, lemony broth has been entitled Happiness Soup. The inspiration and indeed its name is borrowed from Nigella’s recipe as featured in her book Nigella Summer. All I had to do was tweak the original version to make it grain-free and low-carbohydrate as well as something beautiful to behold. 

Easy to make and as gloriously golden-yellow as the midday sun, this light and lovely soup not only raises the spirits, it’s clean, fresh, citrus and anise flavour perks up the appetite too. 

If it doesn’t give you something to smile about on a dismal summer’s day, I don’t know what will!

Happiness Soup (Serves 4)

Ingredients

1 small organic onion, finely chopped

500 grams yellow courgette        

zest & juice of 1 organic lemon

40g organic butter (or for vegans 3 tbsp olive oil)

1 tsp turmeric

800 ml vegetable stock (or for non-vegetarians chicken stock) - see note below        

1 small cauliflower, florets only

Celtic sea salt

3-4 sprigs fresh tarragon, leaves only, finely chopped

Freshly ground black pepper


Instructions

The courgettes do not need to be peeled. Simply wash and trim the ends off before slicing them into 5mm (⅛ of an inch) rounds and then finely dicing them into very small confetti-like cubes. 

To make cauliflower ‘rice’, cut off the florets - you don’t need any of the stem - then blitz the florets in a food processor for about 30 seconds until it comes together into a powdery cauliflower ‘snow’. 

Melt the butter in a large saucepan over a medium/low heat. With the pan lid on, gently sweat the finely chopped onion in the butter for 8 minutes until soft and translucent but not coloured. 

Add the diced courgettes and the lemon zest to the pan and stir to coat. Cover with a circle of greaseproof paper (cut to fit the pan), put the pan lid back on, then cook on a gentle heat for about 5 minutes, stirring occasionally, until they've slightly softened.

Stir in the turmeric, the stock and 40ml of the lemon juice and then drop in the cauliflower ‘rice’. Cook, uncovered, for 6 minutes, or just until the courgettes and cauliflower ‘rice’ are tender. Taste for seasoning. Add a little more salt and lemon juice if it needs it. 

Leave to cool slightly before serving, then ladle into 4 pre-warmed soup bowls before adding a generous sprinkling of chopped tarragon on top of each bowl and a grinding of black pepper, if liked.


Notes

This soup is best eaten warm rather than hot.

For vegetable stock, I generally make up some Marigold vegetable bouillon concentrate with freshly filtered water. I then strain it - as I did here- to remove any re-hydrated bits of veg that would otherwise spoil the clean, good looks of my finished sauce or soup. Use homemade vegetable stock, if you prefer. 

For non-vegetarians, a chicken stock made from freshly filtered water and the concentrated juices leftover from roasting a chicken will add extra depth and flavour to the soup. 


Carbohydrate 12g Protein 5g - per serving


Sweet Potato Gnocchi With Sage Butter & Goats Cheese

by Susan Smith in , ,


Good news for all Primal/Paleo enthusiasts who still crave potatoes. Today’s blog post for sweet potato gnocchi offers all that’s best about the much-loved spud - golden and crisp on the outside, soft and fluffy on the inside - without going off-piste. These delicious little pillows of potato-like perfection have the heart of soft, light-tasting mashed potato and the soul of crispy, caramelised, umami-flavoured chips.

Sweet potatoes offer a healthier, lower-starch alternative to other potato varieties, but here I’ve tamed down their sweetness and cancelled out their higher water content with primal-friendly ingredients to mimic the taste and texture of regular potatoes. As a cook, there have been many occasions when I’ve thought that only potato can properly complete a meal that’s lacking the comfort and pleasure of something satisfyingly starchy. No longer. These sweet potato gnocchi have the density and depth of flavour I’ve been missing and are the perfect potato substitute for any meal crying out for chips, mash, roasties or croquettes. 

However, I think today’s recipe for Sweet Potato Gnocchi With Sage Butter & Goat’s Cheese is at its best presented as a gratifyingly simple, vegetarian main course. With just enough sweetness from the gnocchi to complement the saltiness of strong-tasting goat’s Cheddar, it’s a combo that’s so tasty you won’t even think about reaching for the ketchup! Also, these beauties are a brilliant dinner-party starter or, piled onto a platter with freshly grated goat’s Cheddar and crispy fried sage leaves scattered over, they will blow your guests away when handed around as a hot savoury canapé to accompany drinks. 

Unlike traditional gnocchi that’s made from regular potato and refined wheat flour, Primal Plate gnocchi are grain-free, potato-free and gluten-free too. They may require a little effort to make but the pre-cooked and cooled gnocchi ‘sausages’ can be stored, still in their cling-film wrapping, for up to 2 days before being cut into gnocchi-sized pillows and quickly fried off in butter. Finally, without compromise, my appetite for potato is satiated!

Sweet Potato Gnocchi With Sage Butter & Goats Cheese (Serves 6)

Ingredients

750g organic sweet potatoes (should yield about 500-550g sweet potato puree)

1 organic egg yolk, lightly beaten

200g organic ground almonds

50g Sukrin organic coconut flour

50g organic arrowroot powder

1½ tsp Celtic sea salt

100g full-fat organic soft cheese

40g organic butter

18 fresh sage leaves

100g Quicke's Goat Cheddar (I purchased this from Waitrose's deli counter) or Parmesan-style cheese, freshly grated - to serve

Freshly ground black pepper - to serve


Instructions

Pre-heat oven to 180°C / 350℉ / Gas mark 4

Place the sweet potatoes on a baking tray and bake for 45-60 minutes (depending on their size) until completely cooked through.

Remove the potatoes from the oven and whilst they’re still hot cut them in half, then scoop out the centres of each. Pass the sweet potato flesh through a fine sieve into a large bowl. Discard the skins.

Add the ground almonds, coconut flour, arrowroot powder, cream cheese, egg yolk and sea salt to the sieved sweet potatoes and mix everything together well. 

Cover and chill for 20-30 minutes in a refrigerator.

Bring a wide, deep pan of water to boil.

Divide the cooled gnocchi mixture into manageable portions (about 200g each). Roll each portion out between cling film into a 2 cm (¾ inch) thick long sausage. Twist the ends of the cling film together tightly then cook each sausage for 6 minutes in the boiling water.

At the end of the cooking time, remove the gnocchi sausage from the boiling water with the aid of two spatulas and lay each one down in an ice-cold water bath to cool down.

Once cool, remove the cling film and slice each sausage into little gnocchi ‘pillows’ i.e. about 2.5cm (1 inch) long pieces. Cover and keep chilled. N.B. They can be stored for up to 2 days in a refrigerator.

When you’re ready to eat, heat 40g grass-fed butter in a large frying pan set over a medium heat. Do not let the pan get too hot - you want the butter to foam, not burn. Sizzle the sage leaves for 1 minute, then remove from the pan and set aside. 

Top left: Gnocchi rolled into cling wrapped  'sausages'. Top right: Blanching in simmering water (put the lid on). Bottom left: In the ice cold water bath. Bottom right: Chopping the chilled Gnocchi 

Top left: Gnocchi rolled into cling wrapped  'sausages'. Top right: Blanching in simmering water (put the lid on). Bottom left: In the ice cold water bath. Bottom right: Chopping the chilled Gnocchi 

Now add the gnocchi pillows to the pan and fry them in the sage-infused butter until golden on the outside and light and fluffy in the centre. Depending on how many people you’re feeding, you may have to do this in several batches. N.B. It’s important that you don’t overcrowd the pan and if the butter starts to burn, clean the pan out and start afresh with more butter. When the gnocchi are nice and golden on all sides, lift them onto a warm plate lined with kitchen paper.

Serve the gnocchi hot with a generous amount of grated goat’s Cheddar sprinkled over and a good grinding of fresh black pepper. Garnish with the crispy sage leaves.


Carbohydrate 29g Protein 13g - per serving


Lemon Courgetti With Summer Vegetables & Tomato Salad

by Susan Smith in , ,


Celebrate summer, when it shows up, with an ‘Italian-style’ meal of healthy, seasonal deliciousness. The shops are filled with a cheap and plentiful supply of courgettes in July and August, so now is the time to make them into the brilliant, low-carb, pasta substitute popularly dubbed “courgetti”. This fresh, healthy and surprisingly substantial dish accompanied by a selection of the most vibrant of summer fruits - sweet tomatoes - is an amazingly flavourful way to enjoy a taste of Italy without the high-starch hit you get from eating regular pasta.  

My eldest daughter Elizabeth provided the inspiration for Primal Plate's tomato salad recipe. Last weekend she served up something very similar at an impromptu family BBQ and it tasted so fresh and looked so colourful that I was reminded how versatile a simply prepared and beautifully presented plate of tomatoes can be. This salad is a great way to lighten-up all manner of dishes, or perhaps to eat on its own with some fresh goat's cheese with grain-free bread to mop up the juices.

Quick, light and super-easy to make, this lovely combo is my idea of summer on a plate!

Ingredients - for the Lemon Courgetti with Summer Vegetables

300ml organic double cream

1 organic lemon, juice and finely grated zest

80g organic full-fat cream cheese

100g Parmesan-style cheese, finely grated

200g frozen peas

200g frozen baby broad beans

200g fresh asparagus tips

4 medium-large, firm, flat (not curved) chunky courgettes - size and shape matters!

small bunch of basil

sea salt and black pepper


Ingredients - for the Tomato Salad

600g ripe vine tomatoes - for interest and sheer good looks, choose from a selection of red or yellow cherry tomatoes, heirloom golden-orange, red and green vine tomatoes, baby plum tomatoes or the beautiful red and green Tigerella varieties

2 tbsp organic cold-pressed olive oil

2 tsp best-quality Balsmanic of Modena vinegar

sea salt and freshly ground black pepper

fresh basil leaves - to decorate

Instructions

Boil a kettle-full of fresh water. Pre-heat 4 individual pasta bowls.

Measure the frozen peas and broad beans into two separate heat-proof jugs or bowls. Pour the boiling water from the kettle equally over the peas and broad beans and allow to stand until they’re defrosted. 

Prepare the courgettes by washing them and spiralising into long thin spaghetti-like shreds - alternatively, this can be done with a knife by cutting them into long, thin strips.

Drain the defrosted peas through a sieve and tip them into a clean bowl. When the broad beans have cooled down, drain them too before popping them out of their tough outer skins between your finger and thumb straight into the bowl with the peas. 

Trim the bottom of the asparagus tips - it’s not necessary, but I also like to peel the bottom third of the stems with a potato peeler. Boil a second kettle of water.

Heat the cream with the lemon zest in a medium-large saucepan over a medium heat until it comes to the boil. Turn the heat down to simmer and continue cooking for 3 minutes. Cover and set aside.

Meanwhile, pour the boiling water into the bottom of a steamer, then put the asparagus tips into the steamer basket, cover and steam for just 1 minute. Remove the asparagus tips from the steamer with a slotted spoon into a bowl of cold water (or put into a sieve and run under the cold tap) to ‘set’ their bright green colour. Drain and dry on kitchen paper. Cut the asparagus into 3 centimetre pieces (or in half) and then add them to the bowl of peas and broad beans.

Reserve 4 sprigs of basil then strip the leaves off the rest of the basil stems and tear them into small pieces. Set aside.

Whisk the cream cheese, 80g of Parmesan and 30ml of lemon juice into the lemon infused cream and then over a medium heat bring the sauce back to just below boiling point. Taste, then season with sea salt and a good grinding of black pepper. Taste again and add a little more lemon juice if you think it needs it. 

Add the asparagus, broad beans and peas to the cream sauce and then over a low/medium heat, allow the vegetables to gently warm through - make sure the sauce gets nice and hot but don't let it boil.

Bring the water in the steamer back to the boil, add the courgetti to the steamer basket, cover and steam for just 1½ minutes - no longer. They need to cook just long enough to lose their raw-edge and get hot but not so long that they become limp and soggy. 

Immediately tip the courgetti out of the steamer basket onto a dry, clean tea-towel. Wrap them up in the tea towel to absorb as much water as possible.

Divide the drained courgetti equally between the 4 pre-heated serving dishes. Stir the torn basil leaves into the cream sauce and vegetables then ladle or spoon this on top of the courgetti - distributing the vegetables and sauce evenly. Sprinkle the rest of the grated Parmesan-style cheese over each serving and finish with a good grinding of black pepper and a sprig of fresh basil.

Serve immediately with tomato salad.   


Instructions - to make Tomato Salad

No need to peel or remove the seeds from the tomatoes. Wash and slice the larger tomatoes, removing the core at the stem end by cutting out a small ‘v’ at the centre of the bigger slices with the point of a small, sharp knife. Halve the cherry tomatoes.

Layer all the tomatoes attractively on a large platter. Lightly season with sea salt and then drizzle over the olive oil and balsamic vinegar. Add a grinding of freshly ground black pepper and decorate with green and/or purple basil leaves. 

Serve at room temperature for a simply delicious way to enjoy all the nutritional benefits of sweet, fragrant tomatoes. Yum!

Notes

If you prefer, you can substitute the frozen vegetables with 500 grams each of fresh peas and broad beans (weight before podding). Pod them, then cook in boiling water (or steam) for 3 minutes before draining well and adding to the cream sauce to keep warm. 


Carbohydrate 14g Protein 19g - per serving of lemon courgetti with summer vegetables

Carbohydrate 7g Protein 1g - per serving of tomato salad


Mediterranean Sauce With Sea Bream

by Susan Smith in , , ,


Whilst Britain voted to leave the EU last Friday we are still inseparably European. I for one am proud to celebrate the fact with this brilliantly versatile, sunshiny flavoured, fresh-tasting Mediterranean Sauce that goes with just about everything. Marvellous with organic grass-fed steak, tender-cooked chicken breast, fresh fish or vegetables this hearty tomato and sweet pepper sauce with black olives, baby capers and fresh oregano cannot fail to transport you to sunny Provence. We love it.

I don’t know who to credit this recipe to. Although I found it at Delia Online, on this website it states that the recipe is taken from A Year In My Kitchen by Skye Gingell. No matter, Primal Plate has tried and tested this recipe several times over and it’s a really healthy, speedy, elegant-looking dish that can be on the table within forty-five minutes. I have increased the quantities of some ingredients, which I think makes for a better balance of flavours and also a more generous portion of vegetables.  

As with the original recipe, I chose to showcase this Mediterranean sauce with fresh sea bream but it can also deliver a glorious Primal vegetarian feast served with roasted cauliflower and lemon-herb dressing dolloped over - please see Notes below.

Summer sun here we come!

Mediterranean Sauce With Sea Bream (Serves 2)

Ingredients

2 whole sea bream, weighing 300g -352g each, de-scaled and gutted (get the fishmonger to do this for you)

1-2 tbsp extra virgin olive oil

Celtic sea salt and freshly milled black pepper

2 shallots, peeled and finely chopped

1 medium/large yellow pepper, de-seeded and sliced lengthways into strips

300g large organic vine tomatoes, skinned and chopped (see Note below)

1 heaped tablespoon fresh oregano, finely chopped  

30g pitted black olives (I used Kalamata), cut into slivers

1 heaped tablespoon baby capers, rinsed and dried

1 heaped tablespoon organic tomato puree

75g organic cherry vine tomatoes, unpeeled but cut into halves

Curly leaf parsley - to garnish


Instructions

Pre-heat the oven to 190℃ / 375℉ / Gas mark 5

Boil a kettle of water.

Wipe the fish with some kitchen paper, then make 3 diagonal cuts across the fish (on both sides) and brush lightly all over with a little olive oil. Season inside and out with sea salt and freshly milled black pepper.

Place the fish on a flat baking tray lined with non-stick foil and transfer to the centre of the pre-heated oven for 15-20 minutes.

Meanwhile, heat the olive oil in a deep sauté pan over a medium/low heat. Add the shallots and gently cook with the pan lid on for a couple of minutes. Add the yellow pepper strips to the pan then cover and continue to soften the vegetables over a medium heat for another 5 minutes.

Add the chopped tomatoes, tomato puree, olives, capers and oregano. Stir everything together, then season with sea salt and freshly milled black pepper. 

Simmer gently with the pan lid half-on / half off for a further 10 minutes, stirring occasionally. 

Add the cherry tomato halves - gently stirring them into the rest of the sauce - then turn the heat down to its lowest setting and continue cooking for a minute or so until the cherry tomatoes are just warmed through and retaining their shape i.e. not collapsed.

To serve, place the fish onto two warm serving plates and spoon the sauce alongside. Garnish with a sprig or two of fresh parsley, if liked.  

For vegetarians and vegans, the Mediterranean Sauce also goes well with roasted cauliflower, served here with lemon-herb dressing 

For vegetarians and vegans, the Mediterranean Sauce also goes well with roasted cauliflower, served here with lemon-herb dressing 

Notes

To skin the tomatoes, use the pointy end of a sharp knife to prick the tomatoes all over several times. Put them into a heatproof bowl and cover in boiling water. Leave them for about 25- 35 seconds - no longer or they’ll start to cook - then using a slotted spoon lift them directly into a bowl of ice-cold water. Remove from the cold water and peel the skins off before proceeding with the recipe.

For simplicity’s sake, the vegetarian version of this recipe, Mediterranean Sauce With Roasted Cauliflower and Lemon-Herb Olive Oil Dressing will feature as a separate Primal Plate blog post soon.


Carbohydrates 12g Protein 69g - per serving


Asparagus Loaf

by Susan Smith in , ,


There’s been a seismic shift in my life situation over the past few weeks - and yes, it’s been every bit as horrible as it sounds. All self-care has gone out of the window and I’ve thrown my despairing food-blogging hands up in the air more than once because there has been no time for me to be creative. Nevertheless, with just a few more days left to get your hands on the last of the English Asparagus - the notoriously short season starts on St. George’s Day and ends on 21st June - I was determined to blog one of my all time favourite asparagus recipes. 

Thankfully, not much original thought was required. I’ve borrowed this recipe straight out of Rose Elliot’s book ‘The New Vegetarian Cookbook’ - although I’ve more than doubled the amount of ingredients than the original recipe calls for, because it just doesn’t make enough of this delicious savoury loaf to satisfy my greed for English asparagus.

If I wasn’t strictly Primal, I would most enjoy eating a couple of slices of this asparagus loaf for a lazy lunch in the garden on a warm summer’s afternoon, with a few Jersey Royal potatoes, homemade mayo, a fresh leaf salad and a glass of ice-cold wine. My food fantasy aside - and the fact that so far this year there’s been precious little summer weather to speak of - mangetout peas and some crisp lettuce will do just as nicely in place of potatoes for a lovely Primal-inspired summer dinner party dish. Alternatively, cut the loaf into tasty, canapés-sized mouthfuls to serve with drinks, transport to a glamorous picnic, or serve as a delicious vegetarian option as part of a buffet party spread. I think Asparagus Loaf is very, very delicious - anywhere, anytime, any place. 

Asparagus Loaf (serves 6)

Ingredients

1 medium onion, peeled and grated

225g Parmesan or Vegetarian Parmesan-style Cheese (I used Gran Moravia)

225g organic ground almonds (I bulk buy ground almonds online here)

4 large organic eggs

285ml single cream (I actually used 250ml organic double cream and made up the quantity with filtered water)

sea salt and freshly ground black pepper

freshly-grated nutmeg (I used about ⅓ of a whole nutmeg)

750g green asparagus (at least 30 decent-sized asparagus spears)

Sprigs of organic watercress - to garnish


Instructions

Boil a kettle of water. 

Set the oven to 190℃ / 375℉ / Gas mark 5

Snap the ends off the asparagus spears and using a potato peeler trim off the bottom third of the spears to make sure that all the tough part has been removed - you should end up with about 325-350 grams of trimmed asparagus.

Pour the boiling water from the kettle into a large pan. Put the trimmed asparagus into a steamer basket set over the boiling water, put the pan lid on and steam the asparagus for 3 minutes. Drain, refresh under cold water, drain well again and set aside. 

Grease a 2lb loaf tin with melted butter and line with a long strip of baking parchment to cover the base and short-end sides.

In a large bowl, mix together the grated onion, cheese, ground almonds, eggs and cream.

Season with sea salt (about a teaspoon), a generous grinding of black pepper and the nutmeg.  

Put a layer of this nut mixture into the base of the loaf tin, then neatly arrange a layer of asparagus spears on top. Continue in layers like this until all the ingredients are used up, ending with the nut mixture. 

Bake for 60-70 minutes, until risen and firm in the centre.

Cool completely in the tin, then slip a knife around the sides and carefully turn out onto a plate.

Strip off the paper. Cut into slices. Arrange the slices on a plate - or individual plates - and garnish with watercress.


Notes

It’s well worth taking the time to arrange the asparagus spears neatly into the loaf tin. 

You’ll end up with 4 layers of the nut mixture and 3 layers of asparagus spears in your loaf tin, so try to split your ingredients evenly upfront. When baking this for the blog, I threatened to run out of the nut mixture for the final layer. From experience I know that If the top nut layer is too thin, when the loaf is cut into slices it will tend to break off. Annoyingly, I also ended up 2 asparagus spears short, which then had to be steamed separately! 

Season carefully as Parmesan cheese tends to be salty.

If you’re making canapés - makes about 48 - cut the slices neatly again into thirds.

Although leftovers keep well in a sealed container in the fridge, if the size of this loaf is too much for your needs, simply halve the ingredients and bake in a 1lb loaf tin for 45-60 minutes. 


Carbohydrates 11g Protein 28g - per serving


Primal Pronto Drop Scones

by Susan Smith in , , ,


Light, versatile and so quick to make, these little fluffy cushions of loveliness can be served with either sweet or savoury dishes whenever you fancy something bready to eat. I like them for breakfast - either topped with a little raw honey, maple syrup, fresh berries or 100% fruit spread - though my real ‘soft-spot’ is for old fashioned marmalade, because it brings back memories of my childhood. 

Sent off to boarding school at five years old, I could never seem to get enough food to eat! It was here that I was introduced to Robertson’s Golden Shred marmalade with their (now politically incorrect) Golliwog branding, which included beautifully made enamel brooches to collect and pin to the lapel of my school blazer. Overly sweet and unsophisticated it may have been, but back then, much like Paddington Bear, marmalade was my hunger monster’s saviour! 

School breakfasts were usually our choice of pre-packaged cereal (Sugar Puffs for me please!) followed by plates stacked high with yesterday’s scantily ‘buttered’ (with Stork margarine, I fear), pre-sliced white bread. It seemed to me that magic marmalade could transform these half-stale offerings into something rather nice that temporarily filled me up. Teatimes were similarly skewed in favour of high carb foods. Bread with jam or chocolate spread, a banana and soft, sticky buns - the sort topped with glacé white icing. We didn’t mind! These are sweet treats as far as children are concerned and, for me, also a real source of comfort that helped me deal with the stress of being away from home.

Unfortunately, overloaded with wheat, gluten and sugar, young children are particularly vulnerable to tummy bloating, clogged-up systems and chronic constipation. Our guardians must have had an inkling because every morning they would check to see if we were ‘regular’ by keeping a 'poo log'! The ‘little me’ thought it most prudent to try and save face when asked the question, so I’d always answer in the affirmative. Unfortunately, I didn’t realise that no amount of toilet paper rammed down the loo would disguise the fact if I’d lied! I’d only know I’d been rumbled when I was given All-Bran for breakfast instead of my favourite cereal. My blushes weren’t spared either. An uninteresting bowl of roughage foisted on a child lets everyone know where their bowels are at. I was embarrassed and ashamed - as if it was my fault! Scarred by this early life experience, I was still eating what I thought was a mandatory bowl of All-Bran every morning up until my thirty-eighth birthday! 

Being regularly fed massive amounts of refined, processed, high carbohydrate foods not only caused my digestive discomfort, but also nagging hunger too. I was part of an experimental dietary disaster promulgated by the food industry in collusion with public health advisers, which in my view was, and still is, tantamount to child abuse because… 

Normally when you eat some food your blood sugar goes up and your insulin levels rise to get the nutrients into your body cells. Once this work is done, your blood sugar goes back to normal. All is as it should be and you’ll only get hungry again when you need more energy. However, when you eat certain foods that contain a lot of sugar and carbohydrates, your blood sugar sky-rockets. In response, your body releases inordinately high amounts of insulin to get the sugar inside your cells. Once your blood sugar spikes, the excess insulin, which is far more than your body needs, continues affecting your blood sugar way and beyond just normalising it. Consequently, your blood sugar continues to plummet much lower than it’s supposed to. At which point, your brain then tells you you’re still hungry! Unbelievably, as a child, in an attempt to satisfy these constant hunger cravings I resorted to eating Germolene after dormitory lights out! By the time I was eleven I was, unsurprisingly, quite porky!

Fast forward almost sixty years, and today’s recipe for Primal Pronto Drop Scones served with orange fruit spread is my idea of heaven. This is bread and marmalade revisited in satisfyingly good taste with no nasty consequences. As warm and as soft as a hug, these high protein, low-carb, nutritious Primal Pronto Drop Scones a.k.a Scotch pancakes served straight from the pan, showcase all the comfort factor of freshly baked or toasted bread with the crunch of pumpkin seeds. Grain-free and gluten-free, and loaded up with tangy, low-carb, organic orange ‘marmalade’ served with a plentiful supply of freshly brewed coffee, they are one of the things I most love about being a grown-up. Oh, and they are really filling too!  

Primal Pronto Drop Scones (make about 16)

Ingredients

150 g organic ground almonds

50 g organic tiger nut flour

2 tbsp organic coconut flour               

2 tsp baking powder

½ tsp sea salt

250 ml raw organic full-fat milk (or homemade, unsweetened almond milk)

3 eggs, beaten 

30 ml organic tiger nut oil (or coconut oil, melted)

2 drops organic liquid stevia

50 g organic pumpkin seeds

1 tbsp organic tiger nut oil (or coconut oil) - for frying

Instructions

In a large bowl, combine the ground almonds, tiger nut flour, coconut flour, baking powder and sea salt together with a whisk.

Measure out the milk into a jug then add the beaten eggs, liquid stevia, and tiger nut oil.

Make a well in the centre of the dry ingredients and slowly pour in the wet ingredients, whisking the mixture as you go. Keep whisking until the mixture becomes a thick, but still pourable, smooth batter - no lumps please! 

Set aside for a minute or two to allow the coconut flour to fully thicken out the mixture. If the batter then seems too thick to pour thickly from a spoon or ladle, add a little filtered water. When you’re satisfied that the batter is of a thick ‘dropping’ consistency, stir in the pumpkin seeds. 

Place a smidge of oil in a large, shallow non-stick frying pan and set over a medium heat. When hot (takes about 2 minutes), spoon small pools (heaped tablespoons) of the batter into the pan, spacing them well apart - no more than 2 or 3 pancakes at a time - making each pancake about 6 centimetres (2.5 inches) in diameter. 

Cook for about 1½ - 2 minutes until the underside is golden brown, then using a flexible, thin-edged silicon spatula to help you, carefully turn them over and cook for 1½ - 2 minutes on the reverse side. 

Turn onto warmed plates and serve immediately with either no-added-sugar 100% fruit spread, fruit puree, fresh berries, a drizzle of honey or maple syrup. 


Notes

Primal Pronto Drop Scones are every bit as good served alongside a cooked breakfast, a bowl of soup, or curry. Alternatively, spread lavishly with savoury toppings e.g. Carrot Hummus or a feisty tomato and avocado salsa for a filling snack or starter. Or, make them into small ‘blini-sized’ canapés and serve with drinks.  

Whilst these drop scones are very quick and easy to make, you may find you need to cook several batches before you get fully acquainted with the optimum temperature (medium/low not medium/high) and exact cooking times (keep checking their doneness' after 1½ minutes) to get them light, fluffy and perfectly golden on both sides. N.B. Let the drop scones firm up just enough for you to turn them over without the uncooked batter running off the top surface when you do. It takes a little practice!  


Carbohydrate 3g Protein 4g - per pancake


Caramelised Onion Soup With Gruyere

by Susan Smith in , ,


Who can resist a simple, savoury broth with melting cheese? Not me! Last week Sarah succumbed to a nasty cold virus so I upped the ante on her intake of vitamins and minerals by replacing our usual pre-dinner glass of wine with either a green smoothie or a comforting bowl of fresh vegetable soup.

Sarah was never a big fan of onion soup until I persuaded her to try this healthy, restorative, Primal variation of traditional French onion soup - no crouton, but still lots of cheese on top of caramelised onions sat in a deeply flavoured golden broth, with just a touch of apple brandy for medicinal purposes. Good call! I told Sarah there is great healing power in onions (it’s true!), though neither of us are willing to eat our onions raw and I think she would have definitely drawn the line at using halved raw onions as air purifiers (reputedly, they kill off airborne germs/bacteria), or more bizarrely, sticking one inside her sock at night to pull the toxins from her body to help her heal! Instead, I settled on making her this delicious soup. 

Apart from slicing what seems to be a copious amount of onions - trust me, four large onions isn’t too many because they melt down to a quarter of their original volume during cooking - there’s very little ‘hands-on’ time involved in making this soup. True, it can take up to 45 minutes of slowly, slowly sweating the onions down in butter to tease out their natural sweetness and to caramelise them into a deep mahogany-brown, meltingly-soft conglomeration of intensely flavoured oniony goodness but, apart from the occasional stir, they can be more or less left alone to do their thing whilst you attend to other matters.  

Caramelised Onion Soup With Gruyere is much healthier than French onion soup because it doesn’t have the classic bread crouton submerged in it. And, whether you’re feeling under the weather or not, it’s also a lot easier to eat when you don’t have to chase unwieldy pieces of soggy bread around your bowl with a spoon! Tastewise, this simple yet sophisticated soup loses nothing in translation. Sweet, succulent and intensely umami, it’s a surefire recipe for success. 

So, don’t wait to catch a cold. This fabulous soup is a cheap, low-carb, health-boosting food that goes way beyond the curative powers of onions. Deeply flavoursome, without any of raw onion’s lingering pungency (I do so hate the smell of onion/garlic breath!), it’s a heart-warming bowl of soft, sweet loveliness incapable of offending anyone. What’s not to love? I hope you will enjoy it as much as Sarah did. 

Caramelised Onion Soup With Gruyere (Serves 4)

Ingredients

4 large organic onions, very finely sliced (I used this mandolin slicer - a bit more expensive to buy, but worth every penny)

50g organic unsalted butter

1 tsp organic raw coconut palm sugar

40ml Calvados (apple brandy)

1 litre well-flavoured stock 

1 bay leaf

2 tbsp fresh thyme, leaves only

1 tbsp organic tamari (I used Clearspring)

sea salt and freshly ground black pepper

handful of fresh parsley, very finely chopped - to serve

80g Gruyere, finely grated (or vegetarian alternative, see notes below)


Instructions

Melt the butter in a large pan. Add the sliced onions, sprinkle over the coconut palm sugar and add a small pinch of sea salt. Stir well to ensure the onions are evenly doused in the butter, then cover with the pan lid and sweat down very gently over a low heat for 20-25 minutes, stirring occasionally, until the onions are soft and translucent, but not browned.

Turn the heat up to medium and continue cooking for a further 15-20 minutes, stirring from time to time, until the onions are deep golden-brown, caramelised and sticky.  

Turn the heat up to high. Add the apple brandy and continue cooking 1-2 minutes more until the liquid is reduced and the alcohol has evaporated. 

Pour in the stock then add the tamari, bay leaf and thyme and bring to the boil. Check the seasoning, adding a little more sea salt, if required.

As soon as the broth has reached boiling point, turn the heat down to low and simmer the soup, uncovered, for 20 minutes. At the end of the cooking time, discard the bay leaf.

Ladle the onion soup into four pre-warmed bowls, dividing it equally between them. 

Sprinkle with the grated Gruyere and finish with a grinding of black pepper and the chopped parsley. Serve piping hot. 


Notes

The stock I used on this occasion was a nutritious, homemade chicken bone broth made from the carcass of an organic chicken I’d previously cut up to make pet food for my cat Sushi. Waste not, want not! However, if you’re strictly vegetarian, or don’t have any bone broth, it will still taste good with a simple stock made from freshly filtered water and organic vegetable bouillon powder.

Gruyere D.O.P. is the preferred cheese for making the classic garnish of cheese-topped croutons for French onion soup for good reason - it melts beautifully and has a deep, intense, nutty flavour. For non-vegetarians, Gruyere is the perfect accompaniment to Caramelised Onion Soup. 

Followers of the Paleo diet will enjoy Caramelised Onion Soup without any cheese, whilst strict vegetarians will want to substitute a cheese that isn’t made with animal rennet. For vegetarians I recommend using tasty, tangy, Parmesan-style Gran Moravia or a strong-tasting, organic, vegetarian-friendly Cheddar instead of Gruyere. 


Carbohydrate 10g Protein 8g - per serving


Mushroom & Three-Cheese Pizza

by Susan Smith in , , ,


Last week, when Sukrin tweeted the idea of making pizza with their ‘just add water’ Chia & Hemp bread mix I couldn’t resist giving it a go! 

Notwithstanding that low-carb practitioners and the gluten intolerant are particularly susceptible to temptation, we all seem to get cravings for pizza. Unfortunately, I also know far too many other people who complain they’re fat and unwell but won’t give up eating grains (bread, pasta, rice and pizza) and doggedly refuse to cook for themselves at home. In a last ditch effort to convince them that not everything that looks stylish and tastes delicious is laboriously difficult to prepare and cook, this Mushroom & Three-Cheese Pizza recipe should be universally appealing! 

Though probably not strictly Primal or indeed ‘proper’ pizza - because I’ve deliberately left homemade tomato sauce out of the equation to save you the bother of making one! - it is nevertheless an extremely low-carb, satisfyingly healthy, cheesy pizza ‘fix’ that everyone can enjoy. We love it with a glass of Chianti or icy-cold Pinot Grigio.  

Mushroom & Three-Cheese Pizza (Serves 4)

Ingredients - for the base

210 g pack of Sukrin Chia & Hemp Mix

250 ml cold filtered water

1 dsp fresh rosemary leaves, finely chopped


Ingredients - for the topping

225 g organic chestnut mushrooms

30 g organic unsalted butter

sea salt 

freshly ground black pepper

2 dsp fresh rosemary leaves, finely chopped

120 g soft goat’s cheese, without rind (I used Sainsbury’s Taste The Difference Goats Cheese and removed its rind before dicing into small pieces)

125 g organic vegetarian mozzarella

50 g vegetarian Parmesan-style cheese (I used Gran Moravia)


Ingredients - to serve

40 g organic wild rocket 

8 large fresh basil leaves 

1 dsp organic, cold pressed, extra virgin olive oil

Balsamic vinegar of Modena - for drizzling

The part-cooked, grain-free pizza bases, topped with mushroom and cheese, before returning to the oven 

The part-cooked, grain-free pizza bases, topped with mushroom and cheese, before returning to the oven 

Instructions

Cut the base of the stems off the mushrooms and wipe them clean with a damp paper towel. Cut the mushrooms into thick slices.

Warm the butter in a large non-stick frying pan over medium-high heat. Add the mushrooms and cook, stirring occasionally, until tender and tinged golden-brown and the majority of the juices in the pan have evaporated (about 5 minutes). Take off the heat, season the mushrooms to taste with sea salt and freshly ground black pepper. Cover and set aside.    

Preheat an oven to 200℃ /  400°F / Gas mark 6.

Tip the Chia & Hemp mixture into a medium sized bowl and add the filtered water and the finely chopped rosemary. Stir everything together well with a fork and allow to stand for 3 minutes (as directed on the packet)

Form into 4 x 15 cm / 6” ‘mini’ pizzas. The best way to do this is to divide the bread mixture into 4 equal portions (weighing approximately 105 g - 110 g each) before placing each piece of dough in the centre of a 15 cm / 6” non-stick baking parchment circle (4 baking parchment circles in total).

Using a sheet of cling film placed on top of the dough to stop it from sticking to you or the rolling pin, flatten it down - first with the palm of your hand and then rolling out evenly - into a round pizza shape that just comes to the edges of the parchment circle. Lift or slide the pizza, still on its parchment paper, onto a baking tray.  Repeat to make 4 pizzas.

Bake in the pre-heated oven for 15 minutes.

Meanwhile, grate the Parmesan-style cheese and crumble or cut the goat's cheese into small pieces. Lastly, drain the mozzarella cheese, then coarsely grate it onto a plate lined with paper kitchen towel (this soaks up any milky liquid that may ooze from the cheese when it’s left to stand). If not using immediately, keep the prepared cheeses covered and refrigerated on 3 separate plates. 

After the pizza bases have had their first baking, remove from the oven. Whilst they're still sat on the baking tray, top the pizzas evenly with grated mozzarella, goat’s cheese and mushrooms. Don’t take the topping right to the edges of the pizza bases - leave a 1.5 cm gap all the way round to allow the cheese to melt and spread out in the heat of the oven without it running off the top of the pizzas. Sprinkle over the rest of the chopped rosemary and finally, add an even layer of Parmesan-style cheese divided equally between each pizza.

Put the baking tray back into the oven and bake the pizzas for a further 10-12 minutes until the cheese is meltingly hot and bubbly and the edges of the pizza tinged golden-brown. 

During this final cooking time, finely slice the basil leaves and mix them with the rocket. Dress lightly with olive oil. 

Remove the pizzas from the oven. Wait for 1-2 minutes then, with the aid of a flat spatula, carefully remove the pizzas from their paper circles. Put the pizzas onto 4 warmed serving plates. 

Pile equal quantities of the dressed rocket and basil leaves on top of each pizza and drizzle over a little real Modena balsamic vinegar before serving. 


Carbohydrate 5.5 g Protein 16g - per pizza