Hot Bitter Chocolate Sauce

by Susan Smith in ,


I have nothing to say today except Hot Bitter Chocolate Sauce poured over No-Sugar, Old-Fashioned Vanilla Ice Cream is a match made in heaven.

With high temperatures and sunshine forecast for this weekend...

Make. Eat. Enjoy.

hot chocolate sauce.jpg

Hot Bitter Chocolate Sauce (serve 4)

Ingredients

75g of very dark organic chocolate, broken into small pieces (I use 85% raw chocolate chips - see Notes below)

10g organic unsalted butter 

85ml organic full-fat milk  (I used whole raw milk from Gazegill because it’s the only milk I ever buy)

50ml organic double cream

4-6 drops organic liquid stevia, if required

Instructions

Place the pieces of chocolate and butter in a glass heatproof jug or bowl.

In a saucepan heat the milk and cream to just under boiling point then pour over the chocolate and butter, stirring until all of the chocolate has melted.

Pour the chocolate mixture back into a clean pan, add liquid stevia if using and gently heat, whisking constantly until completely smooth, thick and hot but not boiling. N.B. Do not allow the chocolate sauce to overheat as this will cause it to separate.

Serve immediately spooned over ice cream.

Notes

Buying high quality organic chocolate chips saves the potentially messy business of breaking or chopping a solid bar of chocolate into pieces.

The chocolate for Hot Bitter Chocolate Sauce should be at least 75% cocoa solids but a higher percentage dark chocolate is much better. To minimise sugary carbs, use an 85% chocolate and judiciously add a few drops of organic liquid stevia - a single drop at a time - to taste. Don’t go overboard by making your chocolate sauce sickly-sweet. Remember, you’re aiming for ‘bitter-sweet’ to complement an already sweet vanilla ice cream. Anything less than 85% chocolate shouldn’t need any additional sweetening at all!

Fat 18g Protein 2g Carbohydrate 8g - per serving of hot chocolate sauce

Total Fat 42g Protein 5g Carbohydrate 13g - per serving of ice cream & hot chocolate sauce


3-Minute Macadamia Nut Oil Mayonnaise

by Susan Smith in


My definitive 3-Minute Macadamia Nut Oil Mayonnaise is a real foodie staple in my house and very quick to make! Packed full of goodness and healthy fats, there’s nothing to fear from having an extra spoonful. In fact, once you’ve stocked up on the necessary ingredients it is hard to see why you’d bother with the unhealthy shop-bought alternative, which tastes artificial and cloying in comparison.

mayonnaise.jpg

I make a batch most weeks, if not more often, and it’s the perfect side dip and sauce for a whole range of dishes. It’s especially useful as a sandwich filler, perhaps with some cold roast organic chicken stuffed into my Keto Dinner Rolls.

The health benefits of Macadamia oil are well documented and its flavour isn’t too strong, which makes it the perfect mainstay for this mayo recipe.

primal plate macadamia oil.jpg


3-Minute Macadamia Nut Oil Mayonnaise

Ingredients

large organic eggs

2½-3 tbsp organic lemon (or lime) juice, freshly squeezed

1 tsp organic Dijon mustard 

½ tsp Himalayan pink salt

freshly ground organic black pepper

1-2 drops organic liquid stevia 

200 ml cold pressed macadamia nut oil

50 ml organic extra virgin olive oil

Instructions

Place all the ingredients into a tall, narrow container.

Using a hand-held stick blender, blend everything together until it emulsifies into a pale, creamy mayonnaise. Takes about 30 seconds!

Taste and add a little more lemon/lime juice and seasoning, if liked. 

Transfer to a glass container and seal with an airtight lid. 

Store in a refrigerator and use within 7 days.

Notes

Don’t worry if the mayonnaise seems a little on the runny side when it’s first made. It thickens up to the perfect consistency, when chilled down in a refrigerator. 


Gourmet Beef Burgers

by Susan Smith in , ,


Almost every evening after dinner, we go for a three mile walk around the outskirts of the village where we live. Aside from helping us to attain a self-imposed daily fitness goal of at least 10,000 steps, it’s a wonderful opportunity to say ‘hello' to numerous four-legged friends that we regularly meet and greet along the way. Amongst them, four horses, some special canine characters - Star, George, Rosie, Eric, Oscar and Alfie to name but a few - grazing sheep, the llamas that live with the sheep to protect them from foxes, and numerous cats who, when they see Sarah approach, literally run over to her to be fussed and stroked. There’s a suggestion of Walt Disney about our walks…save for a couple of spoilers.

The first is that one of ‘our’ horses is old, alone and extremely dirty. Her mucky face, constantly weeping eyes and un-groomed body attracts hoards of flies that readily exploit her poor condition and clearly irritate her beyond measure. She is my favourite. A gentle soul who, when called, snorts, nickers and blows us greetings as she slowly and tentatively makes her way from the farthest end of her field to receive the healthy snack of organic apples and carrots that awaits her. Until last week, we thought she was incapable of moving any faster, but then she surprised us. One evening after she’d been fed, she lay down on the ground in front of us and did what can only be described as a ‘victory roll’ of appreciation. The next day, as we walked away, she came with us - galloping at full speed alongside the hedge separating her field from the lane where we were continuing our walk. Truly heart-warming! It’s clear to us that almost all animals love and want to be loved.

The second is the bullocks that used to stand cheek-to-jowl in the adjacent over-crowded shed to watch our nightly horse feeding ritual almost certainly craved some loving act of kindness. Sadly, it wasn’t ours to give. These permanently confined sentient beings were kept for months on end, unable to move freely and without access to fresh grass even at the height of last summer’s heatwave. We always stopped to talk to them and, looking into their soulful eyes, their boredom and neglect was almost tangible. They’re gone now…we presume raised for beef and slaughtered. Although more fortunate than factory-farmed animals, the unnatural way these animals were forced to live is a moral mistake that leaves us with very little appetite for meat.

For the sake of Sushi the cat, whose health naturally depends on meat and fish, I’ve had to come to terms with the fact that all animals survive and thrive by the seemingly barbaric act of killing other animals lower down in the food chain. Twice, through dietary interventions I’ve brought her back from the brink of “incurable” conditions that, in the vet’s opinion, warranted euthanasia. If food is medicine, chicken bone broth appears to be an elixir for health and longevity. Feeding it to Sushi every day for the past two years has seemingly transformed her back to ‘kittenhood’…or so you’d think, if you met her. Her coat is shiny, her appetite hearty and her energy levels amazing. Stands to reason, whatever she’s having, we all need some of it!

The Primal food laws are: Eat whole, real foods, avoid unnecessary carbs and don’t fear fat and animal protein. We prefer to eat a primarily plant-based diet but Sushi’s remarkable recovery has persuaded me to make my peace with eating more animal protein. As well as a regular supply of chicken bone broth for Sushi and ourselves, I also cook a couple of meals a week that centre around organic, grass-fed red meat (primarily for its iron and vitamin B12 content), free-range organic chicken or sustainably-caught wild fish (for Omega 3 fatty acids). Animal products are only as nutritious as the food they are fed on and the care they get while being raised so it behoves health-conscious, compassionate cooks to put their money where their mouth is and support organic farming. Buying organic food is not expensive when you factor in the extra cost, time and dedication that organic farmers expend in producing nutritionally dense meat, milk, eggs and cheese from animals that are raised in a natural environment with full consideration for their welfare.

Today’s post for Gourmet Beef Burgers is a celebration of ‘Organic September’. The award-winning recipe for the ready-made beef burgers isn’t mine but it does provide the perfect opportunity for a well-deserved shout out for both Brown Cow Organics and Abel & Cole

For convenience, I buy Brown Cow’s Guernsey beef burgers from Abel & Cole. Unfortunately, when they arrive vacuum-packed they look more like beef ‘splats’ than the gourmet burgers featured on Brown Cow Organic’s website! First impressions count, so the first job is to quickly re-shape them. Note: Any gourmet burger worth its salt must have depth to it to fully appreciate its juicy succulence when cooked and should only be defined “gourmet” if it requires ludicrous amounts of paper towel or napkins to eat it!

For maximum gustatory pleasure, the toasted keto bread rolls and homemade basil mayonnaise are mandatory. Not a problem since both are best made in advance. To finish, just whiz a large handful of fresh basil leaves into homemade mayonnaise a couple of hours before serving and toast the halved bread rolls in a dry griddle pan at the same time you’re cooking the burgers.

After selecting your preferred salad accompaniments, e.g. lettuce, watercress, rocket, slices of tomato, radish, avocado or cucumber, you’re ready to do an ‘assembly job’. I like to stack the ingredients ‘sky high’ - to the extent that it usually requires a bamboo skewer to hold everything together. Making them visually enticing is the primary objective, not ease of eating! Only Sarah ever manages to work her way through an entire burger whilst holding it in her hand. But even if you can hold it together, there’s no chance of being la-di-dah when tucking-in to one of these bad boys! 

Fast, fun food doesn’t have to be ultra processed junk. Very satisfyingly (to me at least), these keto-friendly Gourmet Beef Burgers are light years away from a ‘Big Mac’ or the ironically named ‘Happy Meal’ for kids. There’s nothing ‘happy’ about filling a child’s belly with beef from cows raised on GM crops. Or encouraging them to eat a disturbingly sweet-tasting burger bun made from damaging-to-human-health ingredients such as high fructose corn syrup and/or sugar, bleached wheat flour (genetically modified to withstand being sprayed with Glyphosate - a herbicide proven to cause cancer), toxic soybean and canola oils (also genetically modified). Or turning a blind eye to the pro-inflammatory effects of the polyunsaturated vegetable oil that Mackie D’s use to cook their fries. What you need to know is that MD’s fries aren’t just potato, salt and oil as you might imagine, but are manufactured with seventeen other “shocking” ingredients. Still “lovin it?” I thinketh not!

Whereas, Sarah recently found herself spontaneously retching at the mere smell of a McDonalds (quite rightly!), she would tell you that these Gourmet Beef Burgers are one of “the best meals ever!” Serve them at an informal gathering of friends or family, perhaps with some low-carb ice cream for dessert, and I doubt you’ll hear any dissenting voices drowning out enthusiastic grunts of approval.

Sarah’s photos are probably the best way to show you how to make these Gourmet Beef Burgers. Have fun!

grass fed organic burgers.jpg

Gourmet Beef Burgers (serves 4)

Ingredients

2 packs (2x 180g) Brown Cow Organics Guernsey Beef Burgers

2 tbsp organic, grass-fed gheefor frying 

4 keto bread rolls

Ingredients - to serve

Salad e.g. lettuce, cucumber, tomatoes, radish, avocado, watercress, rocket etc. 

4 heaped tbsp organic mayonnaise (preferably homemade - see Notes below)

10 g fresh organic basil leaves

Plus,

4 mini bamboo skewers - optional

Instructions

Pre-make the keto bread rolls and 3-minute mayo up to 24 hours in advance.

Several hours before you intend to eat, re-shape the ready-prepared portions of beef into burgers about 3.5” in diameter and x 0.75” deep. Cover and refrigerate until half an hour before you want cook them. Then take them out of the refrigerator and let them sit at room temperature.

Whilst the burgers are ‘coming to’ prepare the salad ingredients, cover and set aside.

Using a hand-held stick blender, combine the fresh basil leaves and mayonnaise together until smooth and green. Set aside and keep cool.

Melt the ghee in a large frying pan over a high heat. Meanwhile, halve the bread rolls and place them cut side down into a dry frying or griddle pan set over a medium-hot heat.

When the ghee is fully melted and sizzling, place the burgers into the pan and fry for 4 minutes. Carefully turn with the aid of a spatula and cook the other side for another 4 minutes.

From time to time, check the keto bread rolls. There’s no need to turn them over - you just want them hot and toasty.

organic burger recipe.jpg

Once the beef burgers have been fried on both sides for an initial 4 minutes, flip them over again and cook the first side for further 2-4 minutes. Flip again to cook the other side for 2-4 minutes more. N.B. Total cooking time is 12-16 minutes, depending on whether you want your burgers to be slightly pink in the middle or completely cooked through. If in doubt, use a sharp knife to cut into one to check that it’s done to your liking.

Place the bottom halves of the toasted bread rolls on to 4 warm serving plates. Build as much height as you can by layering the salad on top of the beef burger. Finish with a large dollop of basil mayonnaise before pressing the other half of the bread rolls firmly down on top.

Pass the problem of imminent collapse over to your guests by skewering the burgers together from top to bottom with mini bamboo skewers.

Serve with plenty of paper napkins and don’t mind messy eating!

Notes

I’ve updated and improved Primal Plate’s original 3-Minute Mayonnaise recipe by changing-up the oils and altering their amounts. The rest of the ingredients and instructions remain the same. Here’s the revised recipe (with changes in bold):

3-Minute Macadamia Nut Oil Mayonnaise

Ingredients

2 organic eggs 

2½ tbsp organic lemon juice, freshly squeezed

1 tsp organic Dijon mustard

½ tsp sea salt or Himalayan Pink salt

a good grinding of organic pepper 

1-2 drops organic liquid stevia

200 ml cold-press macadamia nut oil

50 ml organic cold-pressed olive oil

Instructions

Place all the ingredients into a tall, narrow container in the order listed above.

Using a hand-held stick blender, blend everything together until it emulsifies into a pale, creamy mayonnaise. Takes about 30 seconds!

Taste and add a little more lemon juice, sea salt and freshly ground pepper, if liked.

Transfer to a glass container and seal with an airtight lid. Use within 5 days.

grass fed organic burger.jpg


Fat 14g  Protein 41g Carbohydrate 0g - per Guernsey Beef Burger

Fat 21g  Protein 13g Carbohydrate 3g - per keto bread roll

Fat 30g Protein 2g Carbohydrate 0g - per serving of Basil Mayonnaise


Creamy Avocado ‘Hummus’

by Susan Smith in ,


In this ravingly busy life, one of the best ways to improve your health is to consume lots of fresh vegetables. Abel & Cole and Riverford Organics are my lifeline because twice weekly they bring a wide variety of organic, fresh produce direct to my door. I always buy half a dozen or so avocados every week because they happen to be one of the healthiest things you can eat. They’re rich in monounsaturated fat that your body can easily burn for energy and moreover the fat they contain helps your body absorb fat-soluble nutrients from other foods you eat with them.

Actually, avocados are not a vegetable, they’re a very-low-in-fructose fruit with a buttery texture and delicious flavour that means they’re my number one go-to favourite snack when I want something quick and savoury to eat. For simplicity and satiety, I like to halve and stone them before stuffing the cavities beyond reason with prawns or tuna mayo. Prawns bound together with a spicy, tomatoey mayonnaise atop a halved avocado was the first food I ever prepared for my husband John. It was love at first sight - he’d always thought such food, simple as it is, only came out of restaurant kitchens! On a more fruity note, avocados can be transformed into a silky, delectable dark chocolate or avocado and lime mousse or used as a base for ice cream. Yum! Full of essential vitamins and minerals, including fibre, vitamins K, B5, B6 and C, folate and more than twice the potassium of a banana, you can see where I’m going with this.

avocado.jpg

Today my fancy is for avocado hummus. I love traditional chickpea hummus but can see no reason to take the anti-nutrient, high carbohydrate hit from legumes when this creamy avocado dip is a far healthier, yet comparative alternative. I first eyeballed Paleo Hacks version of Bean-Free Creamy Avocado ‘Hummus on their blog but glancing down the list of ingredients quickly assessed they were too out of whack for my taste (what’s with a teaspoon of lemon juice?). I’ve re-written the recipe to balance out the flavours and it works. Beautiful to look at and delicious to eat, it’s a really fresh, clean ‘take’ on hummus. Apologies to garlic lovers, there is none in my version of Creamy Avocado ‘Hummus’ because its whiffiness on post-consumption breath always offends me!

A quick and easy keto way to get your five a day. 

avocado hummus.jpg

Creamy Avocado ‘Hummus’ (serves 6 as a dip, serves 4 for a light lunch)

Ingredients

2 large organic courgettes, peeled and deseeded

2 large organic ripe avocados (use 3 medium if large not available) 

3 tbsp organic extra virgin olive oil

3 tbsp organic lemon juice, freshly squeezed 

100g organic light tahini

½ tsp ground organic cumin        

½ tsp Himalayan Pink salt, or to taste

¼ tsp organic cayenne pepper

a good grinding of organic black pepper

15g fresh organic coriander leaves, roughly chopped

Organic paprika and extra sprigs of fresh coriander - optional

A selection of freshly cut crudités - to serve

IMG_8672 copy.jpg

Instructions

Slice off the ends of both courgettes, peel, then lay them on a cutting board and slice them in half lengthwise.

Using the pointy end of a teaspoon run it down the middle of the courgettes, gently scooping out the seeds. Chop the courgette into rough pieces. Discard the seeds. 

Peel and de-stone the avocados, roughly chop into pieces.

Place the avocado, courgette, olive oil, lemon juice, tahini, cumin, cayenne pepper, most of the coriander leaves and salt in a food processor. 

Process on high until smooth, scraping down the sides as necessary.

Transfer to a bowl, sprinkle with paprika and the remaining coriander leaves before serving with a selection of freshly cut crudités for dipping. 


Fat 32g Protein 6g Carbohydrate 4g - per serving of ‘hummus’ only.

If you’re counting macronutrients, please add on extra grams of carbs for the crudités. N.B. Vegetables grown above ground are less carb heavy than veggies grown below ground

IMG_8682 copy.jpg

Celeriac Terrine With Red Pepper Sauce

by Susan Smith in , , ,


I was slowly but surely getting through the training programme to become a qualified health coach until I was recently stopped in my tracks. Last week I received an email announcing “numerous coursework and program updates” that were being rolled out now and later this year. Gees! They don’t mean maybe. The volume of coursework has increased by a hefty 60% and I can’t now move on through the 16 original lessons and exams unless I first go back and then sequentially complete each of the new business building tasks interspersed between them. It’s not easy being forced to switch between academia and creative writing on demand - I simply don’t have the time or headspace for both - and last week’s task, which was to write ‘my story’, overwhelmed me. Firstly, who cares what trials and tribulations I’ve suffered? Secondly, it seems if anyone does, it’s me! I found wading through the timeline of my life and reliving the experience extremely upsetting. So today, I’m taking some welcome time out to write this blog. For sanity’s sake, I have to loosen my grip on my study work and let go of my original intention to be an accredited health coach before the end of the year. After all, there are so many other things I have to do. 

Without the support of my husband, who steps into the domestic breach every time he finds me glued to my computer, I would have given up completely. Economy of effort is where it’s at and Celeriac Terrine With Red Pepper Sauce is one of those meals that John can prepare single-handedly so that we’re still well fed even when I’m overly committed to tasks beyond the kitchen table. Celeriac Terrine With Red Pepper Sauce makes an impressive vegetarian meal for six people. Since there are only three of us to feed, that means enough leftovers to slice-up cold several days later, which you can then generously top with more cheese before reheating in the oven for 15 minutes and gently warming through the leftover red pepper sauce on the hob. Alternatively, the terrine eats equally well cold with homemade mayonnaise and salad leaves, preceded by a delicious creamy, hot tomato and red pepper soup that’s simply thrown together in minutes by combining the leftover red pepper sauce with a bottle of Abel & Coles cherry tomato passata and a generous dollop of double cream. Voilà, two nutritious, keto-inspired meals for the price of one! 

celeriac terrine recipe.jpg

Celeriac, otherwise known as celery root, is a bit of a culinary life saver when you’re living a low-carb lifestyle. Although a root vegetable, celeriac isn’t nearly as starchy as potatoes (potatoes contain over twice as many net carbohydrates) so it’s really useful for making mash, chips, gratins and soups - watercress soup thickened with celeriac instead of potato is even better. High in dietary fibre and loaded with vitamins and minerals for maintaining good health, this recipe totally transforms celeriac from its reputation as the gnarly hobbit of the vegetable world into a very elegant looking, make-ahead main course for entertaining, or a much more appetisingly colourful, meat-free alternative to a family roast.

celeriac organic vegetable.jpg

A long-standing favourite of ours, this recipe is taken from the Winter section of Rose Elliot’s book ‘Vegetarian Four Seasons’. However, while I can still buy organic celeriac in May, I make no apology for enjoying it in Spring! It’s simply delicious food, whenever!

Celeriac Terrine With Red Pepper Sauce (Serves 6)

Ingredients - for the celeriac terrine

700g organic celeriac

25g organic butter

125g organic strong Cheddar cheese, grated

25g freshly grated organic Parmesan or organic vegetarian Parmesan-style cheese 

4 tbsp snipped organic chives

3 organic eggs

Himalayan pink salt or Celtic sea salt

Freshly ground organic black pepper

Organic cherry tomatoes and fresh chives - to garnish 


Ingredients - for the red pepper sauce

2 tbsp organic olive oil or macadamia nut oil

2 organic onions, finely sliced

2 organic red peppers

150ml vegetable stock

Himalayan pink salt or Celtic sea salt

Freshly ground organic black pepper

15g cold organic unsalted butter, cut into small pieces

celeriac terrine.jpg

Instructions

Pre-heat the oven to 160℃ / 325 ℉ / Gas mark 3

Grease and line a 450g / 1lb loaf tin with a piece of non-stick parchment paper to cover the base and extend up the short sides. Grease again.

Boil a kettle of freshly filtered water.

Peel the celeriac and cut into even-sized 2cm chunks.

Pour the boiling water from the kettle into the base of a steamer. Place the celeriac into the top of the steamer and cook for about 12-15 minutes, or until the celeriac is tender.

Lift the celeriac out of the steamer and drain well before tipping into a bowl - the water in the bottom of the steamer makes wonderful stock.

Add the butter to the celeriac and mash, but don’t puree because some texture is good in this dish. Mix in the grated Cheddar and Parmesan cheeses, the chives, eggs and salt and pepper to taste.

Spoon the mixture into the prepared tin and level the top. Bake for about 50 minutes or until the terrine feels firm to the touch, is golden-brown and a skewer inserted in the middle comes out clean.

While the terrine is baking make the red pepper sauce. Heat the oil in a large saucepan, put in the onions and cook over a gentle heat with the pan lid on for about 10 minutes until the onions are softened but not browned.

Meanwhile, wash the peppers and cut into rough pieces - there’s no need to remove the seeds because the sauce will be strained.

Add the peppers to the onions, cover the pan again and cook gently for a further 5 minutes.

Pour in the stock. Cover and simmer for about 10 minutes or until the peppers are tender.

Liquidise the sauce, strain into a clean saucepan and season to taste.

When the terrine is cooked, remove from the oven and allow to stand for 5 minutes or so before slipping a knife around the edges to loosen, then turn it out onto a warm plate.

Garnish the terrine with halved cherry tomatoes, sprigs of parsley and small strips of chives.

Just before serving, bring the pepper sauce to the boil. Take off the heat and whisk in the cold butter, a little at a time, to make the sauce glossy. 

Serve the sauce with the terrine and some lightly cooked broccoli or other green vegetables. 


Fat 22g Protein 14g Carbohydrate 11g - per serving

celeriac terrine pepper sauce.jpg

Raw Sugar-Free Raspberry Jam

by Susan Smith in ,


What to say about this jammy delight? Simply that it’s a healthy alternative to regular jam that can be made in less than 5 minutes flat. I recommend you keep a pot of it in your fridge to slather on toasted Vegan Paleo Nut & Seed Bread - trust me, there are few better ways to start the day than with freshly brewed coffee and pure raspberry jam spread thickly on buttered toast! 

Also delicious served with Grain-Free Scones, for making into smoothies, as a topping for yogurt or ice cream and for sandwiching together Primal Plate’s Vegan Victoria Sandwich Cake.

Raw Sugar-Free Raspberry Jam

Ingredients

200g organic frozen raspberries, defrosted

2 tbsp organic white chia seeds (white chia seeds are nutritionally identical to black chia but are visually more appealing! You can use either)

1½ tsp organic psyllium husks

1 tbsp organic lemon juice

30g Sukrin 1

1 tsp pure vanilla extract


Instructions

Place all the ingredients into a blender or food processor and pulse gently until just smooth. 

Taste and add a little more Sukrin:1 (or a couple of drops of liquid stevia) if you would like a sweeter jam.

Transfer the mixture to a glass container with a lid (I used a mason jar) and allow to set in the fridge.

Notes

This jam is veering towards the tart, which is how I like it! If you want it to taste more like regular jam (sweeter) and you’re not keeping to a keto (very low carb) diet, a tablespoon of raw, organic ‘runny’ honey or maple syrup (for vegans) would be a better choice.


Carbohydrate 36g Protein 8g - per whole pot of jam! 


Best Ever Vegetarian Gravy

by Susan Smith in


I’m sort of selling myself short on today’s recipe title because this gravy may well be the best ever gravy for everyone; vegan, vegetarian and carnivore alike. It doesn’t need meat juices from the roasting pan for depth of flavour, this stand-alone gravy is as intensely flavoursome as any I’ve tasted…ever! Better still, it can be made well in advance, so there’s no last minute panic to rustle up a tasty gravy whilst the rest of dinner goes cold. Simply make ahead of time then, whilst you’re plating up the rest of the meal, re-heat your gravy to boiling point and pour over.   

I knocked this vegetarian gravy up ‘out of the blue’ in about 15 minutes flat whilst the Nut Loaf that was featured on last week’s Primal Plate blog was resting in its tin before being turned out and sliced. Frantically looking around my kitchen for any ingredients that I could gravy-fie to get our meal onto the table pronto, the first thing I espied was the tomato juice leftover from a 400g tin of chopped tomatoes I’d used to make the Nut Loaf. The second was my husband’s glass of red wine poured in readiness for dinner.

Combined with a few other store cupboard ingredients - not least Sukrin almond flour to thicken - it was gravy alchemy. A light, bright, delicious, vegetarian accompaniment to elevate the pure and simple into the most tasty meal imaginable. 

Best Ever Vegetarian Gravy (Serves 4)

Ingredients

1 tbsp organic olive oil
1 organic medium onion, finely chopped
1 dsp organic tomato puree
2 tsp organic reduced salt vegetable bouillon powder
1 heaped tsp Sukrin organic reduced fat almond flour
75 ml organic tomato juice (I used the juice that I’d drained from a 400g tin of organic chopped tomatoes)
75 ml red wine
200ml fresh filtered water
1 tbsp organic tamari
½ tsp Marmite or natural yeast extract
1 fresh bay leaf - optional

Instructions

Heat the olive oil in a medium sized saucepan. Add the chopped onion and cook gently with the pan lid on for about 8-10 minutes, stirring occasionally, until the onion is soft and light golden in colour.

Meanwhile, in a small bowl, combine the Sukrin almond flour with a little of the tomato juice, stirring well to make sure there are no lumps before adding the rest of tomato juice. Set aside.

When the onions are soft and golden, take the saucepan off the heat and add the tomato puree and bouillon powder. Stir everything together really well until it forms into a smooth-ish paste then add the red wine. Keep stirring until this is fully integrated, then do the same with the almond flour/tomato juice mixture. Finally add the water, the tamari, the Marmite and the bay leaf (if using).

Set the pan back over a medium-hot heat and stir continuously until the gravy comes to the boil and has thickened slightly. Turn the heat down to a simmer and continue cooking, uncovered, for a further 10 to 15 minutes.

Strain the gravy through a stainless steel sieve into a clean saucepan - I also like to press about half of the softened onions through the sieve to achieve a gravy with a bit more substance. Cover the pan and set aside until you’re ready to eat.

Alternatively, strain into a clean glass or ceramic bowl, cover and store in the refrigerator for up to a week.

Notes

The drained chopped tomatoes can be used to make Nut Roast, Virgin Mary Vegetable Cocktail (recipe coming soon) and Coconut King Prawn Curry (recipe also coming soon) - as you can see I’m currently awash with ideas for organic tinned tomato recipes!

I’ve not included sea salt or freshly ground pepper in the ingredients list for this recipe because quite frankly the Swiss bouillon powder, tamari and Marmite do the trick without. However, if you’re using ‘no-salt’ natural yeast extract you might want to test for seasoning and adjust to taste if needs be.


Carbohydrate 4g Protein 2g - per serving


Lemon Curd Ice Cream With Vodka Blueberry Compote

by Susan Smith in , , ,


Last week, in the run up to Easter, our Nespresso machine, main oven and microwave all conked out over three consecutive days. The repairs and/or replacement of the coffee machine and oven are still outstanding, but did you know that in this day and age you can actually order a microwave on Easter Saturday afternoon and have it delivered free of charge on Easter Sunday morning? Really? Does no one take time out any more for those ‘we-wanna-be-together’ happy-holiday, family occasions, which for us means coming together to share some exceptional food and drink. Ah well, their loss, our gain. Not that I need a microwave for anything other than warming plates, but still, when you’ve only a half-sized oven left to cook in, you simply can’t have empty plates occupying the space. 

As if nothing else could go wrong, it did! I’d already made our Easter lunch starter to feature on last week’s blog but to get even further ahead of our Easter celebrations (after all, I do have my third share of a bottle of LPR Champagne to drink before lunch is served!) I decided to make little lemon cream pots for dessert (think lemon tart filling without the pastry).

Usually, when I’m trying out a recipe for the first time, I deliberately override my natural instincts and do exactly what the recipe tells me to. Oftentimes, it’s a big mistake but, hey, I’m not always in the mood for original thought! On this occasion, at a quarter to midnight on Saturday night, I was spooning twelve ramekins worth of expensive ingredients into the waste bin! Nor did I realise, until I finally got to bed at 2:16 am, that the clocks had gone forward and it was now only 4 hours before I needed to get up again! 

It’s at times like these that I am so grateful for Primal Plate. I don’t know if there’s anyone else ‘out there’ cooking Primal Plate recipes, but that becomes secondary when I actually find my own food blog the most essential guide to eating well every day! On Easter Sunday morning, just using the site’s search facility for ‘lemon’ was enough to spark the idea of Lemon Curd Ice Cream. The rest is down to what’s in the fridge. Hence it was a case of making ice cream with Co Yo natural coconut milk yogurt and the remnants in a pot of crème fraîche, or making something else. Turns out, if you simply stir lemon curd, coconut milk yogurt and crème fraîche together in a bowl and freeze, the result is food alchemy - a deliciously bright, light, primrose-yellow, zingy, creamy-smooth ice cream.

Purplish-blue Vodka Blueberry Compote and sunshiny Lemon Curd Ice Cream - sweetened with raw organic honey - is the perfect match in this refreshing, tangy dessert. Lemon and blue always look good together and juicy blueberries and lemons are a heady, flavour pairing that’s cooling, floral, citrusy and fresh - reminiscent of springtime and all things bright and beautiful.

If, at first glance, you think the recipe below looks a little complex, look again. The lemon curd takes less than 15 minutes to make, the 3-ingredient ice cream about 10 minutes and the blueberry compote even less than that! Lemon Curd Ice Cream With Vodka Blueberry Compote is in fact a spectacularly easy, make-ahead, special occasion dessert.

Cool, sophisticated, delectable…there aren’t enough superlatives to do this enticing, Vitamin C packed fruit dessert justice!  

Lemon Curd Ice Cream With Vodka Blueberry Compote (Serves 6)

Ingredients - for the lemon curd

3 large organic eggs

120g raw organic ‘runny’ honey

100ml fresh lemon juice (2-3 lemons worth)

60g unsalted butter, at room temperature, cut into small pieces

1 heaped tbsp lemon zest, finely grated

2-3 drops organic liquid stevia


Ingredients - for the lemon curd ice cream

420g (approx) lemon curd i.e. the full quantity of lemon curd made with ingredients above

250g plain (unsweetened) Greek-style yogurt - I used Co Yo Natural Coconut Milk Yogurt

125g crème fraîche (I used Longley Farm)


Ingredients - for the vodka blueberry compote

300g fresh blueberries

100g organic ‘sugar-free’ blueberry spread (I used Clearspring)

30 ml freshly squeezed lemon juice

1 tsp organic arrowroot

2 tbsp organic vodka (I used Snow Queen vodka)


Instructions - for the lemon curd

In a stainless steel bowl, whisk together the eggs, honey and 80ml lemon juice until well blended. Cut the butter into small pieces. 

Place the bowl over a saucepan of gently simmering water. Do not let the bottom of the bowl come into contact with the water. 

Cook for approximately 6-8 minutes, whisking constantly with a balloon whisk (to prevent it from curdling) until the mixture becomes thick (like soured cream or hollandaise sauce). Don’t get distracted, the mixture can quickly and suddenly turn from thin to thick! 

Remove from heat and immediately pour into a clean bowl. 

Add the butter to the mixture and whisk until it has melted, then add the grated lemon zest, the rest of the lemon juice and 2 drops liquid stevia. Give everything a good stir then taste. If you think the lemon curd is still too tart, stir in another single drop of stevia. 

Take a sheet of plastic cling-film and immediately lay it directly onto the surface of the lemon curd to stop the air getting to it (to prevent a skin forming). Allow the mixture to cool completely. The lemon curd will continue to thicken as it cools. Keep covered and refrigerate until needed.


Instructions - to make lemon curd ice cream

Tip all the ingredients into a bowl and stir together well. Churn the ice cream in an ice cream maker until soft-set consistency, then quickly transfer to a plastic freeze-proof container and freeze until solid.

If you don’t have an ice cream machine, pour into a plastic freeze-proof container and freeze for about an hour-and-a-half until the sides start to get solid. Then mash with a fork to combine the solid ice cream at the sides of the container with the softer centre. Straightaway, put it back into the freezer and freeze until solid.

Take out of the freezer and put in the refrigerator 20-30 minutes before serving to allow the ice cream to soften slightly.


Instructions - to make the vodka blueberry compote

Combine the blueberries, lemon juice and the fruit spread in a medium saucepan over medium heat and cook for about 5 minutes or until the fruit spread dissolves, the blueberry juices start to run and the mixture becomes syrupy - don’t let the berries cook too long or they will become mushy and lose their beautiful shape. Take the pan off the heat. 

In a small bowl or tea cup, combine the arrowroot powder with a little of the vodka until a very thin paste is formed. Add a little of the hot blueberry juice to the slaked arrowroot to even out the temperature between the two mixtures, then quickly pour the arrowroot mix into the berry compote, stirring continuously as you do so. 

Put the pan back on the heat and keep stirring until the mixture thickens slightly (just below boiling point). Stir in the rest of the vodka. 

Remove from the heat. Tip into a bowl and lay a piece of cling film directly onto the surface of the compote to stop the air getting to it - i.e. to stop a skin from forming. 

Best served warm or at room temperature.


Notes

Blueberries are known as a super fruit; rich in antioxidants, high in vitamins and minerals. Read more about them here: 20 Science-Backed Health Benefits of Blueberries


Carbohydrate 19g Protein 7g - per serving of lemon curd ice cream

Carbohydrate 13g Protein 0g - per serving of vodka blueberry compote


Parsnip, Cranberry and Chestnut Loaf with Port Wine Sauce

by Susan Smith in , ,


In just three weeks time we’ll all be sitting down to (or feeling replete from) one of the most planned-for meals of the year; Christmas Day. I love it!  I especially love it now I’m fully committed to eating vegetarian. 

Notwithstanding that I’m not getting the goodwill vibe of the ritualistic killing of 10 million factory-farmed UK turkeys immediately before Christmas, I’m actually somewhat bewildered by people’s obsession with eating a traditional turkey dinner. If you’re not an experienced cook (and all the feedback I get tells me they’re few and far between) roast turkey has to be be one of the trickiest, most labour intensive, time consuming meals to get right. Then there’s the expense of putting a decent, organic, free-range turkey on the Christmas table (albeit, in my opinion, nothing less will do).

Putting my money where my mouth is, four years ago I blew almost an entire week’s housekeeping (£120) on a medium-sized (6kg) organic Kelly Bronze turkey for our celebration meal. To meet my self-imposed lunchtime deadline of 1pm, I set my morning alarm call for 7:30am so I could switch the oven on at 8:00am. A pre-prepared bird that size (firstly you have to stuff it and lubricate it up-to-the-nines, inside and out, in butter) takes 4.5 hours to cook, including five essential clock-watching interruptions of rather more pleasant social interactions, such as opening presents and drinking Champagne, if you want to be certain of a ‘tah-dah’ moment and gasps of appreciation when you present your perfectly roasted and dressed bird at the table. In retrospect, all the effort required now seems a bit passé and Bah Humbug for my taste! 

This year I will not be found up to my elbows in turkey early on Christmas morning, nor will I be on tenterhooks waiting for the kitchen buzzer to repeatedly call me to my basting duties. Instead, I will have pre-prepared for our delectation a leisurely, spectacular-looking, vegetarian lunch full of the flavours of Christmas, without the fuss. 

The star of the show, a Parsnip, Cranberry and Chestnut Loaf, isn’t altogether my idea. The original recipe for Parsnip, Cranberry and Chestnut Loaf first appeared in Good Food Vegetarian Christmas magazine, December 2009 and, as you can see, I’ve borrowed its presentation (sort of!). However, being a Primal-phile, my version had to be grain-free (no breadcrumbs allowed), refined sugar-free (found lurking in their cranberry sauce) and, for my taste, much more umami-savoury. Without the addition of the mature Cheddar that I’ve added to my recipe, the original seemed boringly bland. I believe that this is why many people eschew eating vegetarian, especially on special occasions, because all too often what you end up with is second-rate stodge - pastry, pasta, potato or rice and other grain-based dishes - that in their mundanity simply don’t sing-out ‘celebrate’, or entice you to eat them, even if you could. Which, being staunchly Primal I can’t - though sometimes I could kill for a decent roast potato!

In reality, vegetarians do not need to be short-changed. Even followers of the Primal/Paleo diet, who don’t eat grains or potatoes and, for compassionate reasons are reluctant to eat meat, can feast just as well, if not better than, their carnivore counterparts. This is how Primal Plate’s Christmas lunch is shaping up (although the starter and dessert may still yet be subject to further flights of fancy!): A red, green and white starter of Red Pepper Rolls with Goats Cheese, which looks like Christmas on a plate. Then, today’s amazing recipe for Parsnip, Cranberry and Chestnut Loaf with Port Wine Sauce, accompanied by Braised Red Cabbage, Creamed Celeriac and Baby Brussel Sprouts. Followed by cinnamon-laced Horchata Ice Cream with Stuffed Baked Apples in Clementine Syrup. Maybe, a platter of cheese with seasonal fruit and finally, coffee and mince pies. 

All this fabulous food with absolutely no added sugar, no grains, no legumes, no potato, no meat and, if everything goes according to my ‘get-ahead’ menu plan, definitely nothing to drive me into a cook’s frenzy on Christmas morning. In fact, I intend to spend less than an hour doing hands-on cooking on the day itself, and even that will largely involve primping the food so it looks its best on the plate! 

This should help to make Christmas everything it promises to be - a happy, food-filled celebration that everyone, including the cook, can enjoy. Almost every component of this lavish, rainbow-coloured, festive vegetarian feast can be made oven-ready and/or stashed in the fridge/freezer and ready-to-go by Christmas Eve and, in most instances, well before. By my reckoning, that means the most exacting thing I’ll have to do on Christmas day is core and stuff the apples through a Champagne-induced haze of alcohol! As much as I love cooking, not spending almost the entire day in the kitchen sounds like the best-ever Christmas to me!

Parsnip, Cranberry and Chestnut Loaf (Serves 8)

Ingredients

45g butter, plus a little extra for greasing

3 onions, finely chopped

15g pack sage, 8 leaves reserved, the rest finely chopped

180g pack cooked chestnuts

120g walnuts

100g ground almonds

1 tsp ground mace

100g good quality vegetarian Cheddar cheese, finely grated

2 eggs, beaten            

600g baby parsnips, trimmed, peeled and cut in half lengthways (or choose standard parsnips - long, thin ones if you can - peeled then halved lengthways) 

1 tbsp honey

sea salt and freshly ground black pepper

180g Low-Sugar Cranberry & Orange Relish

Fresh cranberries and flat leaf parsley - to decorate 


Instructions

Boil a kettle of water. Grease a 900g (2lb) loaf tin with some butter, line with a long strip of non-stick baking parchment to cover the bottom and the two ends of the tin.

Melt 15g butter in a non-stick pan, add the onions and gently cook with the lid on the pan for 10-15 mins over a medium low heat until very soft and just starting to turn golden. Stir in the chopped sage, cook for a further 1 minute, then tip into a large mixing bowl. 

Pulse the chestnuts in a food processor until chopped into small bits, then tip these into the bowl with the onions and repeat with the walnuts. Now add the ground almonds, cheese, mace, beaten eggs, 1½ tsp salt and a generous amount of freshly grated pepper and mix everything together well.

Pour the boiling water from the kettle into the bottom half of a steamer. Put the halved parsnips in the top of the steamer, put the lid on and steam for 3 minutes.

Tip the parsnips onto a clean dry tea towel and pat them dry. Line up the best looking halves of parsnip (you’ll need about 10 halves) and lay them widthways, cut side down, along the bottom of the loaf tin. You will need to alternate the parsnip halves ‘thick ends to thin’ and pack them tightly side-by-side, so they fit snugly in the base of the tin. N.B. If you’re using normal-sized parsnips, cut off lengths of parsnip from the thinner ends and fit across the base of your loaf tin in the same way. Keep going until you have enough parsnip halves to snugly line the base of the tin. 

Take the parsnip halves back out of the loaf tin and set aside. Chop all the leftover parsnip into small neat dice and mix into the nut mixture. 

Melt the remaining 15g of butter in a heavy based frying pan over a medium heat. When it starts to foam add the honey and the reserved parsnip halves laying them cut side down in the pan. Fry gently in the butter (on the cut side only) for about 5 minutes or until they are lightly browned - they should be just turning golden. Take off the heat and set aside to cool. 

Heat oven to 180℃ (160℃ fan) / 350℉ Gas mark 4

When the fried parsnip are cool enough to handle, fit them back into the loaf tin, as before (cut and browned side down). Top with ⅓ of the nut mixture – pack it down well and smooth the surface. 

Spread the cranberry and orange relish on top, leaving a small space around the edges. 

Top with the remaining nut mixture and pack down as before. Cover with tin foil. 

The loaf can be made up to 24 hrs ahead, then covered and chilled, before continuing. 

Bake in the pre-heated oven for 1 hour. Take the loaf out of the oven and remove the foil, then put back in the oven for a further 10 minutes. 

Remove from the oven and allow to stand for 10 minutes.

Meanwhile, melt the remaining 15g butter in a small frying pan and sizzle the reserved sage leaves for 1 minute. 

Loosen around the sides of the loaf with a round-bladed knife if you need to, then turn the loaf out onto a warm serving platter. Peel off the parchment paper. 

Brush the top of the loaf with the hot sage butter then decorate with cranberries, fried sage leaves and sprigs of flat-leaf parsley.  

Serve in slices with extra Cranberry Orange Relish and Port Wine Sauce.


Carbohydrate 30g Protein 12g - per portion

Port Wine Sauce (Serves 6)

Ingredients

2 tbsp olive oil

1 medium onion, finely chopped

600ml (1 pint) soft, fruity red wine (I used McGuigan Estate Merlot)

1 dsp Marigold organic vegetable bouillon powder

2 tsp arrowroot powder 

3 tbsp port wine

1 dsp sugar-free redcurrant jelly

sea salt and freshly ground black pepper

25g cold butter, cut into small pieces


Instructions

Heat the oil in a medium saucepan, add the onion, cover and fry over a low-medium heat for 10 minutes until it is tender but not browned. 

Stir in the bouillon powder and then pour in the wine, bring to the boil, and leave to simmer, without a lid, for about 15 to 20 minutes, or until it has halved in volume i.e. reduced to 300ml (½ pint). Take off the heat and strain through a sieve into a small clean saucepan

Put the arrowroot into a small bowl and mix to a paste with the port. Add a tablespoon of the hot wine mixture, stir, then quickly pour the slaked arrowroot into the saucepan with the rest of the wine mixture and stir briefly until it has thickened slightly (just below boiling point). 

Stir in the redcurrant jelly. Taste, then add salt and pepper, if necessary

You can make the sauce up to this point in advance. Either freeze and defrost overnight the day before you need it, or keep in the fridge until you want to serve.

Just before you want to serve the sauce, re-heat in a small saucepan to just below boiling point, then quickly whisk-in the cubes of cold butter to make it glossy.


Carbohydrate 5g Protein 0g - per portion


Low-Sugar Cranberry Orange Relish

by Susan Smith in ,


A happy prelude to Christmas for me is in late autumn, when the first fresh cranberry harvest hits the shops. Can anything be more gloriously pertinent to the forthcoming festive season than these plump, fiery red berries? Packed full of vitamin C and credited with impressive medicinal powers, one glass of cranberry juice per day could well keep the doctor away! Bite into a raw cranberry though and you’ll find it’s so very bitter that it’ll make your face pucker! 

Thus, most commercial enterprises and home cooks have traditionally assumed that the only fun way you can cram more of these gutsy phytonutrient-laden berries into your diet is to cook them with lots of sugar to reduce their bitter tartness. Unfortunately, people who eat Paleo or Primal prefer not to eat sugar, so now what? The health food saviours at Sukrin have come to the rescue again with their 100% safe and all-natural alternatives to sugar. Made from erythritol, these alternative, almost non-caloric, sweeteners are as close as it gets to being Paleo/Primal friendly whilst still managing to taste like sugar.

Hence I’ve been able to create this very healthy recipe for low-carb, Low-Sugar Cranberry Orange Relish. The perfect Christmassy accompaniment to all savoury dishes, this is also the first make-ahead ingredient you’ll need for Primal Plate’s alternative vegetarian Christmas lunch - a sensational looking and tasting, Cheese, Parsnip, Cranberry and Chestnut Loaf (recipe coming soon).

Low-Sugar Cranberry Orange Relish (Makes 450g = 12 generous servings)

Ingredients

300g fresh cranberries

40g Sukrin Gold

1 medium/large organic orange - finely grated zest and juice (you need 100ml of fresh orange juice)

½ tsp ground ginger

½ tsp ground cinnamon

¼ tsp nutmeg, freshly grated

2 tbsp port

2 tbsp organic raw ‘runny’ honey


Instructions

Pulse the cranberries in a food processor until coarsely chopped (do not overdo this, you don’t want cranberry puree at this stage).

Tip the chopped cranberries into a saucepan with the orange zest and juice, the Sukrin Gold and the ginger, cinnamon and nutmeg.

Bring everything up to simmering point and gently cook over a low heat, stirring occasionally, for 8-10 minutes until the mixture collapses into a thick puree. 

Remove from the heat. Let the mixture cool down for a few minutes, then stir in the port and raw honey.

Allow to cool then spoon into a serving dish, cover with cling film and keep in a cool place until needed (alternatively, spoon the cranberry relish into a sealed, sterilised glass jam jar and store in the fridge). 


Notes

To sterilise jars, wash the jars and lids in warm soapy water, rinse well, then dry thoroughly with a clean tea cloth, place the jars on a baking tray and place on the middle shelf in a medium oven 180°C / 350°F / Gas mark 4 for 5 minutes. 

Lids can be left in boiling hot water to sterilise. If you are using Kilner jars you may want to remove the orange rubber seal and soak that in boiling water too.

You can make and freeze Low-Sugar Cranberry Orange Relish up to a month in advance of Christmas. Just take it out of the freezer a couple of days before you need it and allow to defrost overnight in the refrigerator. 

Low-Sugar Cranberry Orange Relish can be stored in the refrigerator for up to 1 week. Bring back to room temperature before serving.


Carbohydrate 7g Protein 0g - per serving


Roasted Cauliflower & Mushroom Curry with Green Pea Fritters and Avocado Cream

by Susan Smith in , , , , ,


Continuing my quest to find Primal Pronto veggie-inspired meals, I discovered these delicious Green Pea Fritters at The Healthy Chef. Initially, I was just looking for an alternative to Primal Naan Bread and Cauliflower Rice to accompany a family supper of Roasted Cauliflower & Mushroom Curry because, as satisfying as Primal naan bread might sound, since posting the original naan bread recipe I subsequently found out that I need to re-invent it without tapioca flour, (which increases blood sugar even more than wheat flour) and zanthan gum. Yikes! Sorry for the oversight! Plus, cauliflower ‘rice’ and cauliflower curry have zero gastronomic appeal when eaten in combo, so I wanted something new and tasty, preferably vegetable-based, to make our curry meal more appetising. 

As it turned out, the Green Pea Fritters were such a hit that I’m including them as part of this week’s blog, so today, three recipe posts for the price of one! Whilst the Green Pea Fritters and Avocado Cream are a perfect stand-alone meal for a fast and simple supper or to serve with drinks, when brought together with Roasted Cauliflower & Mushroom Curry you have several wonderful things that make for a fresh, creative, vegetarian meal fit for entertaining friends. I think the whole thing looks mouthwatering on the plate and it tastes just as good - spicy, savoury, creamy and delicious!

The cauliflower and mushroom curry recipe is adapted from a recipe in Daniel Green’s book, The Paleo Diet but there is one notable exception - if you try to make this curry with “1 tablespoon of chilli powder (or more to taste)” as directed in the book, please do not even think of inviting me for supper! It may simply be a ‘typo’ (I think it should read 1 teaspoon of chilli!) but it would nevertheless be ruinous to the finished dish and most likely would get missed by an inexperienced cook slavishly following the recipe. Thank goodness for Primal Plate’s extensive testing and tasting of all blog featured recipes before posting! 

I have added tiger nut flour to the pea fritter recipe to enhance the sweetness of the peas and on this occasion left out the lemon zest in favour of fresh mint because a) fresh mint and peas are a classic and b) the avocado cream has a lemony ‘hit’ all of its own that more than compensates for its absence in the fritters. Plus, it saves the time and effort of grating a lemon!

The pea fritters are very quick and easy to make - it’s just a matter of mixing everything together in a bowl and dropping spoonfuls of the mixture into a hot frying pan (only a few at a time), pressing them flat with the help of a spatula and cooking (for less than a total of 10 minutes) until they’re golden brown on each side. Meanwhile the avocado and cream cheese can be quickly whizzed to a luscious pale green cream in a food processor or with a hand-held blender.  

The Roasted Cauliflower and Mushroom Curry is just as fuss-free and makes a great vegetarian low-carbohydrate option for followers of Paleo and Primal diets. 

Put it all together for warming, nourishing mouthfuls of extreme pleasure.  

Green Pea Fritters (Serves 4)

Ingredients

300g frozen peas, defrosted

2 tablespoons fresh chopped parsley (about 10g without stalks)

1 tablespoon freshly chopped mint leaves

2 large organic free range eggs, lightly beaten

100g full-fat soft cheese, softened (I used Longley Farm)

25g organic tiger nut flour

15g organic coconut flour

1½ tsp sea salt and a generous grinding of black pepper

1 small organic lemon, finely grated zest only - optional

1tbsp olive oil, for frying

Handful of pea shoots, to garnish - optional


Instructions

Crush the peas in a food processor using the pulse button. Make sure you keep the peas a coarse texture, this is not meant to be a puree.

Transfer the crushed peas to a bowl, add the parsley, mint, eggs, lemon zest (if using), tiger nut and coconut flours. The ground tiger nuts and coconut flour help to hold the mixture together during cooking. 

Season with the sea salt and freshly ground black pepper. Taste and correct the seasoning if necessary. 

Soften the cream cheese by breaking it down with a fork then add to the pea fritter batter and combine well.

Heat a little olive oil in a large heavy-based non-stick frying pan over a low heat.

Add heaped tablespoons of the pea fritter mixture to the pan -  you should get about 16 bite-sized fritters. To avoid overcrowding the pan you may need to cook them in several batches. 

Cook the pea fritters over a medium heat for 5-6 minutes without disturbing them. When they are firm and golden on the underside, carefully turn them over with the aid of a flat-ended spatula. 

Continue to cook for a further 3-5 minutes or until the fritters are cooked through and golden brown on both sides. 

Immediately transfer to an oven proof dish (or serving platter if you’re handing them out with drinks) and then into a pre-heated hot oven until you’ve cooked the rest of the fritters and you’re ready to eat.


Avocado Cream (Serves 3-4)

Ingredients

1 large ripe avocado

½ lemon, juiced

100g full-fat soft cheese, softened by breaking down with a fork (or use Waitrose Duchy Organic Soft Cheese straight out of the tub).

Sea salt

Cayenne pepper


Instructions

Peel, stone and mash the avocado with the lemon juice then mix together with the soft cheese, sea salt and cayenne pepper to taste until it is completely smooth and creamy - this is best done in a food processor or with a hand-held blender.  

Serve as a dip with Green Pea Fritters or crudités.


Roasted Cauliflower & Mushroom Curry (Serves 4)

Ingredients

1 medium head of cauliflower, broken into small bite-sized florets

1 large onion, finely chopped

3 tbsp olive oil

250g button mushrooms

1 x 2½ cm piece of fresh ginger, grated

1 tbsp ground coriander

1 tbsp ground cumin

1 tbsp garam masala

1 tsp chilli powder

1 tbsp Marigold organic vegetable bouillon powder

400ml full-fat organic  coconut milk

sea salt and freshly ground black pepper

a large handful of fresh coriander, chopped - to garnish


Instructions

Pre-heat the oven to 200℃ / 400℉ / Gas mark 7

In a large bowl, toss the cauliflower florets in 2 tablespoons of olive oil and season with freshly ground black pepper.

Tip onto a non-stick roasting tray and roast for 25 minutes, turning occasionally until the cauliflower is nicely browned. Remove from the oven and set aside.

In a wide, shallow pan set over a moderate heat, fry the onion in the remaining olive oil with the pan lid on for about 8 minutes, stirring from time to time, until softened and starting to brown.

Add the mushrooms and ginger and cook for another 1-2 minutes, stirring. Stir in the spices and bouillon powder and cook for another minute.

Add the coconut milk and season to taste. Bring to the boil then stir in the cauliflower.

Reduce the heat to low, cover the pan and cook for about 5 minutes. 

Ladle into warmed bowls and top with plenty of fresh coriander. 


Notes

I was in two minds about the Primal Pronto status of the Green Pea Fritters and Roasted Cauliflower & Mushroom Curry because both these recipes are so easy and fuss-free. In the end I decided that Primal Pronto should be defined as: a recipe with 5 or less main ingredients, or one that can be prepped, cooked and on the table within 45 minutes. The Roasted Cauliflower & Mushroom Curry didn’t quite make it on both counts (realistically it’s takes more like 50 minutes to make) but it is still wonderfully warming comfort food that’s simple to prepare. It’s also suitable for vegans.  

You can defrost the peas quickly by putting them in a heat proof jug and pouring boiling water over. Allow to stand for a few minutes, then drain well and proceed with the recipe. 

The uncooked pea fritter batter can be made well in advance and stored in the fridge overnight. The mixture will make approximately 16 small or 8 large fritters. I use a heaped tablespoon to make the bite-sized ones and a ¼ US cup for bigger ones.

Two large Green Pea Fritters per person served with a medium/soft boiled egg and a dollop of avocado cream is great for a fast and easy low-carb brunch or supper.

If you can’t get button mushrooms for the curry, use closed-cap mushrooms cut into halves or quarters instead.


Carbohydrate 14g Protein 11g - per serving (4 small or 2 large) of Green Pea Fritters

Carbohydrate 5g Protein 2g - per serving of Avocado Cream

Carbohydrate 22g Protein 8g - per serving of Roasted Cauliflower & Mushroom Curry


Vegetarian Sausages, Creamy Cauliflower Mash and Red Wine & Onion Gravy

by Susan Smith in , , ,


The Brits love sausages. Grilled or fried to perfection, and piled on top of creamy ‘mash’ and slathered in onion gravy, or put to bed in a soft pillowy bread roll with tomato ketchup - sausages taste great! As a teenager, I certainly thought so. Every Sunday night a crowd of us would leave our church youth club and walk into town to catch the bus home. There was a burger stand next to my bus stop that sold what we thought were the most delicious hot sausage ‘cobs’  (a Northern English word for bread rolls) with HP sauce. Myself and my boyfriend, who always walked me to my bus stop before crossing town to catch his own bus home, would shelter together in a shop doorway, like young lovers do, to eat our late night feast before saying a long and wistful goodbye prior to my return to weekly boarding school. My father too always prided himself on buying ‘proper’ fresh sausages from a traditional butcher and would travel 25 miles across the county of Nottinghamshire for the privilege. Whilst nothing like the mass-produced muck that you find on today’s supermarket chiller shelves, my dad probably didn’t realise that sausages per se are one of the oldest processed foods in history and, despite their reputation for tasting good, most sausage-making is almost certainly best done behind closed doors!

Although sausages are currently making a comeback with the consumption of them soaring, producers bulk out their sausages with scraps, fat, cereal, chemical preservatives and water. In my view, it’s high time for a sausage re-think. I don’t want sausages packed out with cereal and other nasties and I don’t want to cause farm animals immeasurable suffering just so I can eat them. Notwithstanding the risks to our health, if you’re a pig, any mention of sausage is never going to be a good idea!

The highlight of many a British BBQ, a cooked English breakfast, or a child’s favourite meal of sausage and baked beans, I think it is perhaps more the walk down memory lane that’s responsible for our adult sausage cravings, rather than the reality of what they are and where they come from. But there is a kinder and healthier way to satisfy our desire.

Today’s blog post features no ordinary ‘bangers and mash’. It is a no-meat, grain-free, potato-free, alternative to this great British staple, which is nonetheless every bit as comforting and tasty as the original and, most importantly, looks just like people think ‘sausage and mash’ should!

For taste and texture these cheesy veggie sausages are as close to their meat counterparts as ‘damn it’ is to swearing! Plus, they cook like a dream (see note below) because they don’t spit and splutter like ‘bangers’ do. Fabulous with low-carb creamy cauliflower mash and served with a deeply satisfying vegetarian red wine and onion gravy, it is the best transition to autumnal comfort food that you could ever hope for. 

Vegetarian Sausages (Makes 12 large sausages - allow 2 sausages per serving)

Ingredients

600g vegetarian Lancashire cheese, crumbled or grated (I coarsely grated mine in a food processor)

4 large spring onions, finely chopped

165g organic ground almonds

20g organic milled flaxseed

15g green banana flour

1 tbsp Marigold organic bouillon powder

2 tbsp fresh thyme leaves, finely chopped

2 tbsp fresh flat leaf parsley, finely chopped

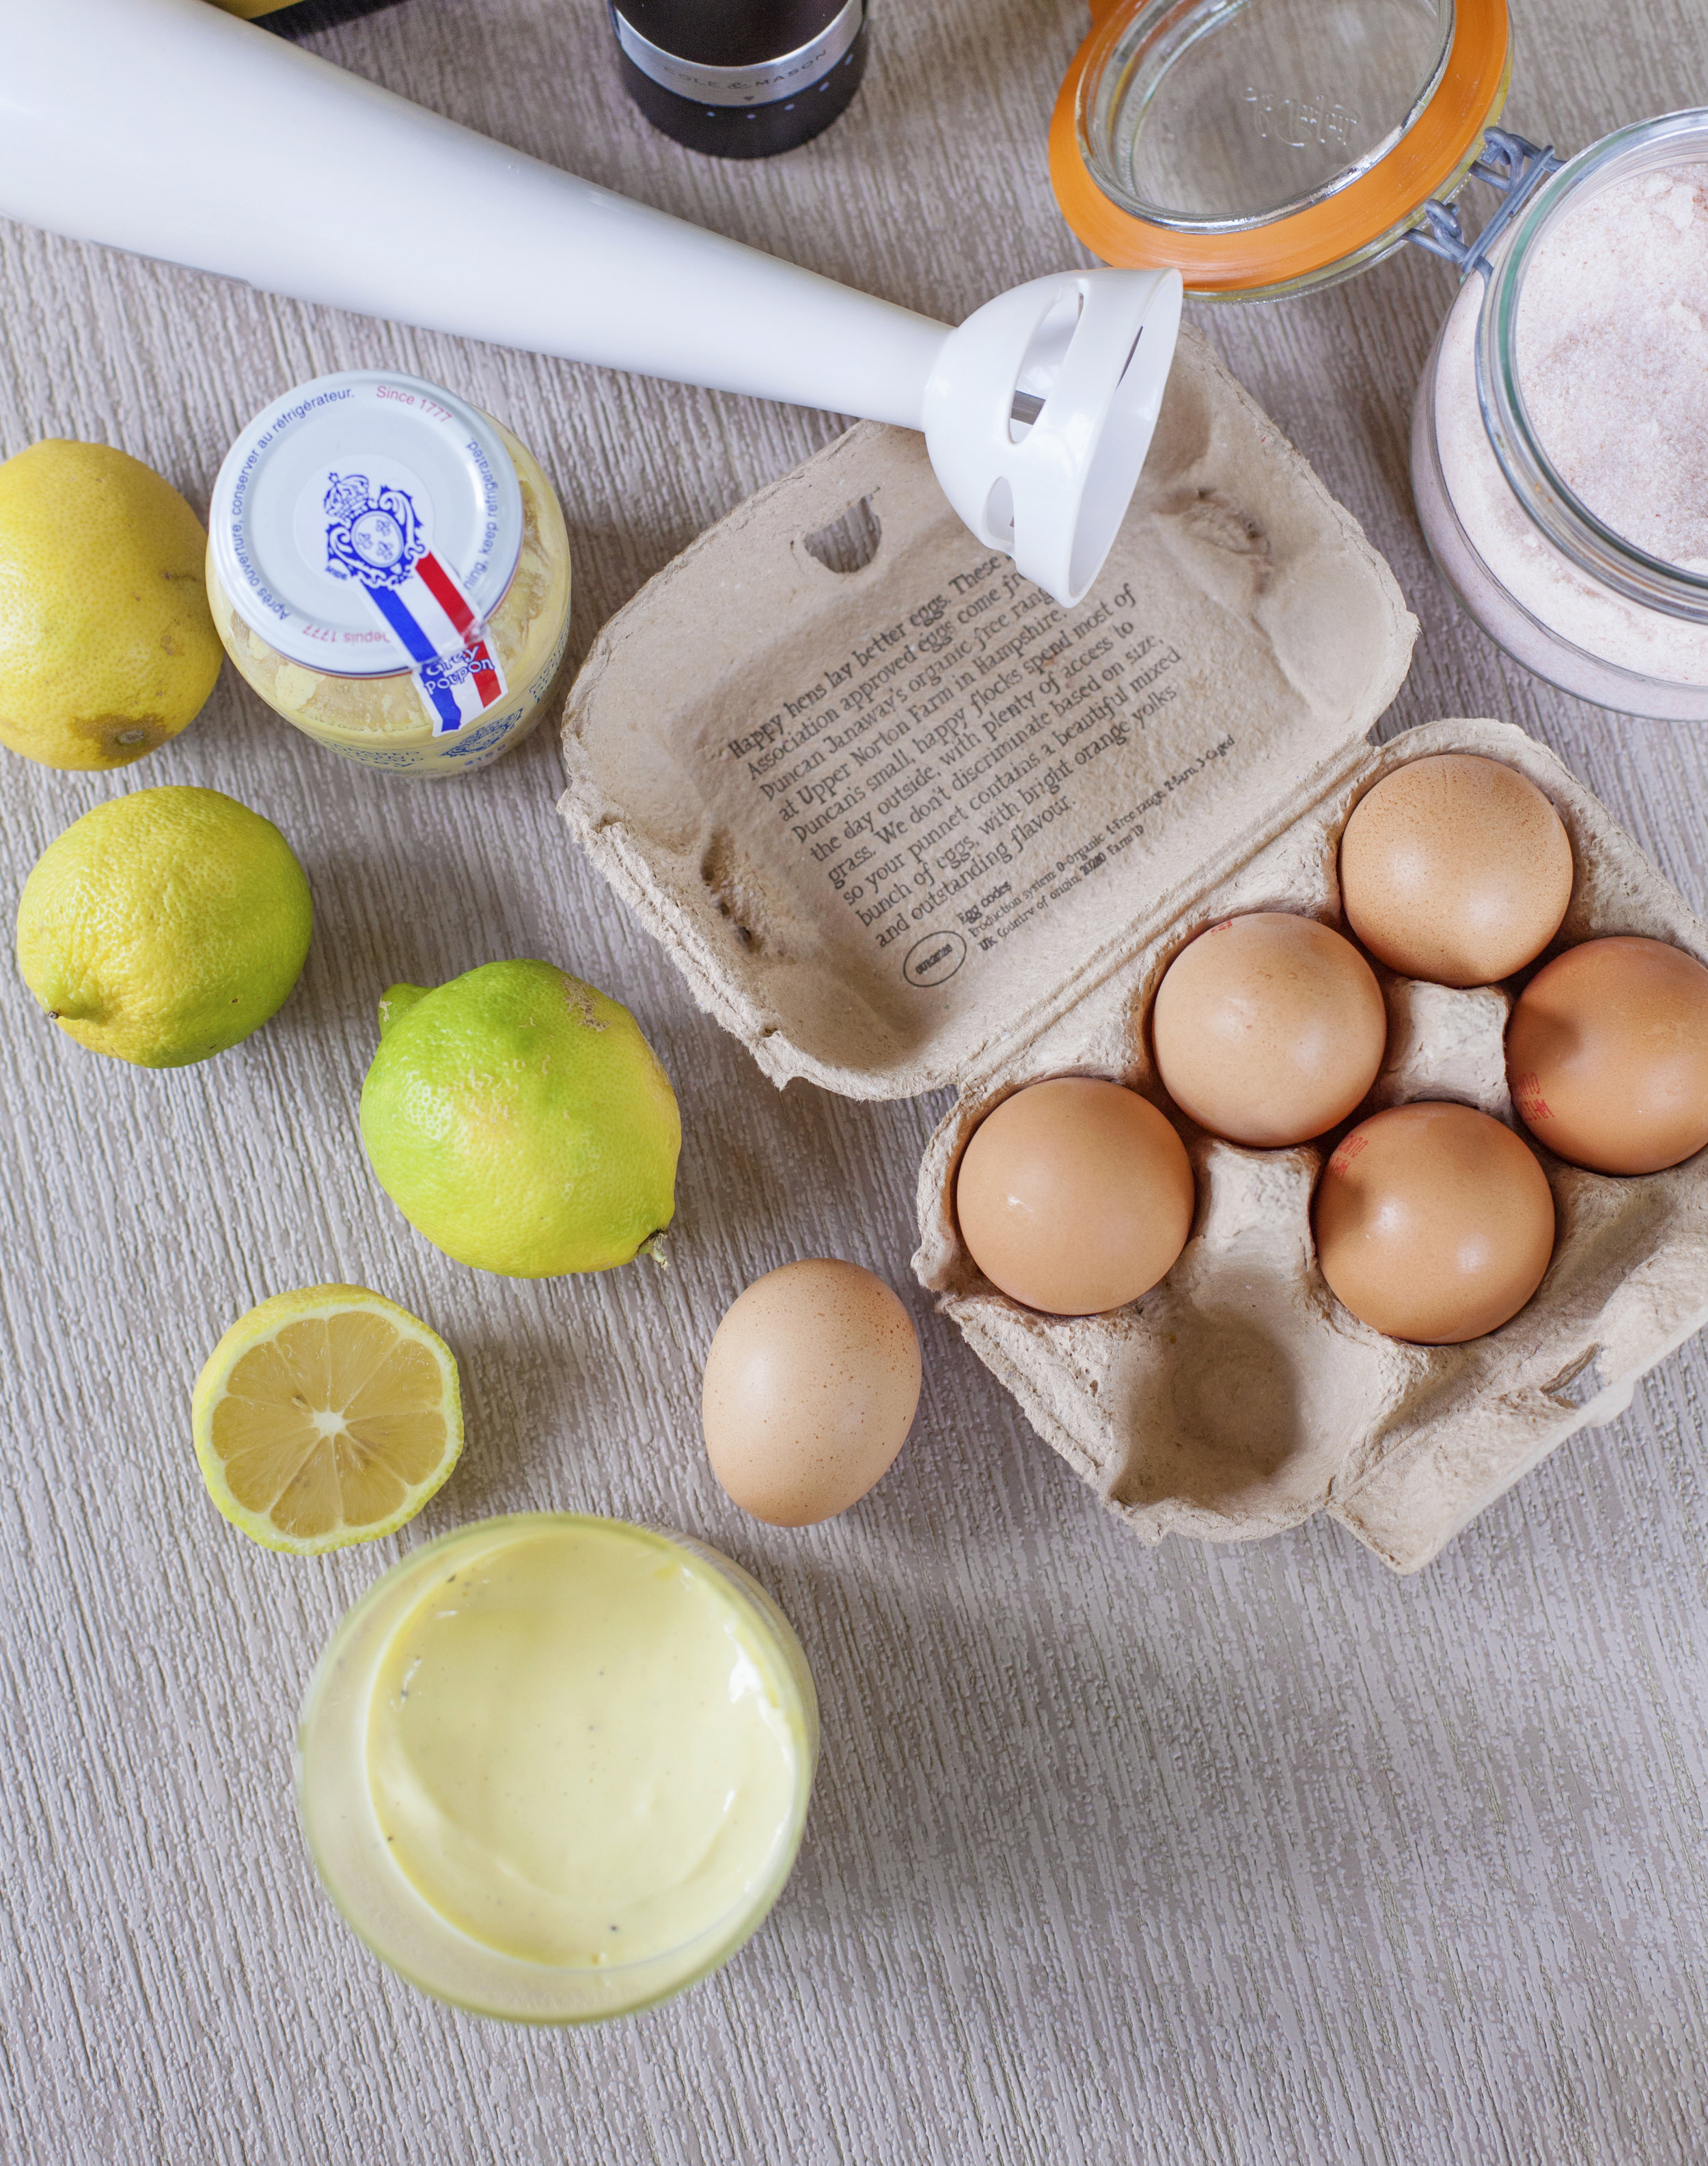
3 large organic eggs, lightly beaten 

Sea salt (about 1½ tsp) and freshly ground black pepper (about ¾ tsp)

Olive oil - for frying


Instructions

Put the grated cheese, spring onions, ground almonds, ground flaxseed, banana flour, bouillon powder and herbs into a large mixing bowl and mix everything together well. 

Add the beaten eggs and a generous amount of seasoning, then using a fork or your hand bring the mixture together so it binds into a soft cheesy dough-like consistency. 

Cover the bowl with cling film and set aside to chill in the refrigerator for a couple of hours.

When the sausage mixture is thoroughly chilled, form into 12 large sausages - about 7.5cm (3”) long, weighing approximately 85g each.

Pour a large glug of olive oil into a large non-stick frying pan and set it over a high heat until the oil is really hot. When the surface of the oil starts to shimmer shallow-fry the sausages until deep golden brown and crispy on all sides, about 5-6 minutes. Drain the cooked sausages on paper kitchen paper. 

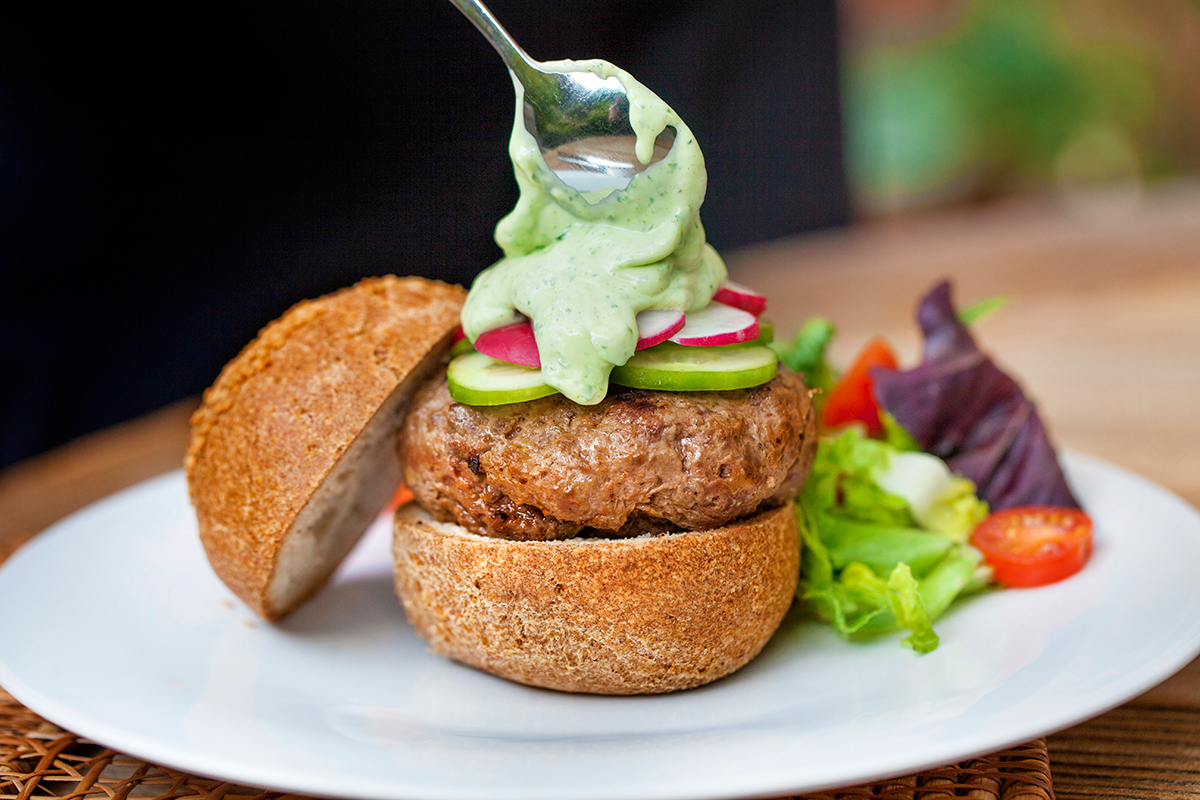
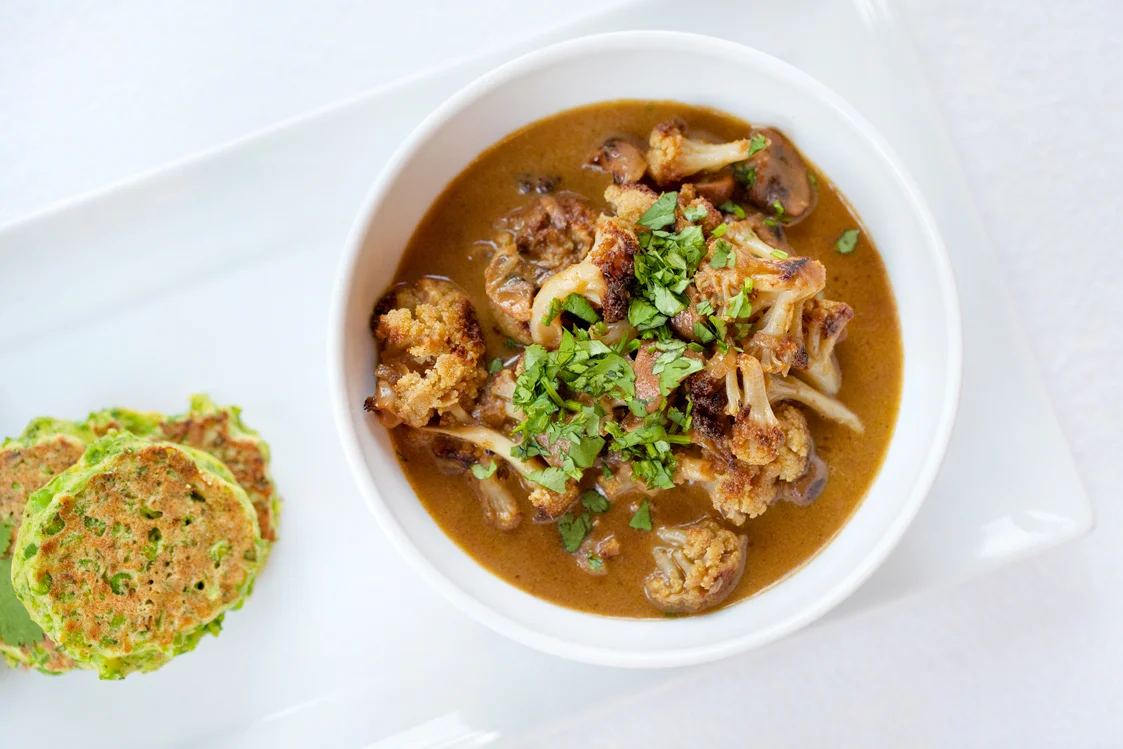
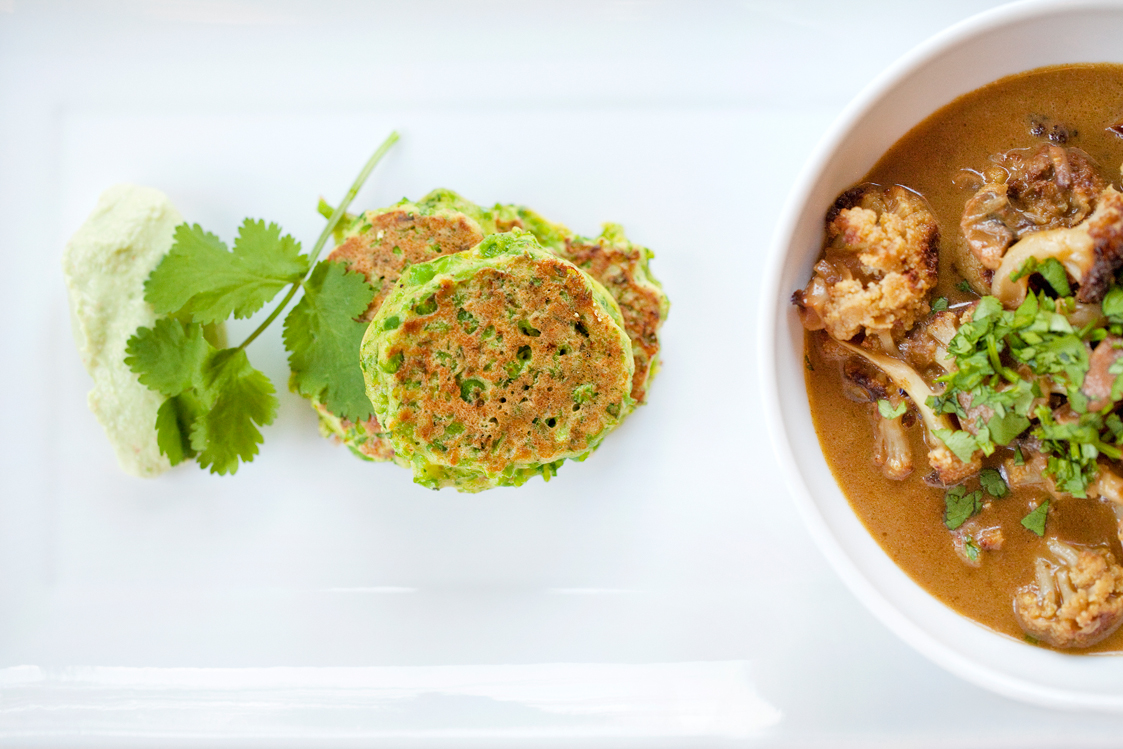
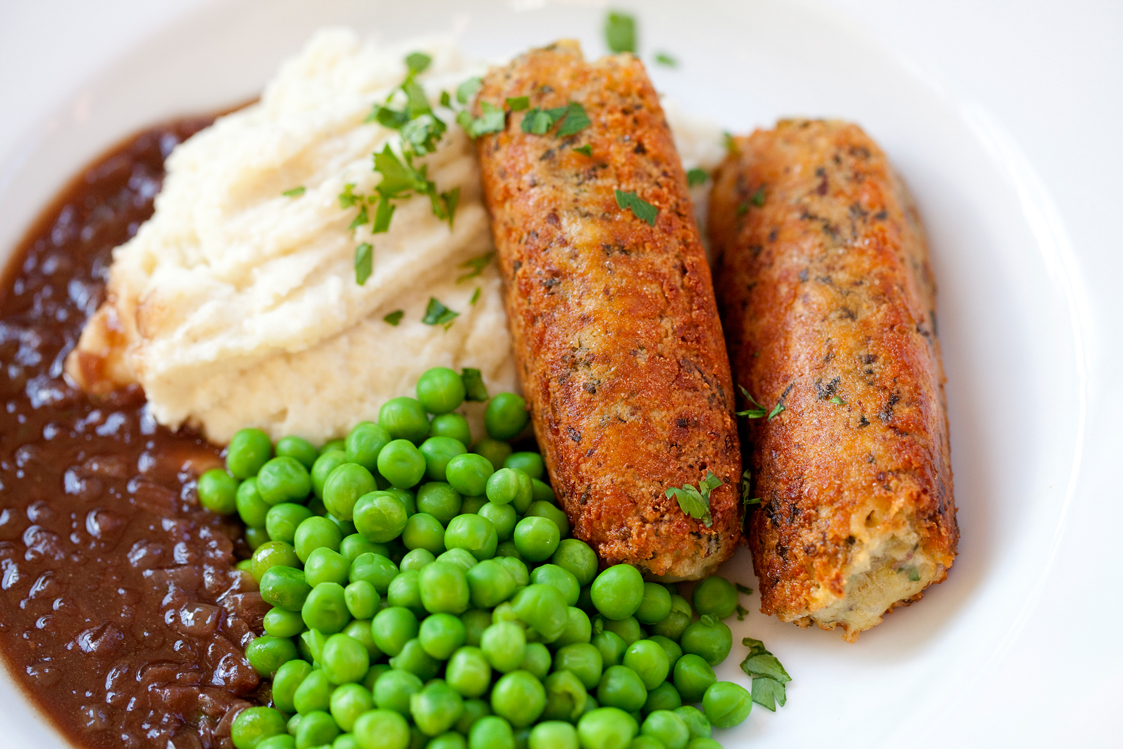
Serve hot with the creamy cauliflower mash, red wine & onion gravy and peas for a low-carb, vegetarian ‘twist’ on a favourite British classic. 


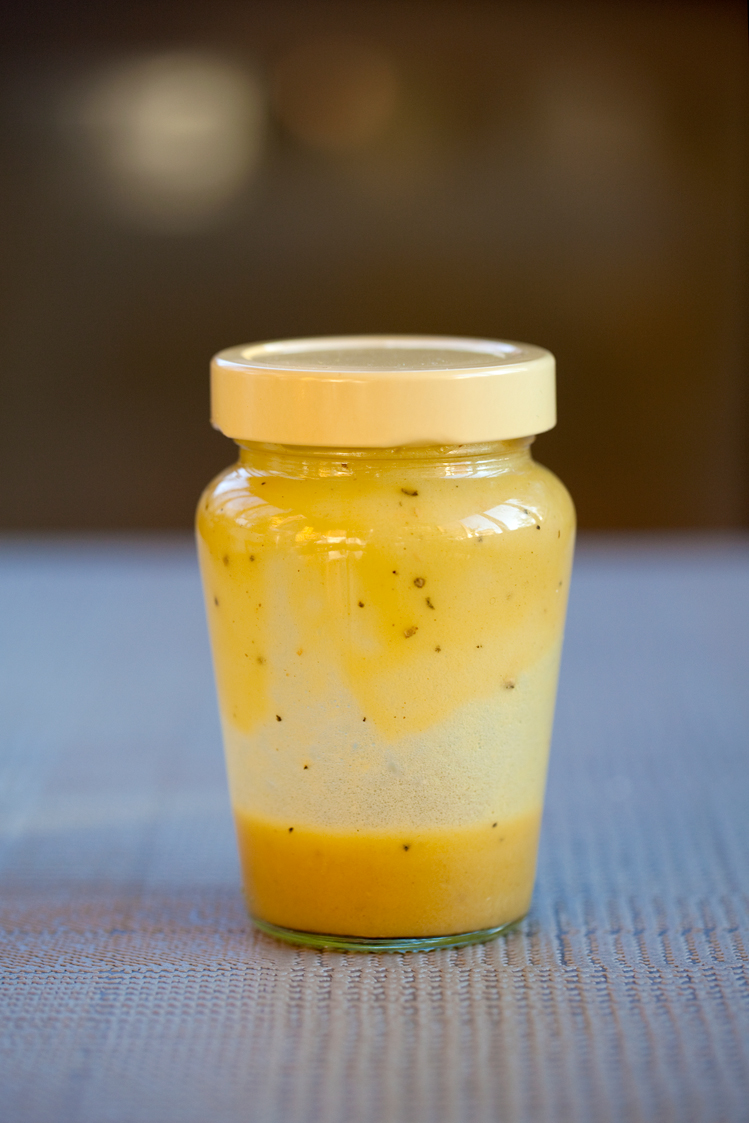
Red Wine & Onion Gravy (Serves 4)

Ingredients

1 tbsp olive oil

2 large onions, finely chopped

1 tsp coconut palm sugar

1 tbsp green banana flour

200ml vegetable stock, made with 1dsp Marigold organic vegetable bouillon powder

200ml red wine

1 tbsp Clearspring tamari (soy sauce)

1 fresh bay leaf

Sea salt and freshly ground black pepper


Instructions

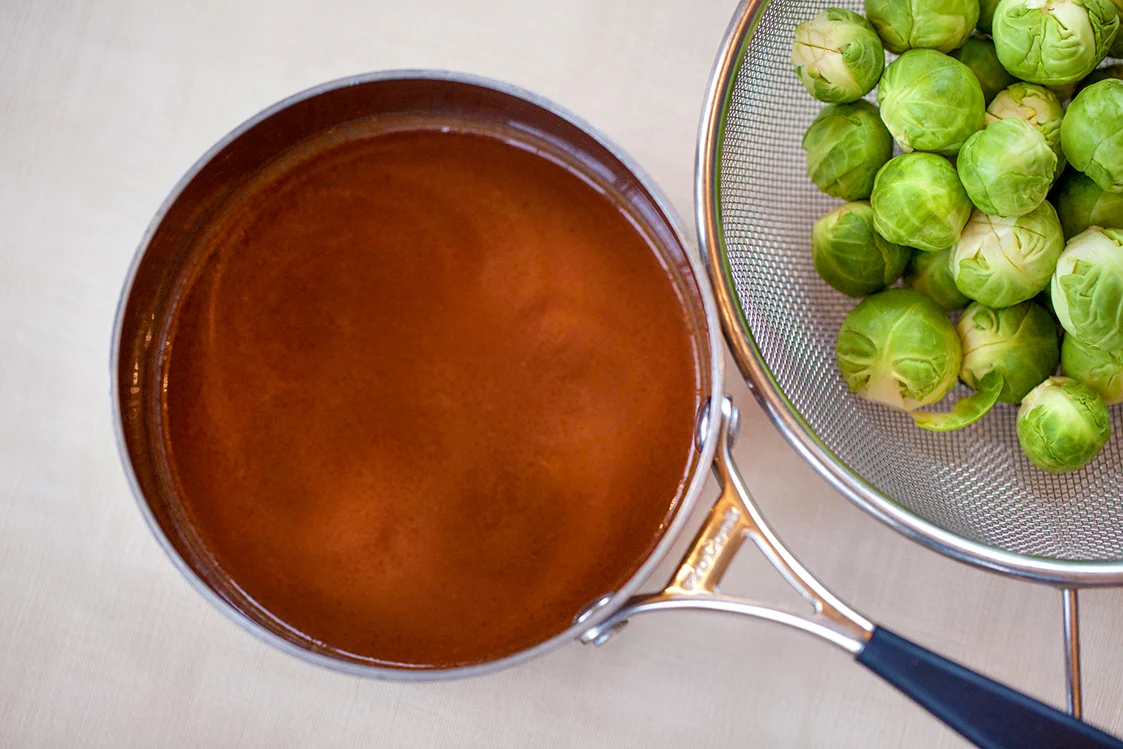
Heat the olive oil over medium-high heat in a large pan. Add the onion and coconut palm sugar to the pan, then cover and cook, stirring occasionally, for 4 minutes or until beginning to brown. Reduce the heat to medium/low and continue to cook with the pan lid on for another 15 minutes, stirring from time to time, until the onion is deep golden brown.

Add the banana flour and stir over the heat for another minute to incorporate, then gradually stir in the stock and wine. 

Bring to the boil, stirring continuously until the sauce has thickened, then turn the heat back down to low.

Add the tamari and taste check. Season with a very little sea salt (only if you think it needs it) and some freshly ground pepper 

Add the bay leaf (or thyme sprig) and gently simmer for another 20 minutes. Remove the bay leaf.

Serve this intensely flavoursome gravy really hot with sausages and other vegetarian savoury dishes. 


Creamy Cauliflower Mash (Serves 4)

Ingredients

1 large head of cauliflower, trimmed and cut into florets

1 fresh bay leaf

100g full-fat soft cream cheese (I used Longley Farm)

Generous pinch of freshly grated nutmeg 

Sea salt and freshly grated black pepper


Instructions

Boil a kettle of water.

Place the cauliflower in the top half of a steamer with the bay leaf tucked in-between the florets. 

Pour the boiling water from the kettle into the bottom half of the steamer, add some sea salt then bring back to the boil. Steam the cauliflower with the pan lid on for about 8 minutes, until it is cooked through.

Tip or spoon the cauliflower into a large bowl and allow it to cool down for a couple of minutes - this will let the steam evaporate and make for a drier mash. Remove the bay leaf. 

Using a stick blender or food processor, whizz the cauliflower into a rough puree. Add the salt, pepper, nutmeg and cream cheese then briefly process again into a creamy mash consistency.

Put the cauliflower mash into a clean pan and gently re-heat, stirring from time to time so it doesn’t catch on the bottom of the pan. 

Serve hot as a delicious low-carb alternative to mashed potato.   


Notes

Keep the formed ‘sausages’ really cold (in a refrigerator) until you’re ready to start cooking them. This will ensure that they stay sausage-shaped in the cooking process i.e. cook to a crispy exterior before the cheese gets a chance to melt and they become misshapen. For the same reason, it is important not to overcrowd the pan because this lowers the temperature of the oil. You want your sausages to fry quickly in the hot oil, not semi-steam, which can cause them to ‘squidge' out of shape as you’re turning them over in the pan (also causing them to absorb more oil).  

The uncooked sausage mixture will keep for several days in a refrigerator. With this recipe being hot-off-the-press I haven’t tried freezing it yet but I think that would probably work too.

If it looks like a sausage, tastes like a sausage and behaves like a sausage it probably IS going to be mistaken for a non-vegetarian sausage! Apart from the difference in colour when you bite into them (pale gold cheese colour rather than cooked-meat-grey) I’d defy anyone to distinguish the difference between these veggie sausages and meat ones, especially when cold. Cooked leftovers, eaten next day straight from the fridge, still had their crispy exterior intact and tasted so ‘porky’ I was genuinely gob-smacked! Which means I’ve also developed a brand new picnic food to go, which is an absolute god-send for when Sarah and I are doing full-day weddings on the move #happy

If you want a smooth gravy i.e. without onion bits,  strain through a fine sieve into a clean pan before re-heating and serving.

If you think the finished gravy is a little too thick just add more water to thin it out to your liking.

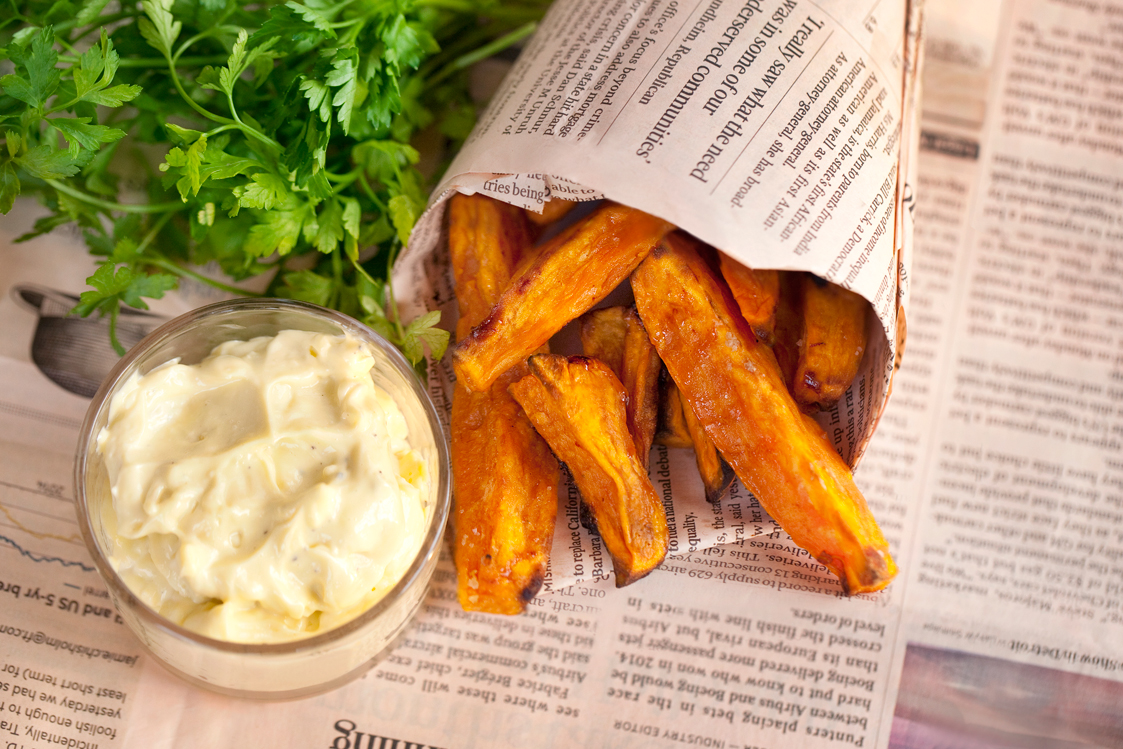
I used steamed cauliflower to create a creamy ‘mash’ that’s very similar to - albeit a lighter, low-carb version of - mashed potatoes. Sweet potatoes, carrots, celeriac, swedes, parsnips and turnips - either alone or in combination - all make a good alternative to potato mash. Just be wary of stacking up the carbohydrates when you eat the sweeter root vegetables i.e. parsnips and sweet potatoes.


Carbohydrates 11g Protein 40g - 2 sausages per serving

Carbohydrates 13g Protein 1g - per serving of gravy

Carbohydrates 12g Protein 6g - per serving of creamy cauliflower mash


Stir-Fried Masala Chicken with Crash Hot Bombay Sweet Potatoes and Coriander & Mint Chutney

by Susan Smith in , , ,


I lost my mojo with regard to writing more recipes for the BBQ this past week, because when the weather turns cold, wet and windy, I really don’t want to eat outside thank you. This means the Halloumi & Vegetable Skewers promised in my last blog post will just have to wait, because I’m now more in the mood for something hot and spicy, like Stir-Fried Masala Chicken.

A packet of organic chicken thighs left too long in the fridge was actually intended for Sushi (my cat), but ended up being far too near its sell-by date for her to deign to eat them! Feeling under some obligation not to waste good food, Stir-Fried Masala Chicken just had to be! Accompanied by Crash Hot Bombay Sweet Potatoes, some baby salad leaves and a fresh, green, zingy, Coriander & Mint Chutney it has the cheer-up factor of spring with a little bit of heat for comfort. An all round winner I’d say, especially as Sushi got some fresh organic chicken breasts to compensate for her loss!

If you’re thinking “Is it okay to drink a lager/beer/cider with my curry when you’re following the Primal diet?” the answer is that none of these alcoholic drinks are strictly Primal (they also contain about 10-15 grams of carbohydrate per glass). However, an occasional, gluten-free, ‘light’ beer or lager (only 3-6 grams carbohydrate a glass) can be considered a bit of a ‘cheat’ and is obviously better for you than regular beers and lagers. 

Anyway, I’m off on a tangent because the drink shown in the picture below (just above Notes) is not alcoholic. It is a deliciously different and refreshing drink made from Thorncroft Detox Cordial  and San Pellegrino Sparkling Mineral Water. Having no artificial flavours or preservatives, no refined sugar and being a great detox to boot, this is how I manage to drink my full quotient of water every day! As a bonus for cider lovers, if you add 1-2 tablespoons of raw, organic apple cider vinegar (also recommended for detox and cleansing) you'll end up with a non-alcoholic cider that not only tastes good, but does you good!  

For ease, I have kept the recipes for the Stir-Fried Masala Chicken, Crash Hot Bombay Sweet Potatoes and Coriander & Mint Chutney separate. However, these dishes brought together on one plate work brilliantly. For those of us committed to a low-carbohydrate, grain-free Primal/Paleo diet, it’s safe to say that the rest of you can keep your traditional naan bread accompaniment, because when compared to this flavourful made-in-curry-heaven combination, it won’t even come close!

To help you avoid any last-minute kitchen frenzy, the Coriander & Mint Chutney can be stored in the refrigerator for a few days, the sweet potatoes can be part-cooked, spiced and 'oven-ready' for a final roasting and the chicken sliced, all in advance. Then, with a pre-heated oven on standby, dinner can be on the table within half an hour or so.

Ingredients - for the  Stir-Fried Masala Chicken (Serves 3)

4 tbsp olive oil

1 onion, finely chopped 

1-2 green chillies, finely chopped

1 tsp (about 2.5cm / 1inch piece) fresh ginger, peeled and finely grated

½ tsp ground coriander

½ tsp ground cumin

1 tsp organic curry powder (or garam masala)

1 tsp Marigold organic bouillon powder

6 x free-range, organic chicken thigh fillets, trimmed and cut into bite sized pieces / strips (alternatively, 2 organic chicken breasts, cut into strips)

2 tsp organic tomato puree

Sea salt and freshly ground black pepper

Baby green or mixed leaf salad, to serve


Instructions

Heat the olive oil in a large frying pan over a moderate heat.  Add the onion and fry for 2-3 minutes until softened. Add the chillies and continue to fry for another 3-4 minutes until the mixture begins to turn golden brown.

Add the grated ginger, bouillon powder, curry powder (or garam masala), coriander and cumin to the pan. Stir until well combined and continue cooking for 2 more minutes until the mixture is thick and fragrant (take care that it doesn’t burn).

Stir in the tomato puree, then add the chicken to the pan. Season with salt and pepper and over a medium/high heat dry-fry for 4-5 minutes, stirring continuously until the chicken is cooked through and a deep reddish brown. Taste and adjust the seasoning if necessary.

Serve immediately with baby green leaf salad. 


Ingredients - for the Crash Hot Bombay Sweet Potatoes (Serves 3)

700g Organic Sweet Potatoes

4 tbsp olive oil

1 tsp black mustard seeds

½ tsp dried chilli flakes

1 tsp turmeric

Sea salt

Freshly ground black pepper


Instructions

Pre-heat the oven to 250℃ / 480℉ / Gas mark 9. Boil a kettle of water.

Peel the sweet potatoes then cut them into approx 2.5cm x 5cm (1in x 2in) pieces and put into the top half of a steamer.

Pour the boiling water from the kettle into the bottom of the steamer, cover with the pan lid and cook the sweet potatoes for 8-10 minutes until just tender (test with a skewer, they should just give without too much resistance). Don’t let them go too soft. Remove from the heat, drain well and set aside to steam dry. 

Meanwhile heat the oil in a large frying pan. Check that the oil is hot enough by adding a sprinkling of mustard seeds (they should pop when it is) then add the rest of the mustard seeds, the chilli flakes, the turmeric and a large pinch of salt. Fry for 1 minute until the spices are well combined and fragrant. 

Tip the sweet potatoes into the pan, give everything a good stir so that they are well coated in the oil, spices and mustard seeds then take the pan off the heat. Using a potato masher, squash and flatten the sweet potatoes down to about half their original size. You’re aiming for a coarsely crushed mixture that'll provide lots of crispy, roasted edges after blasting in the oven. 

Tip the spiced crushed sweet potatoes onto a large non-stick baking tray and season well with salt and freshly ground black pepper.

Bake on the top shelf of the oven for 20-25 minutes until crisp and golden. 

Serve hot with Stir-Fried Masala Chicken. 


Ingredients- for Coriander & Mint Chutney (Serves 4-6)

100g (4oz) bunch fresh coriander, rinsed and dried (I use an OXO salad spinner)

20g fresh mint, stalks removed

2 long green chillies, finely chopped

15g fresh ginger, peeled and finely grated (about 1 tsp, grated)

½ large lime or ½ medium lemon, juiced (about 30ml / 1 fl.oz juice)

1-2 drop(s) liquid stevia

Sea salt, to taste

250g organic Greek yogurt


Instructions

Place the coriander, chillies, grated ginger, lime or lemon juice, a single drop of liquid stevia and a generous pinch of sea salt into a food processor or blender. Whizz together into a smooth, thick puree. 

Add the coriander mixture to the yogurt. Taste and adjust seasoning and/or add another single drop of liquid stevia, if you think it needs it.

Serve as an accompaniment to Stir-Fried Masala Chicken, Crash Hot Bombay Sweet Potatoes and a baby green or mixed leaf leaf salad. 

Notes:

Although the recipes for Stir-Fried Masala Chicken and Crash Hot Bombay Sweet Potatoes serve 3 people, Sarah reckons she can never have too much! Therefore, I suggest that if youve only got two mouths to feed (and youre both hungry), don’t reduce the quantity of ingredients but rather knock yourself out and eat the lot! Just remember, if you're trying to lose weight, you’re loading up the carbs when you eat sweet potatoes!

Skinless chicken breasts are easier to prepare than chicken thighs because there’s no fat or sinew to remove prior to cutting them into strips. Eversfield Organic Farm is Soil Association Approved, deliver nationwide and has won many awards for their organic grass-fed meat from Compassion in World Farming, Food and Drink Devon and Great Taste. They’ve also had many recommendations from top food chiefs and writers and I am now about to add Primal Plate Blog to the list! If you eat a Primal or Paleo diet you will know that only organic, pastured meat is recommended, so this is your one-stop shop for the best fresh meat and poultry you can buy. 

Sweet potatoes are strong sources of beta-carotene, manganese, and copper. A small one has 22g carbs and 3g fibre, making it the perfect post-workout snack. They’re also Primal/Paleo and a lot tastier than a bland white potato (which isn’t!). In this Primal Plate recipe, they perfectly balance out the heat of the Masala Stir-fried Chicken and the fresh, green tang of the Coriander & Mint Chutney. Truly delicious!

Coriander & Mint Chutney, whilst obviously the perfect condiment for an Indian dish, also makes an utterly moreish dip for crudités and other finger-licking goodies. I’ve even recently used it as a dipping sauce for the first-of-the-season English steamed asparagus. My advice would be, never let a bunch of fresh coriander go to waste in your fridge - make some fresh coriander chutney with it instead - once tasted, you just can’t seem to get enough!


Carbohydrate 5g Protein 36g - per serving of Stir-Fried  Masala Chicken 

Carbohydrate 51g Protein 3g - per serving of Crash Hot Bombay Sweet Potatoes 

Carbohydrate 4g Protein 2g - per serving of Coriander & Mint Chutney 


Fast & Easy Vinaigrette

by Susan Smith in


Here comes summer and with it…salad days! Sarah always asks me to make her a vinaigrette if we’re eating Salad at her house. She reckons that whenever she tries to hand whisk vinaigrette together in a bowl, it always separates. 

So, here is the definitive no-fuss method for making perfect vinaigrette. So fast and easy, your child could make it!

Fast & Easy Vinaigrette (V) (Makes about 180ml)

Ingredients:

2 tsp Dijon mustard

1 tsp raw clear honey

3 tbsp raw cider vinegar

100ml organic olive oil

Sea salt and freshly ground black pepper


Instructions:

Find a clean, re-cycled glass jar with well-fitting lid (or plastic food container), add the vinaigrette ingredients to your chosen container in the order listed above. 

Secure the lid tightly, then shake the contents vigorously. Taste and adjust the seasoning if necessary. 

Before serving, give the dressing another good shake then drizzle or spoon the vinaigrette directly from the jar on to your salad as needed (it’s best to do this incrementally, as you want your salad nicely dressed, not drowned!)


Notes:

Without the addition of fresh herbs, the vinaigrette will keep at room temperature for several days.


Carbohydrate - 1g Protein 0g - per serving


Pea & Pistachio Soufflés, Asparagus and Hollandaise Sauce

by Susan Smith in , ,


If you watched the BBC2 documentary Eat To Live Forever on 18th March 2015, with food critic Giles Coren setting out to test three allegedly extreme anti-ageing diet regimes, including the Paleo diet and the less restrictive Primal diet (as endorsed by Primal Plate), you might have been persuaded that devotees of the Primal Blueprint are basically people that are peculiarly afflicted - in the sense that, if they’re not monkeying around and wielding the equivalent of a club in Stone Age style in order to keep themselves fit, they’re gorging themselves silly on heart-attack-inducing animal fat and meat.

Nah! Not true! It seems to me that this is history repeating itself and misinformation, promulgated by vested interests, is damaging to public health! Hence we’re still in the grip of a high-carb, low-fat, calorie counting, portion-controlling, obesity and diabetes crisis! They’ll always find a way to discredit, undermine or silence pioneering thinkers. In 1972, in a book entitled Pure, White and Deadly, Professor John Yudkin tried to warn us about the dangers of sugar and it cost him his career. Distorted information (actually, downright lies!) wilfully fed to the public, causes confusion and so brought the Atkins Diet into disrepute. As for the high carb, low fat, cholesterol scare-mongering advice that’s ravaged the nation’s health for the past fifty years and…well basically, I’d advise you not to blindly believe anything you’re told.

Since it only takes 28 days to seriously test out the low-carbohydrate, higher-fat lifestyle for yourself and discover what’s true, it could be the most worthwhile investment in your health, and the health of your family, that you’ll ever make. You’re not alone, in 2013, Sweden was the first Western nation to reject low-fat dietary dogma in favour of low carb, high fat nutrition.

Most people have been conditioned into thinking dietary fat, especially saturated fat (did you know that olive oil has 9 times the saturated fat of pork?), is unhealthy. Not so. Natural, health-giving fats and oils (I do so love butter), should not be feared or avoided because they are nutritionally essential. And, when you diss the grains and refined sugar you do not even have to think about calories, much less count them! Remind yourself, it is sugar in all its forms that gets stored as fat in your fat cells, not actually the fats that you eat!

However, there is a killer fat on the loose in today’s society called trans fat, also known as hydrogenated or partially hydrogenated vegetable oil. The raison d’être of an allegedly desirable “heart healthy” low-fat spread promoted by the British Heart Foundation (in collusion with Unilever!), you might think from what you’ve been told that it’s good for you because it helps to lower your cholesterol (it does, but not in a good way). Trans fats are a cheap, crap, man-made substitute for natural cold-pressed oils and hand-churned butter and are really injurious to health. They’re everywhere… in commercially baked foods (biscuits, cakes, breads) convenience foods (ready-meals, breaded fish, french fries) food from many fast food restaurants (that use hydrogenated vegetable oils for frying) and ironically, those supposedly ‘good for your heart’ spreads and margarine. 

Trans fats accumulate in the body, can’t be metabolised and are implicated in many serious health problems including heart disease, cancer, diabetes and asthma. I urge you to read and digest this article then check all the labels of the foods you’ve already purchased for the ingredient ‘partially hydrogenated vegetable oil’. If it’s listed, you know what to do!

So beautiful butter it is then, which brings us to todays Easter celebration lunch for vegetarians and Primal people not in the mood for meat, because there’s no better or more natural time of year to enjoy a savoury dish based around eggs. Pea & Pistachio Soufflés, Asparagus and Hollandaise Sauce has both the green colour and zingy freshness of lemon that I associate with springtime, so rather than eating any feather, fur or scale related friends (which always makes me feel a bit cheerless) this elegant, low-carb main course will be the one to grace our table next weekend. A compassionate extension, if you will, to Meat-Free Week, which seems to me to be far more appealing and relevant for a festival celebrating fertility, birth and new life. 

Pea & Pistachio Soufflés with Hollandaise Sauce is ideal when English asparagus is in season (only for two months in May and June) but since the flavour of asparagus is so harmoniously aligned with these delicate soufflés and lemony hollandaise sauce, I make no apologies for using good-looking foreign-grown asparagus, when English isn’t available. Just make sure the spears are crisp, not discoloured and decent sized - you don’t want the fine variety of asparagus called sprue for this dish. Other spring-like vegetables that work well with Pea & Pistachio Soufflés and Hollandaise Sauce are tender stem broccoli, baby or Chantenay carrots and cauliflower. Try as I might to persuade Sarah that it might just be okay to eat them as a one-off treat, she simply won’t let me wander into Jersey potato territory!

I hope you will enjoy Easter and the transition to spring as much as we do. I think this is a very pretty and fresh-looking meal that wakes up the tastebuds and is a delicious introduction to the flavours of the new season approaching. Happy days!   

Pea & Pistachio Soufflés, Asparagus and Hollandaise Sauce (V) (Serves 4) 

Ingredients - for pea & pistachio soufflés 

Butter, for greasing

2 tbsp olive oil

450g (1lb) leeks, trimmed, washed and finely chopped

225g (8oz) frozen peas 

60ml (2fl oz) water

120g (4 oz) unsalted, shelled pistachio nuts

Large handful of fresh dill, stalks removed, finely chopped

4 organic eggs

4 tbsp crème fraîche

Fresh dill and lemon slices, to serve


Ingredients - for the asparagus and hollandaise sauce

450g (1lb) asparagus

150g (5oz) butter

1 tsp Dijon mustard

2 tbsp lemon juice

2 organic egg yolks

Celtic sea salt


Instructions - for pea and pistachio soufflés

Pre-set the oven to 190 ℃ / 375 ℉ / Gas mark 5. Grease 4 x 250ml (8oz) ramekin dishes and line the bottom of each with a circle of non-stick baking parchment. Boil a kettle of water.

Heat the olive oil in a large pan on a medium heat. Add the finely chopped leeks, cover with a circle of greaseproof paper (cut to the diameter of your land) and cook with the lid on for 5 minutes.

Remove the lid and paper and stir in the frozen peas. Add the water and cook with the pan lid on for a further 5 minutes. Remove from the heat.

Finely chop the pistachio nuts in a food processor, add the cooked leek and pea mixture and blend until smooth. Add the chopped dill, eggs, crème fraîche and seasoning. Blend together thoroughly, taste and add more seasoning if necessary.

Pour the mixture into the ramekin dishes, filling to the top. Place in a roasting tin and pour boiling water (from the kettle) around the ramekins until it reaches half way up the sides, then carefully place in the oven and cook for 35 minutes until slightly risen and set.

Take out of the ‘bain marie’ (water bath) and leave to stand for 2 to 3 minutes. With a small sharp knife, loosen the edges of each soufflé and turn straight onto a warm plate. Garnish with dill and lemon and serve immediately with the Asparagus and Hollandaise Sauce together with a further selection of lightly cooked vegetables.  

Instructions - for asparagus and hollandaise sauce

Boil a kettle of water.

To make the hollandaise sauce: heat the lemon juice in a small saucepan to just below boiling point.  

Put the egg yolks, mustard, sea salt, cayenne pepper and hot lemon juice into a food processor or blender and whizz together until it’s pale and smooth.

Meanwhile, gently melt the butter in a small saucepan over a moderate heat and when it is very hot and foaming transfer to a heat-proof jug.

Switch the blender / food processor back on and with the machine continually running, slowly pour the melted butter in a steady trickle through the feed tube of the food processor - do this very gradually until all the butter has been added and the sauce is thickened, glossy and pale yellow in colour. Check the seasoning and adjust if necessary. Allow the mixture to stand for a minute or two before serving with the asparagus. (see note below) 

To cook the asparagus: snap the tough ends off the stalks of asparagus, then using a potato peeler trim the bottom of the stalks further if necessary. Wash well.

Pour the boiling water from the kettle into the bottom half of a steamer, then steam the asparagus with the pan lid on for about 5-6 minutes, or until it is just tender.

Serve immediately


Notes: 

It can be difficult to keep Hollandaise Sauce hot without it splitting or becoming overly thickened. Ideally, it should be made quickly at the last minute, which isn’t an easy task if you’re entertaining. The simplest solution is to pre-heat a wide-necked Thermos flask with boiling water, then seal it and set aside whilst you make your sauce. When the hollandaise is ready, quickly pour the water away and transfer the sauce directly from the food processor to the flask. Seal and serve within 20 minutes.

Unfortunately, I didn’t use the Thermos flask trick on this occasion and, as a result, the Hollandaise Sauce shown in the photograph above is a little too thin. This is because it wasn’t allowed to stand for a couple of minutes before serving. It seems to go with the territory of food blogging -  there’s always an anxious 10 minutes for Sarah and I whilst we rush to get the food on the plate, photograph it and get it back to the table before someone’s dinner has gone cold!


Carbohydrate 16g Protein 19g - per soufflé

Carbohydrate 1g Protein 2g - per serving of hollandaise sauce

Carbohydrate 4g Protein 2g - per 100g serving of steamed asparagus


Primal Fishcakes with Lemon Butter & Chive Sauce

by Susan Smith in , , ,


Flushed with success from creating a recipe for Grain-Free Scones with the taste and texture of a traditional wheat-flour scone last week, I was supposed to have taken time out to relax and enjoy my own Mothering Sunday weekend (a one-day celebration doesn’t seem enough for a lifetime’s effort!) However, it wasn’t to be - the best laid plans and all that - because on Saturday morning I woke up ridiculously early (2:30am), with the thought that I had to develop a recipe for low-carb, potato-free, breadcrumb-free fishcakes! This almost impossibly idealistic notion haunted me for the rest of that night and the next four days! 

Whilst authentic Thai fishcakes, those tasty, slightly rubbery morsels that rely on raw fish and egg white to hold them together, do in fact fulfil my criteria for low-carb, no breadcrumbs or potato, I wanted my fishcakes to be of the classic British variety - with a soft fluffy middle and a bit of crunch on the outside. A comfort food that can simply be speared with a fork, smeared with tomato ketchup and eaten as my no-fuss interpretation of fast-food, or perhaps dressed-up for a satisfyingly simple retro meal.   

Trickily, the texture, taste and appearance of mashed potato is unique to (not unsurprisingly) potatoes! How to replicate? I didn’t want the carb count of mashed parsnips or yam, the wetness of mashed celeriac, or the orange colour of sweet potato. Finally, I settled on cauliflower (at least it’s the right colour) and coconut flour (to bind it all together) and…er, that would be a no! Far too dry and crumbly, the fishcakes disintegrated before you could get them into your mouth.

Last evening, tired and weary from a day of helping Mirror Imaging Photography catch up on their admin (or was it two days of non-stop thinking about how to develop my fishcakes?) I finally cracked it! 

Unsophisticated it may be, but nonetheless, the marriage between a light potato-style mash and fish just works, so if you’re a Primal convert and feeling fish-and-chip-shop deprived, this equally delicious potato and breadcrumb-less fishcake is very good news indeed! 

I have teamed them with poached eggs, lightly cooked spinach and Lemon Butter & Chive Sauce (probably a little too ambitious for a family meal at the end of a working day!) but you can decide what other flavour combinations work for you…

With the Lemon Butter & Chive Sauce, a fresh green salad would be perfect for a light supper or lunch. Without the sauce, tomato and mozzarella salad would be good, so would guacamole (spicy avocado dip) or, quite simply, some cooked frozen peas and a low-sugar organic tomato ketchup for dunking.

Easier and quicker to make than traditional fishcakes (because there’s none of the threefold messing about dipping them in flour, egg and breadcrumbs), I think these healthy-looking (the lovely pale green colour comes from an abundance of fresh herbs) and authentic-tasting fishcakes are destined to become a new Primal, low-carbohydrate classic.

Primal Fishcakes with Lemon Butter & Chive Sauce

Ingredients - for the fishcakes (makes 6 generous fishcakes)

500g (1lb 2oz) undyed smoked haddock (MSC certified)

150ml (¼ pint) whole milk 

1 medium-sized cauliflower

2 bay leaves - optional

75g (2½ oz) full-fat cream cheese (I use Longley Farm)

20g (¾ oz) fresh herbs, stalks removed and finely chopped (I used a mixture of parsley and dill)

2 tsp lemon zest, finely grated

Sea salt and freshly ground pepper

½ tsp cayenne pepper

55g (2oz) ground almonds, for coating

Clearspring organic sunflower oil, for frying

Lemon wedges and watercress - to garnish


Ingredients - for the lemon butter & chive sauce (serves 4)

30g (1oz) unsalted butter

Lemon, finely grated zest and juice (about 40ml)

150ml (¼ pint) double cream

sea salt and freshly ground pepper

2 heaped tbsp fresh chives, finely chopped


Instructions

Boil a kettle of water. 

Put the fish into a large flat pan (big enough to hold all the fish in a single layer), pour over the milk and 150ml (¼ pint) water. Bring to a simmer, then gently cook the fish skin-side down for 4 minutes. Take the pan off the heat, turn the fish over and leave to stand, covered with the pan lid, for a further 10 minutes. 

Drain the fish and place on a large flat plate, skin and remove any bones if necessary and set aside to cool.

Meanwhile, cut the florets off the cauliflower (only the florets, you don’t need any stalk) and in a food processor blitz them for about 20 seconds into cauliflower grains - a sort of cauliflower ‘snow’. 

Place the cauliflower snow in the top half of a steamer with a couple of bay leaves. Pour the boiling water from the kettle into the bottom pan of the steamer, bring back to the boil then steam the cauliflower for 4 minutes with the pan lid on.

Have a clean towel laid out ready on your worktop. Using a draining spoon, deposit the just cooked cauliflower onto this. Remove the bay leaves and allow to cool down for about 5 minutes.

When cool, wrap the cauliflower tightly up inside the tea towel and wring it out as forcibly as you can to remove as much liquid from the cauliflower as possible. N.B. wet mash is death to fishcakes!

Put the dried-out cauliflower pulp into a bowl with the herbs, lemon zest and cream cheese. Blend together thoroughly with a hand blender to form a smooth mash (this can be done more easily in a food processor) then season well with salt, pepper and cayenne. N.B. The mash needs to taste really flavourful at this stage. 

Break the cooled fish into large flakes and add to the cauliflower mash, combine thoroughly with a fork but make sure you leave a good percentage of the fish flakes intact for texture. The mixture should be soft but firm enough to hold its shape when squashed together. Taste, if the mixture needs extra seasoning, add it now.

Put the ground almonds onto a large flat plate. Mould the mixture with your hands into six even-sized rounds (about 125g to 130g per fishcake and approx  2cm / ¾ inch thick), then carefully dip each fishcake into the ground almonds, coating thoroughly. Place the fishcakes on a clean plate and put in the fridge for 30 minutes to firm up.

When you’re ready to cook the fishcakes, heat up 2-3 tablespoons of oil in a large non-stick frying pan over a medium heat. Add 3 or 4 fishcakes to the pan and cook for about 5 minutes on both sides, until nicely browned. (N.B. If you overcrowd the pan the fishcakes won’t cook properly and you’ll find it difficult to manoeuvre them when you’re trying to turn them over)

Remove the cooked fishcakes, place on a paper towel lined plate and keep warm in a pre-heated low oven whilst you repeat with the remaining fishcakes.

To make the lemon butter and chive sauce: heat the butter in a small saucepan over a low to moderate heat. When the butter has melted and is just starting to bubble add the lemon zest and juice to the pan and simmer gently for 2 minutes. Add the cream, then gently simmer for a further 4 minutes. Season with salt and freshly ground pepper. Just before you’re about to serve, gently re-heat the sauce and stir in the finely chopped chives.


Notes:

A medium-sized cauliflower should produce about 500g of stalk-free florets

Don’t be tempted to use whipped, ‘light’ or reduced-fat cream cheese for this recipe - it needs to be full-fat soft/cream cheese to help bind the cauliflower mash together.

I use a ½ US Cup to quickly measure the amount of mixture for each fishcake - pack the mixture down firmly into the measuring cup, level it off and then sharply knock the fishcake out of the cup into the palm of your other hand before shaping, i.e. flattening out, into rounds.

If the pan and frying oil looks dirty after frying the first batch of fishcakes, clean the pan out with kitchen paper and heat up some fresh oil before continuing with the remaining fishcakes.


To make Perfect Poached Eggs - using Poaching Pods, cook your eggs (one large egg per person) for exactly 5 minutes, i.e. the same amount of cooking time required for the second batch of fishcakes after they’ve been turned over.

To cook spinach (serves 4): Remove the stalks from 500g (1lb) young spinach leaves, wash the leaves and shake off as much water as possible (I do this in a salad spinner). Warm 50g (2oz) butter in a large non-stick saucepan over a medium-high heat. When the butter is melted and is starting to bubble, add the spinach to the pan (you may have to do this in 2 or 3 batches - stir-frying each batch of leaves until they collapse down to make room in the pan for the rest).

Cook the spinach for 2-3 minutes, stirring continuously until all the leaves are wilted and tender. Don’t overcook, it should provide a burst of bright green on the plate - not be grey or mushy! 

Take the pan off the heat and drain the spinach in a colander, using a potato masher or the back of a wooden spoon to press out any excess liquid. 

Put the spinach back into the still hot pan, loosely break it up with a fork, then lightly season with salt and freshly ground pepper and a pinch of nutmeg. Serve warm.


Carbohydrate 4g Protein 19g - per fishcake

Carbohydrate 2g Protein 1g - per serving of lemon butter & chive sauce

Carbohydrate 0g Protein 7g - per large organic poached egg

Carbohydrate 1g Protein 5g - per serving of spinach

Carbohydrate 3g Protein 1g - per 15g serving of Mr Organic Italian tomato ketchup


Banana Cashew & Rum Ice Cream with Hot Chocolate Sauce

by Susan Smith in , ,


It’s not really warm enough outside to be thinking about ice cream but when faced with yet another bowl of over-ripened bananas, what to do? 

Well, it could have been Banana Poppy Seed Cake with White Chocolate Vanilla Bean Frosting, but in fact it was a recipe for Banana Cashew Ice Cream in last month’s edition of Waitrose Kitchen adapted from Hugh Fearnley-Whittingstall’s latest book River Cottage Light & Easy: Healthy Recipes for Every Day that really grabbed my attention because it looked to be, and in fact is, dead simple to make, problem-free and above all, refreshingly delicious.

My ice cream just naturally evolved into Banana Cashew & Rum Ice Cream because banana flavour marries so well with rum that I couldn’t resist adding a tablespoon or three of alcohol to the recipe! Nor is my version dairy-free, since the colour (the bananas discolour whilst you’re waiting for the mixture to cool) and the texture are enhanced by adding double cream (it makes for a paler and creamier ice). Furthermore, as the total carbohydrate count is identical for both recipes there’s no need to beat myself up over the extra indulgence! In fact, in for a penny in for a pound, I suggest you serve this ice cream with hot chocolate sauce spooned over.

As ever, the quality of your ingredients will determine the results. Hold your nerve with the bananas - they need to be ripened to the stage where the skins are beginning to be mottled with black. Also, make sure that you buy the finest chocolate you can afford (at least 70%). You can then sit back because you will have created something totally scrumptious.

Banana, rum and chocolate is simply a flavour match made in heaven, add to that the contrast between hot and cold and we could all be screaming for ice cream!

Banana Cashew & Rum Ice Cream with Hot Chocolate Sauce (V) (Serves 6)

Ingredients - for the ice cream

75g (2¾oz) raw organic cashews - soaked in cold water for 4-6 hours (or overnight) and drained

2 large or 4 small slightly over-ripe bananas (about 400g / 14oz unpeeled weight)

125g (4½ oz) clear organic honey

½ lemon, juice

125ml (4½ fl oz) double cream

3-4 tbsp rum


Instructions

Peel the bananas and break into chunks. Put them in a blender with the drained cashews, honey, lemon juice and 100ml cold water and blend until smooth.

Pour into a jug and press a piece of cling film directly on top of the liquid and up the sides of the jug to prevent air getting to it - this will minimise the bananas discolouring. Chill until cold.

When cold enough, stir in the chilled double cream then gradually start adding the rum a tablespoon at a time, tasting as you go. Even if you like it strong, 4 tablespoons is probably the optimum amount you’ll need.

Churn the ice cream in an ice cream maker until it is the consistency of very thick cream, then quickly transfer to a plastic freeze-proof container and freeze until solid.

If you don’t have an ice cream machine, pour into a plastic freeze-proof container and freeze for about an hour until the sides start to get solid. Then mash with a fork to combine the solid ice cream at the sides of the container with the still liquid centre. Straightaway, put it back into the freezer for another half-hour then take it out again and repeat the mixing and mashing. Continue doing this every half hour until the ice cream is soft-set, then let it freeze solid.

Take out of the freezer and put in the refrigerator 20-30 minutes before serving to allow the ice cream to soften slightly.


Ingredients - for the chocolate sauce

200ml (7fl oz) whipping or double cream

100g (3½oz) good quality dark chocolate, chopped (I use Callebaut’s finest dark chocolate chips, which saves me the bother of chopping!)

1 tsp pure vanilla essence

Knob of good quality salted butter (I used Rodda’s)


Instructions

In a small pan heat the cream to scalding point (just below boiling). Take the pan off the heat. 

Add the chocolate to the cream, whisking continuously until the chocolate is melted and you have a smooth sauce.

Add the vanilla essence and finally whisk-in the butter.

Gently re-heat the sauce if necessary but do not allow it to boil. Spoon immediately over ice cream.

Alternatively, keep warm over a pan of barely simmering water until you're ready to serve.


Carbohydrate 34g Protein 2g - per serving of ice cream

Carbohydrate 9g Protein 3g - per serving of chocolate sauce


Sweet Potato Chips with Homemade Mayonnaise

by Susan Smith in , , , ,


I like the convenience of always having a jar of good quality mayonnaise in my refrigerator. Unfortunately, even the best organic mayonnaise I can buy has corn syrup, corn starch and agave syrup in its line-up of ingredients. So, as far as eating a Primal diet is concerned, it doesn’t cut the mustard.

However, if you commit to making your own mayo, there’s still the problem of deciding what is the healthiest and the best-tasting oil to use. The choice is bewildering!

For health reasons I’d choose an organic, unrefined, cold-pressed oil such as extra virgin olive oil, avocado oil or macadamia oil. Unrefined oil, which usually means the oil is cold-pressed (mechanically extracted by pressure rather than heat) is much better for you because it retains all its nutrients and flavour.

On the other hand, for the non-overpowering taste and pale look of shop-bought mayonnaise, a refined oil would produce something that’s much more like Hellman’s, which is what most people think is the ‘real deal’ of mayonnaise.

The issue is, I do not want to use refined oils in my cooking because the likes of rapeseed oil (90% of the world’s rapeseed crop is genetically modified!), canola oil (canola oil is extracted from rapeseed), rice-bran, grape-seed, sunflower or pure and light olive oils are subjected to chemical solvents, de-gumming and neutralisation (doesn’t even sound healthy does it?) and this processing removes some of the oil's nutrients and essential fatty acids, as well as their natural flavour and colour.

Consequently, when it came to making mayonnaise for this blog post I found myself having a “Daddy or chips?” moment!

I’ve previously tried making mayonnaise using the best quality organic cold-pressed olive oil (the classic ingredient used for making homemade mayo) and believe me it tastes downright nasty! Its flavour profile is just far too bitter and overpowering for a salad dressing, to be lathered on top of a sandwich, to make a self-respecting egg mayonnaise or as a complement to chicken, meat or fish and, as far as I’m concerned, it would be absolutely ruinous to chips!

I’ve also tried avocado oil, which wasn’t much better. Furthermore, both unrefined olive and avocado oils impart a dark greenish hue to the finished mayonnaise, which I find unattractive. I really just want my mayo a pale-ish golden colour, please!

I still have a bottle of macadamia nut oil waiting in the wings, but for now I’ve decided it’s just a bit too pricey for another culinary mistake, so I decided to use a hybrid version of cold-pressed organic sunflower oil today and…whoop-de-doo-da! Third time lucky!

The reason the Primal community usually tries to avoid sunflower seeds and sunflower seed oil is because they are really high in omega 6 oil. Not that there’s anything wrong with this per se, it’s just that most people are already into omega-6 fat overload (especially if they eat grains and grain fed meat) so the healthy balance between omega 3-6-9 fatty acids, which should be in the ration of 2-1-1 is all out of kilter with good health.

But wait, not all sunflower oil is high in omega-6. There is an alternative high-oleic sunflower oil that’s organic, cold pressed, very stable at high temperatures (as in, suitable for deep fat frying) and has the same monounsaturated fat found in olive oil and your very own adipose tissue. It’s totally tasteless too, which makes it a really good oil for Primal mayonnaise.

So now you know what all the fuss is about, please try this recipe at least once in order to appreciate its enticing balance of velvety smoothness and precisely seasoned piquancy. This homemade mayonnaise can only ever make a Chicken Salad Sandwich (recipe coming soon) or in this case, Sweet Potato Chips even nicer! I promise you, shop-bought mayo doesn’t come anywhere close to the real thing.

Sweet Potato Chips with Homemade Mayonnaise (V) (Serves 4)

Ingredients - for the sweet potato chips

4 orange-fleshed organic sweet potatoes

2 tbsp organic extra virgin olive oil (or Clearspring organic sunflower frying oil)

Celtic sea salt


Instructions

Pre-heat the oven to 200℃ / 400 ℉ / Gas mark 6

Cut the sweet potatoes into even-sized chunky chips (thick wedges) 

Put the chips into a large bowl with the olive oil and sea salt, mix thoroughly together with your hands so that the chips are evenly coated in the oil and salt.

Spread the sweet potato chips out onto a lipped baking tray in a single layer. Roast in the oven for 20 minutes, then take the tray out of the oven and turn the chips over to ensure even browning. Return to the oven for a further 10 to 15 minutes until they are nicely crisp and brown.

Remove from the oven, and tip on to plate lined with a paper towel. Sprinkle over a little more sea salt, if liked and serve immediately with homemade mayonnaise.


Ingredients - for the mayonnaise

2 large organic egg yolks

Sea salt and freshly ground black pepper

1 tsp raw cider vinegar 

½ tsp English mustard powder

240ml Clearspring organic sunflower frying oil

10ml organic extra virgin olive oil

1-2 drops liquid steviaoptional

Lemon juice or extra vinegar, to taste

1-2 tbsp warm water to thin down, if liked


Instructions

Make sure that all the ingredients are at room temperature before starting.

Combine the oils in a drip-free jug.

Whisk the egg yolks, salt, pepper, mustard power and cider vinegar in a bowl for a a minute or so. 

Gradually and slowly start to add the oil to the egg yolk mixture a drop at a time, keep whisking all the time after each addition of oil to ensure it is properly incorporated before adding more oil. Do not try to rush things at this stage otherwise the mayonnaise will split. Keep adding the oil drop by drop. As the mixture thickens, you can then start to add it more quickly. 

By the time all the oil is added you will have a thick stable mayonnaise that holds its shape. Taste it, adding more salt and pepper, mustard, lemon juice or vinegar and a drop of liquid stevia, only if you think it needs it. You can also add other flavourings such as chopped herbs. If you would prefer a thinner mayonnaise, add a little warm water (1-2 tablespoons) as well. 

Keep the mayo refrigerated until you’re ready to eat it. 


Notes

This quantity of mayonnaise makes enough for 8 people. Halve the recipe if this is too much for your family to get through within 3 days - it needs to be eaten within that time due to the inclusion of raw eggs. 

In spite of us being in the midst of a 21st century obesity epidemic, many people still believe conventional wisdom, which says calorie counting and a low-fat diet is the key to weight loss. The reality is, if you’re trying to lose weight and stay that way, it’s sugar in all its forms that you need to seriously restrict, not healthy fats. 

Remember, essential fatty acids are just that. They are ’essential’ because the body needs them, it can’t make them and they must be obtained from the food you eat, so please don’t try to omit healthy fats from your diet. It’s worth noting that unrefined oils, such as Coconut Oil, is 100% fat but is said to aid in weight loss! 

I personally take daily supplements of fish and butter oil to ensure I get enough of the omega-3 fatty acids. These are associated with many health benefits including protection from heart disease and stroke. New studies are identifying potential benefits for a wide range of other conditions including cancer, inflammatory bowel disease and other autoimmune diseases such as lupus and rheumatoid arthritis.


Carbohydrate 21g Protein 4 g - per sweet potato (100g weight)

Carbohydrate 2g Protein 4g -  per serving of mayonnaise


Souffléd Cauliflower with Gruyère Cheese Sauce

by Susan Smith in , , , , ,


Back in the 1970’s, due to a lack of money and much to my husband’s irritation, cauliflower cheese, along with jacket potato and tuna bean salad used to be the mainstay of our diet. It was the repetitive appearance of cauliflower cheese that offended him the most. We’re not together now but I do wonder if he’s carried his grudge against cauliflower with him for the past thirty-five years!

If so, it would be a pity because today’s recipe for Souffléd Cauliflower with Gruyere Cheese Sauce is a far cry from the boiled cauliflower with the flour-based béchamel cheese sauce of our yesteryears, which I confess (too late as far as my ex is concerned!) was a truly monotonous thing to eat no matter how liberally I attempted to mask it in cheesiness.

This no-grain, low-carb version is really an elegant deconstruction of boring old cauliflower cheese that I think is simply brilliant as an imaginative vegetarian main course or as an accompaniment to fish, chicken or meat. It’s amazing what a little bit of height and lightness can do for cauliflower jaded appetites and with the silky-smooth Gruyere cheese sauce poured over, it’s totally transformed into something enticingly delish.

Do not be intimidated by the thought of making a soufflé - they’re really not as difficult or as temperamental as you might think. You’ll need a 6-inch diameter top (No.2 size) soufflé dish for this recipe. 

Souffléd Cauliflower with Gruyère Cheese Sauce (V) (Serves 4)

Ingredients - for souffléd cauliflower

I medium size cauliflower

1 fresh bay leaf - optional

10g-15g (½oz) ground almonds and softened butter (for souffle dish)

Grain-free béchamel sauce (made with 30g/1oz of butter, 20g/¾oz ground almonds, 1 tsp arrowroot powder, ¼ tsp dry English mustard powder, 142ml/¼ pint milk)

Sea salt and freshly ground black pepper

3 large egg yolks 

4 large egg whites

1 tbsp ready-grated Parmesan (for dusting)


Ingredients - for Gruyère cheese sauce

250ml (8fl oz) créme fraîche

125g (4½oz) Gruyère cheese, finely grated (I used the Co-op’s Truly Irresistible Premier Cru Gruyère cheese - it is the best Gruyère I’ve ever tasted!)

½ tsp Dijon mustard


Instructions

Pre-heat the oven to 190℃ / 375℉ / Gas mark 5. Boil a kettle of water.

Butter the soufflé dish and dust with the ground almonds. To allow the soufflé to rise above the dish, tie a deep band of non-stick baking parchment or greaseproof paper around the outside of the dish to come 2-3 inches higher than the top of the dish.

Cut the florets off the head of cauliflower - you don’t need much stalk so just use the florets. Put the florets in a single layer in the top of a steamer, sprinkle over with salt and tuck the bay leaf in-between. Pour the boiling water from the kettle into the bottom half of the steamer and steam the florets until they’re tender (about 7 minutes).

Refresh the cauliflower in cold running water, remove the bay leaf (if used) then drain well and tip the cauliflower on to a clean tea towel to dry. Pulse the cauliflower in a food processor into a puree (alternatively, push the cauliflower through a strainer). Put the cauliflower puree into a bowl.

Prepare the béchamel sauce. In a medium pan set over a low to moderate heat melt the butter, when the butter is melted add the ground almonds, the mustard and arrowroot powders and stir everything together really well.

Keep stirring continuously whilst you gradually add the milk to the pan a little at a time. Make sure after each addition of milk that it is evenly and smoothly incorporated into the butter and flour mix before adding more milk. When all the milk has been added to the pan, bring the sauce up to the boil to allow it to thicken - continuously stirring until it does.

Take the pan off the heat and mix the béchamel sauce in with the cauliflower. Season well with salt and freshly ground black pepper.

Separate the egg yolks and whites. Thoroughly beat the yolks and add them to the cauliflower mixture. With a clean whisk whip the egg whites to a firm snow.

Using a large metal spoon, quickly fold a third of the egg whites into the cauliflower mixture to loosen it, then gently fold in the rest of the egg whites being very careful not to knock the air out of the mixture.

Turn into the prepared soufflé dish, dust with the Parmesan cheese and stand it on the centre shelf of the oven. Bake for about 30-35 minutes until it is well risen and brown. The soufflé should be a little soft in the centre.

Whilst the soufflé is baking, prepare the Gruyère cheese sauce. Heat the creme fraiche in a saucepan without letting it boil. Add the cheese and Dijon mustard and whisk continuously until the cheese melts.

Remove the pan from the heat and set the sauce to one side until you need it.

Just before the soufflé is ready, gently re-heat the sauce and tip into a warm sauceboat.

When the soufflé is cooked, serve it immediately with the Gruyère cheese sauce handed separately. 


Carbohydrate 12g Protein 12g  - per serving of souffléd cauliflower

Carbohydrate 1g Protein 10g - per serving of Gruyere cheese sauce


Spiced Fruit Scotch Pancakes with Orange & Apricot Syrup

by Susan Smith in , , ,


Tuesday 17th February 2015 is Pancake Day!  It must be at least 25 years since I last allowed myself the indulgence of eating pancakes. My prohibition began with the Hay System Diet, a diet that promotes separating food into three meals a day - one meal carbohydrate, one protein and the third entirely alkaline. I followed the Hay Diet, which subsequently evolved into Vegetarian food combining, for over two decades.

Pancakes are normally made of wheat-flour, eggs and milk, that is to say, high starch wheatflour, protein eggs and milk and, if you’re a traditionalist like me, alkaline lemon juice to serve. Add to this the generous quantity of refined sugar people like to sprinkle on top, for Food Combiners and Atkin dieters (that dietary exploration came later!) pancakes were probably one of my most obvious dietary ‘no nos’ of all time. Until now…

Thanks to this brilliant grain-free pancake batter recipe all things ‘pancake’ have been at the forefront of my mind recently - big time! Sweet or savoury, perfect pancakes have the potential to fill so many of the previous gaps in my culinary repertoire. 

Spiced Fruit Scotch Pancakes is my first offering. Stacked high and served with sugar-free Orange & Apricot Syrup and perhaps a dollop of creme fraiche, it makes for a very impressive dessert when entertaining. Alternatively, leave out the fruit and spice and serve these little beauties plain for a lazy Sunday breakfast, perhaps accompanied by a mixed berry compote (recipe to follow in due course!) or with fresh blueberries and a drizzle of maple syrup. 

spicedfruitpancakes


Spiced Fruit Scotch Pancakes (Makes 16) (V)

Basic Pancake Batter Ingredients

180ml (¾ cup) raw whole milk (or almond milk, if preferred)

3 large eggs

30g organic ground almonds

45g Sukrin reduced fat organic coconut flour

40g arrowroot flour

15g (1 tbsp) coconut oil

1 tbsp clear, preferably raw (unheated) organic honey

½ tsp apple cider vinegar

½ tsp baking powder

Plus:

1 tsp mixed spice

85g (½ cup) mixed dried fruit e.g. currants, sultanas, raisins, cranberries


Instructions

Blend all the basic pancake batter ingredients in a blender. Fold in the mixed spice and mixed dried fruit. Set aside. 

Add some coconut oil to a pre-heated non-stick frying pan.

Drop good tablespoons of batter into the pan (one spoonful per pancake - obviously these need to be cooked in batches). 

Even them out slightly with the back of a spoon then leave alone to cook for 2 - 3 minutes (small bubbles will appear on the surface when they’re ready to turn). 

Cook for 2 minutes more, until the pancakes are cooked through, then remove from the pan. Cover with a tea towel to stop them drying out.

To serve, warm through in a low oven and stack them into a tower on each plate, allowing four to five per person.

Drizzle Orange and Apricot Syrup around the pancake stack and top with a spoonful of creme fraiche, if liked.


Carbohydrate 8g Protein 3g - per pancake with fruit


If you don’t like dried fruit or you want to minimise your carb intake, just cook 3-4 tablespoons of the basic pancake batter first...  

Carbohydrate 5g Protein 3g - per pancake w/o fruit


Orange & Apricot Syrup (4 servings) (V)

Ingredients

2 heaped tbsp All-Fruit Apricot Conserve (St Dalfour’s range of all natural 100% fruit spreads are available in most supermarkets and health food shops) 

Juice & finely grated zest of 1 large orange, preferably organic

1 tbsp clear, preferably raw, organic honey (or 1 tbsp Sukrin icing sugar)


Instructions

Heat all the ingredients together in a small saucepan over a low to medium heat for 3-4 minutes.

When bubbling and slightly reduced, pass through a fine sieve into a bowl, pressing as much of the apricot flesh through as possible.

Return to a clean pan and gently warm through when ready to serve.


Carbohydrate 18g Protein 1g - per serving (made with honey)

Carbohydrate 14g Protein 1g - per serving (made with Sukrin icing sugar)