Maple Ice Cream

by Susan Smith in


Continuing the theme of Susan’s very merry, get-ahead Christmas, this is the recipe I promised to share in my last blog post and it’ll be my last culinary ‘hurrah’ of 2019.

With lots of celebratory meals to cook during the next two weeks, I’ve recently been on a mission to find super-simple, festive food that can be prepared in advance so that when party-time beckons I’m not a slave to the task. So far so good. Last Tuesday we celebrated John’s birthday with a knockout Coq Au Vin and ketofied cranberry & cinnamon cheesecake with a single sturdy candle atop to transform it into a “Happy Birthday to You” cake. 

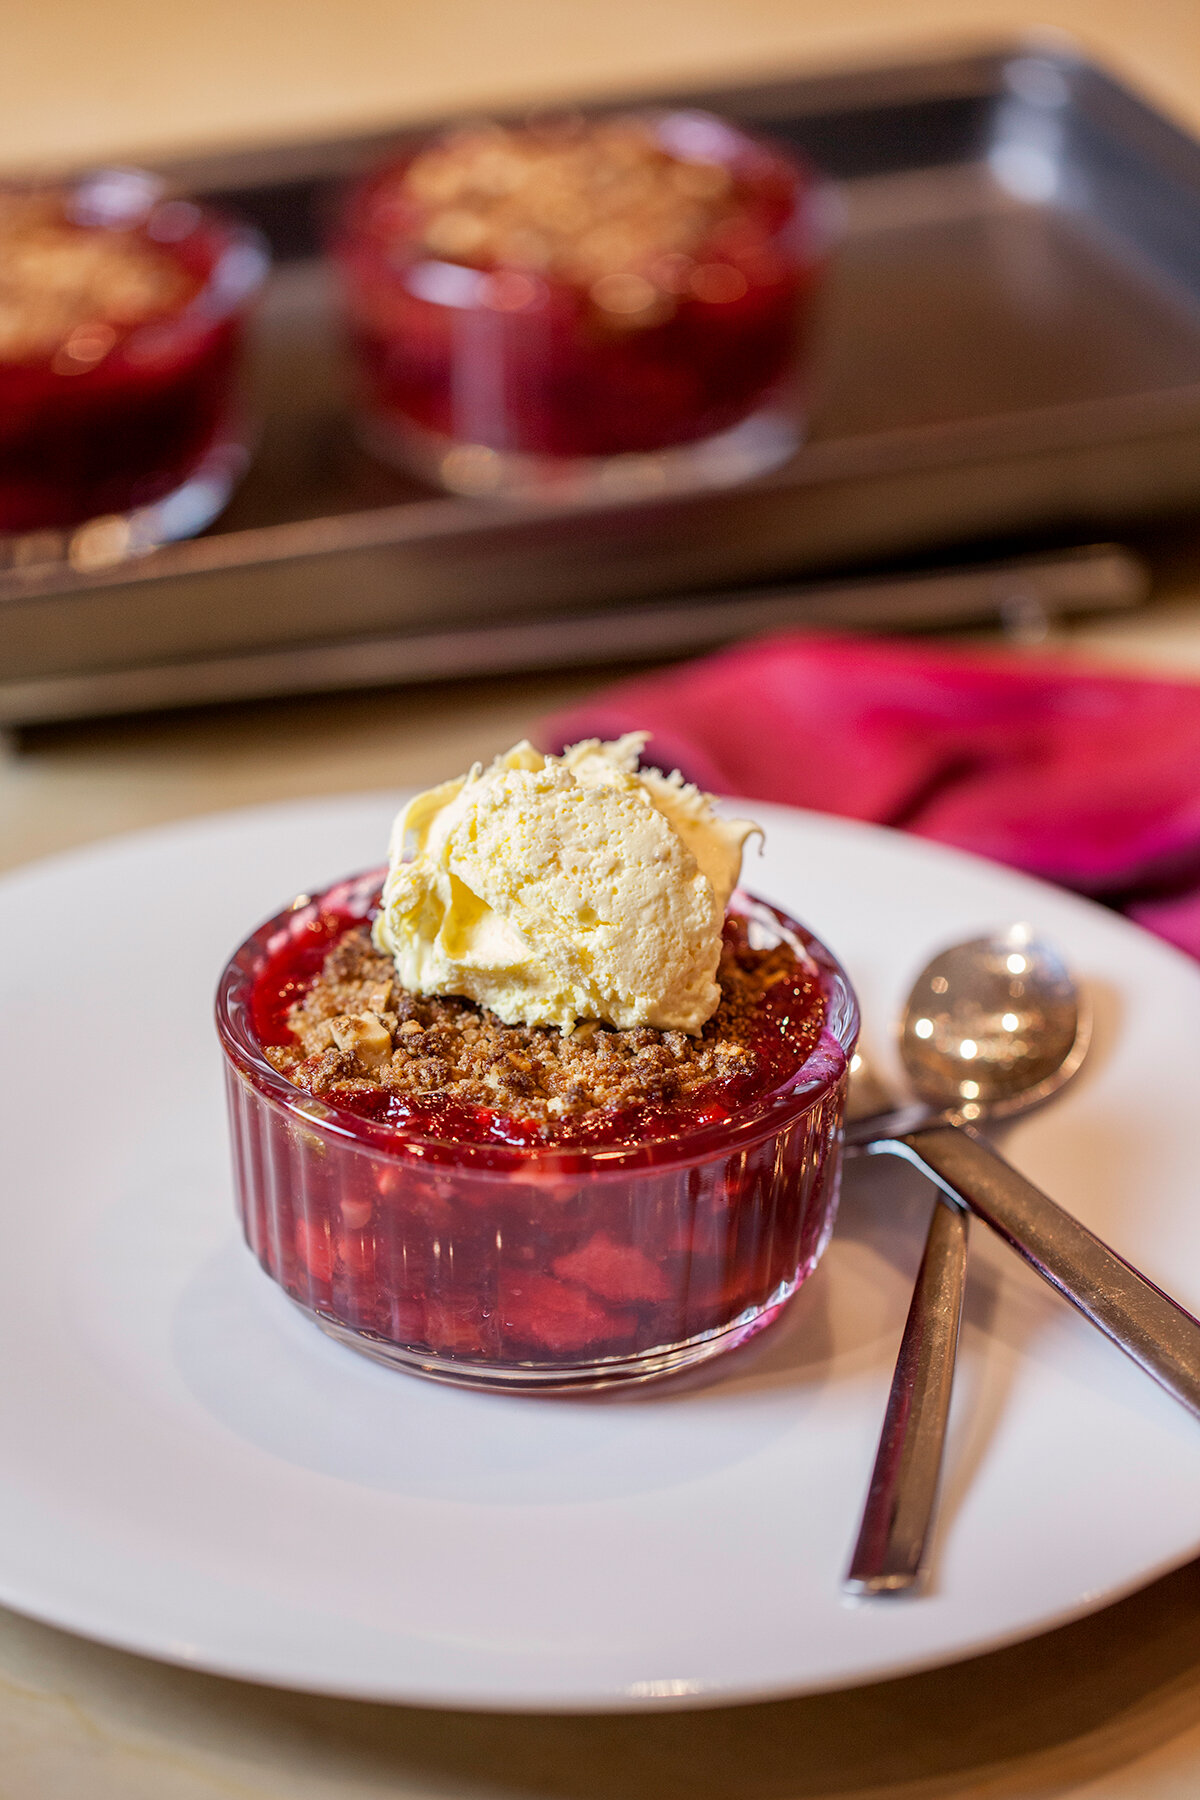
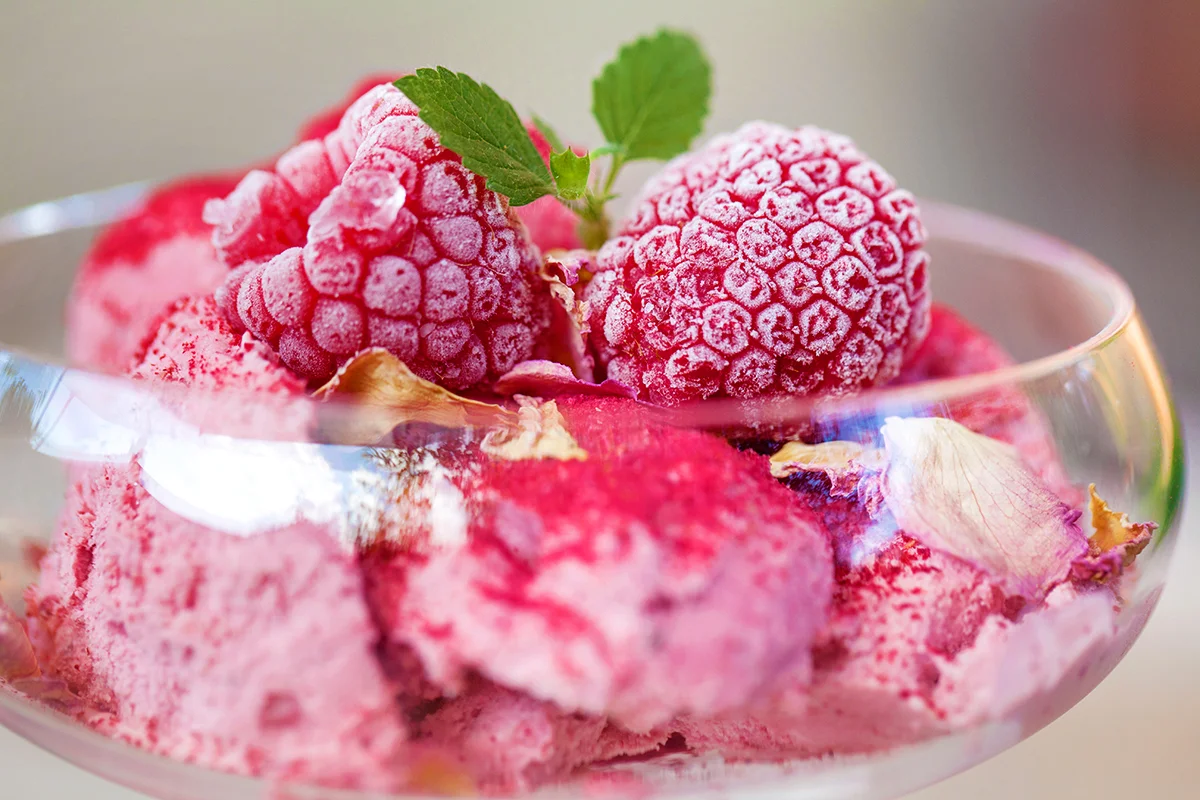
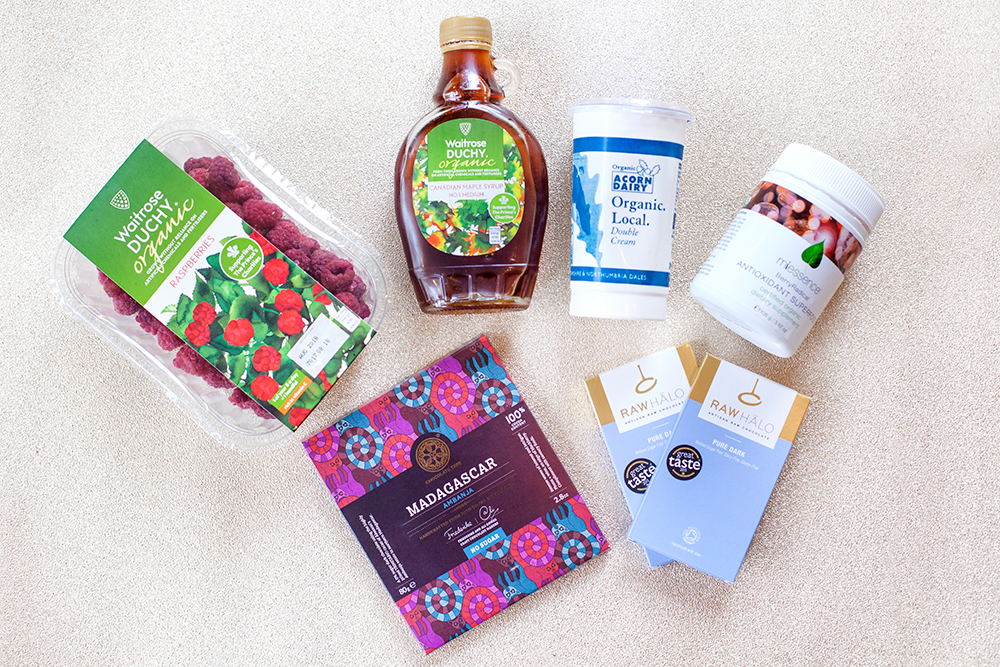
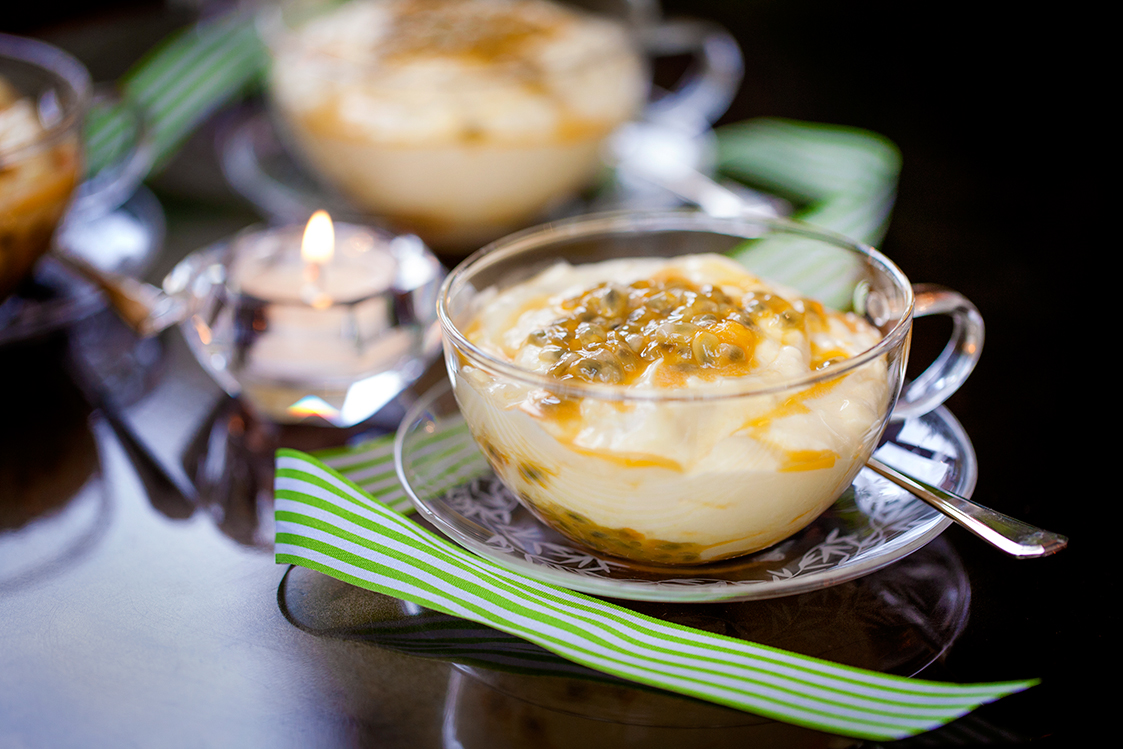
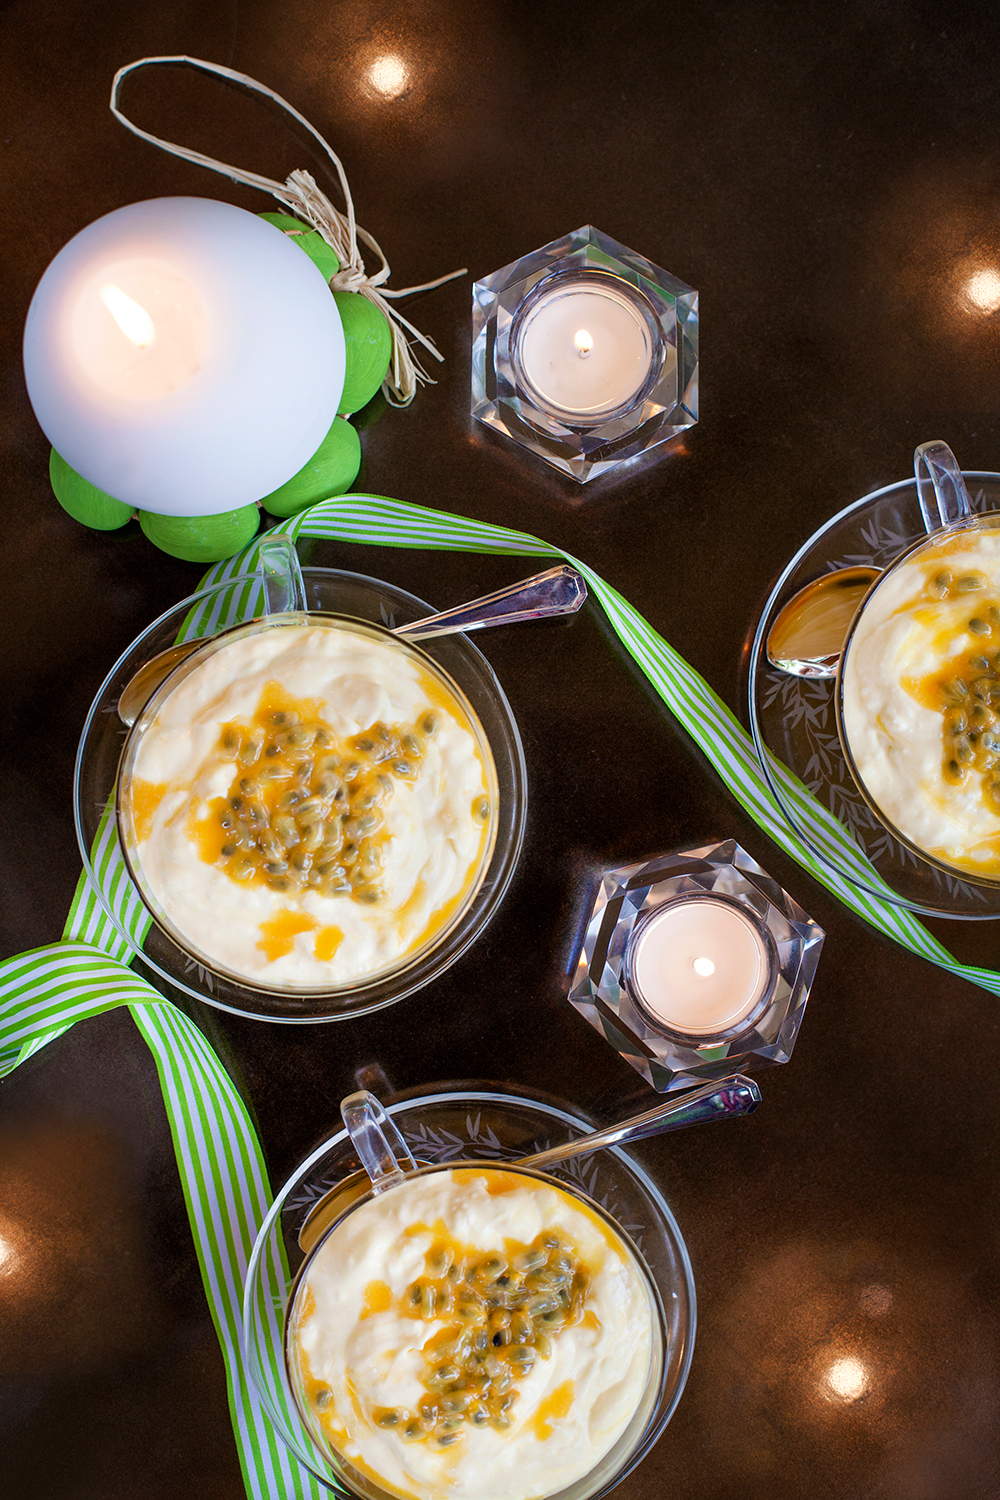
As much as there was some debate between the boys over how to divvy-up leftovers (they took half each), Sarah’s boyfriend already knows what he wants for dessert on his birthday next month and it’s this scrumptiously creamy Maple Ice Cream, which I recently discovered in Rose Elliot’s book ‘Vegetarian Four Seasons’. However, because organic whipping cream isn’t widely available, I’ve adapted the recipe by combining raw milk with double cream for the same smooth, velvety and decadent result. It tastes divine. 

maple icecream.jpg

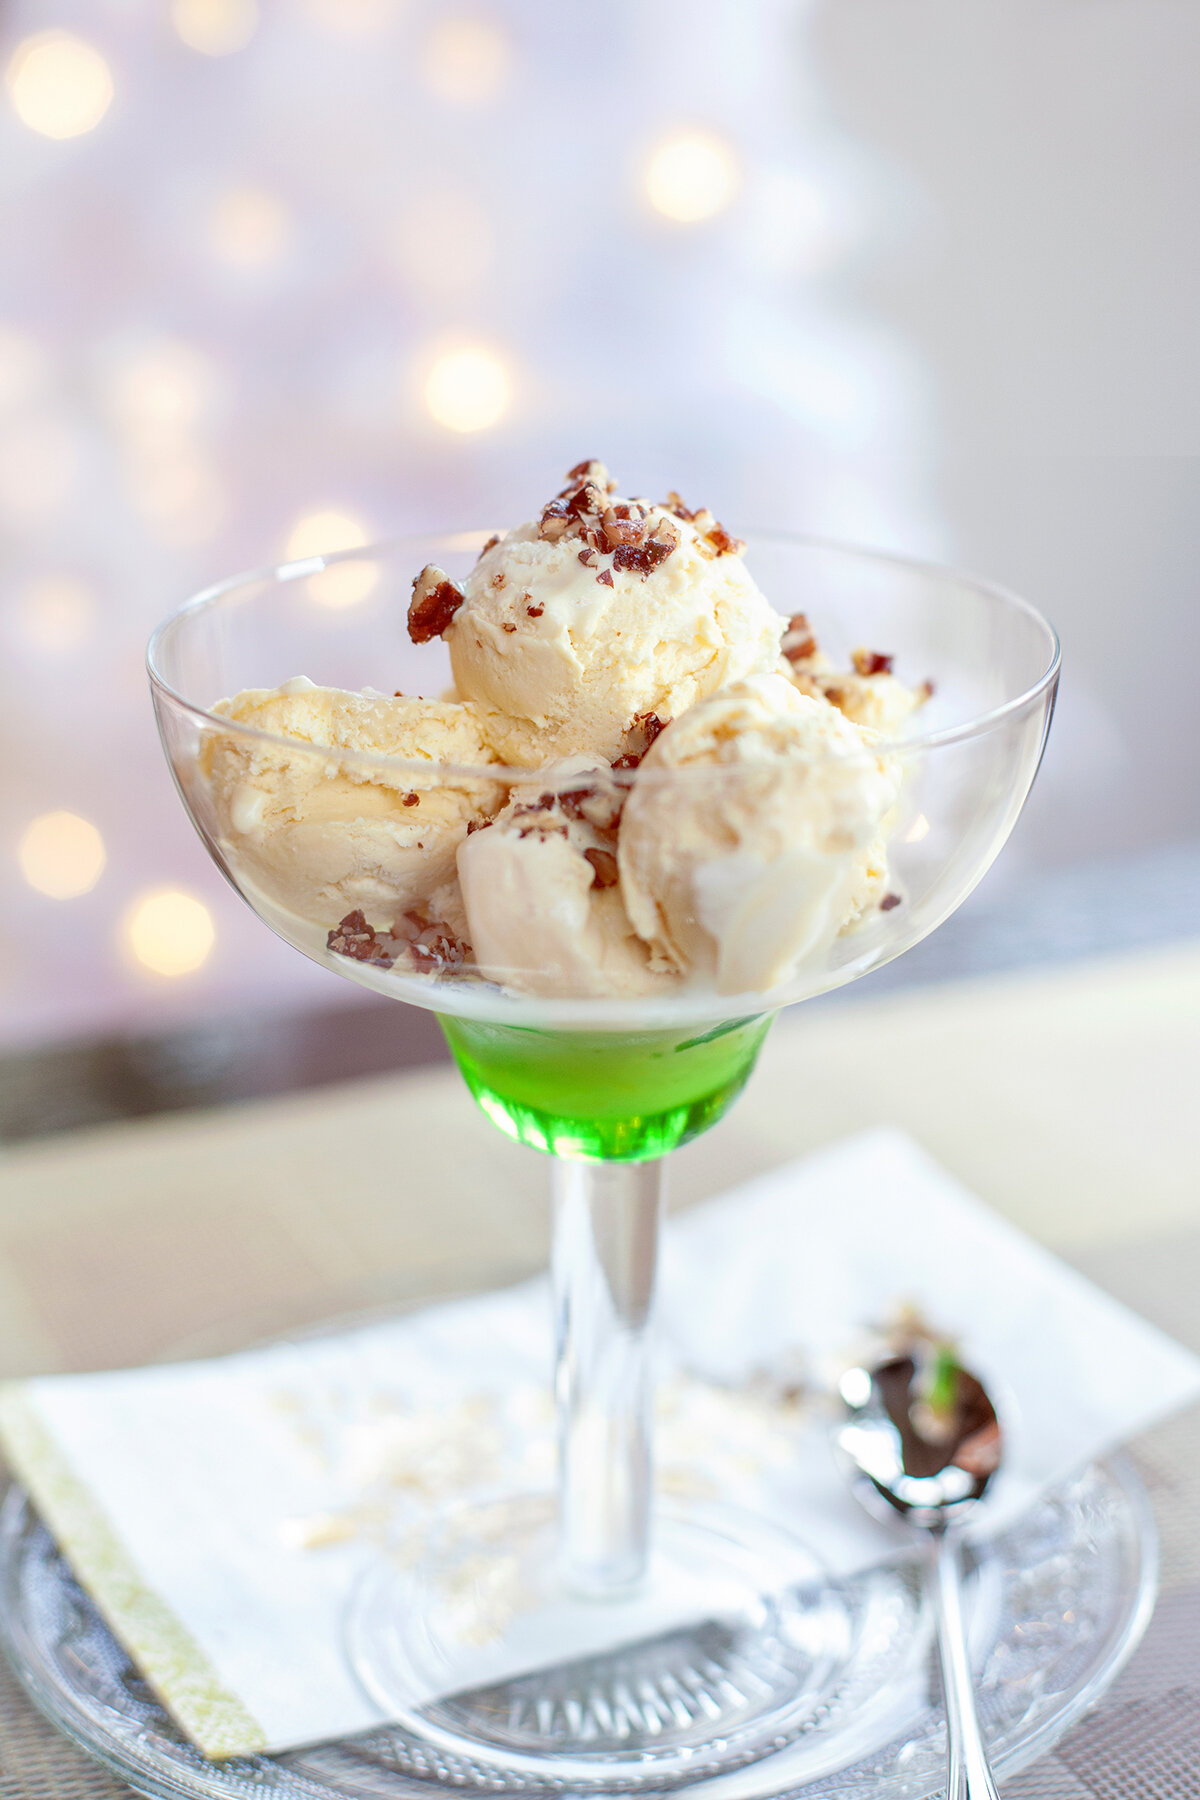
Made in about 20 minutes with just four ingredients, the star of the show is clearly the pure maple syrup flavour that shines through. The caramelised pecans were an afterthought but add a nice, nutty crunch, which Sarah thought elevated Maple Ice Cream far beyond the luxury “cookies & cream” commercial ice cream available in shops. 

This Maple Ice Cream always evokes deep sighs of appreciation when my family tuck-in so I think it earns a well-deserved place in every cook’s Christmas repertoire. The only challenge is keeping shtumm about the secret stash stored in the freezer. If my lot know that it’s there…game over. They just don’t want to hear that good things come to those that wait, even if it is only three more sleeps!

Wishing everyone a deliciously happy Christmas.

Maple Ice Cream (serves 8)

Ingredients - for the ice cream

3 large organic egg yolks

75ml pure organic maple syrup

225ml organic double cream

75ml full-fat milk

Ingredients - for the caramelised pecan topping

100g raw organic pecan nuts

10g organic unsalted butter

1 tbsp organic maple syrup

15g Sukrin Gold

½ tsp organic ground cinnamon

maple ice cream.jpg

Instructions - for the ice cream

In a medium-sized bowl beat the eggs yolks with a hand-held electric whisk until pale and creamy.

Put the maple syrup in a small, heavy saucepan and place it over a medium-high heat. 

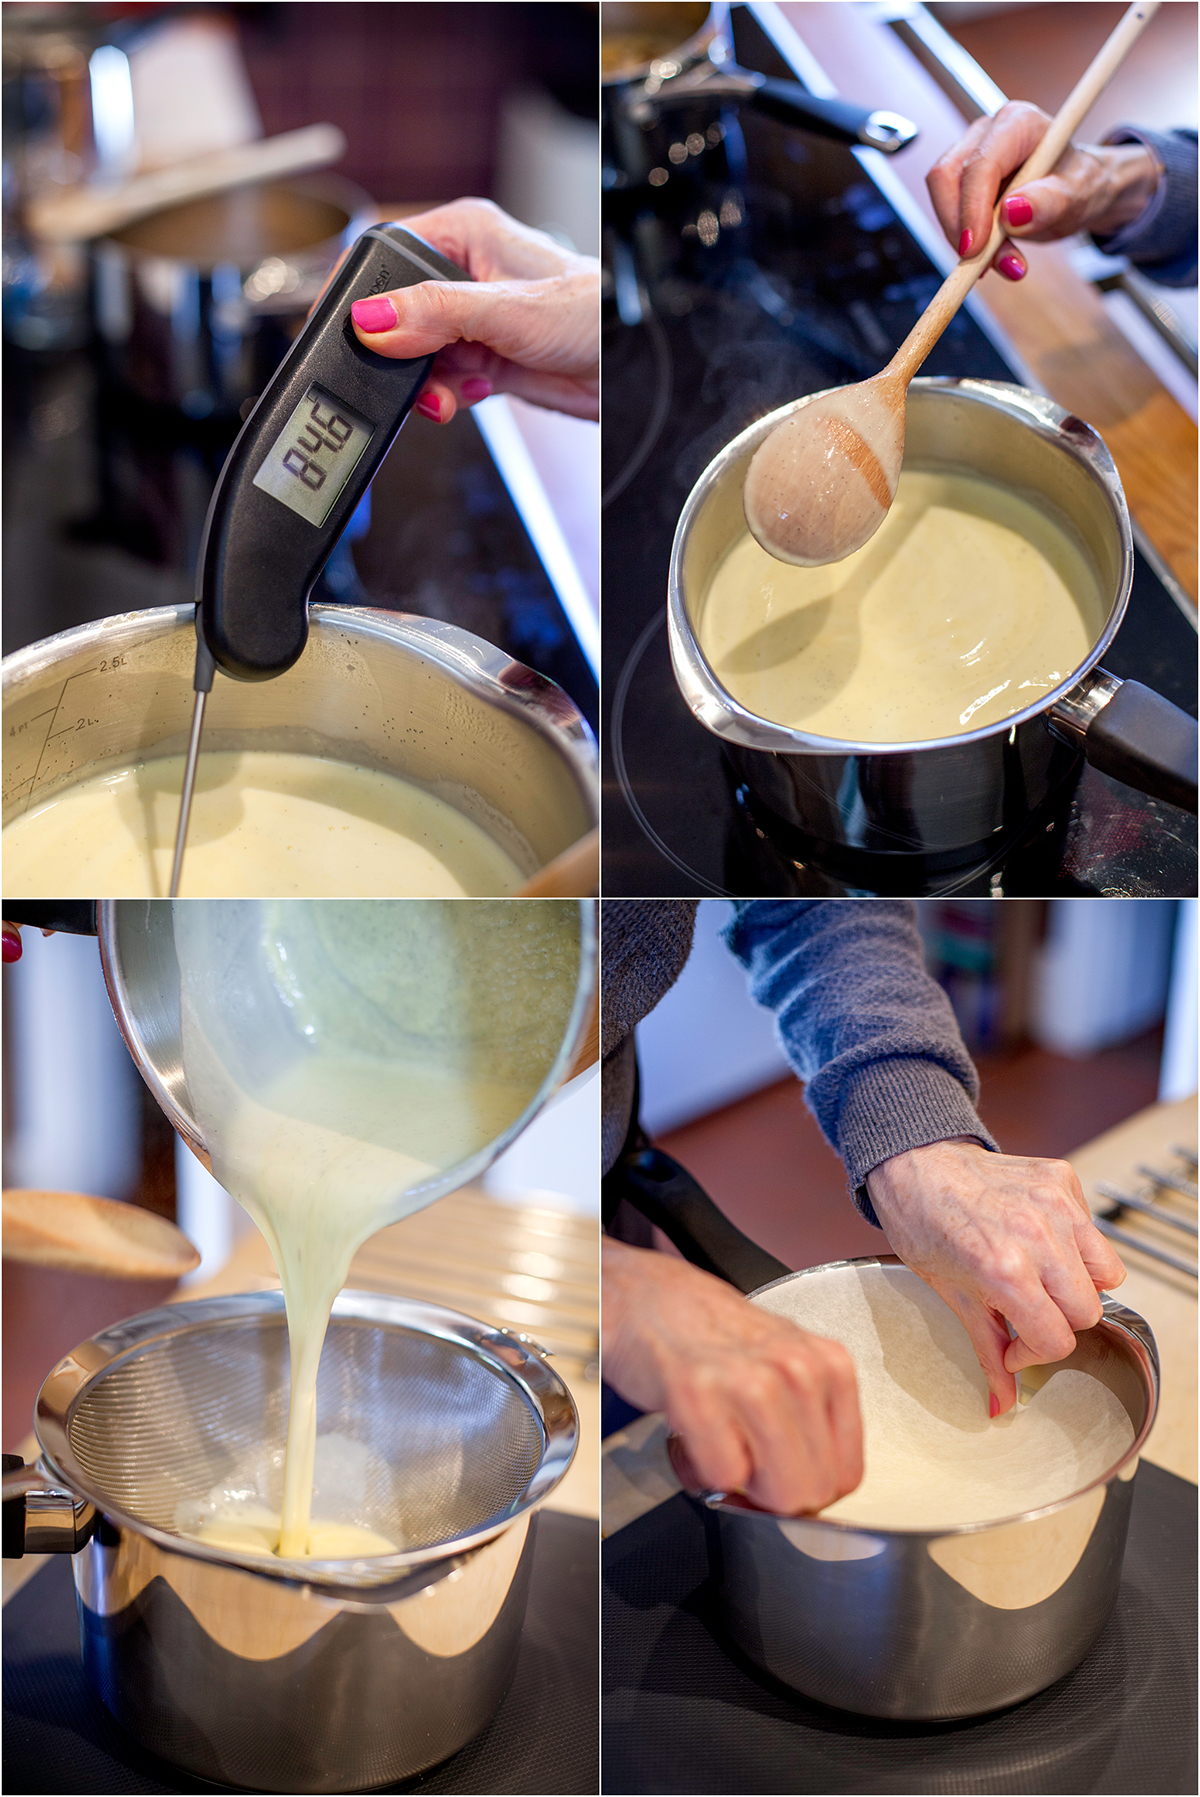
Bring to a boil, reduce the heat to medium, and continue boiling for about 3 to 4 minutes, until it reaches 110 ℃ / 225 ℉ on a thermometer or a drop of it will form a thread when pulled between your finger and thumb.

Immediately pour the hot syrup over the beaten egg yolks, whisking continuously as you do so. Keep whisking for another 3-4 minutes until the mixture is cool and very thick and creamy. Set aside.

Whisk the milk and double cream together in a medium bowl until it holds its shape.

Gently fold the whipped cream into the cooled egg yolk mixture until evenly incorporated. 

Pour int o a freezer-proof, lidded glass container. Cover and freeze until firm.

Remove from the freezer about 15 minutes before you want to serve the ice cream to allow it to soften up a little for easier scooping.

Instructions - for the caramelised pecan topping (optional)

Melt the butter in medium frying pan over medium-high heat.

Add the Sukrin Gold, maple syrup and cinnamon and stir together with a spatula or wooden spoon until completely dissolved.

Add the pecans to the pan in a single layer, then reduce the heat down to medium. Gently stir, turning the nuts over from from time to time, until evenly toasted (takes about 5 minutes). Tip: Watch closely, the pecans can very quickly go from being done to burned.

When cooked, transfer to a baking tray lined with non-stick paper to cool down. When completely cold (can take a couple of hours or so) they’ll firm up and stay crunchy.

Store the caramelised pecans in an airtight container for up to a week (they don’t need to be kept in the fridge).

Notes

If you subscribe to the idea that a little of what you fancy does you good, a few caramelised pecan halves is a healthy snack, which satisfies the urge for something sweet. However, I think they’re best used for making a crunchy topping to complement Maple Ice Cream. Two irresistible sweet treats rolled into one delicious low-carb dessert? Of course - it’s Christmas. Beat that Santa!   

Fat 17g Protein 2g Carbohydrate 10g - per serving of ice cream

Fat 10g Protein 1g Carbohydrate 4g - per serving of caramelised pecan topping

maple syrup icecream.jpg


Autumn Fruit Crumble

by Susan Smith in


Today I’m posting another Primal Plate recipe for old-fashioned, fruit crumble because it is the ultimate comfort food when the nights start to get chillier.

In the past couple of weeks I’ve made several versions of this lovely, warming pudding in quick succession - mainly because I wasn’t able to persuade Sarah to pick up her camera before she’d already grabbed a spoon. It’s perhaps as well. Initially I wanted to feature organic English damsons I’d purchased from Abel & Cole but they were too time consuming and tricky to prep.

I abandoned my first attempt at de-stoning them raw because after I’d tackled just two of the little blighters it was apparent that the rest would take me the best part of an hour and even then, most of the damson flesh would still be firmly stuck to the stones. Frustrated, I threw the whole lot in to the pan with the intention of warning my fellow diners to ‘watch out for stones’ when tucking-in.

The end result was indeed a delicious dessert that turned into a game of tinker, tailor, soldier, sailor etc…as we each lined up a pile of discarded damson stones at the side of our plates. Sarah’s boyfriend cheated by adding one of his to her’s so that she ended up with ‘rich man’. I don’t doubt him. But if you have no idea what I’m talking about…when I was a little girl sent away to boarding school, the last stone you counted on your pudding plate was supposed to represent the man you would marry. Naturally, none of us wanted a poor man, beggar man or thief! As a spontaneous game for slightly-drunk-on-champagne grown-ups it was good fun but for a sensible blog recipe, getting your fellow diners to sift, sort and spit numerous random fruit stones lurking in their dessert isn’t quite the done thing.

My second attempt at damson crumble was equally problematic. After donning a pair of food-safe gloves, it still took a long time to separate the stones from the juicy, fruity mass of cooked damson compote prior to adding the crumble topping. I thought I’d been thorough until two of us inadvertently chomped down hard on several stones that weren’t supposed to be there! Clearly apples, blackberries, rhubarb, plums or even a mixture of frozen seasonal fruits are a safer bet. I’ve chosen red plums for their vibrant colour and because they’re quick and easy to prepare.

English plums are at their best August through to September, which is when the beautiful dark red-skinned plums on my tree were ripe and ready. However, if you’re quick, you can still buy organic plums at Abel & Cole, Waitrose and Riverford Organics. A ripe plum yields to gentle pressure, firmer plums will ripen and soften at room temperature. For use in this recipe, select plums that are just on the firm side of ripe. It’s worth knowing that plums freeze well.

This no-added sugar and grain-free Autumnal Fruit Crumble is one of life’s joys. Nothing quite beats breaking through its buttery, crunchy, crumble topping to the warm, red, juicy fruits beneath. Unlike a classic fruit crumble loaded with refined sugar and starchy carbohydrates, which are best avoided if you want to achieve health, this fruit crumble helps to nourish your body and feed your soul. Tip: It’s even more delicious when served with cooling, vanilla ice cream or clotted cream straight from the fridge.

fruit crumble recipe 5.jpg

Organic plums offer impressive health benefits and the ‘crumble’, made with tiger nuts, which are actually a sweet-tasting, root vegetable rich in nutrients - vitamins, minerals, antioxidants and prebiotic fibre (otherwise known as resistant starch) - has a remarkable effect on your digestion and metabolism because it encourages the growth of your ‘gut-friendly’ bacteria. Taking care of your gut helps take care of so many other things in your body - your skin, digestion, immunity against disease, energy levels and even your moods and brain function.

Both components of fruit crumble - the fruity filling and fibre-rich, nutty topping - can be made several days in advance then covered and stored in the refrigerator until you’re ready to assemble and cook. For this reason, rather than make one large fruit crumble, I like to divide the ingredients in to individual-sized portions that can be enjoyed whenever the mood takes us. It’s a great way to feed last minute guests - albeit a bit too convenient if your intention isn’t to eat pudding every day! Our meals generally focus on lots of vegetables and minimal fruit, but when the appetite for fruit crumble strikes (oftentimes in my household) it’s good to know that plums only contain 7 grams of carbohydrate per medium plum weighing 65 grams and the satiating effects of prebiotic fibre actually helps reduce cravings for fattening and unhealthy foods.

Nourishing food that you enjoy is the ultimate goal of eating well, so in my view, there are a lot worse dietary boo-boos than feasting on a glut of seasonal fruit that at this time of year is there for the taking. The appetite for sweet, autumnal fruit is probably written in our DNA. Feasting on sugar-containing fruit adds extra padding to our bodies that was a matter of life or death for our ancestors facing winter food scarcity and sub-zero temperatures. The human body’s ability to ‘eat’ its own stored body fat for energy when close to starvation meant the ‘survival of the fittest’ came down to being one of the fattest. The opposite is true today and there’s no longer any reason for humans to gorge themselves silly on sugary foods. What we need is the means to satisfy our inherited craving for ‘sweet’ without getting fat.

Rule one is: If you’re going to eat sugar, the natural sugar contained in fresh, organic, fibre-rich fruit is the best way to get your fix. Rule two: If you’re trying to lose weight, raspberries, blackberries, strawberries and (tah-dah!) plums are the lowest carbohydrate i.e. lowest-in-sugar fruits to enjoy. Rule three: Try fasting from time to time. In this way, nature’s bounty and a cook’s love need never go to waste.

I agree that Autumn Fruit Crumble is a little carb heavy for a keto diet (although compared to a standard plum crumble, it contains less than half the carbs) but I have no problem with a little seasonal indulgence that provides an opportunity for balancing ourselves with our earth’s harvest. Translated, that means treating the large bucketful of Bramley apples in my cellar with the respect they deserve by making as many nutritious fruit crumbles as my family can tolerate. As the cooler temperatures of autumn roll-in, a warming, Autumn Fruit Crumble creates the perfect setting for friends and family to cozy up together for good food and a sense of comfort that makes it easy to say goodbye to summer. It’s one of the reasons I think Autumn is the best of season of all.

fruit crumble 4.jpg

Autumn Fruit Crumble (serves 4)

Ingredients - for the filling

450g organic plums, washed, halved, stoned, then each half fruit cut into thirds

1 organic apple, peeled, cored and diced

80g non-GMO erythritol

1 organic star anise

25ml organic red wine (use fresh, filtered water if you prefer)

organic lemon, juice only - optional (see Notes below)

Ingredients - for the topping

100g organic fine tiger nut flour

50g organic butter, chilled and cut into small pieces

25g Sukrin Gold

50g organic hazelnuts, roughly chopped

1 tsp organic ground ginger


Instructions

Place the plums, apple, erythritol, star anise and wine - or water - into a saucepan, give everything a good stir to combine, cover with a lid and set the pan over a medium heat. When the juices in the fruit start to flow (only takes a couple of minutes) turn the heat down to low.

crumble prep.jpg

Continue cooking the fruit, stirring from time to time, until the erythritol crystals have dissolved and the fruit has broken down (takes about 15 to 20 minutes). If the fruit is collapsed but there’s a lot of juice remaining, use a draining spoon to scoop out the cooked fruit and boil the remaining juice over a high heat for a couple of minutes until it reduces down to a sticky syrup. Then take the pan off the heat and add the fruit back in to the syrup.

A this point, you’ll need to use your instincts to determine how you think the fruit compote should taste. If it tastes too tart, add a little more sweetener. If you think it lacks plum flavour, a tablespoon or two of lemon juice will enhance its fruitiness. Once you’re happy with the balance of taste, set the compote aside to cool.

As the fruit cools, make the crumble topping. Place the tiger nut flour, butter, Sukrin Gold and ground ginger into a food processor or blender and pulse to a coarse crumble. N.B. Don’t overdo it, you need the mixture to retain some texture. Tip the crumble in to a bowl and stir in the chopped hazelnuts.

When you’re ready to eat your fruit crumble(s), pre-heat the oven to 180℃ / 350℉ / Gas mark 4.

Divide the fruit compote between 4 large glass ramekin dishes - alternatively, transfer all the fruit to a shallow ovenproof dish - and top evenly with the crumble mixture.

fruit crumble 1.jpg

Place the ramekins/serving dish on to a baking tray (the mixture may bubble up and spill over) and bake in the oven for approx. 20-25 minutes until the filling is hot and the crumble topping golden.

fruit crumble recipe pic.jpg

Allow to stand for a couple of minutes before serving the fruit crumble as it is or with a generous dollop of cream or ice cream.

Notes

If you have a glut of fruit or more mouths to feed, simply double the quantities above and/or store the excess fruit compote and crumble separately in air tight containers in the fridge for up to 5 days.

Experiment by adding other fruits and berries to the compote such as blackberries or blueberries.

Other flavours such as vanilla, cinnamon, finely grated orange zest can easily be incorporated into the compote and/or the red wine can be swapped for other liquids such as orange or lemon juice. Just be aware that this will impact the sweetness of the compote so you will need to adjust the erythritol sweetener as required.

Fruit compote makes a great breakfast served with yogurt and toasted flaked almonds.

Fat 22g Protein 4g Carbohydrate 33g - per serving of crumble (without cream or ice cream)

fruit crumble 2.jpg

Chocolate Mousse Cake With Raspberries & Cream

by Susan Smith in ,


The starting point for this low-carb, densely intense, chocolatey celebration cake or, when still warm from the oven and oozing molten chocolate, the perfect after-dinner pudding cake, was a Waitrose recipe for chocolate ‘cloud’ cake that I recently espied in their free ‘Weekend’ newspaper.

Since my 26th wedding anniversary was imminent, it seemed like the perfect opportunity to show my appreciation for twenty-eight years of togetherness with my beloved John by baking him a cake. He needed cheering-up. Last bank holiday weekend, whilst washing up (dangerous man’s work!) a 10” heavy chopping knife fell off the draining board onto his bare foot and cut his big toe right down to the bone. A visit to A&E was pretty much pointless. By the time we’d got John back home he was bleeding just as profusely as when we’d first arrived at hospital. Nearly three weeks later, his toe is still giving him flak and he can’t walk far or wear shoes. At times like these, a spoonful of sugar - or at least sweet-tasting food - can help.

For the keto-adapted, it’s not so much the craving for sweetness per se that persuades us to indulge but rather that someone lovingly baking a cake in your honour can become the ultimate in spirit-lifting, comfort food. My job is to ensure that the sweet treats that we enjoy from time to time are made from ingredients that do the least harm.

chocolate mousse cake.jpg

Ideally on a keto diet you’d knock all sweeteners, including sugar-free, zero calorie ‘pretenders’  on the head. However, “when life gives you lemons…” or you simply want to go with the flow and celebrate life with decadent desserts and cake like ‘normal’ people do, dissing the grains and choosing a sweetener that mimics the taste of sugar - erythritol is one of the better ones - is the way to sustain you on your low-carb journey. Honestly, does Chocolate Mousse Cake look like diet food to you?

Everyone agrees, it’s depressing to go without food you love. So, without wishing to pander to an unbridled enthusiasm for cake, pastries, ice cream and biscuits, I think it’s a good idea to feed your desire as long as it doesn’t mean eating high-carb treats made with grains and sugar that make you pack on the pounds. Admittedly, it is socially inconvenient to reject the herd mentality that relies on factory-made, ultra processed junk food but in my view, cooking healthy treats for yourself is the most workable way of getting to your perfect weight and then staying there. Just imagine yourself healthy, happy and full of energy every day and steadily losing weight without having to count calories or deny yourself. Primal Plate recipes will make that possible.

Right on cue for Father’s Day, Chocolate Mousse Cake With Raspberries & Cream is a special treat that will remind Dad just how much you appreciate all that he does. There’s no better way to show you care for yourself and others than to take the time to cook and bake edible gifts. Besides, Dad has too many ties already!

keto chocolate cake.jpg

Chocolate Mousse Cake With Raspberries & Cream (serves 10)

Ingredients

200g very dark organic chocolate, broken into small pieces (I combined 75 grams of Pacari’s 70% chocolate drops with 125 grams of their 85% chocolate drops for an average of 80% cocoa solids)

125g organic unsalted butter, plus extra for greasing

25ml organic, freshly brewed ‘espresso’ coffee or alternatively, 1 tbsp organic, instant coffee

1 tsp organic coffee extract 

1 tsp organic vanilla extract 

3 tbsp organic raw cacao powder, sifted 

6 organic medium eggs

200g non-GMO erythritol, powdered

For the cake topping

170ml organic double cream 

1tsp organic vanilla extract

1 tbsp non-GMO erythritol, powdered and sifted

175g organic fresh raspberries  (if you can get them, organic raspberries are less expensive from Tesco or Sainsburys)

chocolate mousse cake recipe.jpg

Instructions

Preheat the oven to 180℃ (160℃ fan oven) / 350℉ / Gas mark 4

Lightly grease then line the base and sides of a 25cm (8 inch) round cake tin - preferably springform or loose bottomed - with non-stick baking parchment.

Make a ‘shot’ of strong espresso coffee - N.B. ignore this step if you’re using instant coffee.

Place the chocolate, butter, espresso coffee (or 1 tbsp instant coffee granules) vanilla and coffee extracts into a glass heatproof bowl and set it over a pan of gently steaming water. Keep the heat under the pan low and do not let the base of the bowl come into contact with the water. Stir the mixture from time to time until melted then take off the heat and set aside.

chocolate mousse cake recipe 1.jpg

Meanwhile, separate the eggs into two large mixing bowls. Whisk the whites into soft peaks.

Leave the whisked whites on one side whilst you whisk together the yolks and erythritol until thick, pale and fluffy - you don’t need to wash the whisk in-between.

Using a metal spoon, stir the melted chocolate in with the egg yolks until evenly combined. Now stir in the cacao powder.

Using a flat-edged spatula or large metal spoon, gently fold half the egg whites into the chocolate mix to loosen, then carefully fold in the other half making sure they’re fully incorporated without knocking the air out of them.

chocolate mousse cake recipe 2.jpg

Tip the mixture into the prepared tin and bake for 30 minutes until set but still wobbly in the centre. If you want it firmer in the centre, cook for another 5 minutes.

Cool in the tin for 15 minutes, then remove the sides of the tin and leave to cool completely to room temperature.

When ready to serve, carefully remove the paper and base of the tin and set the cake on a serving plate. Whisk the cream, powdered erythritol and vanilla extract together into soft peaks. Pile into the middle of the cake and top with the raspberries. 

keto chocolate mousse cake.jpg

Notes

To make the cake easier to slice, it is best made a day in advance and then left overnight to firm-up and set in the centre.

If you’re not going to eat all of the cake straightaway, it will keep better if you don’t top the whole cake with raspberries and cream. Just cut it into as many portions as you need before attractively arranging a generous spoonful of cream and small pile of raspberries on top of each individual slice of cake. Alternatively, this wonderful, rich cake still makes the grade when served simply with a dusting of powdered erythritol and a dollop of lightly whipped cream still cold from the fridge.

Erythritol doesn’t impact blood sugar or insulin, as our bodies actually cannot digest it. It’s about 70% as sweet as table sugar. I buy it in granulated form online and turn it into icing sugar using my Vitamix or a hand-held stick blender. You can also buy it as ready-made icing sugar.

In powdered form, it easily blends into the flourless cake mixture and whipped cream topping to ensure that there’s no grittiness from un-dissolved crystals in the finished cake.

Fat 33g Protein 6g Carbohydrate 9g - per serving with raspberries & cream

Fat 33g Protein 5g Carbohydrate 7g - per serving with cream but no raspberries

Fat 23g Protein 5g Carbohydrate 7g - per serving of cake (without topping)

choc mousse cake.jpg

Hot Bitter Chocolate Sauce

by Susan Smith in ,


I have nothing to say today except Hot Bitter Chocolate Sauce poured over No-Sugar, Old-Fashioned Vanilla Ice Cream is a match made in heaven.

With high temperatures and sunshine forecast for this weekend...

Make. Eat. Enjoy.

hot chocolate sauce.jpg

Hot Bitter Chocolate Sauce (serve 4)

Ingredients

75g of very dark organic chocolate, broken into small pieces (I use 85% raw chocolate chips - see Notes below)

10g organic unsalted butter 

85ml organic full-fat milk  (I used whole raw milk from Gazegill because it’s the only milk I ever buy)

50ml organic double cream

4-6 drops organic liquid stevia, if required

Instructions

Place the pieces of chocolate and butter in a glass heatproof jug or bowl.

In a saucepan heat the milk and cream to just under boiling point then pour over the chocolate and butter, stirring until all of the chocolate has melted.

Pour the chocolate mixture back into a clean pan, add liquid stevia if using and gently heat, whisking constantly until completely smooth, thick and hot but not boiling. N.B. Do not allow the chocolate sauce to overheat as this will cause it to separate.

Serve immediately spooned over ice cream.

Notes

Buying high quality organic chocolate chips saves the potentially messy business of breaking or chopping a solid bar of chocolate into pieces.

The chocolate for Hot Bitter Chocolate Sauce should be at least 75% cocoa solids but a higher percentage dark chocolate is much better. To minimise sugary carbs, use an 85% chocolate and judiciously add a few drops of organic liquid stevia - a single drop at a time - to taste. Don’t go overboard by making your chocolate sauce sickly-sweet. Remember, you’re aiming for ‘bitter-sweet’ to complement an already sweet vanilla ice cream. Anything less than 85% chocolate shouldn’t need any additional sweetening at all!

Fat 18g Protein 2g Carbohydrate 8g - per serving of hot chocolate sauce

Total Fat 42g Protein 5g Carbohydrate 13g - per serving of ice cream & hot chocolate sauce


No-Sugar Old-Fashioned Vanilla Ice Cream

by Susan Smith in


Back in the 1960’s I had lots of friends who all used to curry favour with me in the hopes of becoming regular invitees to my weekly-held Saturday night dinner parties. Some succeeded more often than others. Notably, Alan R, the son of a butcher who worked in his father’s business, who would sequester the most memorable, thick-cut pork chops for me ‘for free’ to secure his seat at my table. It was a fair exchange.

He would cut the chops at least an inch thick so that I could I slice them horizontally through their middles to make a ‘pocket’ that I would stuff generously with sage and onion before sewing them back up with string and slow cooking in a rich cider sauce. As delicious as this meal was, what really rocked my friends’ boat was a dessert of hot, melty chocolate poured over cold, creamy, vanilla ice cream.

You’d think that the authors of Wall’s current product marketing were ‘a fly on the wall’ at my dinner parties 50 years ago, when they say: “Bring your family together with Wall's delicious Ice Cream that everyone loves, it is so easy to connect, laugh and truly bond.” 

They’re not lying. It’s exactly how I remember my ‘hostess with the mostest' glory days. Now I’m fine with being forgotten. Wall’s vanilla ice cream and hot chocolate sauce made from Cadbury’s Bournville chocolate served with aplomb in a previous life may have helped make my dinner parties legendary, but today, even the thought of serving a ‘killer dessert’ of ultra-processed foods made with very low-cost ingredients gives me the heebie-geebies. Learn the chilling truth about commercial ice cream and weep!

Let’s just say, my foolhardy pursuit of social pleasures in my early twenties, which also included smoking up to forty cigarettes a day and regularly drinking myself into oblivion, was largely done in ignorance. As daft as it seems to me now, I didn’t realise the harm I was doing to myself with cigarettes and alcohol and perhaps of even more significance, without access to the internet, I didn’t have a clue about what was going on with the food supply. At the time, there was no way of knowing that the burgeoning food industry’s new-fangled creations were essentially cobbled together from industrially-made substances to make them look and taste (more or less!) like real food, albeit with very little nutritional value.

The late 1960’s supporters of women’s liberation, as well as men resistant to taking on their fair share of domestic duties, happily abdicated the responsibility for cooking to Big Food - and with it control over their health - in exchange for more free time. We now live in a society (UK) where over half the food purchases that people make are ultra processed and I am considered strange by conventional standards because I avoid all unreal food and drink. When I recently commented to a young friend that the cocktail she was drinking was the same bright, fluorescent pink as the skirt she was wearing, she quickly retorted “At least I’ll die happy!” Actually no, you probably won’t. The inconvenience of ‘convenience’ is that Big Agri and Big Food makes you sick and Big Pharma sells you supposed cures. This generally means spending your golden years in pain and suffering whilst waiting to die more slowly. That’s not for me, thanks.

There’s only one ice cream ‘to die for’ and it’s homemade, vanilla ice cream.

This feel-good, does-you-good, No-Sugar Old-Fashioned Vanilla Ice Cream tastes like heaven…just like ice cream used to before the food industry hijacked everyone’s favourite dessert and turned it into sickly-sweet, soft-scoop, emulsified, synthetically-flavoured gunk. 

keto vanilla ice cream.jpg

Vanilla is an orchid whose seed pods are fermented and cured to produce its popular fragrance and flavour. It’s expensive. Vanillin, the main constituent of vanilla flavouring is what men in white coats use to make vanilla flavoured ice cream. Cheaply extracted from clove oil, waste material from the paper and wood pulp industry and petrochemical products, you may not even be able to taste the difference.

vanilla ice cream orchid.jpg

Rich, smooth, creamier than cream, sweet-as-you like and packed with fragrant, real vanilla, No-Sugar, Old-Fashioned Vanilla Ice Cream is a kind-of-magic food that LCHF naysayers tell you you’re not ‘supposed’ to eat if you’re watching your waistline. Basically, they’re talking claptrap.

What is true for both weight-watchers and the health conscious is that you can’t eat humongous amounts of carbohydrates together with unlimited amounts of fat. You can either eat fat to fuel your body’s energy needs (meat, fish, dairy, eggs and dark chocolate) or starch a.k.a glucose (sugar, pasta, rice, potatoes and bread) but whichever one you choose, you need to control your intake of the other.

There’s a turf war going on between self-serving diet dictocrats trying to foist a one-size-fits all, nutritionally deficient, primarily plant-based (grains), high-carb (sugar saturated), low-fat diet (ultra processed seed oils) and the growing fraternity of independent scientists, doctors, dieticians, journalists and self-helpers living in the real world, who know the exact opposite to be true. Dr Zoë Harcombe Ph.D. brilliantly cuts through ‘carbfusion’ in her point-by-point response to Slimmers World experts who claim that “low-carb is damaging the nations health"  and there are “13 Ways that carbs help you LOSE weight”.

It’s your body, your health, your choice but if you’re struggling with chronic health conditions and/or excess weight, a 21-day diet experiment eating low-carb (less than 50 grams daily) lets you be the judge. Listen to your body; it doesn’t lie. Most people will find the easiest and quickest way to burn excess body fat is to eat real food (start counting chemicals, stop counting calories) and to use food as an excuse to add more dietary fat…drizzle oil on top…trickle over dressing…spoon on hollandaise…dollop on cream…spread with mayo…melt over butter…garnish with cheese, olives, nuts, seeds and avocado. Getting slim and staying slim never tasted this good.

vanilla ice cream no sugar.jpg

It may seem counter-intuitive that No-Sugar, Old-Fashioned Vanilla Ice Cream made from wholesome, organic ingredients - full-fat dairy milk, double cream and biodynamic egg yolks - can help you fight the flab, but it is so. Nothing serves your body and brain better than a well-formulated, high-fat, low-carbohydrate diet and this luxurious ice cream is so fat-rich that once you’ve committed to eating low-carb, you could do a lot worse than treat yourself to a bowlful each and every day! It’s not the cheapest ice cream in the world, but then I don’t want cheap food, I want nutritious food. 

Beyond buying organic food for its nutrient density and lack of chemicals, Primal Plate’s overriding advice is: cook your own meals.

With delicious, homemade keto bread and ice cream recipes to chivvy you along the road to dietary independence, true liberation is finding your way back to body wellness by doing the best for yourself. It takes courage and radical self-determination to take back control of what you eat. The question is, do you think you’re worth it?

Industrial agriculture is one of the most unsustainable, destructive practices of modern civilisation. GMO crops, agri-chemicals, ultra processed food and lab-created food substitutes are poisoning people en masse. The distressed and diseased human body is the pharmaceutical industry’s marketplace. Long-term sickcare, not healthcare, pays its shareholders. This unholy trinity of Big Business is killing humans and harming animals and the environment for profit. The answer lies in you transitioning from unreal food to natural food obtained from sustainable, regenerative, chemical-free farming.

So what do you want to eat today?

No-Sugar, Old-Fashioned Vanilla Ice Cream (serves 8)

Ingredients

450ml organic full-fat milk (see Notes below)

450ml organic double cream 

2 organic vanilla pods

6 large organic egg yolks

150g non GMO erythritol 

1 tbsp organic vanilla extract

Instructions

Split the vanilla pods down the centre and place with the milk and cream into a heavy based saucepan pan - preferably one with a pouring edge.

Heat to just below boiling point (you’ll see little bubbles appear at the edge of the pan).

Immediately take the pan off the heat, cover and allow to stand for one hour to allow the flavours to infuse.

Remove the vanilla pods and with the tip of a small pointy knife or the edge of a teaspoon, scrape out the seeds, adding them back into the infused mixture. Discard the pods.

Gently re-heat to just below boiling point.

In the meantime, whisk the egg yolks and erythritol together in a large deep bowl until pale and thick.

Gradually pour the hot cream into the egg yolk mixture, whisking continuously until combined.

vanilla icecream prep1.jpg

Return the mixture to a clean pan and set over a medium heat. Stir the mixture constantly until it reaches a temperature of 85℃ (takes about 4-6 minutes) or alternatively until the custard coats the back of a spoon i.e. when you run your finger through it, the trail left stays put. See image below.

Pour the custard through a fine sieve into a large clean metal or glass bowl and cover its surface with baking parchment to stop a skin forming. Tip: I use a pre-cut baking parchment circle.

vanilla icecream prep2.jpg

Allow the custard to cool to room temperature. To save time, plunge the bowl into cold water then when its cool, chill in a refrigerator for a couple of hours or overnight.

When completely chilled, remove the baking parchment and stir in the vanilla extract.

Churn in an ice cream maker according to the manufacturer’s instructions until the ice cream is soft set. 

Scrape into a glass, freezer proof container and freeze for about 4 hours.

Take out of the freezer about 30 minutes before serving to allow the ice cream to soften slightly.

Notes

I think No-Sugar, Old-Fashioned Vanilla Ice Cream is best appreciated when it’s served simply without embellishment. However, if you’re curious to know why my friends used to rave about my retro dessert of ice cream with hot chocolate sauce, the Hot Chocolate Sauce recipe will be the next to feature on this blog.

I use Gazegill Organics raw (unpasteurised) milk to make my ice cream because that’s the only milk I ever buy. However, because this recipe means heating and holding the milk at a higher temperature than is required for the pasteurisation of milk, it makes no difference if you use pasteurised milk to make it. For the lactose intolerant, A2 pasteurised milk maybe an even better option. 

Fat 24g Protein 3g Carbohydrate 5g - per serving of vanilla ice cream

vanilla ice cream.jpg


Ultimate Chocolate Ice Cream

by Susan Smith in


We L-O-V-E ice cream. About six months ago Sarah asked me if I’d made a chocolate ice cream for Primal Plate’s blog yet. I reminded her that I had, albeit a No-Churn Double Chocolate & Cherry Ice Cream version rather than one made from just pure chocolate. It obviously hadn’t satisfied Sarah’s need because ever since she came back from holidaying in Tuscany (12 years ago!), she’s been raving about the Italian-style ‘cioccolato gelato’ that she just couldn’t get enough of whilst she was there.

chocolate icecream.jpg

As Valentine’s day is just a couple of days away and I’ve heard dark chocolate is literally good for your heart, I thought I’d try and replicate the intensely-flavoured, Italian chocolate ice cream that Sarah still vividly remembers. It was a labour of love. My brief was lots of rich, lingering chocolatey flavour, just the right amount of smoothly soothing creaminess and no sugary aftertaste. It sounds like the perfect combination for a delicious keto dessert, but this one didn’t come easy.

Behind scenes, every new recipe I develop for Primal Plate takes at least three to four hours experimentation before I’m satisfied it works and is worthy of posting. To say I’m demoralised when I spend an entire afternoon in the kitchen and a small fortune on ingredients with nothing delicious to show for it, is an understatement. My first attempt at making Tarfuto Gelato (Italian for chocolate truffle ice cream) whilst carefully following a recipe in a well-known cookery book, turned out to be a rock-hard, grainy, under-sweetened, frozen ‘clod’ of inedible ice!

Usually, when I’m following someone else’s recipe, I instinctively know when something isn’t going to work and how to put it right, but on this occasion my cook’s intuition had gone ‘bye-byes’. In retrospect, the recipe was so ill-conceived and poorly written, I didn’t stand a chance. Sarah and John are always a little more forgiving of my foodie sorties into the unknown and nobly volunteered to eat the damn stuff, but most of it ended up where it belonged…in the bin.

But that wasn’t the end of it. Once chocolate ice cream was on Sarah’s ‘radar’, there was no turning back. Almost defeated, but not quite, I decided that if I was going to succeed in my quest to make The Ultimate Chocolate Ice Cream I’d better go ‘belt and braces’ and buy myself a decent cook’s thermometer. Another sixty-five quid to add to the mounting costs of chocolate ice cream hell!

choc icecream.jpg

As things turned out, it was a good call. Whilst I waited for my luxury digital-probe thermometer to arrive, I tentatively but radically altered everything I knew was wrong with the previous recipe and in one fell swoop came up with The Ultimate Chocolate Ice Cream. For a health-driven food blogger, nothing feels as good as making healthy sweet! Because what’s more Primal than to seek out the sweet taste of sugar like your forebears did? It’s an instinct that’s hardwired into our DNA. The problem is that sugar is no longer the rare and lucky find that thousands of years ago provided our ancestors with the calories their bodies desperately needed to keep moving and to survive times of famine. Today, sugar is the edible enemy that will mostly likely kill you. Not only have we inherited the sugar-craving gene, it’s thanks to Big Food (along with Big Agri, Big Pharma and the likes of Slimmer’s World) who know exactly how to exploit our biological need for sweet, that there’s now sugar, sugar everywhere in the processed foods they peddle, and lots of overweight and sick people to show for it.

Mass-produced ice cream made from milk powder, water, refined sugar, high-fructose corn syrup, artificial flavours, stabilisers, emulsifiers and “substances of plant and synthetic origin” may have the taste and texture of sweetened, aerated cardboard and be a serious health hazard, but at least it’s not a sheep in wolf’s clothing. What really gets my goat is Ben & Jerry’s ‘premium’ ice cream. They’d have you believe that it’s worth paying extra for their all-natural, “Caring Dairy” “Fair trade” environmentally responsible ice cream, but surprise, surprise, they’re not for real. Their reputation has been built on a cynical global marketing ‘game of pretence’ that creates the impression, amongst others, that the milk they source for their ice cream comes from cows that are allowed outside to graze on grass. The truth is that Ben & Jerry’s uses the same milk as most other commercial ice cream manufacturers. It comes from intensive dairy farms where anxious cows are kept in close confinement for their entire (short) lives and fed a diet of soy and grains that their digestive systems simply can’t cope with.

Poison ice cream anybody? Ben & Jerry’s Chocolate Therapy ice cream is not what it seems. As well as containing whacky ingredients such as wheat flour, soybean oil, carageenan, guar gum, Dutched cocoa (alkalised to make it taste less bitter) and six teaspoons of refined sugar per 100 grams (Yikes! That’s the maximum recommended daily sugar allowance for women in just one-half cup serving) it also likely comes with its own sundae topping of pesticide! Here’s what the Organic Consumer’s Association (OCA) has to say about their “Roundup-Ready” ice cream. So far as I know, Unilever-owned Ben & Jerry’s still haven’t cleaned up their act and gone organic and for that reason, as they say, I’m out.

For me, ’The Most Important Thing’ is to show you how to nourish yourself and the people you love with real food that makes everyone want to do a happy dance. To this end, The Ultimate Chocolate Ice Cream is chock-full of organic ‘superfood’ ingredients - high percentage dark chocolate, pastured egg yolks, full-fat grass-fed milk and cream. I think it goes above and beyond the call of duty to eat well and stay slim. It’s so deliciously indulgent, people who want to lose weight, might think of it as food anarchy! How else do you think Sarah and I maintain a dress size 6? It’s not by restricting what we eat - although when you ‘go keto' you can easily intermittently fast for more than 18 hours without even realising you’ve not eaten - It’s all about never feeling deprived of the things you love to eat.

Nothing is more powerful than when you combine care with eating wonderful food. Add to that the emotional response people have to chocolate and ice cream (especially Sarah!), and it’s probably true to say that nothing speaks the language of love more eloquently than this sublime, home-made, chocolate ice cream. It’s so much more than just food…it’s the sweetness and light of the pleasure principle that our ancestors lived by and that a part of us can never forget.

Happy Valentine’s.

keto chocolate icecream recipe.jpg

Ultimate Chocolate Ice Cream (serves 8)

Ingredients

50g organic 100% dark chocolate 

100g organic 70% dark chocolate 

375ml organic whole milk

3 large organic egg yolks 

100g non-GMO erythritol 

200ml organic whipping cream (combine 100ml double cream with 100ml single cream)

1 tsp vanilla extract , optional

1 tbsp alcohol (organic vodka or rum)

40g organic dark chocolate (minimum 75% cocoa solids, but I used 85%), finely chopped

choc ice cream ingredients.jpg

Instructions

If you're not using ready-made chocolate ‘drops’ (as listed in ingredients above) snap or chop the chocolate into small pieces, then place in a heavy-based saucepan with the milk.

Heat gently, stirring until completely smooth. Do not let the mixture boil.

Remove from the heat to cool slightly.

Using an electric hand whisk, beat the erythritol and egg yolks together in a heatproof mixing bowl until pale and thick.

Heat 5cm of water in a saucepan that your mixing bowl will comfortably sit on top of without allowing any steam to escape at the sides (you don’t want to burn your hand when stirring the custard base!).

Add the cooled chocolate mixture to the eggs and erythritol, beat vigorously then set the bowl on top over the top of a pan of barely simmering water, ensuring the bottom of the bowl is not touching the water.

choc icecream prep.jpg

Cook the custard, regularly stirring so it doesn’t catch on the base or sides of the bowl until it thickens into a smooth custard that thickly coats a metal spoon (this can take up to 20 minutes). If you’re using a thermometer to check the temperature, it should reach about 85℃ / 185℉. Whatever you do, don’t allow the mixture to boil or it will curdle.

Remove the pan from the heat. Sit the base of the mixing bowl in a few inches of cold water until the mixture is completely cold, stirring occasionally.

Once cooled, add the vanilla extract and strain through a fine sieve into a clean bowl, then cover and refrigerate.

When the mixture is completely chilled, beat the cream and alcohol into the chocolate mixture.

Churn in an ice cream machine, according to the manufacturer’s instructions, until it is the consistency of whipped cream (about 20-25 minutes).

About 5 minutes before it’s ready, mix in the 40 grams of finely chopped chocolate and continue churning until set.

Quickly scrape into a glass freezer-proof box, level the surface and cover with waxed or greaseproof paper and a lid.

Serve within 2 hours.

If frozen solid, take the ice cream out of the freezer about 30 minutes before you intend to serve it to let it soften enough for scooping.

chocolate ice cream recipe.jpg

Notes

I prefer to use a metal mixing bowl to make ice cream because it transfers heat and cold more quickly. You can use a glass bowl but it will take longer to cook and cool your custard.

Whilst I recommend you get a cook’s thermometer to make The Ultimate Chocolate Ice Cream, it doesn’t need to be a fancy-pants version like the one I bought. This digital thermometer was my second choice and I think it will serve you just as well.

Although I didn’t find Pacari's professional organic chocolate couverture drops in time for this recipe, I’m really tempted to test them out. Perhaps a vegan version of The Ultimate Chocolate Ice Cream made with Pacali’s 85% chocolate drops, coconut milk and cream already beckons!

I added vodka to this recipe to try to stop it from setting too hard, but I’m not sure if I added enough for it make much difference. After 24 hours in the freezer, it took about 40 minutes to get to the right consistency for scooping. Anyway, please don’t include alcohol if you’re serving this ice cream to children - just make sure your freezer temperature isn’t below -18℃ / 0℉

I chose to use organic A2 pasteurised milk for this recipe rather than the raw, organic grass-fed milk we prefer to drink because it has to be heated anyway to make the base custard. If you normally suffer discomfort after consuming regular A1 milk, you might find that you can tolerate A2 milk perfectly well.

Fat 36g  Protein 6g Carbohydrate 13g - per serving


Low-Carb Rose & Raspberry Ice Cream

by Susan Smith in


I’ve recently been channeling my inner child ‘sunshine style’ with gourmet beef burgers and homemade ice cream eaten ‘al fresco’. My only dilemma was which recipe to feature first on Primal Plate’s blog. Given that the hot weather continues unabated, this gorgeous rose and raspberry ice cream, inspired by an English country garden at the height of summer, took priority because in unrelenting heat who doesn’t crave something refreshing to cool down? 

One mouthful of this sophisticated ice instantly tells you that carbohydrate restriction doesn’t mean giving up the foods that give you most pleasure. Low-Carb Rose & Raspberry Ice Cream’s bright and showy presentation actually made me laugh out loud when I first brought it to the table but what really sets this glamorous ice cream apart is the double-whammy of silky-smooth creaminess from organic cream and Mascarpone cheese. The light, fresh flavour of dairy, intensely sweet-sour flavour of ripe raspberries and subtle floral perfume of rose harmoniously combine with each other to make an especially delicious keto ice cream. 

If you like eating ice cream and are following a vLCHF (very Low Carbohydrate, Healthy Fat) diet, this beauty comes with a 100% happiness guarantee!

raspberry icecream recipe.jpg

Low-Carb Rose & Raspberry Ice Cream (serves 8)

Ingredients

200 g organic frozen raspberries

1-2 tbsp organic vodka, chilled

240 ml organic double cream, chilled

3 large organic egg yolks

3 tbsp Sukrin Icing sugar, sieved 

1 tbsp organic rose water

1 organic lemon, just the zest, finely grated 

225 g organic mascarpone cheese, chilled

To serve:

Dried or fresh organic rose petals

Fresh or frozen organic raspberries

Organic freeze-dried raspberry powder

Sprigs of fresh organic lemon balm or mint

keto icecream.jpg

Instructions

Take the raspberries from the freezer half an hour before you start to make the ice cream. Tip them onto a large flat plate and allow them to defrost.

Meanwhile, whip the cream lightly until soft peaks just start to form. Set aside and keep cool in the refrigerator.

Puree the defrosted raspberries and vodka together in a blender. You can pass the puree through a fine sieve if you don’t like the seeds but I don’t bother. Set aside.    

In a separate bowl, beat the egg yolks, Sukrin icing sugar, rose extract and finely grated lemon zest until pale and fluffy - takes about 5 minutes using an electric whisk. 

Whisk in the mascarpone cheese and pureed raspberries, then fold in the whipped cream.

Pour into an ice cream maker and freeze until soft-set following the manufacturer’s instructions*.

Scrape the soft-set ice cream into a freezer proof container quickly smoothing it out on top. Cover the surface with a layer of waxed paper before sealing with a lid and freezing until solid. 

*Alternatively, pour the mixture into a container with a lid and place in the freezer. Stir the ice cream every fifteen minutes or so until it firms up - it will take about 1-1.5 hours.


Notes

Homemade ice cream, especially one made without sugar, tends to go rock solid and the longer it’s left in the freezer the harder it gets. The first time I made a batch of this ice cream I let it set overnight. By the next day it was nigh impossible to scoop and I got so frustrated with waiting for dessert I ended up smashing the glass container it was stored in! Alcohol doesn’t freeze, so I subsequently added a small amount of vodka to the recipe to keep this ice cream the right side of solid without overpowering or altering its original taste. This means it’s an ice cream for adults only. If, like me, you find patience boring please don’t take a hammer and chisel to it! Just remember to take it out of the freezer and keep in a refrigerator for 20-30 minutes before attempting to make the perfect scoop.

Using frozen rather than fresh raspberries makes this ice cream trans-seasonal. So pretty and fresh-tasting, I can see myself serving it for dessert on Christmas Day! 


Fat 32g Protein 3g Carbohydrates 6g - per serving

keto dessert.jpg

Sugar-Free Fresh Lemon Mousse

by Susan Smith in


I’ve taken the zing of lemons to extreme in this sugar-free, light and lovely Fresh Lemon Mousse. In my book, if the clean, fresh, sour essence of lemon doesn’t acidify your tastebuds enough to stimulate a spontaneous squint in one eye, you’ve gone overboard with the sweetener!

What I love about this recipe is the contrast between citrussy aromatics and the soft gentleness of a creamy, light-as-air mousse. In fact it is so fluffy and cloud-like, it feels like you’ve inhaled this dessert rather than eaten it! Add to this the satisfying crunch of toasted almonds to further soothe the sharpness of lemon and it’s a positively sublime, melt-in-the-mouth finale to an Easter celebration lunch.

Sugar-Free Fresh Lemon Mousse is an unapologetic invitation to ‘scaredy-fat’ members of Weight Watchers, Slimmer’s World and all others still faithfully adhering to outmoded, anti-fat dietary guidelines, to do their research. Here’s a helpful link to get you started.

Once you’re persuaded that a low-carb, high-fat (ketogenic) diet can be a more efficient and enjoyable strategy for a healthier, slimmer body than calorie counting and low-fat can ever be, I imagine you’ll be happy to grab yourself a long handled spoon and dive in. After counting calories, syns, food points or whatever else low-fat propagandists have people do, this seductive, Sugar-Free Fresh Lemon Mousse makes for eye-opening, lip-smacking, diet ‘liberation’ that makes the heart sing. 

What a perfect way to celebrate new beginnings. 

Happy Easter!

lemon mousse.jpg

Sugar-Free Fresh Lemon Mousse (Serves 4)

Ingredients

3 large organic eggs

60g non-GMO pure erythritol sweetener

¼-½ tsp pure monk fruit powder

2 large organic lemons

3 tbsp organic Greek yogurt

125ml organic double cream

⅛ tsp cream of tartar

A handful of organic flaked almonds    


Instructions

Grate the zest from the lemons and juice them - you should end up with about 80ml juice and 1 heaped tablespoon of zest.

Bring a pan of water to the boil and reduce the heat so that it is barely simmering.

To create a stove top bain-marie (double boiler) select a stainless steel mixing bowl to fit on top of the pan without the base of the bowl coming into contact with the water. There should be at least an inch of space between the water and the bottom of the bowl.

Now separate the eggs. Place the egg yolks into the bowl you’ve selected for the bain marie and the egg whites into a separate, scrupulously clean, metal bowl. Set the egg whites aside. 

Add the erythritol and monk fruit powder to the egg yolks and whisk for about 2 minutes until pale and thickened. Stir in the lemon juice, zest and yogurt.

Now place the bowl with the egg and lemon mixture on top of the pan of simmering water and whilst whisking constantly, cook the mixture for about 10-15 minutes, until it thickens into lemon curd. It’s ready when it’s the consistency of mayonnaise or hollandaise sauce. 

Immediately plunge the base of the bowl in cold water and keep stirring the lemon curd until completely cooled. Set aside.

In a separate bowl, whisk the cream until soft peaks just start to form, then stir or gently whisk into the lemon curd so it’s evenly combined. Set aside.

Using a clean electric whisk, beat the egg whites for 1½ minutes until foamy, then add the cream of tartar and keep whisking until stiff peaks form and the mixture has increased fourfold - takes about 2 minutes.

Using a metal tablespoon, very gently fold the egg whites into the lemon curd cream in roughly 3 parts, making sure that you don’t deflate the meringue and it’s evenly incorporated.

Spoon the lemon mousse into 4 individual dessert bowls or glasses.

Chill for 2 hours or until ready to serve.

Meanwhile, toast the flaked almonds in a small, dry, frying pan until lightly golden, turning occasionally to make sure they don’t scorch. Watch carefully and take off the heat as soon as they’re toasted, then allow to cool down completely before using.

Immediately before serving, sprinkle the toasted almond flakes on top of the mousse.

lemon mousse keto recipe.jpg

Notes

I’m still a bit dubious about using excessive amounts of sugar alcohols as sugar alternative sweeteners in Primal Plate recipes so I’ve supplemented erythritol with pure monk fruit powder to get the equivalent intensity of sweetness I wanted, naturally. Don’t be put off by the price of pure monk fruit powder, it’s actually very economical because only the tiniest amount is needed for it to work its magic. 

Monk fruit powder is 300 times sweeter than cane sugar but not because it contains natural sugars like most other fruits do. Its incredible sweetness is due to the presence of mogrosides, which are powerful antioxidants. Consequently, monk fruit powder is metabolised differently to fructose and glucose by the body and has a negligible effect on blood sugar. Very useful in food and drinks when you’re trying to lose weight.

Because I’ve not used gelatine to stabilise this mousse, you need to make Sugar-Free Fresh Lemon Mousse on the day you intend to eat it. If it’s left in the refrigerator to chill for more than a couple of hours or so, it may start to separate. Not a culinary disaster, just not quite so visually appealing! 


Fat 22g Protein 6g Carbohydrate 3g - per serving


Zero Sugar Meringues

by Susan Smith in ,


In a society that tends to eat a lot of excess sugar and overeat in general, it seems that for the most part I stand alone when it comes to refusing to eat or drink anything with refined sugar added. It’s not easy. Not because I crave sugar - physically and psychologically I have come to loathe the stuff - but because relatively healthy sugar substitutes are not readily available and when I can get hold of them, they’re expensive. Whilst buying low-carb sugar replacements to bake with is nothing like the financial liability of regularly eating out - which I seldom do because the majority of restaurant food centres around refined, non-organic vegetable/seed oils, sugar and grains - they come at a price that make your eyes water! 

Furthermore, most alternative sweeteners either don’t taste quite right or don’t behave like ordinary sugar when you cook with them. Amazingly, I recently found one that’s a notable exception: NuNaturels Tagatose is a prebiotic sweetener produced from lactose that is virtually indistinguishable from table sugar in every respect. Tagatose is costly and even more annoyingly, only currently available to purchase from the US. But with half the calories of sugar and a low glycemic index (GI) of just 3 (sucrose has a GI of 65), it doesn’t raise blood glucose and insulin levels in healthy individuals and those with diabetes type-2. It is also believed to stimulate the growth of beneficial intestinal bacteria. All of this seems to make it a ‘goer’ as a low-carb, Primal sweetener. It was my discovery of tagatose that first enabled me to successfully make low-carb meringues that looked and tasted like the real deal. To the best of my knowledge, they were a culinary ‘first’ and, if you’re willing to believe what the producers of tagatose tell you, they smash conventional meringues made with sucrose into the ground. That said, tagatose became irrelevant for the purpose of this blog post because the next time I tried to order some, there was none left in stock.

Disappointed but not dissuaded, I decided the way forward was to purchase NKD Living’s Non-GMO Erythritol sugar replacement sweetener instead. I’d previously seen other peoples’ erythritol meringue recipes posted online but to be honest, it was the pictures of these that originally put me off using erythritol myself. However, beggars can’t be choosers and as I had already challenged myself to feature Zero Sugar Meringues on Primal Plate’s blog, last week I put erythritol to the test. As you can see, the revised version of Zero Sugar Meringues also turned out spectacularly well. Sweet, light and ‘sugary’, erythritol has no aftertaste but does have a slight cooling effect in the mouth. I thought this rather enhanced the eating sensation, which was a bit like biting into an exploding snowball!

sugar-free meringue.jpg

Crispy on the outside and meltingly soft in the middle, these crunchy, cloud-like patisseries are a luxurious, hedonistic affair when sandwiched together with lashings of whipped cream and accompanied by fresh, organic raspberries to cut through their sweetness. Never mind the price of tagatose, I’m now on a roll with erythritol. Next up, pavlova! 

Because it takes at least 10 minutes of non-stop beating of the egg whites, meringue is best made in a food mixer with whisk attachment. I’ve included the speeds I set my Kenwood Chef at. Otherwise, use a hand-held electric whisk, or if you’re feeling really energetic, a balloon whisk.

sugar-free merignues.jpg

Zero Sugar Meringues (makes 8 meringues; serves 4)

Ingredients

2 organic egg whites, at room temperature

¼ teaspoon cream of tartar

100g non GMO erythritol, preferably whizzed in a coffee/nut mill to make it extra fine (like icing sugar)

½ tsp organic vanilla extractoptional


Instructions

Preheat the oven to 130℃ / 250°F / Gas mark ½

Cut a piece of non-stick baking parchment to fit a large baking sheet.

Using a scrupulously clean glass or stainless steel bowl and whisk, beat the egg whites on medium speed (Kenwood Chef number 4) until foamy - takes about 2 minutes.

Add the cream of tartar and continue beating at the same speed for another 3 minutes.

With the beater still running, slowly add the erythritol/tagatose, 1 dessertspoon at a time. When all the sweetener has been incoporated, turn the beaters up a notch (Kenwood Chef number 5) and beat for a further 5 minutes until very stiff and glossy.    

Add the vanilla extract, if using and beat 1 minute more.

Remove the bowl and whisk from the mixer stand. Using the meringue left on the whisk attachment, place 4 blobs of meringue at each corner of the baking sheet so that the paper will stay put whilst you’re spooning the meringue on to it.

meringue making montage.jpg

Bang the whisk attachment sharply against the side of the bowl to remove the rest of the meringue then using 2 metal tablespoons shape the meringue into 8 ovals or mounds on the parchment paper.

Bake in the centre of the pre-heated oven for 10 minutes.

After the first 10 minutes, lower the temperature of the oven to 110℃ and continue baking for a further 20 minutes.

After baking for 30 minutes, lower the temperature again to 100℃ and continue baking for another 30 minutes.

Check their progress after 1 hour. Take the baking tray out of the oven and with a flat palette knife attempt to gently lever the meringues off the parchment paper.

The meringues are ready when they are dry and crisp on the outside, are a pale coffee colour and will peel off the parchment paper easily.

If the meringues are still a little sticky, turn them upside down so that the sticky underside is exposed and bake for a further 10-15 minutes until completely dried out.

Now, leaving the meringues in the oven, turn the oven off and allow them to dry out and cool down completely as the oven cools. N.B. This can take a couple of hours or more with the oven door closed, so make sure you don’t need to use the oven for anything else.

When the meringues are cooled, they will have a crispy shell and they should sound hollow when you tap the bottom.

Store in an airtight container. They will keep for 5 days at room temperature. Do not refrigerate.

When you’re ready to assemble the meringues, generously sandwich two of them together with lightly whipped cream and serve with fresh, organic raspberries.

sugar free meringues.jpg

Notes

The bigger the meringues, the longer they will take to bake. Reduce the cooking time if you’re making mini meringue ‘kisses’.

Tagatose is not suitable for vegans because it’s made from whey, which is a milk by-product. However, since tagatose does not contain lactose, it's okay for the lactose intolerant

A word of caution: Primal Plate does not advise eating any sweetener in high amounts and cannot wholeheartedly recommend any non-nutritive sugar replacements. Whilst non-GMO erythritol and tagatose are thought to pass through the body untouched with virtually zero effect on metabolism/blood glucose levels that doesn’t mean, as is touted by their manufacturers, that they’re natural or healthy.

Nevertheless, I do believe that sweet tasting foods are for most people a highly desirable part of their diet, which is why I cautiously promote non GMO erythritol and stevia as possibly the best “naturally occurring” sugar alternatives for low-carb baking. Pure monk fruit powder is probably better if the recipe allows. Unfortunately, monk fruit powder is a 300x sweeter-than-sugar, mustard coloured powder that cannot easily be incorporated into many desserts. If you’re not doing keto and can take the carb ‘hit’, modest amounts of raw organic honey, maple syrup, ripe bananas, homemade apple sauce or medjool dates are also healthier alternatives to table sugar. Whatever sweetener you choose, learn to cut down on the level of sweetness needed. I strongly advise you to try and dampen down your sweet-tooth by saving Zero Sugar Meringues and other Primal Plate sweet tasting treats for special occasions only.


Lemon ‘Sugar’ Keto Pancakes

by Susan Smith in ,


It’s pancake day today, but because it’s taken five attempts to make this recipe foolproof, I’m afraid only we will be able to indulge ourselves with these Lemon ‘Sugar’ Keto Pancakes. Never mind that I missed the deadline this Shrove Tuesday. In one form or another, we’ve eaten these pancakes on six successive days during the past week and we’re not bored of them yet! They’re delicious! 

keto pancakes.jpg

Two years ago I posted a recipe for Primal Pancakes but my understanding of eating low-carb has moved on significantly since then and, in retrospect, 10 grams of carbohydrate per pancake is quite possibly 9 grams too many, especially when you’re trying to lose weight. Personally, we’re no longer in that boat but a low-carb, high-fat (LCHF) diet still holds good for us because we want to stay at our fighting weight and keep ourselves as healthy as possible. 

Talking of boats, did you hear about the four British amateur oarsmen who recently smashed the transatlantic rowing race world record by a full 5 days? Get this, they did it by rowing for just under 30 days on fat. That is to say, eating a LCHF aka ketogenic diet. Furthermore, their boat was a sugar-free zone! Admittedly, after 30 days of extreme exertion they binged-out on carbohydrates, but this can hardly apply to Joe Public, who generally don’t stop eating from the minute they get up in the morning to the minute they go to bed at night, and who do little in the way of exercise in between. In my view, the only excuse for not adopting a LCHF diet is that life loses its sparkle if you’re deprived of bread, cake, ice cream, crisps and pancakes. Enter, Primal Plate food blog. It’s my job to fool you into believing you’re not eating low-carb.

These delicious pancakes are the perfect example. Neither an American pancake nor a French crêpe, they sit somewhere between the two. We had a couple of hilarious days whilst I fathomed out how to create a pancake batter that would ‘flip’ without drama. Apart from sheer tenacity and persistence, I don’t quite know how I finally achieved such a well-behaved batter that is neither too ‘eggy’, too thick or ‘blubbery’ and is a breeze to turn. It’s a mystery to me what alchemy occurs with even the slightest adjustment to a recipe’s ingredients, but here I give to you - drum roll please - my recipe for flourless, sugarless, Lemon ‘Sugar’ keto Pancakes.

lemon sugar keto pancakes.jpg

It’s now your turn to indulge yourself. I think you’ll find these pancakes are everything you dream of when you think of classic, hot, golden pancakes with the crunch of sugar and the sweet tart lift of lemon juice. When Sarah was a baby, she used to entertain herself by sucking on lemon wedges and chuckling uncontrollably at my screwed up face as I imagined their sour taste assaulting her senses. Your little ones may appreciate freshly juiced blood oranges in place of lemon juice and organic maple syrup or raw honey instead of erythritol. These pancakes are equally yummy served with fresh organic blueberries and lightly whipped cream. 

An easy to follow recipe that should have you enjoying pancakes all year round.

IMG_8835 copy.jpg

Lemon ‘Sugar’ Keto Pancakes (makes 8, serves 4)

Ingredients

4 large organic eggs 

2 organic egg whites

150g organic full-fat soft cheese

50g organic full-fat crème fraîche

8g organic whole psyllium husks, ground into a fine powder                

1 tsp baking powder

¼ tsp monk fruit powder

Unsalted butter, coconut or macadamia nut oilfor frying

To serve:

Freshly squeezed organic lemon juice and a sprinkling of zero calorie Erythritol (See Notes below)


Instructions

In a bowl, mix the cream cheese and crème fraîche together with a fork until soft and smooth.

Beat the eggs and egg whites with electric mixer or hand held blender on high for 1 minute to make them light and fluffy. 

Add the softened cheese mixture to the eggs and blend for 20 seconds more before adding the rest of the ingredients and blending again until well combined.  

Let the batter stand for 3-4 minutes.

While the batter is standing, heat a small (20 cm) non-stick frying pan - I use this one - over a medium heat.

When hot, add a little butter or oil to the pan - wiping away any excess with paper kitchen roll. 

Add 2-3 heaped tablespoons of the batter and swirl the pan so it covers the base evenly. Cook for 4-5 minutes until the underside of the pancake is golden and lots of small bubbles appear on the surface.

Turn the pancake over with the aid of a flexible, wide slotted turning spatula.

Fry on the second side of the pancake for a further 2-3 minutes until golden and set.  

pancake making.jpg

Slide the cooked pancake onto a warm plate, sprinkle over the erythritol sweetener and agree to eat in relays. 

Alternatively, roll each ‘sugared’ pancake tightly into a cigar shaped cylinder then cover and keep warm in a low oven whilst you cook the rest.

Notes

Delicious, organic Citron Beldi lemons available from Abel & Cole are sweet, floral citrus fruits that look like squashed lemons and come all the way from Marrakech. They are only around in winter, so make the most of them while you can. They make a delicious juice to serve with these pancakes.

organic lemons.jpg

NuNaturels tagatose was going to be my closest-to-sugar alternative for sprinkling over these pancakes but it’s a nightmare to get hold of and ridiculously expensive to boot, especially when you add on custom charges. I’ve just had to pay an additional £17 to get three 250g bags of tagatose into the U.K. So until someone somewhere pulls their finger out and starts to produce pure tagatose for sale in the U.K., I have decided to abandon the idea of promoting Primal Plate recipes that rely on tagatose as a primary ingredient. Very disappointing, since before last Christmas I’d perfected a brilliant sugar-free meringue recipe that I never had chance to post. Identical to normal, crispy on the outside and slight chewy on the inside meringues, I thought they would be a lovely recipe to feature for Valentines Day. Unfortunately, without it, I’m going to have to start over. For now, that just leaves me with non-GMO erythritol to play with. 

IMG_8931 copy.jpg

Erythritol is naturally found in fruits, vegetables and fermented foods. It has a GI of 0 and 0.2 calories per gram. It does not affect blood sugar and is suitable for a low-carb diet. Its sweetness is about 70% of table sugar, so you may need to use a bit more than sugar. Don’t worry, erythritol counts as a zero carb sweetener because your body can’t digest it. 


Fat 33g Protein 6g Carbohydrate 1g - per pancake (N.B. Don’t forget to add extra carbs for toppings and accompaniments)

pancakes paleo baking.jpg

Chocolate Truffle Pots With Raspberries

by Susan Smith in ,


For crying out loud! How do I know that Christmas is already snapping at my heels again? Answer: When Waitrose start to email and text me that it’s time to bag my preferred Christmas delivery date before all their slots are taken. Apparently, if you don’t want to miss out and be forced to jostle with the rest of the shoppers in-store this Christmas, you’d better be one of the first in their virtual queue. The trouble is, to qualify you have to fill your shopping basket today with everything you might fancy eating in three months time! Looks like wild sockeye salmon, king Madagascan prawns and Nyetimber fizz - the ultimate English alternative to Champagne - are already destined to feature in our Christmas celebrations this year! 

As it happens, last Sunday was one of those all too rare occasions when both my lovely daughters and I sat down together for a family meal. So taken was I at the prospect of this mini social gathering that even though I am currently as run off my feet as it’s possible to be - think headless chicken - I still felt inspired to make something really special for us to eat. These Chocolate Truffle Pots With Raspberries were devoured with so much enthusiasm, I now also know what’s going to be the grand finale to our Christmas lunch! Organised by default, or what? To be honest, they’re such an easy, make-ahead dessert to simply grab from the fridge as you need them, they’ll probably make several dinner party appearances before the festive season gets underway in earnest.

Besides, there’s nothing more un-diet-like than a rich, chocolatey pudding to show people how deliciously easy it is to eat yourself healthy and then stay slim once you’ve decided to ditch high carbohydrates and switch your body’s energy source from sugar to high quality fats. WARNING: If you eat lots of high-fat food whilst continuing to eat sugar and grains, you will get fat! 

Pregnant women and high performance athletes may be an exception, but for the vast majority of us carb intolerants, a high-fat, moderate protein and low-carb diet, especially in combination with gentle intermittent fasting, will burn-off excess body fat, keep you at your optimum weight, reduce chronic inflammation (the root cause of most disease) and help you take back your health and vitality. Sounds too good to be true but I invite you to give LCHF the chance to work its magic before the party season kicks off…by which time there should be significantly less of you to fit into your party clothes!

Very good quality, organic chocolate and a mere tablespoon of organic maple syrup makes six individual Chocolate Truffle Pots With Raspberries that are neither too sweet or too bitter. A sophisticated, delectable dessert that keeps on giving with every luscious spoonful - dig deep for the pretty pink raspberry centre that pairs beautifully with the creaminess of chocolate truffle - and don’t let the big fat lie that you’ve been told, particularly about saturated fat, mar your enjoyment. Though everyone finds it difficult to believe, this heavenly, ‘fit for the gods’ high-fat pudding gets you over the psychological hump of diet deprivation and hangry sugar cravings to actually help you shed body fat. Do you really need any other excuse not to make it?

chocolate pots.jpg

Chocolate Truffle Pots With Raspberries (Serves 6)

Ingredients

150g organic frozen raspberries

50g organic *100% cocoa solids dark chocolate (see Notes below)

75g organic *76% cocoa solids dark chocolate (see Notes below)

300ml organic double cream

4 drops organic liquid stevia

1 tbsp organic maple syrup

1 tsp pure vanilla extract

4 large organic egg yolks

2 tbsp Sukrin:1

Raw organic cacao powder, to dust (see Notes below)

Sukrin icing sugar, to dust

chocolate pots primal recipes.jpg

Instructions

Boil a kettle of water. Pre-heat the oven to 150℃ (130℃ fan) / 300℉ / Gas mark 2.

Put the chocolate into a saucepan with the cream and place over a medium heat. Heat slowly to just below boiling point whilst stirring from time to time until the chocolate is completely melted and the mixture smooth. Stir in the liquid stevia, vanilla extract and maple syrup then set aside to cool slightly.

Divide the frozen raspberries between 6 x 125ml ramekins (25g per ramekin)

recipe step by step 1.jpg

Place the egg yolks and Sukrin:1 into a bowl and stir together using a wooden spoon. Stir in the chocolate mixture and stir to combine.

step by step recipe.jpg

Divide the mixture between the ramekins (approximately 80g per ramekin), settle the mixture evenly into their pots by gently tapping the sides of the ramekins before placing them into a deep roasting tin. Pour enough boiling water into the tin to come halfway up the sides of the ramekins.

step by step chocolate pots.jpg

Bake for 25 minutes. Remove from the oven and leave to to cool, then cover and chill overnight. 

Remove the ramekins from the fridge 30 minutes before serving to allow them to reach room temperature. 

Just before serving dust with cacao powder and a sprinkling of Sukrin icing sugar, if liked  


Notes

Raw cacao is less processed than cocoa powder and so retains natural antioxidants and essential fatty acids. It has the same great taste as cocoa and is used in exactly the same way but for this recipe I chose to go one better. People often ask me if I believe in taking nutritional supplements and indeed I do. Never one to miss a golden opportunity, I used Miessence Berry Radical Antioxidant Superfood - a chocolatey-tasting food supplement - to dust my truffle pots. In fact, if you suspect your diet is deficient in fruit and vegetables, this tasty, high potency formulation gives you the antioxidant equivalent of eight servings of fruit and vegetables in every teaspoon! 

I always prioritise eating well to support good health so there’s no point in being cheap…er frugal, when it comes to feeding your body with the nutrients it needs. Along with Miessence Berry Radical antioxidants, which we usually make into a delicious chocolate milk sweetened with pure stevia drops, we also take a teaspoon each of Miessence InLiven Probiotics and DeepGreen Alkalising Superfood mixed with fresh lemon juice and water, each and every day. At least I then know that no matter how hectic or stressful life gets, my family is never going to be nutritionally short-changed. If you know you don’t always have the time to cook fresh, healthy meals, the Miessence Vitality Pack is the most convenient, natural way to reliably supplement an inadequate diet. 

chocolate pots ingredients.jpg

I had a glut of 100% cocoa solids, no added sugar, organic chocolate bars given to me to sample for a birthday surprise. To be honest, I must be a 100% cocoa solids chocolate ‘wimp’ because I found only one of them smooth and mellow enough to eat straight from its wrapping! The rest will find their way into future Primal Plate recipes to make them even more low-carb. * If you prefer (it’s much cheaper), you can replace the two types of chocolate that I used with 125 grams of Green & Black’s 85% organic dark chocolate. I haven’t tested it out, but I imagine to get a similar taste profile to my chocolate truffle pots (I don’t like overly sweet chocolate), you will need to add less stevia - try adding just 2 stevia drops at first, then taste before adding more to adjust the sweetness to your liking. 


Fat 40g Protein 5g Carbohydrate 9g - per serving


Mango & Passion Fruit Fool

by Susan Smith in ,


When pondering what to eat for our Easter vegetarian feast last weekend, fruit fool - a light and creamy dessert simply made by combining fruit puree with softly whipped cream - was my dessert of choice. I’ve always loved fruit fools, particularly when made with stewed and pureed rhubarb or gooseberries, which back in my sugar-eating days (before I was older and much wiser) I liked to serve with homemade shortbread fingers for dunking. 

Albeit that the first homegrown rhubarb is now in season, this more exotic, fragrant Mango and Passion Fruit Fool is all about its bright daffodil-yellow colour and abstract beauty, which reminds me of springtime and eggs - set off beautifully by serving it in delicate, glass teacups. 

Don’t be alarmed by the extravagant amount of double cream used in the recipe. It’s deliberate. You could lighten things up a bit by substituting 100g of thick, natural Greek yogurt for the same amount of double cream before whipping them together and then folding in the fruit puree, but I like this gorgeous dessert just the way it is and consider it to be healthy.

Consuming saturated fat does not by itself make you fat. Weight watchers take note: A high-fat diet, makes it easier for people to lose weight, lower blood levels of triglycerides (the other circulating fat, besides cholesterol) and raises levels of heart-protective high density lipoprotein, or HDL, the “good” cholesterol (to read more, click here). Conversely, a low-fat diet is fattening and makes you sick. 

The low-fat / high carbohydrate dietary ‘Dementors’ have had their heyday and in the process they destroyed the health of millions of people along with their faith in eating natural (real) food. The truth is, the human body prefers ‘Fat for Fuel’ and furthermore, it’s healthy fats such as raw organic butter and cream that actually make food taste delicious. Way to go! 

More than this, switching your body’s energy supply from glucose to fat is vital for improving health and increasing longevity. It’s almost a case of: If it tastes good, eat it! But, and it is a big BUT, you can only be part of the dietary revolution going on all around you if you are willing to stop eating refined sugar and grains - including conventional breads, cakes, biscuits, breakfast cereals, white rice, pasta - as well as white potatoes, corn and all high sugar food and drinks. Are you ready?

I hope so, because the likes of this creamy, dreamy fruit fool awaits you. In the context of a carbohydrate-sparing diet, it is a healthy, quick and easy dessert that works on every level. Welcome to Primal Plate living. It’s the future.  

Mango & Passion Fruit Fool (Serves 4)

Ingredients

1 large, ripe organic mango

4 large ripe passion fruit (or 6 medium ones)

300ml organic double cream, preferably raw (unpasteurised)

3-4 drops organic liquid stevia


Instructions

Chill the cream and bowl at least 2 hours before you start.

Using a sharp serrated knife, prepare the mango by slicing the mango lengthways - about 5mm (¼ inch) either side of the stalk - to cut the flesh from the flat stone. Peel off the skin and cut the flesh into rough pieces. Remove as much of the flesh from around the stone as possible. 

Place the chopped flesh into a high powered blender and whizz to a puree. Set aside.

Cut the passion fruits in half and using a teaspoon, scrape out all the pulp, seeds and juice into a small bowl. Divide half of the passion fruit between 4 individual glass serving dishes or teacups. 

Using an electric whisk set at medium-high speed, whip the cream until it begins to thicken. Then turn to medium speed and beat only until the cream holds itself up in soft peaks. N.B. Don’t let the cream become too stiff or you won’t be able to fold in the fruit puree. 

Gently fold the mango puree together with 3 or 4 drops of liquid stevia into the whipped cream until it’s roughly incorporated - you don’t need to be too thorough, a marbled effect is quite nice!  

Divide the mango and cream mixture evenly between the 4 serving dishes, spooning it on top of the passion fruit. Then add the remaining passion fruit on top of each cup of fool.   

Cover and chill for at least 30 minutes before serving. 


Notes

Fruit fool is best served within 24 hours of making. Make sure it is well covered (airtight) before chilling, otherwise it can pick up the smells and flavours of other stored food in the refrigerator. 

Other soft fresh fruits, such as strawberries and raspberries can be used instead of mango to make delicious fruit fools. 

Harder fruits such as gooseberries, dried apricots and rhubarb (strictly speaking, the latter is a vegetable) will need cooking before being pureed. Remember, if your chosen fruit needs extra sweetener (I suggest a 50/50 combo of either organic acacia honey or maple syrup and organic liquid stevia - use minimally) it will add extra grams of carbohydrate to the finished dish.


Carbohydrate 18g Protein 3g - per serving


Caramelised Pineapple

by Susan Smith in


As much as I like the sweet-yet-tart, juicy freshness of a properly ripe pineapple, when I’m feeling down in the dumps this Caramelised Pineapple recipe lifts the spirit by transforming the pure and simple into something more like comforting confectionary with a flavour profile redolent of candy-floss. Yum! Very appealing, no matter what your age or state of mind.

Yes, I know that pineapples are full of natural sugar (fructose) and should be eaten in moderation but they’re also a good source of antioxidants, particularly vitamin C, minerals and an enzyme called Bromelain, which is a powerful anti-inflammatory, anti-cancer compound. 

In short, this wonderful, sticky, caramelised dessert is not only fast and simple to make, it’s really good for you too. For a zingy, nutritious taste of the tropics, I recommend you tuck in!

Caramelised Pineapple (V) (serves 4)

Ingredients

1 organic, fair-traded pineapple, peeled, cored and cut into thick wedges

20g organic coconut oil (or organic unsalted grass-fed butter)

2-3 tbsp organic maple syrup

To Serve

A sprinkling of organic ground cinnamon

A sprinkling of Sukrin Icing sugar

Fresh mint leaves, torn

Organic creme fraîche - optional

Ingredients primal recipe.jpg

Instructions

Melt the coconut oil (or butter) with the maple syrup in a large, heavy-based frying pan over a medium heat.

When it is hot, add the pineapple wedges to the pan and with a pair of tongs, turn to coat all the pieces evenly with the syrup.

Continue to fry the pineapple for about 4-5 minutes on each side, frequently turning them over with in the pan until they’re caramelised to a deep golden brown. 

Stack the wedges onto a warm serving platter or individual plates and dust over with a little cinnamon and Sukrin icing. Decorate with torn mint leaves scattered over. 

Serve immediately with creme fraîche, if liked


Notes

Whole pineapples should be stored at room temperature, while cut pineapple should be stored in the refrigerator. 


Carbohydrate 35g Protein 1g - per serving


Blueberry and Apple Jellies

by Susan Smith in ,


Want a fast and easy, make-ahead, low-carb, festive dessert to rival Christmas pudding? This is it! With a flavour profile that’s light, lively and as sweet as it is tart, I’ve stolen this recipe from Annie Bell’s book ‘Low Carb Revolution’ then made it suitable for vegetarians/vegans by using agar agar rather than gelatine to make deliciously fruity, firm set jellies. 

This is jelly come-of-age. Rich in vitamin C, vitamin K, manganese and other antioxidants it looks elegant, tastes delicious and is as close to health food as you can get. The perfect antidote to the groaning Christmas table and eating and drinking more than is strictly good for you!

Blueberry and Apple Jellies (Serves 4)

Ingredients

1 litre clear apple juice (I used Coldpress Golden Delicious apple juice)

150g organic blueberries

2 level tbsp Clearspring agar flakes (see Notes below)

Sprigs of organic mint - to garnish


Instructions

Pour the apple juice into a medium saucepan and bring to the boil. When at boiling point, turn the heat down and let the apple juice simmer away, uncovered, until it is reduced by half. 

Take off the heat, cover and leave to cool (I plunged the base of the pan into cold water to speed things up) 

When cold, sprinkle the agar flakes over the surface of the apple juice and then heat without stirring until boiling. Simmer, stirring occasionally until the agar flakes have completely dissolved, which takes about 5 minutes.

Take off the heat and allow the apple jelly mixture to cool down in the pan for 15 minutes. 

Meanwhile, divide the blueberries equally between four individual glasses.

Ladle or pour the apple jelly over the blueberries, which will float to the surface. Cover and chill until set.

Decorate with a sprig of fresh mint and serve.


Notes

Agar agar is a gelling agent, made from algae (extracted from seaweed) which is mainly used for setting jellies. It is a viable vegetarian alternative to gelatine, which is made from animal collagen. However, agar agar makes a distinctly firm-set jelly that won’t melt-in-the-mouth like gelatine-set puddings do. 

A very small amount of agar agar will set a large amount of liquid so you need to be very precise with your measuring. Clearspring recommend using 1 tablespoon of agar flakes to set 240ml of liquid. I used 2 tablespoons (slightly less) to set 500ml (i.e. the reduced quantity of apple juice in this recipe) and it still made a very firm jelly. When I re-create this dessert for our Christmas Eve celebrations I intend to use just 1½ tablespoons of agar flakes to see if this produces a slightly softer mouth-feel. If successful, I’ll update this blog accordingly.  

You can find agar flakes online (click the link above) in most health food shops and big supermarkets in the Japanese food section. 


Carbohydrate 33g Protein 0g - per serving


Strawberry Ice Cream

by Susan Smith in


Last week I had to tell Sarah that I couldn’t make the No Churn Double Chocolate & Cherry Ice Cream for a recent supper party she was hosting, because there were no decent cherries left in the shops. Besides, as a last hurrah for English summer berries, I fancied making some no-sugar, no-dairy Strawberry Ice Cream instead. She wasn’t best pleased. The look of disappointment that flashed across her face immediately metamorphosed into disbelief. “How?”, she asked.

Sarah is always astonished when I cull ingredients that are considered intrinsic to a recipe’s success and the finished dish looks and tastes as good as the original. Nay, oftentimes better! At the heart of most yummy ice cream is a custardy concoction of sugar, cream or milk and egg yolks, but even substituting Paleo/Primal friendly ingredients like raw, organic honey or maple syrup for refined sugar, and raw organic cream or milk for industrially produced and processed dairy, doesn’t necessarily go far enough. Recent health scares within my own family have motivated me to make even more effort to support people whose bodies are already in a state of turmoil - their condition exacerbated by eating sugar or anything that turns to sugar - such as grains, potatoes, too much meat and high amounts of fructose (fruit sugar) in so-called healthy fruits.

So, undeterred by Sarah’s initial resistance to my suggestion of Strawberry Ice Cream and with more than a passing nod to Hugh Fearnley-Whittingstall’s recipe for the same in his book Light & Easy, I confidently told her it would prove to be a deliciously sophisticated dessert for her guests. I was right. I love its colour - a sort of soft, antique-pink, its creamy texture (I was almost tempted to rename it Strawberries n’ Cream Ice Cream!), and above all its intense, fresh strawberry flavour.

In theory, because both sugar and fat don’t freeze (butter does, but that’s because it contains water) you should never mess ‘willy-nilly’ with the amounts specified in ice cream recipes for either ingredient if you want to achieve a smooth, softer, less-icy texture. Also, before churning, the ice cream mixture needs to taste a bit sweeter than you think it should, because after freezing it will taste less so. Raw, runny honey à la Hugh Fearnley-Whittingstall’s version of strawberry ice cream, works well in frozen desserts - that’s until you’re trying to pare back on healthy sweeteners too. In this recipe I wanted sweetness without sugar, and creaminess without fat. The solution is alcohol. Like sugar and fat, alcohol won’t freeze so adding a tablespoon of pure, organic vodka to the ice cream mix before churning stops it from becoming too hard and makes it easier to scoop. 

As regular readers of this blog will know, my preferred all-natural, safe alternative to refined sugar in all its guises is Sukrin. Free from calories and carbohydrates, Sukrin’s sweeteners have the aroma, sweetness and flavour of regular sugars but, according to Sukrin, none of the aftertaste found in most other sweeteners. Call me supersensitive, but I do sometimes experience a lingering, cooling taste-sensation in my mouth afterwards. To minimise this, I like to use Sukrin in combination with another sweetener - usually honey or maple syrup - rather than on its own. Nevertheless, to challenge my tastebuds and to see whether I could get away without any honey, I made two batches of ice cream. The first with Sukrin:1 in combo with a little honey and the second with just Sukrin:1. It seems the freezing process not only dumbs down sweetness but also, if it existed, any aftertaste. 

Hurrah! There was no discernible difference between the two - they both tasted delicious, which means Primal Plate's Strawberry Ice Cream is good to go, even for vegans.

You should still be able to find British strawberries in the shops up until the end of September so don’t ‘snooze and lose’ like I did with Sarah’s cherries! Just make sure your strawberries are ripe and full flavoured so you can continue to enjoy a taste of summer for just a little while longer. 

Strawberry Ice Cream (Serves 6)

Ingredients

75g raw, organic cashew nuts

100ml fresh, cold filtered water

1 large (or 2 small) organic bananas (unpeeled weight approximately 200g)

85g Sukrin:1 sweetener

400g ripe strawberries, hulled and roughly chopped

Juice of ½ lemon 

1 tablespoon pure vodka (or Kirsch)


To Serve - optional

Extra strawberries, hulled and sliced

A squeeze of fresh lemon juice

Sukrin icing sugar

Instructions

Soak the cashews in cold, filtered water to cover for 6-8 hours, or overnight. Then drain.

Peel the banana and break into pieces then place in a high-powered blender with the drained cashews, Sukrin:1. and 100ml of fresh cold filtered water. 

Blitz thoroughly until the mixture forms into a thick, creamy, smooth puree. 

Add the strawberries, vodka and lemon juice and blitz again, just until smooth. 

Pour the contents of the blender into a jug, then cover and chill in a refrigerator until cold. 

Now churn the mixture in an ice cream maker, according to the manufacturer’s instructions until it’s soft-set.

Transfer the ice cream into a plastic freezer container, before smoothing off the top and pressing a piece of waxed paper (or cling film) directly onto the surface to stop ice crystals from forming. Cover with a lid and and place in the freezer until solid. 

If you don’t have an ice cream machine, pour into a plastic freeze-proof container and freeze for about an hour until the sides start to get solid. Then mash with a fork to combine the solid ice cream at the sides of the container with the still liquid centre. Straightaway, put it back into the freezer for another half-hour then take it out again and repeat the mixing and mashing. Continue doing this every half hour until the ice cream is soft-set, then let it freeze solid.

About 30 minutes before serving remove the ice cream from the freezer to soften slightly.

Serve scoops of ice cream with sliced strawberries macerated in a little sieved Sukrin icing sugar and a squeeze of lemon juice, if liked. 


Notes 

Always start scooping ice cream from the outer edge where it is softest. This stops ice crystals forming on the outer edges when it’s refrozen. Before returning to the freezer replace the waxed paper and the container lid.

N.B. If you have a sweet tooth and want to eat healthily, it’s best if you to stick with Sukrin’s all-natural sugar alternatives, 100% pure stevia, xylitol, raw honey, pure maple syrup, molasses, and coconut palm sugar.

Carbohydrate 9g Protein 3g - per serving of ice cream (without extra strawberries)


No-Churn Double Chocolate & Cherry Ice Cream

by Susan Smith in


Last week, the weather forecasters promised us that there was a heatwave heading our way and in response to this welcome “summer-where-are-you?” turnaround, I decided to celebrate by making ice cream. Second time around (the first batch was as solid as a rock!) it was voted a spectacular success. With a taste and texture to rival Haagen Daz or Green & Black’s, this sophisticated, silky-smooth, chocolatey ice cream has no added sugar and doesn’t need an ice cream machine to make it. It tastes so good, I’m thinking of setting up in business!

Most no-churn ice creams rely on just two ingredients - straight-out-of-a-tin sweetened condensed milk and double cream. Unfortunately, as fine and dandy as it may sound to just open-up a tin and whip up some cream to make ice cream, a little more stove-top effort is required for the health conscious who don’t eat sugar. Actually, it’s more time than effort that’s needed here. The base for Primal Plate’s version of no-churn ice cream is simply made from organic full-fat coconut milk and Sukrin Gold - a natural, healthy, almost zero-calorie, sugar-free sweetener - gently simmered together for 45-60 minutes until it bubbles down into sweetened condensed milk. Easy or what?

Choosing the flavourings for my ice cream was a no-brainer. Just the sight of dark, sweet, juicy English cherries at the height of their seasonal deliciousness (just 4 weeks every July and August) is enough to tempt me to binge on more of them than I can reasonably afford. However, taking this pleasure one step beyond bliss is the winning flavour combination of cherries and chocolate brought together in a delectable ice cream.

Better still, dark chocolate and cherries are ranked No.1 and No.3 respectively on the Top Ten Paleo Super Foods which means that not only does this decadent ice cream taste divine, it is really good for you too. Anti-inflammatory, anti-carcinogenic, cardio protective…the list of health benefits for cherries and cacao goes on. So if you love ice cream, dark chocolate or, like me, cherries, now is the time to indulge yourself completely guilt-free with this low-carb, no added sugar, cooling chocolate and cherry iced cream sensation. 

Although temperatures in the East Midlands never really did hit the high spots this week, this No-Churn Double Chocolate & Cherry Ice Cream most certainly did. Whether you’re stepping out into the sunshine to enjoy a refreshing scoop or two, or you want to create a fabulous 5-star dessert for your next summer soiree, I think you’ll be hard pressed to find anything more pleasing.

No-Churn Double Chocolate & Cherry Ice Cream (Serves 6)

Ingredients

300ml organic double cream

400ml organic full-fat coconut milk

50g Sukrin Gold

30g organic raw cacao powder, sifted

1 tsp pure vanilla extract

6-10 drops organic clear liquid stevia

50g dark chocolate (at least 70% - I used Callibaut 72% Satongo chocolate chips

225g dark cherries

Extra to serve:

Whole cherries, washed

Dark chocolate, finely chopped or grated


Instructions

In a medium saucepan, bring the coconut milk and Sukrin Gold to a light boil. Simmer on a low heat for 45-60 minutes, stirring occasionally (be careful, the mixture has a tendency to bubble-up and splatter when stirred!) or until it has reduced in volume by half. Do not cover the pan.

Mix in the raw cacao powder and vanilla extract and whisk together until all is combined and smooth. Pour into a large mixing bowl, cover and let it cool down to room temperature. Do not refrigerate.

Meanwhile, wash and pit the cherries and cut them into small pieces. And, if you’re not using chocolate chips, roughly chop the chocolate into small pieces with a serrated knife.

Add the double cream (straight from the refrigerator) to the bowl of cooled condensed milk.

Whip the cream and condensed milk together until slightly thickened and the mixture falls in ribbons from the whisk. N.B. The mixture just needs to hold its shape rather than stand in stiff peaks.

Add the chocolate chips and cherry pieces to the whisked cream then very gently stir everything together with rubber spatula until evenly combined.

Pour into a plastic freezer container, smooth off the top then press a piece of waxed paper (or cling film) directly onto the surface to stop ice crystals from forming. Cover with a lid and and place in the freezer for at least 3-4 hours.

Notes:

It’s easier to cut the cherries into pieces if you have them facing skin side up on your chopping board.

To soften the ice cream before serving, let it sit at room temperature for about 15 minutes or in the refrigerator for 30 minutes. 

Always start scooping ice cream from the outer edge where it is softest. This stops ice crystals forming on the outer edges when it’s refrozen. Before returning to the freezer, replace the waxed paper and container lid. 

Full-fat ice cream will become more solid the longer you freeze it. For the best texture and taste, eat within 2 weeks.   


Carbohydrate 16g Protein 5.5g - per serving


Lemon Curd Ice Cream With Vodka Blueberry Compote

by Susan Smith in , , ,


Last week, in the run up to Easter, our Nespresso machine, main oven and microwave all conked out over three consecutive days. The repairs and/or replacement of the coffee machine and oven are still outstanding, but did you know that in this day and age you can actually order a microwave on Easter Saturday afternoon and have it delivered free of charge on Easter Sunday morning? Really? Does no one take time out any more for those ‘we-wanna-be-together’ happy-holiday, family occasions, which for us means coming together to share some exceptional food and drink. Ah well, their loss, our gain. Not that I need a microwave for anything other than warming plates, but still, when you’ve only a half-sized oven left to cook in, you simply can’t have empty plates occupying the space. 

As if nothing else could go wrong, it did! I’d already made our Easter lunch starter to feature on last week’s blog but to get even further ahead of our Easter celebrations (after all, I do have my third share of a bottle of LPR Champagne to drink before lunch is served!) I decided to make little lemon cream pots for dessert (think lemon tart filling without the pastry).

Usually, when I’m trying out a recipe for the first time, I deliberately override my natural instincts and do exactly what the recipe tells me to. Oftentimes, it’s a big mistake but, hey, I’m not always in the mood for original thought! On this occasion, at a quarter to midnight on Saturday night, I was spooning twelve ramekins worth of expensive ingredients into the waste bin! Nor did I realise, until I finally got to bed at 2:16 am, that the clocks had gone forward and it was now only 4 hours before I needed to get up again! 

It’s at times like these that I am so grateful for Primal Plate. I don’t know if there’s anyone else ‘out there’ cooking Primal Plate recipes, but that becomes secondary when I actually find my own food blog the most essential guide to eating well every day! On Easter Sunday morning, just using the site’s search facility for ‘lemon’ was enough to spark the idea of Lemon Curd Ice Cream. The rest is down to what’s in the fridge. Hence it was a case of making ice cream with Co Yo natural coconut milk yogurt and the remnants in a pot of crème fraîche, or making something else. Turns out, if you simply stir lemon curd, coconut milk yogurt and crème fraîche together in a bowl and freeze, the result is food alchemy - a deliciously bright, light, primrose-yellow, zingy, creamy-smooth ice cream.

Purplish-blue Vodka Blueberry Compote and sunshiny Lemon Curd Ice Cream - sweetened with raw organic honey - is the perfect match in this refreshing, tangy dessert. Lemon and blue always look good together and juicy blueberries and lemons are a heady, flavour pairing that’s cooling, floral, citrusy and fresh - reminiscent of springtime and all things bright and beautiful.

If, at first glance, you think the recipe below looks a little complex, look again. The lemon curd takes less than 15 minutes to make, the 3-ingredient ice cream about 10 minutes and the blueberry compote even less than that! Lemon Curd Ice Cream With Vodka Blueberry Compote is in fact a spectacularly easy, make-ahead, special occasion dessert.

Cool, sophisticated, delectable…there aren’t enough superlatives to do this enticing, Vitamin C packed fruit dessert justice!  

Lemon Curd Ice Cream With Vodka Blueberry Compote (Serves 6)

Ingredients - for the lemon curd

3 large organic eggs

120g raw organic ‘runny’ honey

100ml fresh lemon juice (2-3 lemons worth)

60g unsalted butter, at room temperature, cut into small pieces

1 heaped tbsp lemon zest, finely grated

2-3 drops organic liquid stevia


Ingredients - for the lemon curd ice cream

420g (approx) lemon curd i.e. the full quantity of lemon curd made with ingredients above

250g plain (unsweetened) Greek-style yogurt - I used Co Yo Natural Coconut Milk Yogurt

125g crème fraîche (I used Longley Farm)


Ingredients - for the vodka blueberry compote

300g fresh blueberries

100g organic ‘sugar-free’ blueberry spread (I used Clearspring)

30 ml freshly squeezed lemon juice

1 tsp organic arrowroot

2 tbsp organic vodka (I used Snow Queen vodka)


Instructions - for the lemon curd

In a stainless steel bowl, whisk together the eggs, honey and 80ml lemon juice until well blended. Cut the butter into small pieces. 

Place the bowl over a saucepan of gently simmering water. Do not let the bottom of the bowl come into contact with the water. 

Cook for approximately 6-8 minutes, whisking constantly with a balloon whisk (to prevent it from curdling) until the mixture becomes thick (like soured cream or hollandaise sauce). Don’t get distracted, the mixture can quickly and suddenly turn from thin to thick! 

Remove from heat and immediately pour into a clean bowl. 

Add the butter to the mixture and whisk until it has melted, then add the grated lemon zest, the rest of the lemon juice and 2 drops liquid stevia. Give everything a good stir then taste. If you think the lemon curd is still too tart, stir in another single drop of stevia. 

Take a sheet of plastic cling-film and immediately lay it directly onto the surface of the lemon curd to stop the air getting to it (to prevent a skin forming). Allow the mixture to cool completely. The lemon curd will continue to thicken as it cools. Keep covered and refrigerate until needed.


Instructions - to make lemon curd ice cream

Tip all the ingredients into a bowl and stir together well. Churn the ice cream in an ice cream maker until soft-set consistency, then quickly transfer to a plastic freeze-proof container and freeze until solid.

If you don’t have an ice cream machine, pour into a plastic freeze-proof container and freeze for about an hour-and-a-half until the sides start to get solid. Then mash with a fork to combine the solid ice cream at the sides of the container with the softer centre. Straightaway, put it back into the freezer and freeze until solid.

Take out of the freezer and put in the refrigerator 20-30 minutes before serving to allow the ice cream to soften slightly.


Instructions - to make the vodka blueberry compote

Combine the blueberries, lemon juice and the fruit spread in a medium saucepan over medium heat and cook for about 5 minutes or until the fruit spread dissolves, the blueberry juices start to run and the mixture becomes syrupy - don’t let the berries cook too long or they will become mushy and lose their beautiful shape. Take the pan off the heat. 

In a small bowl or tea cup, combine the arrowroot powder with a little of the vodka until a very thin paste is formed. Add a little of the hot blueberry juice to the slaked arrowroot to even out the temperature between the two mixtures, then quickly pour the arrowroot mix into the berry compote, stirring continuously as you do so. 

Put the pan back on the heat and keep stirring until the mixture thickens slightly (just below boiling point). Stir in the rest of the vodka. 

Remove from the heat. Tip into a bowl and lay a piece of cling film directly onto the surface of the compote to stop the air getting to it - i.e. to stop a skin from forming. 

Best served warm or at room temperature.


Notes

Blueberries are known as a super fruit; rich in antioxidants, high in vitamins and minerals. Read more about them here: 20 Science-Backed Health Benefits of Blueberries


Carbohydrate 19g Protein 7g - per serving of lemon curd ice cream

Carbohydrate 13g Protein 0g - per serving of vodka blueberry compote


Tiramisu

by Susan Smith in , ,


Here’s a novel way to spoil your mum with anti-ageing skin care this Mother’s day - treat her to tiramisu! You are what you eat, and this skin-loving dessert is rich in Vitamin E and healthy oils that are sure to get her skin glowing from the inside!

A fantastic confection made with a light tiger nut and almond sponge cake layered with sweet-tasting macadamia nut cream and a rich coffee/chocolate flavoured ‘ganache’, this is tiramisu re-invented - without sugar, dairy or grains.  

Boasting a wealth of antioxidants, essential vitamins, minerals and healthy fats from the ‘darlings’ of the nutritionally-aware foodie brigade - avocados, coconut oil/milk, raw cacao, tree nuts, tiger nuts and a little raw, unpasteurised organic honey (because I simply couldn’t ignore the skin-enhancing benefits of honey!) - this isn’t just tiramisu, it’s superfood! An unrecognisably healthy retro dessert so choc-a-block with nutrients you won’t believe it’s not the luscious (though sadly off the carbohydrate richter-scale!), Italian classic.

Primal Plate’s ‘light as a feather’ Tiramisu is part of my stay slim and gorgeous action plan to make low-carbohydrate/high fat eating (LCHF) a way of life even when the occasion calls for some sweet-toothed indulgence. Not only is this impressive dessert relatively low in carbs, you are nourishing your skin from the inside out by eating Vitamin E packed tiger nuts, almonds, avocado and coconut oil. Vitamin E is widely used in the cosmetics industry to help slow down the ageing of the body cells, improve the elasticity of the skin and reduce skin wrinkles. 

Whilst I maintain that you should never put anything on to your skin that you’re not prepared to put in to your mouth, It’s good fun to turn this beauty maxim on its head with a deliciously decadent dessert that can help every woman channel her inner goddess. Ingenious…the perfect solution to having your cake and eating it! Happy Mother’s day girls!

Tiramisu (makes 4-6 servings)

Ingredients - for the sponge layer            

45g unsalted butter    

60g organic tiger nut flour 

40g organic ground almonds 

1 tbsp raw cacao powder

pinch of sea salt

3 large eggs                            

75g Sukrin:1                             


Ingredients - for the nut cream layer            

125g macadamia nuts, soaked overnight in cold filtered water

250g full-fat coconut milk

20g raw organic honey

4 drops organic liquid stevia

1tsp pure vanilla extract (I use sugar-free Ndali)

25g coconut oil                


Ingredients - for the coffee/chocolate ganache layer            

2 ripe medium avocados (approx 350g unpeeled weight)

20g raw organic cacao powder

50g raw organic honey                                     

10-12 drops organic liquid stevia                 

1 tsp pure vanilla extract (I use sugar-free Ndali)                        

80ml espresso-strength coffee        


Ingredients - to assemble the tiramisu            

100ml freshly brewed expresso-strength coffee                

40 ml malt whisky                    

30g Sukrin Gold               

raw cacao powder, sifted                    

Sukrin no-sugar milk chocolate


Instructions - to make the sponge

Pre-heat the oven to 180°C / 350℉ / Gas mark 4

Melt the butter gently and leave to cool slightly. Use a little of it to grease a 23cm x 30cm (9” x 12”) swiss roll tin, then line the base and sides of the tin with a single sheet of baking parchment (cut down into the corners so that the paper lies flat against the sides of the tin).

Sift the tiger nut flour, salt and cacao powder in to a medium sized bowl. Stir in the ground almonds and set aside. 

Put the eggs and Sukrin:1 in a large heatproof bowl that will sit snugly over the top of a saucepan. Pour boiling water into the saucepan and sit the bowl on top. The hot water must not actually touch the bowl. Set the pan over a low heat so that the water is barely simmering. The steam will help dissolve the Sukrin and the mixture to thicken slightly.

Using a hand-held electric beater set on High, whisk the eggs and Sukrin sweetener together for about 6-8 minutes, or until the mixture is very pale, thick and mousse-like and has at least tripled in volume. It should hold its shape for a few seconds when it’s flicked across the surface of the rest of the mix.

Add one-quarter of the sifted flour/ground almond mixture into the egg and Sukrin mixture and very lightly and gently fold it in with a large metal spoon. Repeat 3-4 times more with the remaining flour/ground almond mixture - folding it in gently each time. When all the flour/ground almonds have been incorporated into the mix, carefully pour in the melted butter and gently fold this in too. N.B. Don’t be in a rush to do this and try not to be too heavy-handed - the idea is to retain as much air as possible inside the mix whilst at the same time bring everything uniformly together. 

Quickly pour the mixture into the tin - tilting the tin this way and that until the cake mixture has levelled itself out evenly in to all four corners of the tin - then bake in the oven for 20-25 minutes, until golden brown and firm to the touch. 

Leave to cool in the tin for a few minutes and then turn it out on to a wire rack to cool completely.

Once cooled, peel off the parchment paper and slice the cake into fingers or squares for making tiramisu or trifle.


Instructions - to make the nut cream layer

Rinse the macadamia nuts in fresh water then blitz all the ingredients together to form a smooth cream. Place in the fridge to set.


Instructions - to make the coffee & chocolate ganache layer

Blitz all the ingredients together to form a rich, smooth, chocolatey cream.


Instructions - to assemble the tiramisu

Make a fresh batch of espresso strength coffee, add the whisky and liquid stevia and pour into a shallow dish.

Cut the cold sponge into suitable sized cubes or fingers (whatever best fits your serving dish).

Layer 1: very briefly (2-3 seconds!) dip the sponge pieces into the coffee mixture until you can see that the liquid has risen about half-way up the depth of the sponge and lay the pieces one at a time as you go into the base of your serving dish(es) (I used 2.5cm / 1” squares for the base layer in 4 x 225ml martini glass)

Layer 2: Spoon over the nut cream layer and spread out evenly

Layer 3: Add a second layer of coffee-soaked sponge

Layer 4: Spoon over a second layer of nut cream and spread out evenly

Layer 5: Spoon or pipe over the coffee & chocolate ganache and spread out evenly

Cover and chill for 1-2 hours in a refrigerator. Then, when you’re ready to serve the tiramisu...

Layer 6: Sift over a fine layer of raw cacao powder

Layer 7: Use a small spoon to carefully transfer a generous, even layer of Sukrin sugar-free milk chocolate (straight off the plate it was grated on to) directly on to the top of each tiramisu - don’t try to sprinkle over the grated chocolate with your fingers as it will melt instantly!


Notes

The best diet for weight loss and maintenance is one that you can easily stick to. A low-fat/low calorie diet requires Herculean willpower because food without fat doesn’t taste good and oftentimes you still feel hungry. The joy of a low-carb/high fat diet is that you don’t count calories and the food you can eat is deliciously satisfying. Nevertheless, Primal Plate desserts and other sweet treats are delights to be enjoyed occasionally, not every day. You can achieve steady, effortless weight loss by limiting carbohydrates to between 50 grams and 100 grams per day - unless you are morbidly obese, in which case you may need to kick-start your body into burning fat by eating less than 50 grams of carbohydrate per day and avoiding tiramisu for the time-being! You can keep a tally of your carb intake at MyFitnessPal. If you then cross the line from time to time (without exceeding 150 grams of carbohydrate) a long, brisk walk should sort things out!

There is enough sponge cake in this recipe to make 6 tiramisu (or to have leftovers). The rest of the ingredients will make 4 very generous servings (it’s deliberate!). If you’re cutting carbs, have a small appetite or just more mouths to feed, simply divide the recipe between 6 smaller (150ml) serving dishes.

All the individual components of this dish can be made separately in advance. The sponge-cake will keep for up to 3 days in an airtight container, and both the nut cream and coffee/chocolate ganache will keep for several days in the refrigerator. You can also assemble the tiramisu up to and including layer 5, twenty-four hours before you want to eat it - finishing with the final flourish of raw cacao and grated chocolate just before serving. 

Although organic liquid stevia is a zero-carb, natural alternative to sugar, it can leave a slight aftertaste. To minimise this and to not miss out on the skin-enhancing benefits of honey, I’ve used a combination of stevia and honey to sweeten both the nut and coffee/chocolate creams.

I do not like overly sweet food, so this sophisticated, not-too-sweet dessert with a touch of alcohol is definitely one for the grown-ups. However, it can easily be adapted for children (or tomorrow’s breakfast!) by substituting a small/medium sliced banana (per serving) for the coffee/whisky soaked sponge and layering it with the nut and coffee/chocolate creams in the same way as described above. You may also want to add a little extra honey to the coffee and chocolate cream to make it more child-friendly. 

The cake mixture rises just enough to make it nicely spongy without being too thick. Firm yet really light in texture, it’s just made for soaking up the boozy coffee in this recipe and for making trifle generally. Once cold, it’s easily cut into neat fingers or cubes (Sarah loves to eat these plain) and is a brilliant substitute for those nasty trifle sponge fingers you can buy in the shops. 


Carbohydrate 25g Protein 11g - per serving (6 people)

Carbohydrate 36g Protein 15g - per serving (4 people)


Feeling Fruity Sweet-Hearts

by Susan Smith in ,


I know it’s Shrove Tuesday today, but with Valentine’s day in just five days time I’m playing to an audience of romantics with this stupendous, creamy, fruity dessert. That said, doesn’t everyone love cheesecake?

I am currently awash with recipe ideas, but when I was thinking out loud about what I could feature on Primal Plate’s blog to symbolise this celebrated upcoming ‘day of love’ Sarah informed me that firstly, no one in their right mind wants to cook when romance beckons and secondly, it mustn’t contain onion, garlic, spices or anything that makes you smell! Apparently, this meant my musings on Thai-inspired prawn curry was a definite no-go!

The rebel in me is now determined to cook Thai prawn curry and drink pink Champagne with my lover this Valentine’s day but, so no ‘young hearts’ be offended, I have also complied with Sarah’s brief for the perfect Valentine’s day meal (the main course will be posted on Friday). In the meantime, feast your eyes on this luscious dessert that should appeal to all lovers of good food, not just the romantically inclined.

You’ll probably need to order these heart shaped moulds straightaway if you want to surprise your Valentine with these Feeling Fruity Sweet-Hearts. My plastic cheese moulds arrived within a couple of days (whatever happened to those beautiful porcelain coeur a la crème moulds of yesteryear?), so hopefully you’ll have them in time. You then need to line them with a double layer of muslin (I obtained muslin squares from Lakeland) or a single layer of cheesecloth.

Although this sensational dessert looks like a ‘work of art’ on the plate, in accordance with Sarah’s remit, there’s no cooking involved, it takes minutes to assemble and both the ‘hearts’ and fruit coulis can be made a few hours in advance and kept refrigerated until you’re ready to serve them.

A delight to the eye and totally scrumptious to eat, I’ve deliberately put this dessert together as a generous sharing-plate for two. However, if those intimate ‘we wanna be together’ moments are likely to be hijacked by hungry longing or downright competitiveness - i.e. you or your partner has a tendency to eat more than their fair share - this recipe has enough ‘heart’ to fill two moulds! Alternatively, if you’re confident that your beloved would give you their last rolo, you can halve the cheesecake recipe and make just one - although I’d still make the full quantity of fruit coulis and have what’s left spooned over some Greek yogurt for breakfast.

Ignoring chocolate, I think Feeling Fruity Sweet-Hearts maybe one of the most ‘happy-ever-afters’ ever created!

Wishing everyone a very Happy Valentine’s, with all my love. x

Feeling Fruity Sweet-Hearts (Serves 2 + 2 people)

Ingredients - for the cheesecake hearts

200g full-fat ‘cream’ cheese (I used Longley Farm full-fat soft cheese)

200g organic, natural Greek yogurt

100ml organic double cream

2 tbsp organic raw honey

2 tsp organic lemon rind, finely grated


Ingredients - for the mango & raspberry coulis & fruit skewers

200g ready-cut fresh mango chunks (I used Waitrose own brand)

Juice of ½ lime (about 20ml)

Juice of 1 organic medium orange (about 90ml)

150g fresh raspberries 

1 heaped tbsp Sukrin icing sugar (or to taste) 

2 (or 4) strawberries, washed (with leaves intact) 

1 kiwi, peeled - 1 (or 2) slices cut from the middle of the fruit, then each slice halved 

2 (or 4) mango chunks (reserved from the above pack) 

1 (or 2) black grape(s) 

1 (or 2) mini bamboo skewers


Instructions - to make the cheesecake hearts

Line two heart shaped moulds with a double layer of muslin or a single layer of cheesecloth.

In a medium sized bowl beat the cream cheese, yogurt, honey and lemon rind together until smooth.

In a separate bowl half-whip the cream until it just begins to hold its shape, then using a metal tablespoon gently fold into the yogurt and cream cheese mixture until fully incorporated.

Divide between the two heart shaped moulds - bang them down several times on the worktop as you’re filling them to allow the mixture to settle evenly inside the moulds - then level off the tops, stand on a large flat plate, cover loosely with cling film and place in the refrigerator for 1½ hours.


Instructions - to make the mango and raspberry coulis

Place all but two (or four) of the best pieces of mango into a blender with the lime juice and half the orange juice. Blitz until completely smooth.

Scrape the mango puree into a clean bowl. The coulis should be smooth and a pouring consistency - runny enough to slowly ‘flow’ when you tilt it on the plate but not so runny that it won’t hold its shape. Cautiously add a little extra orange juice if it seems too thick. Cover and refrigerate.

Next, wash out the blender. Tip the raspberries with the rest of the orange juice and a heaped tablespoon of Sukrin icing sugar into the clean blender and blitz until amalgamated.

Pass the raspberry puree through a fine sieve into a separate bowl. Check the consistency (as above) and add a little more icing sugar if you think it is too tart. Cover and refrigerate.


Instructions - to make the fruit skewers and assemble the dish

First, prepare the fruit garnish by threading pieces of fruit onto mini bamboo skewer(s) in the following order: strawberry (leaf facing inwards), kiwi, mango, grape, mango, kiwi, strawberry (leaf facing inwards). Set aside.

Take a large flat plate and carefully pour or spoon a generous amount of the mango coulis on to one half of the plate - pick the plate up in both hands and tilt it one-way only so that it runs to the outside edge on its side of the plate.

Repeat the process with the raspberry coulis but in this case tilt the plate in both directions so that the two coulis butt right up to the edge of each other (roughly down the middle of the plate) and the raspberry coulis runs to the outside edge of the plate on its side. Do the same thing with a second plate if two couples are dining together.

Take the cheesecake heart(s) out of the refrigerator and working swiftly, carefully turn the heart(s) out into the palm of one hand, remove the muslin with your other hand and gently but swiftly place in the centre of the plate(s).

Place the fruit skewer(s) jauntily alongside (see photograph) and…

Ooh la la! Tuck in!

Notes

The origin of the word coulis is French, from couler, meaning ‘to flow’ - which should give you an idea of the consistency your fruit coulis needs to be for this dessert!

If you think it sounds too tricky tipping delicate cheesecake heart(s) directly into your hand, simply turn the hearts out onto their serving plate first and then carefully pour the coulis around them. 

If you you’re trying to lose weight you can sweeten the cheesecake cream with two tablespoons of Sukrin icing sugar instead of raw honey. This will reduce the carbohydrate grams per serving by 8.5 grams i.e. Carbohydrate 19.5g - not 28g, as shown below.


Carbohydrate 28g Protein 3g - per serving (half the sharing plate)


Poached Pears with Butterscotch Sauce and Almond Shortcakes

by Susan Smith in , ,


Pear and almond is a classy coupling, which is elevated to even greater levels of sophistication when combined with the flavours of toffee and butterscotch. Today’s recipe for Poached Pears with Butterscotch Sauce and Almond Shortcakes is the perfect make-ahead dessert for an elegant dinner party. Right on cue, it made a fantastic finale to our New Year’s Eve dinner party celebrations last night. Hello there 2016!

Pears, butterscotch, shortcake biscuits…it all sounds gloriously indulgent and a bit Fatty Arbuckle doesn’t it? However, as with all Primal Plate recipes, this dessert remains true to the healthy premise of no grains and no added sugar. The joy of eating Primal is that once you’ve reached your target weight (easily achievable it you stick to no more than 50 to 100 grams of healthy carbs each day), occasional indulgences won’t make the blindest bit of difference. No more wodgy, podgy or painful sensations from eating the wrong food, nor the post Christmas angst of feeling fat. Brilliant! The trick is to keep moving (a daily 2-3 mile walk in the fresh air should do it) and to not wander across the 150 grams of healthy carbs per day limit, which still allows you plenty of scope for sweet treats. 

Real food, sustainability and kindliness to all living creatures and the environment is my inspiration for writing this Primal Plate food blog. I hope that in 2016 more people will appreciate the benefits of a low-carb, low sugar, no grain, primarily vegetarian diet so that not only can we renew our own health and vitality but also be kind and mindful enough to allow this beautiful world in which we live the same privilege and freedom.

Wishing everyone a peaceful, healthy and Happy New Year.

Vanilla Poached Pears with Butterscotch Sauce and Almond Shortcakes (Serves 4)

Ingredients - for the poached pears

300ml filtered water

125g Sukrin:1 granulated stevia sweetener

rind of ½ organic lemon

1 dsp pure vanilla extract (I used Ndali)

4 firm, ripe pears (I used Williams)

Bay leaves, to decorate - optional


Ingredients - for the butterscotch sauce

160ml coconut cream

6 Medjool dates

25g raw cashew nut butter

1 tbsp pure vanilla extract (I used Ndali)

1 dsp brandy - optional


Ingredients - for the almond shortcakes

100g organic butter

200g organic ground almonds

60g organic tiger nut flour

50g Sukrin Gold

50g organic flaked almonds, lightly toasted            

1 tsp baking powder                

½ tsp sea salt

1 dsp pure vanilla extract (I used Ndali)


Instructions - to make poached pears

First, check the dimensions of your saucepan to make sure that it is the right size for the pears to fit snugly inside.

Bring the water, Sukrin icing sugar, lemon peel and maple syrup up to the boil then reduce the heat under the pan to a very low simmer.

Peel the pears. Leave them whole with their stalks intact, immediately placing each one into the syrup - turning it to coat - before continuing with the rest. 

Cook the pears with the pan lid on for 20 to 30 minutes or until they’re soft to the point of a skewer or sharp knife. 

Take the pan off the heat and allow the pears to cool in the syrup. When cold, store covered in a refrigerator until needed.


Instructions - to make butterscotch sauce

Remove the stones from the dates and roughly chop. Place in a high powered blender with the remaining ingredients (in the order as listed in ‘ingredients’) and process until smooth.

Serve with poached pears and almond shortcakes

Can be stored in the fridge for up to a week.


Instructions - to make almond shortcakes

Pre heat the oven to 130℃ (fan) / 150℃ / 300℉ / Gas mark 2

Melt the butter in a small saucepan over a low heat. Allow to cool for a few minutes.

Meanwhile, in a large bowl combine ground almonds, tiger nut flour, Sukrin Gold, baking soda, sea salt and flaked almonds.

Using a fork, stir in the cooled melted butter and vanilla essence to bring everything loosely together - then roll up your sleeves and with your hands squash the mixture into a ball of dough - it is a bit sticky and crumbly but don't be worried, be determined! 

Tip the dough onto a large piece of non-stick baking parchment. Place a second piece of baking parchment on top then flatten the dough out a little bit with your hands. 

Use a rolling pin to roll the dough out to about 6 to 8mm (¼ to ½ inch thick). 

Use a 7.5 cm (3 inch) plain cutter to cut out the biscuits. Once you are only left with scraps from the cutouts, bring the pieces together to create a ball, then roll it out again to the same thickness and continue cutting the biscuits out.

Place the biscuits onto a lined baking sheet, about one inch apart. Bake for 35-40 minutes until golden.

Cool on the baking tray for 5 minutes, then transfer the biscuits to a wire rack to cool completely. 

These shortcake biscuits will keep for up to a week in an airtight container.


Notes

The poached pears will keep for up to 5 days in a covered container in the refrigerator.

I love the intense toffee flavour of the Butterscotch Sauce and, when chilled, it's the perfect consistency for piping around the pears. However, if you want a simpler presentation, it can also be formed into elegant looking quenelles (oval scoops of cream formed between two dessert spoons) and served alongside the pears. Alternatively, if you're okay with diluting the butterscotch flavour, thin the sauce down with a little milk, whipping cream or even water until a pouring consistency is achieved, then spoon over or around the pears.

A list of suppliers for Sukrin sweeteners and grain-free flours can be found on Sukrin’s Home page


Carbohydrate 20g Protein 1g - per serving of butterscotch sauce

Carbohydrate 15g Protein 0g - per pear

Carbohydrate 6g Protein 4g - per shortcake biscuit