Primal Fishcakes with Lemon Butter & Chive Sauce

by Susan Smith in , , ,


Flushed with success from creating a recipe for Grain-Free Scones with the taste and texture of a traditional wheat-flour scone last week, I was supposed to have taken time out to relax and enjoy my own Mothering Sunday weekend (a one-day celebration doesn’t seem enough for a lifetime’s effort!) However, it wasn’t to be - the best laid plans and all that - because on Saturday morning I woke up ridiculously early (2:30am), with the thought that I had to develop a recipe for low-carb, potato-free, breadcrumb-free fishcakes! This almost impossibly idealistic notion haunted me for the rest of that night and the next four days! 

Whilst authentic Thai fishcakes, those tasty, slightly rubbery morsels that rely on raw fish and egg white to hold them together, do in fact fulfil my criteria for low-carb, no breadcrumbs or potato, I wanted my fishcakes to be of the classic British variety - with a soft fluffy middle and a bit of crunch on the outside. A comfort food that can simply be speared with a fork, smeared with tomato ketchup and eaten as my no-fuss interpretation of fast-food, or perhaps dressed-up for a satisfyingly simple retro meal.   

Trickily, the texture, taste and appearance of mashed potato is unique to (not unsurprisingly) potatoes! How to replicate? I didn’t want the carb count of mashed parsnips or yam, the wetness of mashed celeriac, or the orange colour of sweet potato. Finally, I settled on cauliflower (at least it’s the right colour) and coconut flour (to bind it all together) and…er, that would be a no! Far too dry and crumbly, the fishcakes disintegrated before you could get them into your mouth.

Last evening, tired and weary from a day of helping Mirror Imaging Photography catch up on their admin (or was it two days of non-stop thinking about how to develop my fishcakes?) I finally cracked it! 

Unsophisticated it may be, but nonetheless, the marriage between a light potato-style mash and fish just works, so if you’re a Primal convert and feeling fish-and-chip-shop deprived, this equally delicious potato and breadcrumb-less fishcake is very good news indeed! 

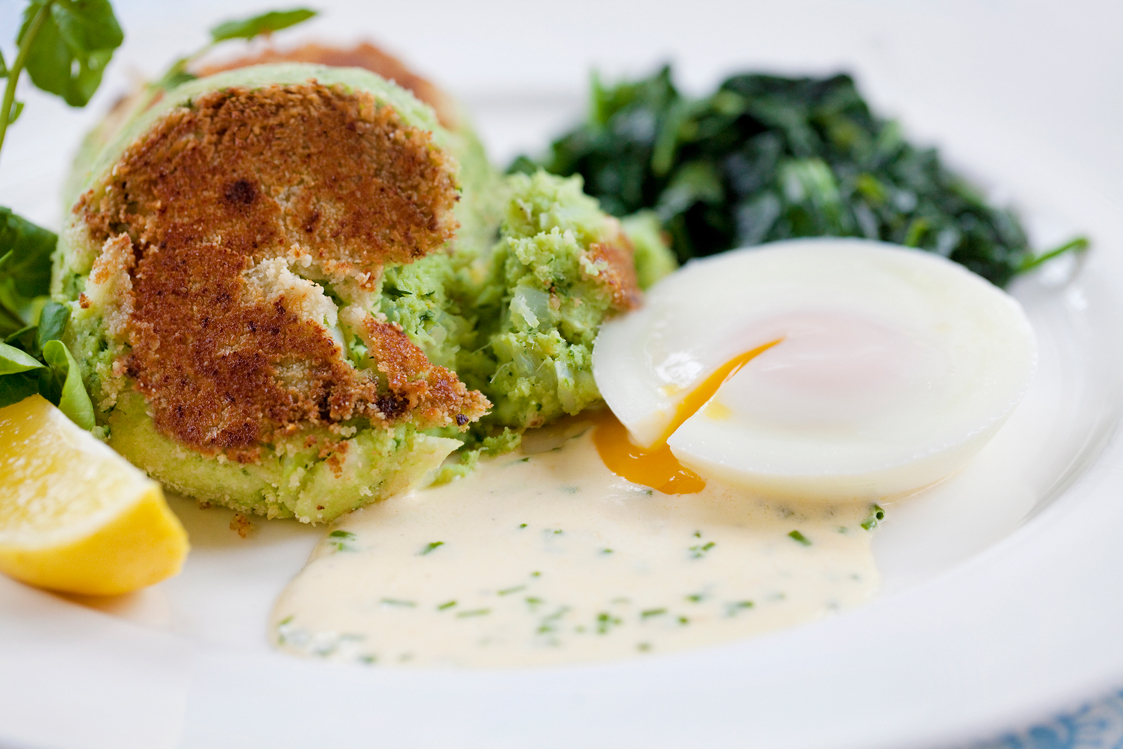
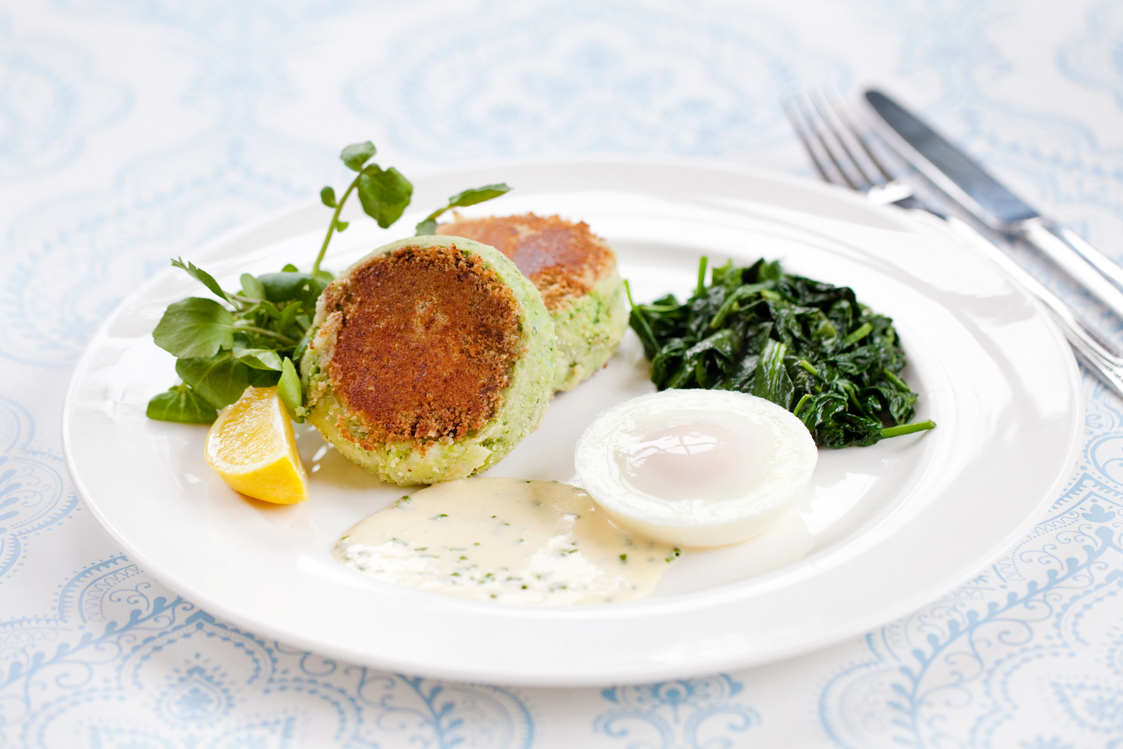
I have teamed them with poached eggs, lightly cooked spinach and Lemon Butter & Chive Sauce (probably a little too ambitious for a family meal at the end of a working day!) but you can decide what other flavour combinations work for you…

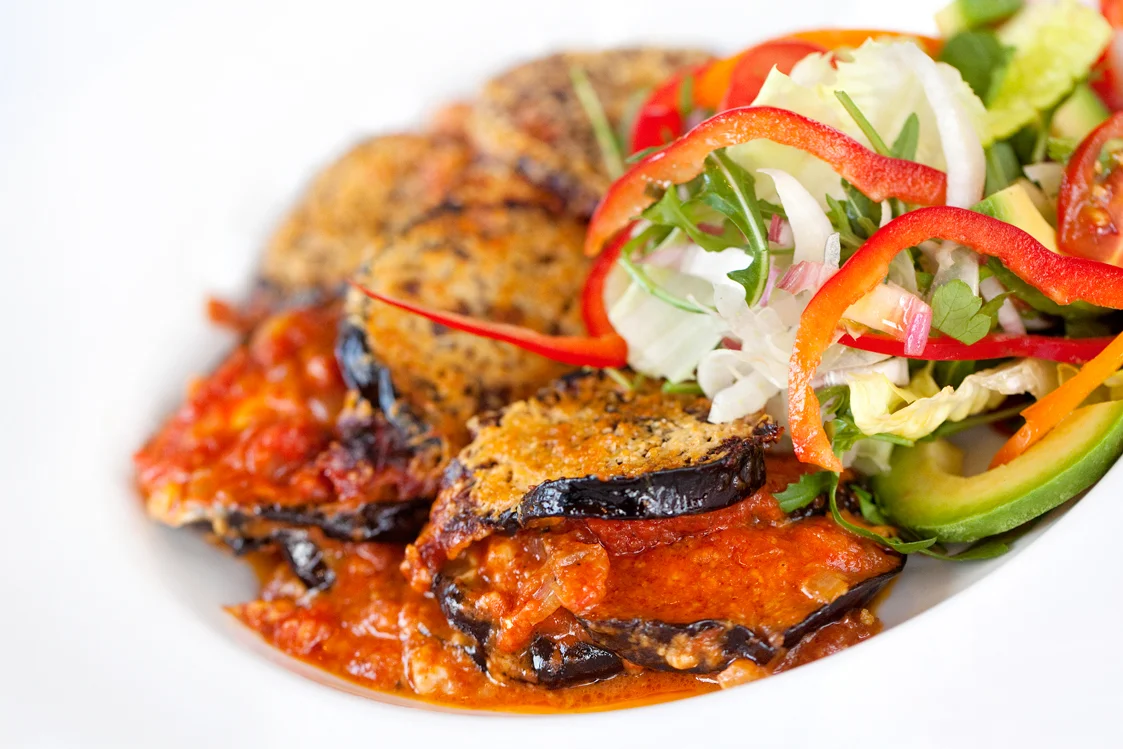
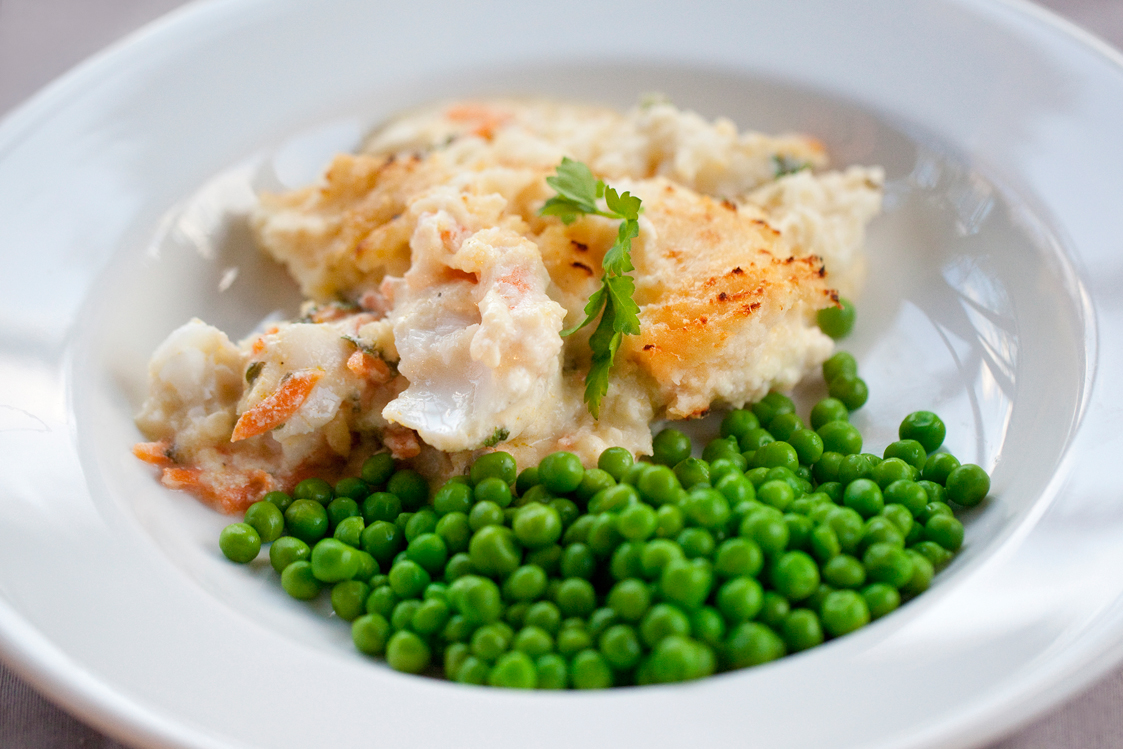
With the Lemon Butter & Chive Sauce, a fresh green salad would be perfect for a light supper or lunch. Without the sauce, tomato and mozzarella salad would be good, so would guacamole (spicy avocado dip) or, quite simply, some cooked frozen peas and a low-sugar organic tomato ketchup for dunking.

Easier and quicker to make than traditional fishcakes (because there’s none of the threefold messing about dipping them in flour, egg and breadcrumbs), I think these healthy-looking (the lovely pale green colour comes from an abundance of fresh herbs) and authentic-tasting fishcakes are destined to become a new Primal, low-carbohydrate classic.

Primal Fishcakes with Lemon Butter & Chive Sauce

Ingredients - for the fishcakes (makes 6 generous fishcakes)

500g (1lb 2oz) undyed smoked haddock (MSC certified)

150ml (¼ pint) whole milk 

1 medium-sized cauliflower

2 bay leaves - optional

75g (2½ oz) full-fat cream cheese (I use Longley Farm)

20g (¾ oz) fresh herbs, stalks removed and finely chopped (I used a mixture of parsley and dill)

2 tsp lemon zest, finely grated

Sea salt and freshly ground pepper

½ tsp cayenne pepper

55g (2oz) ground almonds, for coating

Clearspring organic sunflower oil, for frying

Lemon wedges and watercress - to garnish


Ingredients - for the lemon butter & chive sauce (serves 4)

30g (1oz) unsalted butter

Lemon, finely grated zest and juice (about 40ml)

150ml (¼ pint) double cream

sea salt and freshly ground pepper

2 heaped tbsp fresh chives, finely chopped


Instructions

Boil a kettle of water. 

Put the fish into a large flat pan (big enough to hold all the fish in a single layer), pour over the milk and 150ml (¼ pint) water. Bring to a simmer, then gently cook the fish skin-side down for 4 minutes. Take the pan off the heat, turn the fish over and leave to stand, covered with the pan lid, for a further 10 minutes. 

Drain the fish and place on a large flat plate, skin and remove any bones if necessary and set aside to cool.

Meanwhile, cut the florets off the cauliflower (only the florets, you don’t need any stalk) and in a food processor blitz them for about 20 seconds into cauliflower grains - a sort of cauliflower ‘snow’. 

Place the cauliflower snow in the top half of a steamer with a couple of bay leaves. Pour the boiling water from the kettle into the bottom pan of the steamer, bring back to the boil then steam the cauliflower for 4 minutes with the pan lid on.

Have a clean towel laid out ready on your worktop. Using a draining spoon, deposit the just cooked cauliflower onto this. Remove the bay leaves and allow to cool down for about 5 minutes.

When cool, wrap the cauliflower tightly up inside the tea towel and wring it out as forcibly as you can to remove as much liquid from the cauliflower as possible. N.B. wet mash is death to fishcakes!

Put the dried-out cauliflower pulp into a bowl with the herbs, lemon zest and cream cheese. Blend together thoroughly with a hand blender to form a smooth mash (this can be done more easily in a food processor) then season well with salt, pepper and cayenne. N.B. The mash needs to taste really flavourful at this stage. 

Break the cooled fish into large flakes and add to the cauliflower mash, combine thoroughly with a fork but make sure you leave a good percentage of the fish flakes intact for texture. The mixture should be soft but firm enough to hold its shape when squashed together. Taste, if the mixture needs extra seasoning, add it now.

Put the ground almonds onto a large flat plate. Mould the mixture with your hands into six even-sized rounds (about 125g to 130g per fishcake and approx  2cm / ¾ inch thick), then carefully dip each fishcake into the ground almonds, coating thoroughly. Place the fishcakes on a clean plate and put in the fridge for 30 minutes to firm up.

When you’re ready to cook the fishcakes, heat up 2-3 tablespoons of oil in a large non-stick frying pan over a medium heat. Add 3 or 4 fishcakes to the pan and cook for about 5 minutes on both sides, until nicely browned. (N.B. If you overcrowd the pan the fishcakes won’t cook properly and you’ll find it difficult to manoeuvre them when you’re trying to turn them over)

Remove the cooked fishcakes, place on a paper towel lined plate and keep warm in a pre-heated low oven whilst you repeat with the remaining fishcakes.

To make the lemon butter and chive sauce: heat the butter in a small saucepan over a low to moderate heat. When the butter has melted and is just starting to bubble add the lemon zest and juice to the pan and simmer gently for 2 minutes. Add the cream, then gently simmer for a further 4 minutes. Season with salt and freshly ground pepper. Just before you’re about to serve, gently re-heat the sauce and stir in the finely chopped chives.


Notes:

A medium-sized cauliflower should produce about 500g of stalk-free florets

Don’t be tempted to use whipped, ‘light’ or reduced-fat cream cheese for this recipe - it needs to be full-fat soft/cream cheese to help bind the cauliflower mash together.

I use a ½ US Cup to quickly measure the amount of mixture for each fishcake - pack the mixture down firmly into the measuring cup, level it off and then sharply knock the fishcake out of the cup into the palm of your other hand before shaping, i.e. flattening out, into rounds.

If the pan and frying oil looks dirty after frying the first batch of fishcakes, clean the pan out with kitchen paper and heat up some fresh oil before continuing with the remaining fishcakes.


To make Perfect Poached Eggs - using Poaching Pods, cook your eggs (one large egg per person) for exactly 5 minutes, i.e. the same amount of cooking time required for the second batch of fishcakes after they’ve been turned over.

To cook spinach (serves 4): Remove the stalks from 500g (1lb) young spinach leaves, wash the leaves and shake off as much water as possible (I do this in a salad spinner). Warm 50g (2oz) butter in a large non-stick saucepan over a medium-high heat. When the butter is melted and is starting to bubble, add the spinach to the pan (you may have to do this in 2 or 3 batches - stir-frying each batch of leaves until they collapse down to make room in the pan for the rest).

Cook the spinach for 2-3 minutes, stirring continuously until all the leaves are wilted and tender. Don’t overcook, it should provide a burst of bright green on the plate - not be grey or mushy! 

Take the pan off the heat and drain the spinach in a colander, using a potato masher or the back of a wooden spoon to press out any excess liquid. 

Put the spinach back into the still hot pan, loosely break it up with a fork, then lightly season with salt and freshly ground pepper and a pinch of nutmeg. Serve warm.


Carbohydrate 4g Protein 19g - per fishcake

Carbohydrate 2g Protein 1g - per serving of lemon butter & chive sauce

Carbohydrate 0g Protein 7g - per large organic poached egg

Carbohydrate 1g Protein 5g - per serving of spinach

Carbohydrate 3g Protein 1g - per 15g serving of Mr Organic Italian tomato ketchup


Meat-Free Primal Cottage Pie

by Susan Smith in , ,


The initial inspiration for starting to write this Primal Plate food blog came about as a result of my newly acquired Primal/Paleo diet, and the numerous health benefits and incredibly easy weight loss I can attribute to a higher fat, low-carbohydrate, grain-free lifestyle. Today, I feel compelled to bring something new to the party because, hand-on-heart, I cannot totally subscribe to the Primal Blueprint, which prioritises eating animal protein and fat. 

If you glance through the Primal Plate’s recipes you’ll currently see only one that’s listed under meat. Try as I might (and I’ve some fantastic meat recipes that I could share!), I just cannot bring myself to massively promote meat eating. My reluctance has nothing to do with health and nutrition. I concede that for optimum health, human beings do occasionally require meat, although perhaps the less popular organ meats rather than prime steak would better fulfil our nutritional objectives!

The problem is that the modern Paleo/Primal diet relies heavily on eating meat, albeit the free-range pastured variety. The consumption of grass-fed meat is indeed healthier for humans and kinder to animals than the brutal insanity of factory farms and slaughterhouses supplying most of our diet. But, regularly eating any animal that’s been farm-reared and killed for meat is certainly not aligned with how ancient hunter-gatherers obtained their food. Meat, although actively hunted, would have been an occasional supplement to a diet of berries, fruits and plants - not the daily ‘pig-out’ (pun intended) that almost everyone nowadays takes for granted. Agribusiness has geared-up to meet the incessant demand, but there’s a high price to pay. The whole system is massively destructive, unfair and viciously unkind to millions of starving people (one-third of the world’s grain supply is diverted for animal feed), to factory farmed livestock (OMG, the hidden suffering), the environment and wildlife.  

Let’s look at what ‘free-range, pastured meat’ can mean for the environment. Grazing animals on non-arable land (largely grassy hillsides, where you can’t grow crops) compact the soil and prevent trees and other vegetation from growing, which means no natural habitat for wildlife and no deep plant root systems that would otherwise hold down the earth and conserve water. Consequently, during heavy rain and thunderstorms, there is nothing to prevent the soil and water running off downhill, causing the landslides and flash-flooding downstream that have become so familiar on the news over recent years, and which regularly devastate food crops and people’s homes. 

If we are truly committed to eating as our ancestors did, we will stop mindlessly consuming meat. Ignorance is not bliss when it comes to meat-eating, it is madness. Reverence for life and respect for the food on your Primal plate begins with education. Forget the ‘cutchy-coo' petting farms, which collude with our wanton disassociation from keeping and killing living things. The school curriculum should make it compulsory that all children are taken to a factory farm where they ‘grow’ pigs or chickens in overcrowded sheds, then on to the abattoir where they are slaughtered and finally to the butchers where dinner is made ready - all nicely sanitised and cling-wrapped. If the very idea freaks you out, that’s the point. If you cannot bear the thought of seeing the food you eat being ‘made’ then stop eating it - or at the very least, eat it occasionally with absolute awareness and compassion for a life given as a gift to you and your family.

Could you go meat free for one week? I invite you to join Meat Free Week between 23rd-29th March 2015. It's a practical choice that can make a massive difference.

Meanwhile, to help you adjust to the idea that meat-eating can and should be reserved for special occasions, here is a delicious and comforting cottage pie that may surprise you. Entirely meat and potato free, it is so satisfyingly rich and ‘meaty’ you will be hard-pressed to convince your family they’re not eating the classic version of this very British, and much loved pie. 

Meat-Free Primal Cottage Pie (V) (Serves 4)

Ingredients - for the pie filling

100g onion, peeled and finely chopped

165g leek (1 medium-sized), top and bottom cut off, two outer leaves removed, washed and finely sliced

100g (about 2 outer stalks) celery, trimmed and cut into small dice

300g sweet potato, peeled and cut into small dice

250g parsnips, peeled and grated

250g carrots, peeled and grated

3-4 tbsp olive oil

1 level tbsp Marigold organic bouillon powder

200ml decent quality red wine ( I used a McGuigan Merlot )

2 tbsp Clearspring tamari sauce (wheat-free) 

300g closed-cap chestnut mushrooms, wiped clean and cut into ½cm slices 

1 tbsp fresh thyme leaves, finely chopped

2 tbsp fresh parsley, finely chopped

Sea salt (about 1tsp) and freshly ground black pepper


Ingredients - for the celeriac mash

800g celeriac, peeled and chopped into ¾ inch cubes

100g good quality strong Cheddar cheese, finely grated

Sea salt and freshly ground black pepper, to taste


Instructions - for the pie filling

Firstly, get organised by pre-preparing all the vegetables - chop the onion, sweet potato and celery; slice the leek and mushrooms; grate the parsnip and carrot. Finely chop the thyme and parsley

Heat about 2 tbsp of olive oil in a large sauté pan over a moderate to high heat. Add the onions to the pan and fry for 3 to 4 minutes, stirring occasionally. 

Add the grated parsnips, carrots and celery to the pan, plus a little extra olive oil if it seems too dry, and stir-fry for another 3 minutes.

Add the sliced leek and diced sweet potato, turn up the heat and continue to stir-fry the vegetables for several more minutes until they are soft and starting to brown. Take the pan off the heat.

Stir in the bouillon powder, mix well then add the tamari sauce and red wine. 

In a separate large non-stick frying pan, heat 1 tbsp olive oil and stir-fry the mushroom slices over a high heat for about 3 to 4 minutes until the juices begin to run and they’re starting to turn golden. 

Add the cooked mushrooms to the other vegetables, mix well and season with sea salt (about 1 level tsp) a good grinding of freshly ground pepper and the chopped thyme and parsley. 

Ladle the vegetables into an ovenproof baking dish, cover with cling film and set aside whilst you make the celeriac mash.

If eating straightaway, pre-heat the oven to 190℃ / 375℉ / Gas mark 5.


Instructions - for the celeriac mash

Boil a kettle full of water.

Peel the celeriac and cut into even-sized (about ¾ inch) cubes. 

Put the celeriac in the top half of a steamer, pour the boiling water in the bottom pan and cover with the pan lid. Steam for about 8 to 10 minutes, or until the celeriac is soft. 

Drain the celeriac well and allow to steam dry before whizzing in a food processor or blending with blender to make a smooth puree. Add half the Cheddar cheese and whizz again. Taste, then season with sea salt and freshly ground pepper. 

Pipe or spoon the mash on top of the vegetables to cover evenly, then rough up the surface with a fork. Sprinkle over the remaining cheese.

Bake at 190℃ for 20 to 25 minutes. Finish off under a very hot grill if you like your cheesy topping really brown and crunchy!

Notes

Use organic vegetables, if possible.

This dish is ideal for entertaining as all the preparation can be done, and the pie fully assembled, in advance. Take the pie out of the refrigerator about half an hour before you want to cook it to allow it to come to room temperature before baking.  

To make lighter work of grating vegetables, I use the fine grater on my Magimix food processor

The point of chopping, slicing and grating the different vegetables is to create the right amount of texture - trust me, the finished dish can really fool your brain into thinking you’re eating proper cottage pie! 

For this recipe, I’ve allowed pedantic Primal dietary recommendations to eat higher fat/low-carb to go a little out of sync in favour of creating a nutritious cottage pie that’s full-on umami flavoured, without loss of life. On the plus side, it also does not contain other Primal debarred ingredients such as lentils, beans and potato (that most other vegetarian versions of cottage pie usually do!) 

If you’re trying to lose excess fat, (which in general is agreed possible when you eat no more than 100g carbohydrate per day), this recipe will use up around one half of your daily limit, so adjust the rest of your day’s meals accordingly. Click to read more about the Primal dictum “Carbohydrate drives insulin, drives fat

The carbohydrate content of this recipe is based on the prepared weight of the vegetables i.e. once they’ve been trimmed and peeled. If you wanted to substitute organic swede for the parsnips, or butternut squash for the sweet potato, this would decrease the carb count significantly - although the balance of flavour and texture in the original recipe might also be lost.  


Carbohydrate 50g Protein 7g - approx per serving


Pea & Mint Soup

by Susan Smith in , , , , ,


I love soup…always have.

My mother left home when I was five years old, which meant my father was left to raise myself and my two siblings alone. He was a good dad and I am grateful that my upbringing was more male orientated than most. It can’t have been easy. Although my sister and I were away at boarding school during the week, we were at home at the weekends and during long school holidays. Meanwhile, my older brother stayed home and proved to be a perpetual sword in Dad’s side!

The upside of a world-weary, though infinitely refined, gentleman having to cope with the demands of running his own business and bringing three children up ‘on his tod’, was that every Easter, summer and Christmas we spent our holidays in grand seaside hotels and were often taken out to eat at the best restaurants.

As a little girl trying to contend with making intelligent choices from oversized á la carte menus, I frequently got into trouble! Much to my dad’s irritation (though he kindly never vetoed my decision), soup and bread rolls spread lavishly with butter, was always my preferred ‘appetiser’. Consequently, I was always full-up before the main course arrived, which meant my father paying full whack for half-eaten food!

It’s obvious what the problem was…soup and bread IS (especially for small tummies) a nutritious, warming and satisfying meal in and of itself!

As a parent, I can now appreciate how wise my dad was to graciously accept my mistake and not disrupt my eating pleasure no matter how wasteful the learning process! The upshot is, sixty years later, here I am writing about a love for soup!

The making of soup is probably as old as cooking itself. Originally known as sop, which referred to a liquid broth for dipping bread into, soup-making is basically the art of combining ingredients together in one pot to create a filling, nutritious and easily digested meal.

As I discovered at a very early age, soup can be one of the most satisfying of foods, but it can also be a modern, colourful and adventurous introduction to a meal - especially if you forego grain-laden bread!

Pea & Mint might sound like an English summer soup but not when Bird’s Eye frozen peas are available all year round it’s not! In fact, because frozen peas enable this soup to be cooked so quickly they’re all the better for retaining its brilliant green colour and natural taste.

It’s a delightfully simple soup to make, which should take no longer than 15 minutes hands-on time, so please give it a go and post your comments below. I look forward to your feedback.

Pea & Mint Soup (V) (Serves 4)

Ingredients

1 medium-sized leek (about 175g unprepared weight), top green part discarded, 2 outer layers removed, finely sliced 

1 medium onion (about 55g unpeeled weight), finely chopped

750ml (26 fl oz) vegetable stock (made with water and 4 level tsp Marigold organic vegetable bouillon powder) 

450g (1lb) frozen peas

15g (½oz) fresh mint leaves

150ml (5fl oz) single cream

Sea salt and freshly ground black pepper 

A little extra cream, fresh pea shoots or chopped mint, to serve


Instructions

Fill and boil a kettle with 750ml fresh cold water. Make a stock with the bouillon powder and boiling water and pour into a large saucepan.

Bring the stock back to the boil, then add the chopped leeks and onions. Simmer for 3-4 minutes.

Add the frozen peas and mint leaves and bring back to the boil. Simmer for 1-2 minutes.

Take the pan off the heat and add the single cream. 

Ladle the soup into a food processor or blender and blitz until completely smooth.

Pour back into a clean pan and season with sea salt (about 1 tsp or to taste) and a good grinding of black pepper. Re-heat the soup until it is really hot (just below boiling point)

Divide the soup between four bowls , swirl a teaspoon of cream on the top of each and decorate with pea shoots or chopped mint. Serve immediately. 


Carbohydrate 12g Protein 8g


Ratatouille with Roast Cod and Parmesan Crisps

by Susan Smith in , , , , , ,


In my book, ratatouille made from multi-coloured Mediterranean vegetables is probably one of the best vegetarian meals ever invented!

I was first introduced to this classic dish in the 1960’s through A Book of Mediterranean Food by Elizabeth David. Up until then, fresh, sun-ripened ingredients such as aubergine, courgettes and bell peppers were relatively unheard of, and virtually impossible to source in the UK. Thankfully, food shopping has come a long way since then!

Originally, an ancient French peasant dish made from coarsely chopped fresh summer vegetables (the word ratatouille comes from the French touiller, which means to stir), this iconic vegetable stew made from onions, tomatoes, courgettes, sweet peppers and aubergines is now an all-year-round favourite - although in the depths of winter I think you would be well advised to use tinned plum tomatoes instead of the seemingly non-existent fresh ripe ones!

There are numerous modern interpretations of this dish but it seems to me that this simple version, which is made on top of the stove rather than in the oven, is the most authentic and thus ratatouille at its basic best. I’ve loosely based it on Raymond Blanc’s recipe in Cooking For Friends.

For this blog post, I’ve suggested taking ratatouille into dinner party territory by partnering it with Roast Cod and Parmesan Crisps - although, as French peasants obviously knew, it is equally good for every day eating. Keep it simple, serve with our grain-free bread still warm from the oven and a salad for a main course, or as a side dish. It really comes into its own served cold the next day too. I also like to use it in ratatouille omelette. In fact, serve it hot, serve it cold, serve it any way you like! This low carb medley of vegetable goodness will remind you of summer. 

Ratatouille (V) with Roast Cod and Parmesan Crisps (Serves 4)

Ingredients - for the ratatouille 

50ml (2fl oz) extra virgin olive oil

25g (1oz) butter

150g (5oz) onion, finely chopped

1 large red pepper

1 large yellow pepper

1 medium aubergine

1 large courgette

2 ripe plum tomatoes (I used Mr Organic tinned plum tomatoes)

1 sprig of fresh thyme, leaves only

Sea salt and freshly ground black pepper


Instructions

Cut the stalk end off the aubergine then cut it into 1cm (½ inch) dice. Layer the aubergine dice into a colander liberally sprinkling them with salt as you go. Put a plate underneath the colander (to catch the juices) and another plate on top, weighted down with something heavy (I use a kettle filled with water) Set aside to drain for 30 minutes.

Meanwhile, cut the top and bottom off the courgette and remove the stalks and seeds from the peppers. Cut all the vegetables (courgette, peppers and tomatoes) into 1cm (½ inch) dice. Keep the vegetables separate at this stage. If you’re using tinned tomatoes remove any core, skin or daggy bits before roughly dicing.

In a large deep frying/sauté pan heat the oil and butter together over a medium heat. Add the finely chopped onion and thyme leaves to the pan and cook for 5 minutes, stirring from time to time. Do not let the onion brown.

Dry the aubergine on paper kitchen towel, then add the aubergine and pepper dice to the onion and cook for a further 5 minutes.

Meanwhile, boil 1 litre (1¾ pints) water in a kettle. Pour the boiling water into a separate pan, add some salt then blanch the diced courgettes for 3 minutes. Drain and refresh under cold water.

Add the courgettes to the rest of the vegetables and cook for another 5 minutes until they are turning golden, then add the tomatoes. Give everything a good stir, cover with a lid and continue to cook for a further 10 minutes until all the vegetables are meltingly tender. 

Taste, then  season with sea salt and freshly ground pepper.


Ingredients - for the roast cod

4 x 225g (8oz) sustainably sourced cod fillets, skinned

1 tbsp Clearspring organic sunflower frying oil

15g (½ oz) unsalted butter

Sea salt & freshly ground black pepper

Lemon juice, to serve


Instructions

Preheat oven to 200℃/ 400℉/ Gas mark 6. Skin and bone the cod fillets (if this hasn’t already been done for you by your fishmonger).

Heat the oil and butter together in a large non-stick frying pan over a medium heat. When the butter has stopped foaming place the cod fillets into the pan, presentation side down i.e. skinned side uppermost.

Pan fry the fish until lightly browned (about 5 minutes). Season with salt and pepper.

Carefully turn the fish fillets over and transfer to a non-stick baking tray (now skinned side down) and cook in the oven for 8-10 minutes.

Finish with a little more sea salt and a squeeze of lemon juice. 


Ingredients - for the Parmesan crisps (makes 8) 

150g freshly grated Parmesan cheese


Instructions

Preheat oven to 200℃/400℉/Gas mark 6 

Place a 7cm ring or cutter onto a large non-stick baking tray.

Sprinkle 2-3 teaspoons of Parmesan into the middle of the ring and use your fingers or the back of a spoon to compact the cheese down. 

Remove the cutter and repeat - leaving sufficient space in-between so that the crisps don’t merge into each other when cooking.

Cook for 4-6 minutes or until lightly golden. Remove from oven and allow to cool completely on the baking tray. 

Remove from the tray with a palette knife and store in an airtight container. 

Use within 7 days. 


Notes

It is always best to get organised by preparing all the ingredients listed in a recipe before you actually launch into cooking or bringing everything together. Professional chefs call this “mise en place” (putting in place) and it is a very effective way of staying on top of the situation when you’re cooking at home too. 

The ratatouille and the Parmesan crisps can be prepared well in advance - several days ahead, if needs be!

You can re-heat the ratatouille or serve it cold as an hors d’oeuvre.

Parmesan crisps are also great served as no-carb nibbles with pre-dinner drinks.


Carbohydrate 15g Protein 4g - per serving of ratatouille

Carbohydrate 1g Protein 38g - per serving of cod

Carbohydrate 0g Protein 12g - per parmesan crisp


Souffléd Cauliflower with Gruyère Cheese Sauce

by Susan Smith in , , , , ,


Back in the 1970’s, due to a lack of money and much to my husband’s irritation, cauliflower cheese, along with jacket potato and tuna bean salad used to be the mainstay of our diet. It was the repetitive appearance of cauliflower cheese that offended him the most. We’re not together now but I do wonder if he’s carried his grudge against cauliflower with him for the past thirty-five years!

If so, it would be a pity because today’s recipe for Souffléd Cauliflower with Gruyere Cheese Sauce is a far cry from the boiled cauliflower with the flour-based béchamel cheese sauce of our yesteryears, which I confess (too late as far as my ex is concerned!) was a truly monotonous thing to eat no matter how liberally I attempted to mask it in cheesiness.

This no-grain, low-carb version is really an elegant deconstruction of boring old cauliflower cheese that I think is simply brilliant as an imaginative vegetarian main course or as an accompaniment to fish, chicken or meat. It’s amazing what a little bit of height and lightness can do for cauliflower jaded appetites and with the silky-smooth Gruyere cheese sauce poured over, it’s totally transformed into something enticingly delish.

Do not be intimidated by the thought of making a soufflé - they’re really not as difficult or as temperamental as you might think. You’ll need a 6-inch diameter top (No.2 size) soufflé dish for this recipe. 

Souffléd Cauliflower with Gruyère Cheese Sauce (V) (Serves 4)

Ingredients - for souffléd cauliflower

I medium size cauliflower

1 fresh bay leaf - optional

10g-15g (½oz) ground almonds and softened butter (for souffle dish)

Grain-free béchamel sauce (made with 30g/1oz of butter, 20g/¾oz ground almonds, 1 tsp arrowroot powder, ¼ tsp dry English mustard powder, 142ml/¼ pint milk)

Sea salt and freshly ground black pepper

3 large egg yolks 

4 large egg whites

1 tbsp ready-grated Parmesan (for dusting)


Ingredients - for Gruyère cheese sauce

250ml (8fl oz) créme fraîche

125g (4½oz) Gruyère cheese, finely grated (I used the Co-op’s Truly Irresistible Premier Cru Gruyère cheese - it is the best Gruyère I’ve ever tasted!)

½ tsp Dijon mustard


Instructions

Pre-heat the oven to 190℃ / 375℉ / Gas mark 5. Boil a kettle of water.

Butter the soufflé dish and dust with the ground almonds. To allow the soufflé to rise above the dish, tie a deep band of non-stick baking parchment or greaseproof paper around the outside of the dish to come 2-3 inches higher than the top of the dish.

Cut the florets off the head of cauliflower - you don’t need much stalk so just use the florets. Put the florets in a single layer in the top of a steamer, sprinkle over with salt and tuck the bay leaf in-between. Pour the boiling water from the kettle into the bottom half of the steamer and steam the florets until they’re tender (about 7 minutes).

Refresh the cauliflower in cold running water, remove the bay leaf (if used) then drain well and tip the cauliflower on to a clean tea towel to dry. Pulse the cauliflower in a food processor into a puree (alternatively, push the cauliflower through a strainer). Put the cauliflower puree into a bowl.

Prepare the béchamel sauce. In a medium pan set over a low to moderate heat melt the butter, when the butter is melted add the ground almonds, the mustard and arrowroot powders and stir everything together really well.

Keep stirring continuously whilst you gradually add the milk to the pan a little at a time. Make sure after each addition of milk that it is evenly and smoothly incorporated into the butter and flour mix before adding more milk. When all the milk has been added to the pan, bring the sauce up to the boil to allow it to thicken - continuously stirring until it does.

Take the pan off the heat and mix the béchamel sauce in with the cauliflower. Season well with salt and freshly ground black pepper.

Separate the egg yolks and whites. Thoroughly beat the yolks and add them to the cauliflower mixture. With a clean whisk whip the egg whites to a firm snow.

Using a large metal spoon, quickly fold a third of the egg whites into the cauliflower mixture to loosen it, then gently fold in the rest of the egg whites being very careful not to knock the air out of the mixture.

Turn into the prepared soufflé dish, dust with the Parmesan cheese and stand it on the centre shelf of the oven. Bake for about 30-35 minutes until it is well risen and brown. The soufflé should be a little soft in the centre.

Whilst the soufflé is baking, prepare the Gruyère cheese sauce. Heat the creme fraiche in a saucepan without letting it boil. Add the cheese and Dijon mustard and whisk continuously until the cheese melts.

Remove the pan from the heat and set the sauce to one side until you need it.

Just before the soufflé is ready, gently re-heat the sauce and tip into a warm sauceboat.

When the soufflé is cooked, serve it immediately with the Gruyère cheese sauce handed separately. 


Carbohydrate 12g Protein 12g  - per serving of souffléd cauliflower

Carbohydrate 1g Protein 10g - per serving of Gruyere cheese sauce


Mellanzane Parmigiana

by Susan Smith in , ,


The recent weather’s cold snap, which in our Edwardian property has to be endured even when the central heating is on 24/7, got me fantasising about a different kind of a life lived in the Mediterranean - specifically Italy. 

I’ve had several Italian friends (still do!) and am drawn by their unbridled warmth and generosity. They are my sort of people; the sort who love to relax, celebrate and socialise with family and friends. My understanding is that these celebrations most often centre around the table and an abundance of traditional Italian food. 

Since a trip to Naples is not do-able, today’s recipe injects a bit of that Italian sentiment and sunshine into an otherwise bleak January day (though it works just as well eaten ‘al fresco’ on a balmy summer’s evening).

A layered bake of aubergines, tomatoes and cheese is something of an Italian classic. My version has more than it’s fair share of cheese - I have used Cheddar as well as  the more usual mozzarella and Parmesan. The texture and richness make for a glorious vegetarian bake that will keep you warm from the inside out.

There was a time when bringing this dish together seemed somewhat onerous. So many processes…slicing and salting the aubergines, rinsing and drying them before pan-frying in batches in copious amounts of olive oil, making the tomato sauce, grating the cheese - all of which was required before assembling the final dish. It seemed like an awful lot of ‘faff’.

Anyway, necessity being the mother of invention I was forced to streamline the prep to something more manageable. In fact, because everything can be prepared in advance, this delicious bake is ideal for entertaining. 

We think if there was ever a meal that’s able to build a bridge between committed carnivores and ardent vegetarians, this gorgeous bubbling aubergine bake is definitely it.

Mellanzane Parmigiana (V) (Serves 4)

Ingredients

4 medium aubergines

80ml (3fl oz) olive oil

1 large onion, peeled and finely chopped

2 x 400g (2 x14oz) good quality tinned whole plum tomatoes (I favour Mr Organic)

200g (7oz) strong Cheddar cheese, coarsely grated (I used Davidstow's vintage Cheddar cheese from Waitrose)

60g (2oz) Parmesan Reggiano, freshly grated

150g (5oz) buffalo mozzarella, sliced

Sea salt

Freshly ground black pepper

Large handful of fresh basil leaves, roughly chopped

2-3 drops liquid stevia (optional)


Instructions

Trim the aubergines and cut across into 1cm thick slices. Layer them up in a colander sprinkling each layer with salt as you go. Put a plate underneath the colander (to catch the juices) and another plate on top, weighted down with something heavy (I use a kettle filled with water) Set aside to drain for 30 minutes.

Meanwhile, put two tablespoons of olive oil into a medium pan on a medium heat. Add the onion and cook for 10 minutes until it is soft but not coloured. 

Add the tinned tomatoes, breaking them up with a flat edged spatula into chunky pieces. Season with salt and pepper, give the mixture a good stir and bring to the boil. Cover and simmer over a gentle heat for 20 minutes.

Pre-heat the oven to 220℃ / 425℉ / Gas mark 7. Line two large baking trays with silicon baking mats or non-stick foil.

Wash the aubergine well under a running cold tap, then drain and dry on a clean tea towel.

Brush the aubergine slices on both sides with the remaining olive oil (I find it easiest to lay them all out on the two trays before oiling, I then brush oil over the uppermost side first before turning them over and doing the other side).

Roast the aubergine slices in the oven for 15 minutes, then turn them over and cook for another 10-15 minutes or until they’re nicely browned on both sides.

Meanwhile, reheat the tomato sauce, adjusting the seasoning if necessary. Add 2 or 3 drops of liquid stevia if it tastes too tart, then add the chopped basil.

When the aubergines are ready, take them out of the oven and turn onto a plate.

Switch the oven temperature down to 195℃. 

Get yourself an oven-to-table lasagne type dish (mine is 30cm x 24cm x 5½cm).

Spoon a little of the tomato sauce in the bottom of the dish, top with a layer of aubergines, some of the sliced mozzarella torn into smallish pieces and some of the Cheddar cheese. 

Continue with the layers until you’ve used up all the ingredients, finishing with the Cheddar. Sprinkle over the Parmesan cheese and bake for 30 minutes until crispy, bubbling and golden.

Serve with a crisp salad.


Carbohydrate 11g Protein 30g - per serving


Leek, Stilton & Walnut Stuffed Mushrooms

by Susan Smith in , , , ,


There is something so British about leeks in winter. I love their green sweet oniony softness, juxtaposed against the salty tang of blue Stilton cheese and the savoury earthiness of mushrooms. This is a happily vegetarian dish that’s as deeply umami flavoured as a beef steak and as warm and soothing as my Celtic sheepskin house boots!

It’s also a doddle to prepare.

Leek, Stilton & Walnut Stuffed Mushrooms (Serves 1 as a main course or 2 as an appetiser) (V)

Ingredients

2 large Portabello mushrooms (approximately 80g each)
1tbsp olive oil
1 medium to large leek (about 89g prepared weight), washed and thinly sliced
15g butter
30g walnuts, chopped or broken into smallish pieces
50g Stilton cheese, cut into small dice
40g creme fraiche
Sea salt and freshly ground black pepper

Instructions

Pre-heat the oven to 200℃, gas mark 6

Wipe the mushrooms with a damp paper towel and remove the bottom of the stalk with a small sharp knife so it’s level with the gills.

Place the mushrooms stalk side up on a silicon baking mat (or a sheet of non-stick foil) on a baking tray. Brush with olive oil and season with salt and pepper

Cook in the pre-heated oven for about 6 minutes, or until the natural mushroom juices just start to appear on the surface of the mushroom. Take out of the oven and set aside.

In a lidded frying pan, melt the butter over a moderate heat. When it is foaming add the sliced leeks. Give the leeks a good stir to make sure they are evenly coated in the butter, then put the lid on the pan and gently cook the leeks for 5 minutes until they are soft but not coloured.

Take the frying pan off the heat and add the walnuts, the creme fraiche and the Stilton cheese to the leeks. Mix everything together well. Season with a pinch of salt (don’t go overboard as Stilton cheese is already quite salty) and a generous grinding of black pepper. Stir again and re-check the seasoning.

Divide the stuffing equally between the mushrooms (don’t worry about piling it too high, the mixture is quite well-behaved and won’t collapse in the heat of the oven).

Bake the stuffed mushrooms in the oven for a further 10 minutes until they are heated through and turning golden on the surface.

Serve immediately with a simple watercress or rocket salad, perhaps dressed with a little walnut oil and the finest balsamic vinegar you can find.

Yum!


Notes:

Without the walnuts, the creamy leek and mushroom sauce would make a delicious accompaniment to grilled chicken or steak

This recipe easily adapts to feeding more or less people by increasing or reducing the ingredients proportionately.


Carbohydrate 10g Protein 12g - per stuffed mushroom


Italian Style White Fish in Tomato Basil ‘Broth’

by Susan Smith in ,


Ever since I started to teach my daughter Sarah to cook a knock ‘em dead tomato sauce for the televised Junior Master Chef finals, I have been searching for tinned tomatoes without citric acid. Tinned tomatoes with citric acid do exactly what they say on the tin. They taste ‘acid’, which means having to add sugar to balance out their flavour, which isn’t ideal.

Sainsbury’s So Organic tinned tomatoes used to be good to go until quite recently when, without warning, the labelling changed showing that they too had succumbed to adding what I consider the unwelcome ‘acidity regulator’ used by most brands.

So, I say hurrah for Mr Organic! Although their tinned tomatoes cost a little more, they have no additives and are much the better for it. I buy mine in bulk from Ocado and have them delivered to my door.  

This dish can be prepared, cooked and on the table within half an hour. 

Italian Style White Fish in Tomato Basil ‘Broth’ (Serves 2)

Ingredients

2 x 225g (2 x ½ pound) sustainably sourced white fish fillets, skinned and boned - e.g. haddock, hake, cod 

125g (4½ oz - drained weight) buffalo mozzarella, thinly sliced 

1 small onion, finely chopped

1 tbsp olive oil

400g (⅔ cup) tinned organic whole plum tomatoes

10g (2 tbsp) fresh basil leaves, finely shredded

Sea salt and freshly ground black pepper, to taste

1-2 drops liquid Stevia* - optional

Sprigs of whole leaf basil, to serve


Instructions

If not already done by your fishmonger, remove the skin and bones from the fish fillets (I prefer tail-end fillets because they don’t have any bones to remove!) then season each piece of fish generously with a pinch of salt and a good grinding of black pepper.

Heat the olive oil in a large lidded oven-proof frying pan over a medium heat. Add the finely chopped onion to the pan and give it a quick stir to distribute the olive oil evenly, then cover the pan and cook for 8 minutes over a low heat until the onions are soft but not coloured.

Add the tinned tomatoes to the pan, roughly breaking them up with a wooden spoon into a sauce-like consistency. Season with salt and pepper. Taste, then add a drop or two of liquid Stevia if you think it tastes too tart. Finally, add the shredded basil, stir well, then put the lid back on the pan and simmer over a low heat for 10 minutes. 

Re-check the seasoning of the sauce at the end of this cooking time and adjust as necessary. 

Take the pan off the heat, remove the pan lid and lay the fish fillets skinned side down, on top of the tomato sauce. Note: If you’re using fish tail fillets tuck the ends under so that the pieces are of uniform thickness for cooking. Cover with the pan lid.

Put the fish and tomato sauce back on a low heat and simmer gently for 6 minutes.

Meanwhile, heat your oven grill to high.

After the 6 minutes, take the pan off the heat and lay the mozzarella slices over the top of each fillet of fish to cover. 

Place the pan under the grill for 2-3 minutes until the the mozzarella is meltingly soft.

Using a couple of fish slices, carefully place the fish fillets in the middle of 2 warmed plates, spooning the tomato broth all around. Top each with a sprig of basil and serve.  


Carbohydrate 15g Protein 51g - per portion


*Although I generally favour natural unprocessed sweeteners such as raw organic honey, maple syrup and raw coconut palm sugar for baking, pure liquid stevia is a useful zero carb / zero calorie sweetener for sauces, tea and green smoothies. I buy mine from here. It may seem expensive, but because you’re only using a drop or two at a time, one bottle lasts for ages. 


Luxury Fish Pie

by Susan Smith in , ,


I think a good fish pie is one of the greatest comfort foods there is.

Our no potato, no pastry, no grain Luxury Fish Pie is an adaptation of Jamie Oliver’s recipe and it’s what we’ll be having for a late lunch or early supper this weekend, perhaps with a glass of cold Riesling.

This recipe features celeriac mash instead of mashed potato and crème fraîche instead of bechamel sauce and is all the better for it. In fact, because celeriac mash is slightly softer than potato it is easier to spread on top of the pie. A finishing touch of grated parmesan crisps it up nicely. What’s not to love?

Simple to make (the quickest way to grate the vegetables and cheese is with the grater attachment on a food processor), it can be prepared in advance and cooked in a pre-heated oven half an hour or so before you want to sit down and eat.

All you need as an accompaniment are some cooked peas (frozen are fine) and/or a green salad. It really is luxurious enough for special occasions too. This is a perfect make-ahead recipe for relaxed entertaining.

Luxury Fish Pie (Serves 6)

Ingredients

250g (9 oz) salmon fillets (skinless weight)

250g (9 oz) undyed smoked haddock fillet (skinned, bones removed)

250g (9 oz) white fish fillets - e.g hake, haddock or cod (skinned, bones removed)

200g (1 ⅓ cup) raw peeled king prawns

2 medium to large carrots, coarsely grated

2 outer sticks of celery, coarsely grated

1 tbsp olive oil 

15g (2 tbsp) fresh parsley, finely chopped

150g (1 ½ cup) good quality strong cheddar cheese, coarsley grated

Lemon, juice of ½ and grated zest of whole, finely grated

225g (⅞ cup) full-fat crème fraîche

1.4 kg celeriac (3 lb) - unpeeled weight

50g (4 tbsp) butter

Sea salt and freshly ground black pepper

25g (¼ cup) ready-grated parmesan cheese


Instructions

Pre-heat the oven to 200℃ Gas Mark 6.

First prepare the celeriac for the fish pie topping. Boil a kettle of water. Peel and chop the celeriac into 1 inch pieces. Place the cubes of celeriac in the top of a large steamer, pour boiling water from the kettle into the base pan of the steamer, cover with the pan lid and steam the celeriac for 15 minutes or until it is completely soft and cooked through (stick a sharp pointed knife in to check).

Whilst the celeriac is cooking, heat the olive oil in a large non-stick lidded pan over a medium heat. Add the grated carrot and celery to the pan and cook with the pan lid on for 5 minutes until softened but not coloured. Remove from the heat and stir in the chopped parsley.

Take off the celeriac off the heat and drain the water from the bottom of the steamer into a jug - this makes a really good vegetable stock for later use. Tip the cooked celeriac into the now empty base pan of the steamer and place back on a medium heat for a couple of minutes to drive off any excess moisture. Shake the pan from time to time or stir the celeriac with a wooden spoon to prevent it from sticking to the bottom of the pan. Do not allow it to colour.

When the water from around the celeriac has evaporated, tip the celeriac into a food processor with the butter and process it to a smooth puree. Season generously with salt and pepper. If you don’t have a food processor a hand-held stick blender will do nicely, as will a bog-standard potato masher if you’re feeling energetic! Re-check the seasoning and then set to one side whilst you assemble the pie.

Cut the fish into bite size chunks and season all but the smoked haddock with salt and pepper.

In an oven-to-table ceramic dish (mine is 12” x  9” x  2”) layer up the fish pie ingredients in the following order making sure that everything is evenly distributed: 

  1. Grated vegetable & parsley mix
  2. Fish chunks and prawns
  3. Lemon zest and juice
  4. Grated cheese
  5. Spoonfuls of crème fraîche dotted over
  6. Celeriac mash, spread evenly over the top of the fish pie, then roughed-up with a fork
  7. Ready-grated parmesan, sprinkled evenly on top of the celeriac mash
fish.jpg

Place in the pre-heated oven for 20 minutes. 

At the end of this cooking time, switch the oven grill to high and cook for a further 5 minutes under direct heat for a golden, crispy topping


Carbohydrate 9g Protein 42g - per serving