Sarah’s Taleggio, Broccoli & Leek Tart

by Susan Smith in


I am never one to say “No” to an invitation to dinner and last week Sarah surprised me by inviting us over to her’s…twice! It just so happens that’s she’s become a dab hand at making today’s recipe for Taleggio, Broccoli and Leek Tart - although after years of perfecting the art, neither of us can remember where her original inspiration came from. As with all things Primal, there have been enough modifications to allow me to confidently call this deeply delicious, satisfying tart “Sarah’s Taleggio, Broccoli & Leek Tart.” 

Firstly, being Primal, there are no grains allowed and secondly, she’s confidently upped the ante on the eggs and cheese to make this a really luxurious and filling family dinner - albeit it’s not unknown for us to eat the whole of this tart, which is supposed to feed six, between the three of us. 

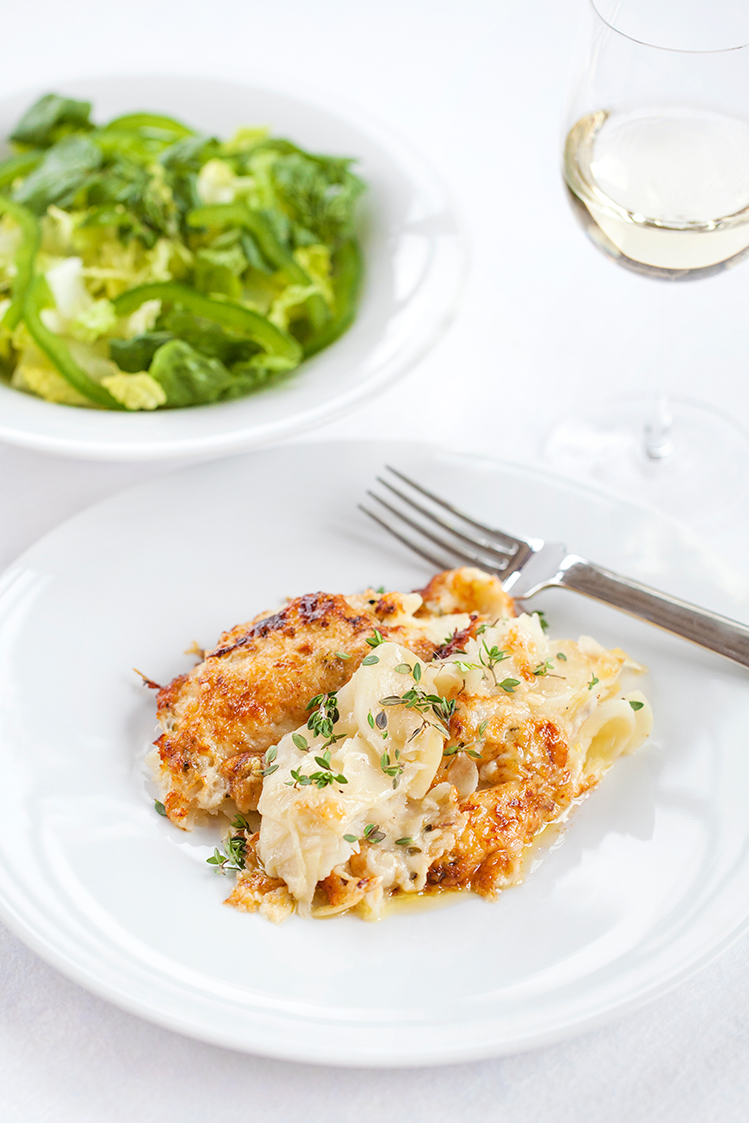
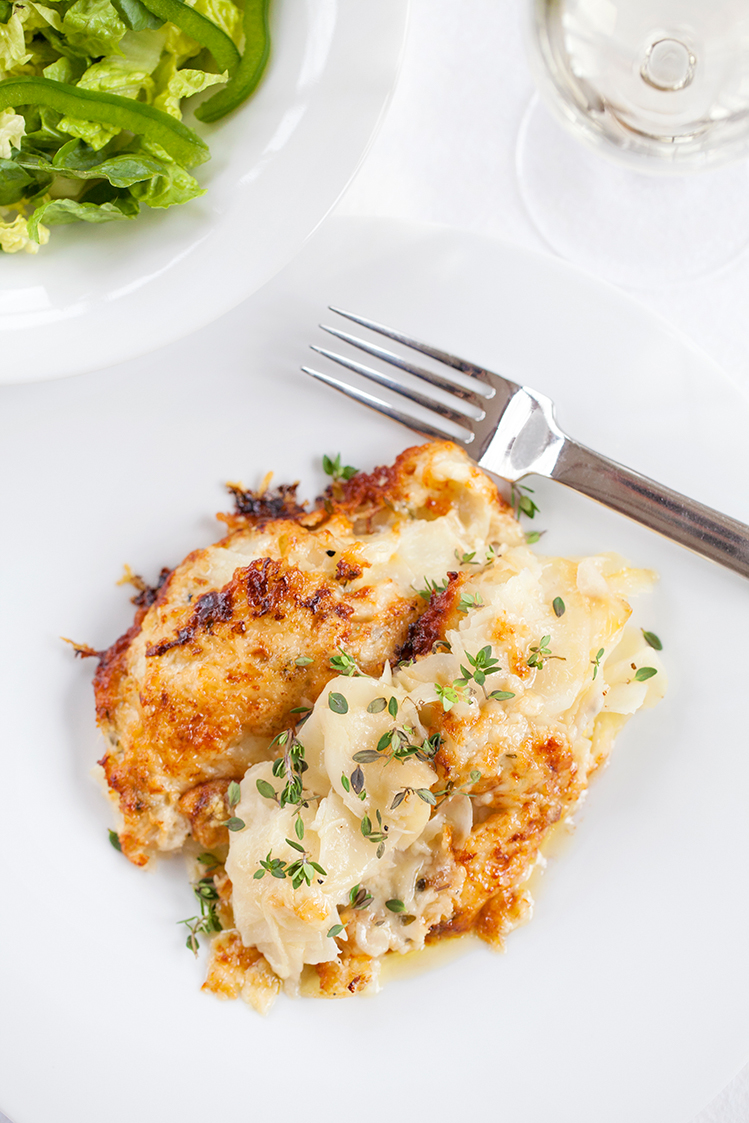
As it turns out, it was much trickier to get the recipe out of Sarah’s head and into written form than it is for her to bake it! It took her a couple of hours to write the recipe down and me twice as long as that to decipher what she’d written before it could make an appearance on Primal Plate’s blog! Nevertheless, as you can see from the picture of my serving of tart, it is very worthy of its honorary place.

Taking on the ‘huff and puff’ of food blogging is very much akin to photographing the finished food on the plate. From time to time, this strong mother-daughter team, of which I am so proud, will attempt to walk a mile in each other’s shoes. Sometimes Sarah passes me her camera, but on this occasion she volunteered for a day in the life of a food blogger. This is what workplace equality is all about and as I write, epitomises the spirit of today’s ‘International Women’s Day’ (8 March 2017) but more than this, it is always a privilege to have Mirror Imaging Photography create such beautiful images to bring to life all of Primal Plate's recipes. 

This one is an absolute winner. It’s also much easier to make than a conventional tart because the nut-based pastry behaves itself so much better than a normal wheat flour pastry does. Sarah learned this lesson very early on in life from Mrs Bainbridge, her home economics teacher at secondary school, who thought that the way to get a crumbling flour pastry mix under control was to bash it around on the worktop until it surrendered itself up as a pliable piece of dough, which then cooked out to something resembling a brick. Did I miss my vocation? Is this why so many of Sarah’s generation have given up on cooking their own food? Over-handling or adding too much water to normal flour is the sure-fire way to achieve pastry disaster. This can’t happen with nut-based pastry. Provided that you add the diluted milk judiciously - just enough to bring the mixture together (see instructions below) - you cannot help but achieve a crispy, golden, melt-in-the-mouth almond pastry because, without gluten, it’s impossible to overwork. Perfect for the novice cook and, without any grains or gluten, it's much healthier for you too.

Sarah’s Taleggio, Broccoli & Leek Tart (serves 6)

Ingredients - for almond pastry

400g organic ground almonds

2 teaspoons gluten-free baking powder 

50g organic butter, melted + a little extra for greasing

4-6 tbsp diluted whole organic milk (to dilute the milk, mix 3 tbsp milk & 3 tbsp fresh filtered water together)


Instructions - to make the pastry case

Preheat oven to 190℃ / 375℉ / Gas mark 5 

Grease a 25cm / 10inch round, fluted, non-stick, loose-bottomed pastry case with a little melted butter, then line the base with a round piece of non-stick baking parchment for good measure.

To make the almond pastry - sieve the baking powder into the ground almonds and mix together well. 

Stir the melted butter into the almond mixture, then add the diluted milk - one tablespoon at a time - and stir everything together with a fork. N.B. We’ve found that 4 tablespoons of diluted milk is usually enough to bind the mixture without the pastry becoming too wet.

When it starts to clump together, abandon the fork and use your hand to bring the mixture together into a firm but moist dough (the warmth of your hand will help to do this by releasing the oil in the nuts). Shape into a ball.

Lay out a large sheet of clingfilm onto a work surface (you may need two sheets overlapped), then place your smooth ball of pastry in the middle and flatten it out slightly.

Lay a second sheet of clingfilm over the top of the pastry (this will stop it from sticking to your rolling pin) and roll out evenly to about 3mm-5mm thickness. As you roll, turn regularly to achieve an even round shape that is approximately 2½cm/1” larger than the circumference of your tart tin (this allows for the sides of the tart). 

Carefully peel off the top layer of clingfilm, then loosely wrap the pastry around your rolling pin removing the bottom layer of clingfilm as you do. Then using the rolling pin to support the pastry, lift it in one piece directly into the tart tin. If it splits or breaks in transition (as it often does!), don’t worry, just patch it back together by pressing it firmly and evenly into the base and up the sides of the tin with your hands. You can add smaller pieces of pastry to fill any gaps and particularly to reinforce the top edge - just press any seams together with your fingers so there are no gaps and it’s as even as you can make it. N.B. Since almond nut flour is gluten-free it’s easier to handle than normal shortcrust pastry, because it doesn't get harder and tougher when you re-work it.

Once it’s settled in the tart tin in an even thickness, prick the base with the prongs of a fork, then lift the pastry tin into the air and, rotating the tin with one hand, use a sharp knife to trim any raggedy bits of pastry off the top edge to create a neat finish. Form any leftover pastry into a ball, cover in clingwrap and store in the fridge for up to a week. You can then re-roll and make into almond biscuits, which are perfect served with cheese after dinner, or as a base for pre-dinner smoked salmon canapés.

Bake the pastry case blind i.e. place a large piece of baking parchment on top of the pastry - it needs to be big enough to cover the entire pastry case - and weight down with ceramic baking beans (rice grains, dried peas or dried beans will do just as well) then bake in the pre-heated oven for about 8-10 mins. 

After this first baking, remove the baking beans and parchment and cook for a further 5-6 minutes - you’re looking for an evenly baked, pale golden case without any wet pastry showing in the middle. N.B. Keep a careful eye on it to ensure that the top edge doesn’t get too brown - nut-based pastry can scorch easily and if it’s over-browned at this stage it will be too dark after it’s filled and re-baked. 

When cooked, remove from the oven and set aside. 

Ingredients - for filling

Head of organic broccoli (about 350g)

200g taleggio cheese

6 tbsp organic whole-fat milk

2 tsp English mustard powder

6 organic eggs

120ml organic double cream

sea salt and freshly ground black pepper

1 tbsp organic butter, melted (or organic olive oil)

2 organic medium-sized leeks

1 tbsp organic fresh thyme leaves, chopped 


Instructions - to make filling

Reduce the oven temperature to 170℃ / 325℉ / Gas mark 3

Cut the broccoli into small florets. Steam for about 4-5 minutes or until just tender. Drain and put straight into ice cold water (or run under the cold tap) to stop the cooking process and to keep their colour.

Trim off the roots and coarse dark green tops of the leeks, then with a sharp knife slice them lengthways halfway through i.e. from top to root without actually cutting them in half. Wash under a running tap, fanning the layers out with your fingers to rinse away any grit or soil trapped between them. Drain thoroughly and then slice across into 1cm thick rings. 

Place the leeks and the olive oil into a large saucepan, give the leeks a quick stir to make sure that they’re evenly coated in the oil, then cover with a circle of greaseproof paper cut to fit the pan and the pan lid. Cook over a gentle heat for about 8-10 minutes until the leeks are soft and tender but not coloured. 

Remove the paper lid and stir in the broccoli and thyme then, whilst continually stirring, turn up the heat to cook off any excess liquid. You need to make sure the mixture is as dry as possible without browning the vegetables. Season with salt and pepper and set aside.

Prepare the taleggio cheese by removing its wrapping and cutting off any of the rind as thinly as you can (it will have a mould-like bloom, which you don’t want in the tart). Slice into thin pieces, and set aside.

In a Pyrex jug or bowl, first whisk the mustard powder into a little of the milk until smooth, then add the rest of the milk, cream, eggs and season to taste with salt and pepper. Whisk the mixture until the eggs are broken up and all the ingredients are well combined. Set aside.


Instructions - to assemble the tart

Lay a sheet of tin foil on a flat baking sheet, then place your pastry case, still in its tin, on the sheet. Scrunch the tinfoil up a little around the base of the tin because if your pastry has any gaps at all, this will prevent the filling running out all over your oven!

Evenly distribute the vegetables in the base of the pastry case. 

Give the egg custard mixture a quick stir (sometimes the mustard settles at the bottom) and carefully pour into the pastry case over the vegetables. Lay the slices of taleggio cheese evenly over the top. 

Bake immediately in the pre-heated oven for about 25 minutes, or until the custard is lightly set and the surface of the tart is nicely golden.

Remove from the oven and let the tart cool for 5-10 minutes. Then, using a small sharp knife, loosen around the top edge of the tart before releasing from its tin.

Slice and serve warm or cold. 


Notes

Sarah doubles up on the quantity of Primal Plate’s original almond pastry recipe to make sure there is plenty to roll out without scrimping; this means that there will be about a third left over for almond biscuits etc. The remaining raw dough can be stored in a refrigerator for up to a week. 

Taleggio cheese is made from non-vegetarian rennet, strict lacto-vegetarians could substitute a soft-melting cheese such as Duchy’s organic brie.


Carbohydrate 12g Protein 33g - per serving


Nutty Parsnip Gratin

by Susan Smith in , ,


I am fully “living life on the veg” courtesy of Riverford Organics, and I could not be happier with my regular supply of the freshest, tastiest organic produce that they deliver every Friday straight to my door. An absolutely brilliant service!

Notwithstanding my new-found addiction to drinking a large glass of freshly pressed juice every day - which I’m convinced is far more life enhancing than the proverbial ‘apple a day’ that’s reputed to ‘keep the doctor away’ - I’m having a ball creating new recipes from a plethora of organic fruit and vegetables that you can never reliably find on supermarket shelves.

Because eating Primal is what my close family prefers, we never succumb to eating white potatoes or even compensate very often with other high-carb root vegetables. However, last week I couldn’t resist ordering some new season parsnips for inclusion in my weekly Riverford box of goodies. When they arrived, I thought I’d go all out and make a main meal of them.

Totally delicious, this creamy Nutty Parsnip Gratin has a gorgeous sweet spiciness about it that pairs beautifully with salty Parmesan cheese and crunchy roasted hazelnuts. In fact, I think I’ve succeeded in elevating the humble parsnip to giddying new heights with this dish! Let’s just say, when you dive in with your fork you might not even recognise that you’re eating parsnips - it’s just the most perfectly balanced, tasty, autumnal meal that ticks all those cold-weather comfort food cravings without a potato or grain in sight. How good is that? 

Nutty Parsnip Gratin (serves 3-4)

Ingredients

500g organic parsnips (trimmed and peeled weight of approximately 3 large parsnips)

2 large organic shallots

300ml organic whole milk 

125ml organic double cream

1 dsp fresh rosemary leaves, finely chopped (about 2 decent sprigs of rosemary)

1 tsp English mustard

¼ tsp organic nutmeg, freshly grated 

1 tsp Celtic sea salt

80g Parmesan cheese (I used Gran Moravia vegetarian Parmesan-style hard cheese), finely grated

50g organic roasted, blanched hazelnuts, chopped

40g organic ground almonds

15g organic unsalted butter

Freshly ground organic black pepper


Instructions

Pre-heat the oven to 200℃ / 400℉ / Gas mark 6

Peel and finely slice the parsnips lengthways into 2-3mm thick strips using a mandolin. If the parsnips are large, first cut them in half across the middle, then cut the top half into quarters and using a vegetable peeler, trim away the fibrous core before slicing.

Peel the shallots and still using the mandolin, slice them very finely.

In a large, wide, lidded sauté pan heat the milk to scalding point (just below boiling) then add the parsnip and shallot slices, pressing them down into the milk (the vegetables won’t be completely covered at this stage).

Cover and cook over a medium-low heat for 4 minutes until the parsnips are soft but not broken up. Tip: Gently stir the vegetables around after 2 minutes to ensure that everything cooks evenly. Take off the heat and set aside.

In a medium-sized bowl, mix together the cream, rosemary, mustard, nutmeg and salt, then stir in half the grated cheese. Pour the mixture over the parsnips and shallots and gently combine everything together. Tip into a gratin dish, press down with the back of a spoon and level off the top.

In a small bowl mix together the rest of the cheese, ground almonds, chopped hazelnuts and a good grating of freshly ground black pepper. Scatter evenly on top of the parsnip mixture.

Dot all over with small pieces of cold butter and bake the gratin for 30 minutes until lovely-bubbly, crisp and golden.

Eat and enjoy.

Notes

Nutty Parsnip Gratin tastes special enough to serve as a vegetarian main course with all the trimmings on Christmas Day. It’s also a brilliant make-ahead vegetable side dish for carnivores - I imagine that served alongside something meaty, it would be an absolute winner.

It doesn’t matter so much for this recipe because you’re boiling the milk anyway, but because it’s kinder to cows and much healthier for humans, I only ever buy whole milk that’s raw and organic from Gazegill Organics This is what they say:

Here at Emma’s Dairy we believe that cows should have the freedom to roam, grazing our pastures and producing raw organic milk that is naturally high in omega 3. Our cows produce a natural amount of milk and are not intensified in any way to produce more, thats why our milk is rich in butterfat and protein. We do not homogenise our milk but believe that in leaving a cream line you can enjoy simply put an un-tampered with natural product that is full of natures best, we also offer raw organic milk and pasteurised milk as well as cream and offer UK wide delivery, we hope you enjoy it.” 


Carbohydrate 31g Protein 15g - per serving


Mushroom & Three-Cheese Pizza

by Susan Smith in , , ,


Last week, when Sukrin tweeted the idea of making pizza with their ‘just add water’ Chia & Hemp bread mix I couldn’t resist giving it a go! 

Notwithstanding that low-carb practitioners and the gluten intolerant are particularly susceptible to temptation, we all seem to get cravings for pizza. Unfortunately, I also know far too many other people who complain they’re fat and unwell but won’t give up eating grains (bread, pasta, rice and pizza) and doggedly refuse to cook for themselves at home. In a last ditch effort to convince them that not everything that looks stylish and tastes delicious is laboriously difficult to prepare and cook, this Mushroom & Three-Cheese Pizza recipe should be universally appealing! 

Though probably not strictly Primal or indeed ‘proper’ pizza - because I’ve deliberately left homemade tomato sauce out of the equation to save you the bother of making one! - it is nevertheless an extremely low-carb, satisfyingly healthy, cheesy pizza ‘fix’ that everyone can enjoy. We love it with a glass of Chianti or icy-cold Pinot Grigio.  

Mushroom & Three-Cheese Pizza (Serves 4)

Ingredients - for the base

210 g pack of Sukrin Chia & Hemp Mix

250 ml cold filtered water

1 dsp fresh rosemary leaves, finely chopped


Ingredients - for the topping

225 g organic chestnut mushrooms

30 g organic unsalted butter

sea salt 

freshly ground black pepper

2 dsp fresh rosemary leaves, finely chopped

120 g soft goat’s cheese, without rind (I used Sainsbury’s Taste The Difference Goats Cheese and removed its rind before dicing into small pieces)

125 g organic vegetarian mozzarella

50 g vegetarian Parmesan-style cheese (I used Gran Moravia)


Ingredients - to serve

40 g organic wild rocket 

8 large fresh basil leaves 

1 dsp organic, cold pressed, extra virgin olive oil

Balsamic vinegar of Modena - for drizzling

The part-cooked, grain-free pizza bases, topped with mushroom and cheese, before returning to the oven 

The part-cooked, grain-free pizza bases, topped with mushroom and cheese, before returning to the oven 

Instructions

Cut the base of the stems off the mushrooms and wipe them clean with a damp paper towel. Cut the mushrooms into thick slices.

Warm the butter in a large non-stick frying pan over medium-high heat. Add the mushrooms and cook, stirring occasionally, until tender and tinged golden-brown and the majority of the juices in the pan have evaporated (about 5 minutes). Take off the heat, season the mushrooms to taste with sea salt and freshly ground black pepper. Cover and set aside.    

Preheat an oven to 200℃ /  400°F / Gas mark 6.

Tip the Chia & Hemp mixture into a medium sized bowl and add the filtered water and the finely chopped rosemary. Stir everything together well with a fork and allow to stand for 3 minutes (as directed on the packet)

Form into 4 x 15 cm / 6” ‘mini’ pizzas. The best way to do this is to divide the bread mixture into 4 equal portions (weighing approximately 105 g - 110 g each) before placing each piece of dough in the centre of a 15 cm / 6” non-stick baking parchment circle (4 baking parchment circles in total).

Using a sheet of cling film placed on top of the dough to stop it from sticking to you or the rolling pin, flatten it down - first with the palm of your hand and then rolling out evenly - into a round pizza shape that just comes to the edges of the parchment circle. Lift or slide the pizza, still on its parchment paper, onto a baking tray.  Repeat to make 4 pizzas.

Bake in the pre-heated oven for 15 minutes.

Meanwhile, grate the Parmesan-style cheese and crumble or cut the goat's cheese into small pieces. Lastly, drain the mozzarella cheese, then coarsely grate it onto a plate lined with paper kitchen towel (this soaks up any milky liquid that may ooze from the cheese when it’s left to stand). If not using immediately, keep the prepared cheeses covered and refrigerated on 3 separate plates. 

After the pizza bases have had their first baking, remove from the oven. Whilst they're still sat on the baking tray, top the pizzas evenly with grated mozzarella, goat’s cheese and mushrooms. Don’t take the topping right to the edges of the pizza bases - leave a 1.5 cm gap all the way round to allow the cheese to melt and spread out in the heat of the oven without it running off the top of the pizzas. Sprinkle over the rest of the chopped rosemary and finally, add an even layer of Parmesan-style cheese divided equally between each pizza.

Put the baking tray back into the oven and bake the pizzas for a further 10-12 minutes until the cheese is meltingly hot and bubbly and the edges of the pizza tinged golden-brown. 

During this final cooking time, finely slice the basil leaves and mix them with the rocket. Dress lightly with olive oil. 

Remove the pizzas from the oven. Wait for 1-2 minutes then, with the aid of a flat spatula, carefully remove the pizzas from their paper circles. Put the pizzas onto 4 warmed serving plates. 

Pile equal quantities of the dressed rocket and basil leaves on top of each pizza and drizzle over a little real Modena balsamic vinegar before serving. 


Carbohydrate 5.5 g Protein 16g - per pizza


Celeriac Dauphinoise

by Susan Smith in , ,


If I could have one 'mardy' about my Primal diet it’s that I just can’t seem to tactically allow potatoes back into my life…not ever! Having initially lost one and a half stones by eating low-carb, high fat (LCHF), I have on more than one occasion subsequently pined for the simplicity and density of potatoes. Carby they may be, but potatoes are in a league of their own and their virtues are not easily replicated. As well as being a naturally nutritious whole-food, simple spuds need no more than the application of heat to make them into something very, very tasty indeed (is there anyone that doesn’t love golden, crispy roasties?). When pre-cooked and chilled (think yummy potato salad) potatoes are also an alluring dietary source of resistant starch - which is top-notch food for ‘good’ gut bacteria, and thus your overall health. Or so I debate with myself…

Unfortunately, neither my nostalgia for potatoes or their nutritional profile is of any help to me. As far as my metabolism is concerned it’s not playing! I cannot ignore the fact that previously, within an hour or so of eating potatoes, my feet and ankles would swell alarmingly. No doubt potatoes had also long been playing havoc with my blood glucose levels, but after the age of fifty the almost immediate inflammatory response (edema) not only made me look like a frump, it actually made me feel quite queasy. I may forever mourn their loss, but for me it’s a case of R.I.P. potatoes! 

Another thing that peeves me is cheese! It’s virtually impossible to be a non-meat eater on compassionate grounds and still follow Primal principles without eating eggs and cheese. Unfortunately, almost all vegetarian recipes seem to ignore the fact that the most wonderful-tasting, beautifully-textured, traditionally-made cheeses, such as Parmesan, Gruyere and Mozzarella, are totally unsuitable for vegetarians. Whilst I’ve found good-enough substitutes for Parmesan and Mozzarella, I have still not found a copy-cat vegetarian version of Gruyere D.O.P. that’s available to retail customers, which can emulate anything like Gruyere’s unique melting quality and depth of flavour. Even if you can get past the ‘no-no’ of cheese made with calf rennet, there’s still the massive cruelty involved in milk production generally, and the nutritional degradation that occurs with pasteurised milk taken from grain-fed cows. Given that not all cheese is created equal, there is one family-run traditional cheese dairy that I am happy to be acquainted with because they share Primal Plate’s ethos - a passionate commitment to animal welfare and human health. This family run business makes award-winning, artisan, vegetarian cheeses from the raw milks of free-range, grass-fed cows, goats and ewes. In this day and age of intensive factory farming, small enterprises such as The Traditional Cheese Dairy make my heart sing. Not only because they fly in the face of extreme human exploitation of animals inherent in the dairy industry, but also because their end-products taste so good and are naturally healthful to animals and humans alike. I know it isn’t always practical, but please try to seek out and support all farmers that treat their animals as animals - not just a commodity for ‘growing’ meat or as 24/7 milking machines. Raw milk from free-range, grass-fed cows is not only better for the animals it is far, far better for you.  

Wherever you shop, substitute any mature, organic, vegetarian Cheddar in recipes that call for Gruyere. You may need to ask for advice at the Deli counter. It is often a case of trial and error when you’re trying to find a decent tasting vegetarian Cheddar cheese that doesn’t disintegrate into an oil-slick when baked or grilled! I will keep you posted if and when I find the perfect one!

Rant over, I have stopped arguing with reality long enough to create a potato-like dauphinoise using that great potato ‘pretender’…celeriac. Whilst the finished result isn’t as pillow-soft as cooked potatoes, cheesy gratins and bakes always have the yummy, comfort factor that low-carbers sometimes crave - and this cheese-topped Celeriac Dauphinois is no exception. I’ve lightened-up the full-on fat experience of double cream and cheese (oftentimes called for in traditional dauphinoise recipes), by substituting dry white wine for most of the cream. The crispy, crunchy cheesy topping speaks for itself. All in all, much tastier and less rich, Celeriac Dauphinois is an excellent low-carbohydrate main course for a light family supper or when entertaining vegetarians. It’s equally delicious served as a vegetable accompaniment.  

Ingredients

3 medium/large shallots, finely sliced

2 small celeriac, total weight about 900g

½ lemon, juiced

2 tbsp fresh lemon thyme, leaves only

2 tbsp olive oil

40g butter

sea salt and freshly ground black pepper

¼ tsp freshly grated nutmeg

150 ml dry white wine (I used a dry, white Spanish Rioja)

60 ml organic double cream

165g Gruyere (or mature, vegetarian Cheddar), finely grated              

60g Parmesan (or Parmesan-style cheese), freshly grated                 


Instructions

Pre-heat the oven to 190℃ / 375℉ / Gas mark 5

Fill a large bowl with cold fresh water and add the lemon juice.

Cut the top and bottom off the celeriac and then stand flat on a chopping board. With a sharp knife cut off the thick skin working all the way around the celeriac from top to bottom.

Cut each peeled celeriac into 4 quarters.

Using the thinnest slicer on a food processor, a hand-held mandolin slicer or a very sharp knife, cut the celeriac into 3mm thin slices. Put the celeriac slices into the lemon water to prevent them discolouring.

If not done already, finely slice the shallots. 

Heat the butter and olive oil together in a large pan until the butter has melted.

Drain the celeriac then either spin in a salad spinner or dry on a clean tea-towel. 

Add the shallots and drained celeriac to the pan. Continue to cook over a medium heat for about 5 minutes, turning the vegetables over now and again to make sure that everything is well coated in the olive oil and butter. 

Season with salt, freshly ground pepper and nutmeg then pour in the wine and continue to cook for about 10-12 minutes more with the pan lid on, stirring occasionally, until the celeriac is just tender.  

Tip the contents of the pan into a gratin dish. Scatter half the thyme leaves over the top then drizzle over the double cream and flatten the slices of celeriac down so they’re submerged as much as possible under the liquid.

Mix the two grated cheeses i.e. Gruyere & Parmesan (or vegetarian substitutes) together, then sprinkle on top of the celeriac in a thick even layer. Cover the dish with tin foil.

Place in the pre-heated oven and cook for 20 minutes. 

Remove the foil, then place back in the oven for a further 20-25 minutes until bubbling and golden brown. 

Remove from the oven and allow to stand for 2 minutes. 

Scatter over the rest of the thyme leaves before serving with a fresh green salad.


Notes

Cheese has a tendency to break down when cooked at high temperatures. The maximum temperature you should bake this dauphinoise - and any other cheesy casserole - is 190℃ / 375℉ / Gas mark 5, or below. If the cheese does separate and you’re left with a layer of fat sat on the surface of your Celeraic Dauphinoise, lightly dab off the excess oil with sheets of paper towel before allowing to stand for a couple of minutes prior to serving. It will still taste good!

If you like your cheese topping really brown and crozzly a couple of minutes under a very hot grill at the end of the cooking time should do the trick.  

Only buy small heads of celeriac - larger specimens can lack flavour, tend to be a bit woody and are much more unwieldy to peel and slice.


Carbohydrate 23g Protein 17g - per serving


Cheesy Sweet Potato, Cauliflower & Spinach Gratin

by Susan Smith in , ,


Want something fast, fresh and fabulous for supper tonight? This vegetarian cheesy gratin ticks all the boxes - comforting, healthy, delicious and on the table in under 45 minutes.

Although today’s recipe includes full-fat crème fraîche, cheese and sweet potatoes, let’s be clear - a Primal, low-carbohydrate / high fat diet (LCHF) does not mean eliminating carbohydrates completely or that it’s okay to gorge yourself on fatty food. In my view, Dr. Atkins was much maligned and misrepresented in this respect. It does mean that oftentimes you’ll find Primal Plate recipes are contrarian to decades of public health advice which has hoodwinked most people into believing that saturated fat - fatty meat, milk, butter and cheese - is the root cause of clogged-up arteries, high cholesterol, heart attacks and obesity. Truth is, there’s never been a shred of reliable scientific evidence that can demonstrate saturated fat is harmful to human health. In fact, numerous scientific studies show the opposite to be true. The real culprit for the type 2 diabetes epidemic and obesity crisis (which are themselves a risk factor for heart disease and stroke) is a fat-phobic society indoctrinated into believing that a healthy diet is one low in fat and high in carbohydrates (LFHC). 

This myth has been perpetuated for the past fifty years or so and it’s time we turned things around. In a nutshell: It’s not fat that makes you fat and sick, it’s sugar. 

In layman’s terms, all the carbohydrates we eat are converted by the body into a type of sugar called glucose. Glucose is fuel for the cells and is transported around the body in the bloodstream. In response to glucose in the bloodstream the pancreas secretes insulin. Without insulin, glucose stays in the bloodstream - it’s insulin that allows glucose to enter the cells (of the brain, heart, liver and muscles) to provide the energy for them to work. Or, if it’s not required for immediate use, to be converted into glycogen and stored in the liver and muscles for later. 

However, once the cells are full to the gunnels with excess glucose they become increasingly resistant to the call of insulin to open up their cell doors and let more in. When there’s nowhere for glucose to go it stays in the bloodstream and blood sugar levels stay high - a toxic situation. What follows is pancreatic panic! In a frantic attempt to get rid of excess glucose in the bloodstream, the pancreas makes even more insulin. Unfortunately excess insulin is also toxic so then the cells become even more insulin resistant. Catch 22!

Eventually the over-production of insulin will help convert the excess glucose into fat but in the meantime the glucose in the bloodstream forms a sort of sludge that blocks arteries and causes systemic inflammation - the underlying cause of multiple degenerative diseases, including heart disease and cancer. Furthermore, an excess of insulin stops the fat-burning enzyme lipase from working efficiently inside the cells, so you don’t even burn off the fat that’s been stored!  

Most human beings are genetically predisposed to insulin resistance, which worsens with age and inactivity. The solution is to stop feeding the problem with high carbohydrate food - no grains, no potato, no sugar - and to exercise more. When you’re not constantly topping-up the body with sugar and starches it can start burning fat for energy instead. Without high carb foods spiking your blood sugar, natural, healthy fat becomes your new best friend. It satiates your appetite, you feel full for longer, it stops sugar cravings and it helps make all food look and taste yummy. 

As for the shoddy science and scaremongering that aims to convince you otherwise, I’ve been on the frontline of a randomised double-blind controlled study (the ‘gold-standard’ of scientific research) when I taught a group of asthmatics the Buteyko Method in the first UK Clinical Trial funded by the National Asthma Campaign. Unfortunately, several participants reported back to me that the study was biased against Buteyko because during their reviews with research staff they had been actively encouraged to continue using their asthma medication. According to our carefully compiled records, over ninety per cent of the Buteyko group either significantly reduced or gave up their bronchodilators completely during the study. However, when the scientific paper was finally published these remarkable results were buried. True, there was much scientific gobbledygook that I wasn’t familiar with, but suffice to say it took several more years before the method was given any credence whatsoever by the NHS. Why did I expect otherwise? Like most people I never imagined that highly respected academics would stoop so low. In reality, too many vested interests - years of study potentially wasted, livelihoods at risk, research funding cut, pharma greed and charity donations threatened - is a massive incentive to keep schtum or worse, go on the offensive to protect the status quo. It’s just how egos rock n’ roll. Nobody wants to admit they’ve been complicit in giving health advice that actually destroys tens of thousands of peoples’ lives but the truth is, there’s safety in numbers and the powers that be are far more interested in self-preservation than your health and well-being.

Dr Aseem Malhotra says it best: “In my opinion a perfect storm of biased research funding, biased reporting in the media and commercial conflicts of interest have contributed to an epidemic of misinformed doctors and misinformed patients. The result is a nation of over-medicated sugar addicts who are eating and pill-popping their way to years of misery with chronic debilitating diseases and an early grave.”

After years of trial and error, I found my way through the lies, confusion, chronic illness and creeping weight gain to discover that the exact opposite of ‘conventional wisdom’ is the truth. It convinced me that eating LFHC is tantamount to death, disease and obesity by the Food Pyramid and that switching to LCHF diet stops the rot. However, if you’re overweight or unwell please don’t ‘wait and see’ how the continuing debate about fat plays out between the warring scientific community - and please don’t take my word for who’s right either. For a few short weeks, simply test out the LCHF hypothesis yourself - using Primal Plate recipes for your inspiration - to see if it works for you.   

Primal Plate is proud to play its part by translating unbiased scientific evidence into a pleasurable eating plan for life. If you want to join in, I think the quick and easy-to-make cheesy deliciousness of today’s vegetable gratin might be a very good place to start. 

Although a LCHF diet avoids white potatoes, we still eat orange-fleshed sweet potatoes because of their versatility in recipes and powerful nutritional punch. In spite of them being sweet-tasting, they have more fibre, fewer calories and less carbohydrates than white potatoes and their natural sugars are slowly released into the bloodstream, which helps ensure a balanced and regular source of energy, without the blood sugar spikes associated with fatigue and weight gain. They’re also a beautiful complementary colour to the Red Fox Leicester cheese I’ve used in the recipe!

It’s really important not to stint on the quality of crème fraîche you use for making the cheese sauce. Unlike most cheese sauces, this one isn’t thickened with flour so its success relies on the crème fraîche not breaking down during the cooking process. For a really silky-smooth, cheese sauce finish, I always recommend Rodda’s crème fraîche (available from Waitrose) because it doesn’t curdle or turn into a thin liquid when heated - this is what usually happens with lesser varieties. If you can’t find Rodda’s, Longley Farm’s crème fraîche is also a good bet.

Cheesy Sweet Potato, Cauliflower & Spinach Gratin (Serves 4) 

Ingredients

280g Leicester cheese (I use Red Fox), coarsely grated

250g crème fraîche (I use Roddas)

1 dsp Dijon mustard

Sea salt and freshly ground black pepper

3 medium orange-fleshed organic sweet potatoes, unpeeled and cut into 1-2inch chunky ‘chips’

1 medium organic cauliflower, broken into largish florets

235g organic spinach, washed

2 tbsp fresh chives, finely chopped


Instructions

Fill the bottom of a steamer with boiling water from the kettle and butter a large gratin dish.

Pre-heat the oven to 190℃ / 375℉ / Gas mark 5 

Steam the sweet potatoes in the top of the steamer, covered, for 10-12 minutes. 

Whilst the sweet potatoes are steaming, make a cheese sauce by whisking the crème fraîche, Dijon mustard and three quarters of the grated cheese together in a medium-sized saucepan set over medium heat. Keep whisking everything together until the cheese has fully melted in to a silky smooth, hot cheese sauce. Don’t let it boil. Season to taste with sea salt and freshly ground black pepper then take the pan off the heat, cover and set aside. 

Using a large metal draining spoon scoop the cooked sweet potato wedges out of the top of the steamer and lay them flat in the bottom of the gratin dish. Cover and keep warm.

Add the cauliflower florets to the steamer basket and steam them, with the pan lid on, for 5-6 minutes. They need to be just cooked through, so don’t let them get too soft or soggy.

Arrange the cooked cauliflower, placing it evenly between the potato wedges in the gratin dish. 

Now pile the spinach into the steamer basket, put the lid back on and steam for 1-2 minutes until the leaves have just collapsed. Drain well then add to the sweet potatoes and cauliflower in the gratin dish spreading it out evenly. Sprinkle the chopped chives on top. 

Whilst stirring constantly, re-heat the cheese sauce to just below boiling point. Spoon over the vegetables making sure they’re all nicely coated. Finally, sprinkle over the remaining cheese and bake the gratin in a hot oven for 15 minutes. 

At the end of the cooking time switch the overhead oven grill to hot and continue to cook the gratin a little longer under the direct heat until the top is gorgeously crisp and golden. 

Serve immediately with a fresh green salad, if liked.  


Carbohydrate 43g Protein 26g - per serving


Cheddar Muffins

by Susan Smith in , , , , ,


Tasty, filling and sustaining, these yummy Cheddar Muffins are a high-protein, low-carbohydrate viable alternative to bread and the perfect accompaniment to soup. So perfect, that soup need no longer be relegated to starter or snack status but can sit proudly at lunch or dinner as the main event. The fact is that these bread-like Cheddar Muffins pack enough nutritional oomph to turn every veggie soup into a satisfying meal. 

But don’t stop there. Their ‘breadiness' invites you to slice them through and fill them like a sandwich. They also toast beautifully - you only need to toast their cut side - before serving with scrambled eggs, creamy mushrooms, cheese and tomato or any other toast topper that takes your fancy. 

I like them best of all when they’re still warm from the oven and spread with generous amounts of grass-fed butter. A veritable nutritional powerhouse of goodness, it appeals to the child in me to split them in half horizontally (like a scone), then eat the all the bottom halves before slowing-down to savour the warm, golden, crunchy, deliciousness of their cheesy toppings. If you’re craving comfort food, Cheddar Muffins can be on the table in 40 minutes - with satisfaction guaranteed.  

Cheddar Muffins (Makes about 10)

IngredientsMakes 10

75g unsalted butter, melted

150g ground almonds

50g coconut flour

2 tsp baking powder

1 tsp sea salt

1 tsp paprika

freshly ground black pepper

4 large eggs, beaten

6 tbsp diluted milk (50/50 with filtered water)

125g organic vegetarian Cheddar cheese, finely grated

30g vegetarian parmesan-style cheese, finely grated

Instructions

Pre-heat the oven to 200℃ (fan) / 400℉ / Gas mark 6 and line a muffin tray with 10 large paper cases.

In a small saucepan melt the butter over a very low heat. Take the pan off the heat and allow the butter to cool slightly.   

In a large bowl mix together the ground almonds, coconut flour, baking powder, salt, paprika and black pepper. Add the grated Cheddar and combine well with a fork.

Add the melted butter, the beaten eggs & the diluted milk to the dry ingredients and continue to mix everything together well with a fork until a thick batter is formed.

Spoon the batter into the muffin cases (about 65-70g mixture per muffin) - for speed I use a self-releasing ice cream scoop - then lightly press the mixture down evenly into the paper cases with the back of a fork.  

Sprinkle over the grated Parmesan-style cheese, dividing it equally between the muffins and bake in the oven for 25 minutes (I turn the muffin tray around halfway through the cooking time to ensure even browning). 

Best served still warm from the oven.


Notes

Whilst I recommend these muffins are served warm fresh from the oven, they do have a tendency to vexingly stick to their paper cases until they’ve gone cold. If you don’t want the hassle of scraping remnants of muffin off their paper cases with a teaspoon, use non-stick tulip wrap muffin cases instead. 

Carbohydrate 7g Protein 14g - per muffin


Feeling Fruity Sweet-Hearts

by Susan Smith in ,


I know it’s Shrove Tuesday today, but with Valentine’s day in just five days time I’m playing to an audience of romantics with this stupendous, creamy, fruity dessert. That said, doesn’t everyone love cheesecake?

I am currently awash with recipe ideas, but when I was thinking out loud about what I could feature on Primal Plate’s blog to symbolise this celebrated upcoming ‘day of love’ Sarah informed me that firstly, no one in their right mind wants to cook when romance beckons and secondly, it mustn’t contain onion, garlic, spices or anything that makes you smell! Apparently, this meant my musings on Thai-inspired prawn curry was a definite no-go!

The rebel in me is now determined to cook Thai prawn curry and drink pink Champagne with my lover this Valentine’s day but, so no ‘young hearts’ be offended, I have also complied with Sarah’s brief for the perfect Valentine’s day meal (the main course will be posted on Friday). In the meantime, feast your eyes on this luscious dessert that should appeal to all lovers of good food, not just the romantically inclined.

You’ll probably need to order these heart shaped moulds straightaway if you want to surprise your Valentine with these Feeling Fruity Sweet-Hearts. My plastic cheese moulds arrived within a couple of days (whatever happened to those beautiful porcelain coeur a la crème moulds of yesteryear?), so hopefully you’ll have them in time. You then need to line them with a double layer of muslin (I obtained muslin squares from Lakeland) or a single layer of cheesecloth.

Although this sensational dessert looks like a ‘work of art’ on the plate, in accordance with Sarah’s remit, there’s no cooking involved, it takes minutes to assemble and both the ‘hearts’ and fruit coulis can be made a few hours in advance and kept refrigerated until you’re ready to serve them.

A delight to the eye and totally scrumptious to eat, I’ve deliberately put this dessert together as a generous sharing-plate for two. However, if those intimate ‘we wanna be together’ moments are likely to be hijacked by hungry longing or downright competitiveness - i.e. you or your partner has a tendency to eat more than their fair share - this recipe has enough ‘heart’ to fill two moulds! Alternatively, if you’re confident that your beloved would give you their last rolo, you can halve the cheesecake recipe and make just one - although I’d still make the full quantity of fruit coulis and have what’s left spooned over some Greek yogurt for breakfast.

Ignoring chocolate, I think Feeling Fruity Sweet-Hearts maybe one of the most ‘happy-ever-afters’ ever created!

Wishing everyone a very Happy Valentine’s, with all my love. x

Feeling Fruity Sweet-Hearts (Serves 2 + 2 people)

Ingredients - for the cheesecake hearts

200g full-fat ‘cream’ cheese (I used Longley Farm full-fat soft cheese)

200g organic, natural Greek yogurt

100ml organic double cream

2 tbsp organic raw honey

2 tsp organic lemon rind, finely grated


Ingredients - for the mango & raspberry coulis & fruit skewers

200g ready-cut fresh mango chunks (I used Waitrose own brand)

Juice of ½ lime (about 20ml)

Juice of 1 organic medium orange (about 90ml)

150g fresh raspberries 

1 heaped tbsp Sukrin icing sugar (or to taste) 

2 (or 4) strawberries, washed (with leaves intact) 

1 kiwi, peeled - 1 (or 2) slices cut from the middle of the fruit, then each slice halved 

2 (or 4) mango chunks (reserved from the above pack) 

1 (or 2) black grape(s) 

1 (or 2) mini bamboo skewers


Instructions - to make the cheesecake hearts

Line two heart shaped moulds with a double layer of muslin or a single layer of cheesecloth.

In a medium sized bowl beat the cream cheese, yogurt, honey and lemon rind together until smooth.

In a separate bowl half-whip the cream until it just begins to hold its shape, then using a metal tablespoon gently fold into the yogurt and cream cheese mixture until fully incorporated.

Divide between the two heart shaped moulds - bang them down several times on the worktop as you’re filling them to allow the mixture to settle evenly inside the moulds - then level off the tops, stand on a large flat plate, cover loosely with cling film and place in the refrigerator for 1½ hours.


Instructions - to make the mango and raspberry coulis

Place all but two (or four) of the best pieces of mango into a blender with the lime juice and half the orange juice. Blitz until completely smooth.

Scrape the mango puree into a clean bowl. The coulis should be smooth and a pouring consistency - runny enough to slowly ‘flow’ when you tilt it on the plate but not so runny that it won’t hold its shape. Cautiously add a little extra orange juice if it seems too thick. Cover and refrigerate.

Next, wash out the blender. Tip the raspberries with the rest of the orange juice and a heaped tablespoon of Sukrin icing sugar into the clean blender and blitz until amalgamated.

Pass the raspberry puree through a fine sieve into a separate bowl. Check the consistency (as above) and add a little more icing sugar if you think it is too tart. Cover and refrigerate.


Instructions - to make the fruit skewers and assemble the dish

First, prepare the fruit garnish by threading pieces of fruit onto mini bamboo skewer(s) in the following order: strawberry (leaf facing inwards), kiwi, mango, grape, mango, kiwi, strawberry (leaf facing inwards). Set aside.

Take a large flat plate and carefully pour or spoon a generous amount of the mango coulis on to one half of the plate - pick the plate up in both hands and tilt it one-way only so that it runs to the outside edge on its side of the plate.

Repeat the process with the raspberry coulis but in this case tilt the plate in both directions so that the two coulis butt right up to the edge of each other (roughly down the middle of the plate) and the raspberry coulis runs to the outside edge of the plate on its side. Do the same thing with a second plate if two couples are dining together.

Take the cheesecake heart(s) out of the refrigerator and working swiftly, carefully turn the heart(s) out into the palm of one hand, remove the muslin with your other hand and gently but swiftly place in the centre of the plate(s).

Place the fruit skewer(s) jauntily alongside (see photograph) and…

Ooh la la! Tuck in!

Notes

The origin of the word coulis is French, from couler, meaning ‘to flow’ - which should give you an idea of the consistency your fruit coulis needs to be for this dessert!

If you think it sounds too tricky tipping delicate cheesecake heart(s) directly into your hand, simply turn the hearts out onto their serving plate first and then carefully pour the coulis around them. 

If you you’re trying to lose weight you can sweeten the cheesecake cream with two tablespoons of Sukrin icing sugar instead of raw honey. This will reduce the carbohydrate grams per serving by 8.5 grams i.e. Carbohydrate 19.5g - not 28g, as shown below.


Carbohydrate 28g Protein 3g - per serving (half the sharing plate)


Cheese Cocktail Biscuits

by Susan Smith in , , , ,


Continuing the theme of keeping Christmas simple, please raise your glasses to these deliciously rich Cheese Cocktail Biscuits! Quick and easy to prepare, these grain-free, low-carb nibbles are just perfect for handing out with pre-dinner drinks. Plus, they’re so tasty, you don’t need to serve any other accompaniments with them.

To get the party started, simply pile these elegant-looking, cheesy, crispy, buttery delights onto a platter and serve with ice-cold dry martinis, chilled Champagne, Manzanilla sherry or frosty glasses of dry white wine. Talk about eat, drink and be merry!

Because they can be stored for up to a week in an airtight container, they’re also the ideal finger-food to accompany drinks when unexpected guests pop-by. 

In fact, I think they’re at their crispiest-best when ‘twice-baked’ and still warm from the oven. So if I’m not going to serve them as soon as they’re made, I just re-heat as many biscuits as I need later on. Simply lay the pre-baked biscuits out on a baking tray and bake at 180℃ for a further 5 minutes, cool briefly on a wire tray and then serve warm to your guests. Totally delicious and utterly brilliant - they must be one of the simplest and fastest party foods to make and bake ever!

Cheese Cocktail Biscuits (makes 20-24 biscuits)

Ingredients

55g butter, chilled and cut into small cubes

100g organic ground almonds

1 tsp gluten-free baking powder

50g Sukrin reduced-fat organic almond flour

80g ‘Parmesan-style’ vegetarian cheese, finely grated

¼ tsp sea salt

large pinch of cayenne 

freshly ground black pepper

1 tbsp cold water

1 small organic egg, beaten

1 dsp each of fresh rosemary and thyme leaves

Maldon sea salt flakes


Instructions

Pre-heat the oven to 180℃ /  350℉  / Gas mark 4. Line a baking sheet with parchment paper.

Put the butter, ground almonds, almond flour, baking powder, cheese, sea salt, cayenne and black pepper into the bowl of a food processor and whizz until just starting to clump together - takes about 30 seconds.

Add the tablespoon of cold water and whizz again until a soft dough starts to form - takes about 15 seconds. 

Tip the dough onto a sheet of non-stick baking parchment and knead lightly until the mixture comes together into a ball. Flatten out into a disc with the palm of your hand, then place another sheet of non-stick paper on top of the dough - this will stop it sticking to your rolling pin. Roll out the dough evenly (do quarter turns of the paper every few rolls) to 4mm-6mm (½ cm / ¼ inch) then using a 5cm plain-edged cutter, cut into rounds.

Place the biscuits on the pre-lined baking sheet - they won’t spread much. Gather up the rest of the dough and re-roll the trimmings, cutting out rounds as before until all the dough is used up - you should end up with about 24 biscuits.

Lightly brush the tops of the biscuits with beaten egg, then sprinkle over the fresh thyme and rosemary leaves. Finally, add a small pinch of Maldon sea salt flakes to each biscuit. 

Bake in the pre-heated oven for 12 to 15 minutes or until the biscuits are crisp and golden brown. You may want to turn the baking tray around half way through the cooking time to ensure the biscuits bake evenly.

Transfer to a wire baking tray and allow to cool before serving, still slightly warm, with drinks.   


Notes

The quality and flavour of the cheese you use for this recipe is vitally important to the end result. I highly recommend you track down the Gran Moravia Parmesan-style vegetarian cheese I’ve used because it is so like Parmesan in both texture and flavour that even I am hard-pressed to tell the difference. It’s a real find for vegetarians who love the taste of Parmesan but don’t want to eat Parmesan Reggiano because it contains animal rennet. This Italian-made hard cheese is truly the one I rave about every time I need a cheese to look, taste and behave like Parmesan - not only is it vegetarian and costs a lot less money, even my pernickety Parmesan-eating cat loves it! 


Carbohydrate 1g Protein 3g - per biscuit

A more-ish accompaniment to pre-dinner drinks, these simple canapés are a real crowd pleaser. If you're making them ahead of time, pop them back in the oven for 5 minutes to crisp them up, before serving them to your guests!

A more-ish accompaniment to pre-dinner drinks, these simple canapés are a real crowd pleaser. If you're making them ahead of time, pop them back in the oven for 5 minutes to crisp them up, before serving them to your guests!


Eggs Florentine

by Susan Smith in , , , ,


I’ve come in for a bit of flack recently from people who say they’d like to eat simple, tasty, healthy (low-carb) food on a regular basis, but at the end of a long day are too tired, busy or hungry to cook the recipes I post on Primal Plate’s blog. 

I can empathise, but like everything else in life, whether you cook or don’t cook really depends on your perception and priorities. The likes of Jo Wicks (The Body Coach) and TV celebrity chefs may be able to briefly convince you that it’s possible to knock up a delicious meal in 15 minutes flat, but try a couple of their ‘simple’ recipes out for yourself (how about a vegetable stir-fry?) and you’ll likely conclude one of two things; 1) there’s something wrong with you because it’s taken you nearly an hour to cook a meal that’s should have taken a quarter of that time, or; 2) it’s a con, so next time you’ll just buy a ‘ready-meal’ instead. 

The fact is, it wouldn’t take me much less than 15 minutes to singlehandedly boil an egg and prepare a couple of slices of buttered toast - let alone to create a family meal. Realistically, if you want to eat well, you need to make space in your life to cook. That said, many Primal Plate recipes are no more complicated than the fast and furious meal suggestions promoted on television and social media. 

Many of the recipes I post often involve nothing more than throwing everything together in a bowl, whacking it into a tin and getting on with life whilst the oven does its thing. I suggest you start with Grain-free Bread and take it from there. 

However, if you want ‘speedy’ recipes, look for those that have no more than 5 main ingredients. For example, Primal Plate’s Courgetti with Cherry Tomatoes & Asparagus, Leek, Stilton & Walnut Stuffed Mushrooms or Italian Style White Fish in Tomato Basil Broth. You can add today’s recipe for Eggs Florentine to the list. 

Personally, I don’t find cooking a chore when it’s a shared opportunity to create something tasty to eat with the people I love, but on this occasion, just to satisfy my curiosity, I asked my ‘sous chef’ John to step down from his food-prep duties, whilst I switched on a stop-watch and got on with making Eggs Florentine without his help. 

No slouch in the kitchen, I could make this recipe in my sleep! In my head, I’d roughly calculated 12 minutes to steam-boil the eggs, 2 minutes to peel them, 4 minutes to make a quick cheese sauce, 3 minutes to wilt and drain some ready-washed spinach and 4 minutes final cooking time under a hot grill. Total: 25 minutes. 

But not so fast! It actually took 37 minutes 21 seconds to bring everything together and about 3 minutes to finish if off under the grill - i.e. 40 minutes for an experienced cook to prepare and serve a simple meal for three people. A novice cook would take longer. My point is, there’s a lot of kidology going down in the kitchen! What you see on TV cookery programmes and on social media is not what you get. I know, because I trained Sarah to compete in Junior Masterchef and the winner in her heat had the majority of his ingredients for his curry pre-made by his mother! Sure, a professional celebrity chef could probably chop an onion in 20 seconds flat but who peeled the damn thing in the first place? Eggs Florentine requires you to grate cheese and peel eggs - simple enough to do but time-consuming. If you’re being filmed, you can make these behind the scenes tasks magically disappear but you have to allow for these ‘extras’ when cooking at home. 

In my case, every partner I’ve ever had (similarly my children) will step into the breach to fulfil the role of peeling, chopping, slicing, grating - as well as the ongoing washing-up. A glass of wine in hand, our combined efforts to get the meal on the table heralds the end of our working day and the start of social time. It’s pleasure not pain and something we all look forward to. 

None of the photographs on Primal Plate are ‘staged’ - it is the actual food we’re about to eat that day. Primal Plate is a cookery blog and its raison d’être is to encourage people to spend more time in the kitchen and learn how to eat properly. By showing you what we eat and sharing innovative, primarily vegetarian recipes that aren’t made with sugar, grains, legumes, unhealthy fats and cancer-causing meat I hope to convince people that cooking at home pays dividends on the time invested, namely: quality time spent with your family, delicious dinners, optimal health, quick loss of excess body-fat and easy weight maintenance.  

You reap the consequences of your actions either way. With so many major health issues now affecting so many people, it’s time for us to get back in the kitchen and to teach our children to do likewise. 

It’s not just that people think themselves too busy to cook - it’s a lack of basic cookery knowledge that’s also part of the problem. Primal Plate is here to help. Off the top of my head, I can think of more than a dozen home-cooked, easy-to-make meals that we turn to for busy days, which haven’t yet featured on this blog. In response to your feedback, I’ll be rolling out my quick, tasty ideas in the forthcoming weeks and months. You’ll find these in the Recipes section of Primal Plate’s blog under Primal Pronto.

To start with, my variation on the classic Eggs Florentine recipe. It's made with spinach, hard steam/boiled eggs and topped with a flour-less Primal cheese sauce before being finished off under the grill. A truly indulgent brunch, light lunch or supper to treat family and friends to. 

Eggs Florentine (Serves 4)

8 organic free-range eggs

1 tbsp olive oil

500g organic spinach, ready-washed

225g crème fraîche (I used Rodda’s crème fraîche because it doesn’t split when heated)

200g Gruyere cheese, finely grated

1 dsp (20g) Dijon mustard

Pinch of cayenne pepper

sea salt and freshly ground black pepper


Instructions

Boil a kettle of water. Pour about 2.5cm (1 inch) of the boiling water straight from the kettle into a saucepan. 

Place a steaming basket inside the pan and place the eggs into the steamer-basket (I find a collapsible steamer most useful because one-size fits all pans). 

Put the lid on the pan and steam/boil the eggs for 12 minutes until hard-boiled. 

Whilst the eggs are cooking, heat up a large pan (big enough to hold all the spinach) over a high heat. When the pan is really hot add a tablespoon of olive oil and throw in the spinach (you may need to do this in 2 or 3 batches - allowing each batch to wilt down slightly before adding the rest). Stir fry the spinach for 1-2 minutes until it has all wilted. 

Tip the cooked spinach into a colander and press out as much liquid as you can - I use a potato masher but the back of a spoon will do. Return to the pan and lightly season with sea salt and black pepper.

Heat the crème fraîche, mustard and 160g of the cheese together in a saucepan over a medium/high heat. Whisk continuously until the cheese has melted and you have a very hot, but not boiling, unctuously smooth, cheese sauce. Take the pan off the heat and season with a pinch of cayenne pepper and two pinches of sea salt.

Tip the eggs into a bowl of cold water then quickly peel them (if they're still too hot, hold them in a clean tea towel so you don’t burn yourself) then place each shelled egg onto a clean chopping board and cut in half.

Preheat the grill to high.

To assemble the dish: spoon the spinach along the bottom of four individual gratin dishes (alternatively, use one large gratin dish). Place four egg halves per person (yolk side down) on top of the spinach then evenly spoon or pour over the hot cheese sauce making sure each egg is covered. Sprinkle the rest of the grated cheese evenly over the top of the eggs.

Finish under the hot grill for 3-4 minutes or until heated through and golden brown. 


Notes

If you’re looking for quick, healthy, vegetarian and Primal meal ideas, organic, free-range ‘pastured’ eggs are the business! However, after all my years in the kitchen I’ve only just ‘twigged on’ to steam-boiling eggs! I can’t even remember where I read about this method, but it’s altogether a much easier and reliable way to boil eggs because you can take them straight from the fridge and, because they’re not actually immersed in the boiling water, they're much less likely to crack when the heat first hits them. They’re cooked to perfection in exactly 6 minutes for a soft-boiled egg and 12 minutes for hard-boiled. Primal Pronto at its best! 

Annoyingly, as with Parmesan cheese, it’s hard (impossible?) to find vegetarian Gruyere. Joseph Heler make British Gruyere with non-animal rennet but having spoken to them today, I was informed they do not supply their cheese pre-packed to supermarkets but rather to retail, wholesale food service suppliers as an ingredient for their ‘ready meals’. You may have more luck finding vegetarian versions of Emmental (the melting quality and nutty taste is quite similar to Gruyere) or Edam (always check the packaging to confirm it’s vegetarian) - use either of these instead of Gruyere if you’re strictly vegetarian.  


Carbohydrate 4g Protein 35g - per portion


Vegetarian Sausages, Creamy Cauliflower Mash and Red Wine & Onion Gravy

by Susan Smith in , , ,


The Brits love sausages. Grilled or fried to perfection, and piled on top of creamy ‘mash’ and slathered in onion gravy, or put to bed in a soft pillowy bread roll with tomato ketchup - sausages taste great! As a teenager, I certainly thought so. Every Sunday night a crowd of us would leave our church youth club and walk into town to catch the bus home. There was a burger stand next to my bus stop that sold what we thought were the most delicious hot sausage ‘cobs’  (a Northern English word for bread rolls) with HP sauce. Myself and my boyfriend, who always walked me to my bus stop before crossing town to catch his own bus home, would shelter together in a shop doorway, like young lovers do, to eat our late night feast before saying a long and wistful goodbye prior to my return to weekly boarding school. My father too always prided himself on buying ‘proper’ fresh sausages from a traditional butcher and would travel 25 miles across the county of Nottinghamshire for the privilege. Whilst nothing like the mass-produced muck that you find on today’s supermarket chiller shelves, my dad probably didn’t realise that sausages per se are one of the oldest processed foods in history and, despite their reputation for tasting good, most sausage-making is almost certainly best done behind closed doors!

Although sausages are currently making a comeback with the consumption of them soaring, producers bulk out their sausages with scraps, fat, cereal, chemical preservatives and water. In my view, it’s high time for a sausage re-think. I don’t want sausages packed out with cereal and other nasties and I don’t want to cause farm animals immeasurable suffering just so I can eat them. Notwithstanding the risks to our health, if you’re a pig, any mention of sausage is never going to be a good idea!

The highlight of many a British BBQ, a cooked English breakfast, or a child’s favourite meal of sausage and baked beans, I think it is perhaps more the walk down memory lane that’s responsible for our adult sausage cravings, rather than the reality of what they are and where they come from. But there is a kinder and healthier way to satisfy our desire.

Today’s blog post features no ordinary ‘bangers and mash’. It is a no-meat, grain-free, potato-free, alternative to this great British staple, which is nonetheless every bit as comforting and tasty as the original and, most importantly, looks just like people think ‘sausage and mash’ should!

For taste and texture these cheesy veggie sausages are as close to their meat counterparts as ‘damn it’ is to swearing! Plus, they cook like a dream (see note below) because they don’t spit and splutter like ‘bangers’ do. Fabulous with low-carb creamy cauliflower mash and served with a deeply satisfying vegetarian red wine and onion gravy, it is the best transition to autumnal comfort food that you could ever hope for. 

Vegetarian Sausages (Makes 12 large sausages - allow 2 sausages per serving)

Ingredients

600g vegetarian Lancashire cheese, crumbled or grated (I coarsely grated mine in a food processor)

4 large spring onions, finely chopped

165g organic ground almonds

20g organic milled flaxseed

15g green banana flour

1 tbsp Marigold organic bouillon powder

2 tbsp fresh thyme leaves, finely chopped

2 tbsp fresh flat leaf parsley, finely chopped

3 large organic eggs, lightly beaten 

Sea salt (about 1½ tsp) and freshly ground black pepper (about ¾ tsp)

Olive oil - for frying


Instructions

Put the grated cheese, spring onions, ground almonds, ground flaxseed, banana flour, bouillon powder and herbs into a large mixing bowl and mix everything together well. 

Add the beaten eggs and a generous amount of seasoning, then using a fork or your hand bring the mixture together so it binds into a soft cheesy dough-like consistency. 

Cover the bowl with cling film and set aside to chill in the refrigerator for a couple of hours.

When the sausage mixture is thoroughly chilled, form into 12 large sausages - about 7.5cm (3”) long, weighing approximately 85g each.

Pour a large glug of olive oil into a large non-stick frying pan and set it over a high heat until the oil is really hot. When the surface of the oil starts to shimmer shallow-fry the sausages until deep golden brown and crispy on all sides, about 5-6 minutes. Drain the cooked sausages on paper kitchen paper. 

Serve hot with the creamy cauliflower mash, red wine & onion gravy and peas for a low-carb, vegetarian ‘twist’ on a favourite British classic. 


Red Wine & Onion Gravy (Serves 4)

Ingredients

1 tbsp olive oil

2 large onions, finely chopped

1 tsp coconut palm sugar

1 tbsp green banana flour

200ml vegetable stock, made with 1dsp Marigold organic vegetable bouillon powder

200ml red wine

1 tbsp Clearspring tamari (soy sauce)

1 fresh bay leaf

Sea salt and freshly ground black pepper


Instructions

Heat the olive oil over medium-high heat in a large pan. Add the onion and coconut palm sugar to the pan, then cover and cook, stirring occasionally, for 4 minutes or until beginning to brown. Reduce the heat to medium/low and continue to cook with the pan lid on for another 15 minutes, stirring from time to time, until the onion is deep golden brown.

Add the banana flour and stir over the heat for another minute to incorporate, then gradually stir in the stock and wine. 

Bring to the boil, stirring continuously until the sauce has thickened, then turn the heat back down to low.

Add the tamari and taste check. Season with a very little sea salt (only if you think it needs it) and some freshly ground pepper 

Add the bay leaf (or thyme sprig) and gently simmer for another 20 minutes. Remove the bay leaf.

Serve this intensely flavoursome gravy really hot with sausages and other vegetarian savoury dishes. 


Creamy Cauliflower Mash (Serves 4)

Ingredients

1 large head of cauliflower, trimmed and cut into florets

1 fresh bay leaf

100g full-fat soft cream cheese (I used Longley Farm)

Generous pinch of freshly grated nutmeg 

Sea salt and freshly grated black pepper


Instructions

Boil a kettle of water.

Place the cauliflower in the top half of a steamer with the bay leaf tucked in-between the florets. 

Pour the boiling water from the kettle into the bottom half of the steamer, add some sea salt then bring back to the boil. Steam the cauliflower with the pan lid on for about 8 minutes, until it is cooked through.

Tip or spoon the cauliflower into a large bowl and allow it to cool down for a couple of minutes - this will let the steam evaporate and make for a drier mash. Remove the bay leaf. 

Using a stick blender or food processor, whizz the cauliflower into a rough puree. Add the salt, pepper, nutmeg and cream cheese then briefly process again into a creamy mash consistency.

Put the cauliflower mash into a clean pan and gently re-heat, stirring from time to time so it doesn’t catch on the bottom of the pan. 

Serve hot as a delicious low-carb alternative to mashed potato.   


Notes

Keep the formed ‘sausages’ really cold (in a refrigerator) until you’re ready to start cooking them. This will ensure that they stay sausage-shaped in the cooking process i.e. cook to a crispy exterior before the cheese gets a chance to melt and they become misshapen. For the same reason, it is important not to overcrowd the pan because this lowers the temperature of the oil. You want your sausages to fry quickly in the hot oil, not semi-steam, which can cause them to ‘squidge' out of shape as you’re turning them over in the pan (also causing them to absorb more oil).  

The uncooked sausage mixture will keep for several days in a refrigerator. With this recipe being hot-off-the-press I haven’t tried freezing it yet but I think that would probably work too.

If it looks like a sausage, tastes like a sausage and behaves like a sausage it probably IS going to be mistaken for a non-vegetarian sausage! Apart from the difference in colour when you bite into them (pale gold cheese colour rather than cooked-meat-grey) I’d defy anyone to distinguish the difference between these veggie sausages and meat ones, especially when cold. Cooked leftovers, eaten next day straight from the fridge, still had their crispy exterior intact and tasted so ‘porky’ I was genuinely gob-smacked! Which means I’ve also developed a brand new picnic food to go, which is an absolute god-send for when Sarah and I are doing full-day weddings on the move #happy

If you want a smooth gravy i.e. without onion bits,  strain through a fine sieve into a clean pan before re-heating and serving.

If you think the finished gravy is a little too thick just add more water to thin it out to your liking.

I used steamed cauliflower to create a creamy ‘mash’ that’s very similar to - albeit a lighter, low-carb version of - mashed potatoes. Sweet potatoes, carrots, celeriac, swedes, parsnips and turnips - either alone or in combination - all make a good alternative to potato mash. Just be wary of stacking up the carbohydrates when you eat the sweeter root vegetables i.e. parsnips and sweet potatoes.


Carbohydrates 11g Protein 40g - 2 sausages per serving

Carbohydrates 13g Protein 1g - per serving of gravy

Carbohydrates 12g Protein 6g - per serving of creamy cauliflower mash