Thai Green Curry With Prawns & Thai Green Garden Curry

by Susan Smith in , , , ,


Ever since I walked into the Royal Thai restaurant in Nottingham 20 years ago, I have been enchanted by Thai cuisine. Not so much the ‘farang' (Thai for Western foreigners of white descent!) version of Thai food, with our predilection for all things deep-fried - a sort of spring rolls with everything attitude - but the fresh and light, hot and spicy flavours brought together in a variety of harmonious dishes that seem to make every Thai meal a banquet.

Without dairy and hardly any emphasis on meat, Thai cooking is the embodiment of all the main flavour components - sweet, sour, spicy, salty and bitter - perfectly balanced in playful, imaginative dishes that are full of colour and texture. I’ll never forget the sheer joy and excitement of one gorgeous Thai girl called Tinkerbell (how endearing a nick-name is that?) as she ran out from the restaurant’s kitchen to proudly show us her first representation of a beautiful bird she’d painstakingly carved out of a carrot! 

Our first visit to the Royal Thai was an attempt to educate ourselves in anticipation of a month long business trip to Bangkok. At first they must have smiled at our naivety, but, prior to the journey we were generously afforded numerous ‘insider’ traveller’s tips and we quickly became one of their more regular customers…hungry for their companionship as much as the food! Subsequently, the amazingly beautiful, gracious and intelligent Thai girls running the business at that time welcomed us with open arms into the Thai community, and for many years it was as if we were part of their family. Sadly, the girl I most fell in love with died in a road traffic accident shortly after opening a second restaurant in Nottingham (formerly known as Siam Thani). Nang was the dearest of friends to me and the absolute epitome of all that I now associate with Thai people generally - kind, generous and incredibly friendly.

Now that we’re low-carb and Primal, it’s not so easy to eat out in Thai restaurants - you really do need lots of steamed rice to quieten down the chilli-heat - but for the home cook, authentic-tasting Thai food is simple and fast to prepare, and because you’re in control it doesn’t have to be the hottest of the hot. 

Prawns are synonymous with Thai cookery, but their popularity comes at a price. A violent, Asian slave trade exists to produce most of the prawns for sale in Western supermarkets, so please be careful that the prawns you buy are ethically and responsibly sourced. Choose organic king prawns from Waitrose or Honduran raw prawns from M&S. Thank you. Or you could forego the prawns altogether by opting for our vegan-friendly, equally flavoursome, Thai Green Garden Curry.

I’ve paired Primal Plate's tasty, just nicely spicy, warming green curry with pak-choi but Cauliflower Rice is good too. Vegans and vegetarians can simply substitute cherry tomatoes and asparagus tips for the prawns. Hand-carved vegetable flowers and birds are optional!

With food as delectable as this, no wonder Thailand is known as the “land of smiles”.

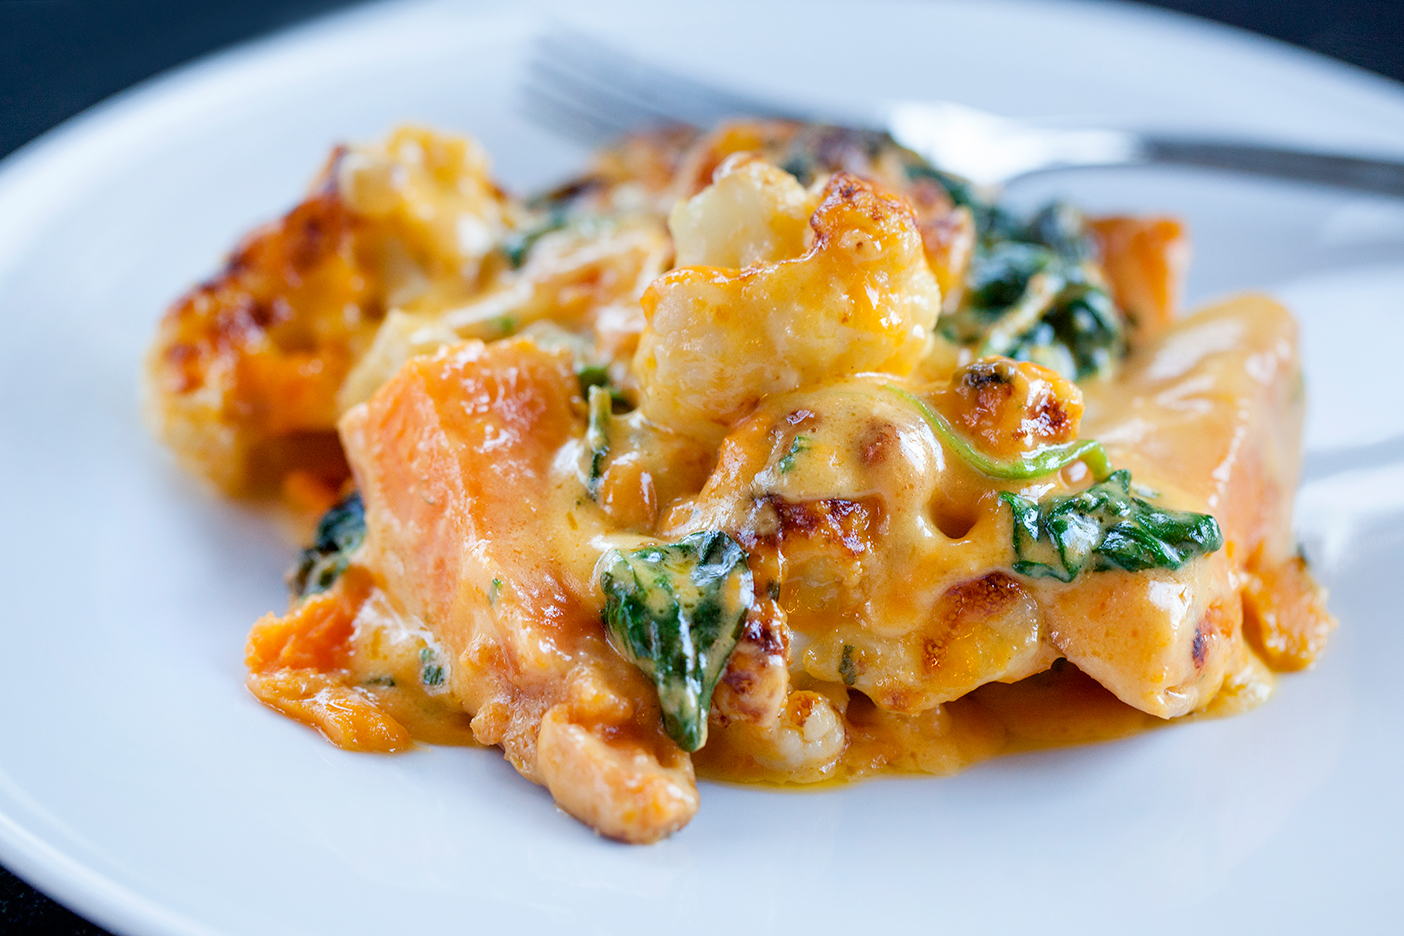
Thai Green Curry With Prawns (Serves 4) 

1 tbsp organic coconut oil

2 medium organic sweet red peppers, cored, de-seeded and cut into thin strips

4 medium/large organic spring onions, sliced diagonally into 5 or 6 pieces  

2 x 400ml tins organic coconut milk (full fat)

1 tbsp Marigold organic Swiss vegetable bouillon powder

4 tsp Thai green curry paste

1 tbsp organic tamari

450g raw peeled organic king prawns

200g frozen petits pois, defrosted  

½ tsp sea salt and freshly ground black pepper

20-30ml freshly-squeezed lime juice

2-3 drops organic liquid stevia

20g fresh coriander leaves, chopped

Thai Green Garden Curry

Simply follow the instructions given below - omitting the prawns and substituting with:

300g organic cherry tomatoes, halved

300g asparagus tips, trimmed and cut in to 5cm (2”) pieces

To Serve

2 x 235g packs pak choi, washed, prepared (*see below) and lightly steamed for 3 minutes. 

*If using very young pak choi they can be left whole or cut into halves or quarters. However, larger stems of pak choi will cook more evenly and are much easier to manage on the plate if you cut the leafy tops off their white stems. If the outer stems and leaves are still too large, split them in half down the middle. Place the white stems into the bottom of the steamer, then pile the green leaves on top and steam for 3 minutes with the pan lid on.


Instructions

Fill and boil a kettle of water. Pre-heat 4 large serving dishes/bowls. 

For making the Thai Green Garden Curry: Pour some of the boiling water from the kettle in to a medium saucepan. Bring back to the boil, throw in the asparagus and cook for just 2 minutes (do not overcook them, they should still have some ‘bite’). Drain and refresh the blanched asparagus in cold water (or place under a cold running tap) to stop the cooking process and set their bright green colour. Drain again and set aside.

To quickly defrost the petits pois: Put the peas in a heatproof jug, pour over the boiling water then drain and set aside.

Melt the coconut oil over a medium/high heat in a large, deep sauté pan. Add the pepper strips and spring onions to the pan and stir-fry for about 2 minutes or until just beginning to soften. 

Add the bouillon powder and the green curry paste and continue to stir-fry for a further 30 seconds - try to avoid breathing in the fumes at this stage, they’re quite pungent!

Pour the coconut milk into the pan and bring the mixture to the boil whilst stirring constantly. Once it comes to the boil turn the heat down to medium, then add the tamari, half the lime juice and a single drop of liquid stevia. Taste. Add a pinch of sea salt and a good grinding of black pepper - plus an extra drop of stevia, if you think it needs it. 

Let the sauce gently bubble away over a medium heat for 5 minutes to allow it to reduce down slightly.

Meanwhile fill a steamer with the rest of the boiling water from the kettle. Place the pak choi in the top of the steamer and cook with the pan lid on for 3 minutes.

Whilst the pak choi is cooking, tip the prawns (or, if making Thai Green Garden Curry, the cherry tomatoes and blanched asparagus tips) and the petits pois into the curry sauce and cook for a further 2 minutes or until the prawns turn pink and are completely opaque - or if making the Thai Green Garden Curry, just until the tomatoes, asparagus and peas are warmed through. 

Take the pan off the heat and stir in half the chopped coriander. Check the seasoning again and adjust to taste - also add a little more lime juice and/or another drop of stevia, if needed.

Pile the cooked and drained pak choi in the centre of the four pre-warmed serving bowls. Carefully ladle the green curry over the top dividing the prawns and vegetables equally between each bowl.

Sprinkle over the rest of the coriander and serve immediately. 


Notes

N.B. To keep the Thai green curry fresh and vibrant you need to be careful not to over-boil it in the final two minutes of cooking time. Gently heat through until just below boiling point. If you over-cook it at this stage, you’ll end up with tough prawns, collapsed tomatoes and dirty-looking, more-khaki-than-green, vegetables. Not very nice!


Carbohydrate 21g Protein 25g - per serving (with prawns)

Carbohydrate 26g Protein 10g - per serving (with cherry tomatoes & asparagus)


Cheesy Sweet Potato, Cauliflower & Spinach Gratin

by Susan Smith in , ,


Want something fast, fresh and fabulous for supper tonight? This vegetarian cheesy gratin ticks all the boxes - comforting, healthy, delicious and on the table in under 45 minutes.

Although today’s recipe includes full-fat crème fraîche, cheese and sweet potatoes, let’s be clear - a Primal, low-carbohydrate / high fat diet (LCHF) does not mean eliminating carbohydrates completely or that it’s okay to gorge yourself on fatty food. In my view, Dr. Atkins was much maligned and misrepresented in this respect. It does mean that oftentimes you’ll find Primal Plate recipes are contrarian to decades of public health advice which has hoodwinked most people into believing that saturated fat - fatty meat, milk, butter and cheese - is the root cause of clogged-up arteries, high cholesterol, heart attacks and obesity. Truth is, there’s never been a shred of reliable scientific evidence that can demonstrate saturated fat is harmful to human health. In fact, numerous scientific studies show the opposite to be true. The real culprit for the type 2 diabetes epidemic and obesity crisis (which are themselves a risk factor for heart disease and stroke) is a fat-phobic society indoctrinated into believing that a healthy diet is one low in fat and high in carbohydrates (LFHC). 

This myth has been perpetuated for the past fifty years or so and it’s time we turned things around. In a nutshell: It’s not fat that makes you fat and sick, it’s sugar. 

In layman’s terms, all the carbohydrates we eat are converted by the body into a type of sugar called glucose. Glucose is fuel for the cells and is transported around the body in the bloodstream. In response to glucose in the bloodstream the pancreas secretes insulin. Without insulin, glucose stays in the bloodstream - it’s insulin that allows glucose to enter the cells (of the brain, heart, liver and muscles) to provide the energy for them to work. Or, if it’s not required for immediate use, to be converted into glycogen and stored in the liver and muscles for later. 

However, once the cells are full to the gunnels with excess glucose they become increasingly resistant to the call of insulin to open up their cell doors and let more in. When there’s nowhere for glucose to go it stays in the bloodstream and blood sugar levels stay high - a toxic situation. What follows is pancreatic panic! In a frantic attempt to get rid of excess glucose in the bloodstream, the pancreas makes even more insulin. Unfortunately excess insulin is also toxic so then the cells become even more insulin resistant. Catch 22!

Eventually the over-production of insulin will help convert the excess glucose into fat but in the meantime the glucose in the bloodstream forms a sort of sludge that blocks arteries and causes systemic inflammation - the underlying cause of multiple degenerative diseases, including heart disease and cancer. Furthermore, an excess of insulin stops the fat-burning enzyme lipase from working efficiently inside the cells, so you don’t even burn off the fat that’s been stored!  

Most human beings are genetically predisposed to insulin resistance, which worsens with age and inactivity. The solution is to stop feeding the problem with high carbohydrate food - no grains, no potato, no sugar - and to exercise more. When you’re not constantly topping-up the body with sugar and starches it can start burning fat for energy instead. Without high carb foods spiking your blood sugar, natural, healthy fat becomes your new best friend. It satiates your appetite, you feel full for longer, it stops sugar cravings and it helps make all food look and taste yummy. 

As for the shoddy science and scaremongering that aims to convince you otherwise, I’ve been on the frontline of a randomised double-blind controlled study (the ‘gold-standard’ of scientific research) when I taught a group of asthmatics the Buteyko Method in the first UK Clinical Trial funded by the National Asthma Campaign. Unfortunately, several participants reported back to me that the study was biased against Buteyko because during their reviews with research staff they had been actively encouraged to continue using their asthma medication. According to our carefully compiled records, over ninety per cent of the Buteyko group either significantly reduced or gave up their bronchodilators completely during the study. However, when the scientific paper was finally published these remarkable results were buried. True, there was much scientific gobbledygook that I wasn’t familiar with, but suffice to say it took several more years before the method was given any credence whatsoever by the NHS. Why did I expect otherwise? Like most people I never imagined that highly respected academics would stoop so low. In reality, too many vested interests - years of study potentially wasted, livelihoods at risk, research funding cut, pharma greed and charity donations threatened - is a massive incentive to keep schtum or worse, go on the offensive to protect the status quo. It’s just how egos rock n’ roll. Nobody wants to admit they’ve been complicit in giving health advice that actually destroys tens of thousands of peoples’ lives but the truth is, there’s safety in numbers and the powers that be are far more interested in self-preservation than your health and well-being.

Dr Aseem Malhotra says it best: “In my opinion a perfect storm of biased research funding, biased reporting in the media and commercial conflicts of interest have contributed to an epidemic of misinformed doctors and misinformed patients. The result is a nation of over-medicated sugar addicts who are eating and pill-popping their way to years of misery with chronic debilitating diseases and an early grave.”

After years of trial and error, I found my way through the lies, confusion, chronic illness and creeping weight gain to discover that the exact opposite of ‘conventional wisdom’ is the truth. It convinced me that eating LFHC is tantamount to death, disease and obesity by the Food Pyramid and that switching to LCHF diet stops the rot. However, if you’re overweight or unwell please don’t ‘wait and see’ how the continuing debate about fat plays out between the warring scientific community - and please don’t take my word for who’s right either. For a few short weeks, simply test out the LCHF hypothesis yourself - using Primal Plate recipes for your inspiration - to see if it works for you.   

Primal Plate is proud to play its part by translating unbiased scientific evidence into a pleasurable eating plan for life. If you want to join in, I think the quick and easy-to-make cheesy deliciousness of today’s vegetable gratin might be a very good place to start. 

Although a LCHF diet avoids white potatoes, we still eat orange-fleshed sweet potatoes because of their versatility in recipes and powerful nutritional punch. In spite of them being sweet-tasting, they have more fibre, fewer calories and less carbohydrates than white potatoes and their natural sugars are slowly released into the bloodstream, which helps ensure a balanced and regular source of energy, without the blood sugar spikes associated with fatigue and weight gain. They’re also a beautiful complementary colour to the Red Fox Leicester cheese I’ve used in the recipe!

It’s really important not to stint on the quality of crème fraîche you use for making the cheese sauce. Unlike most cheese sauces, this one isn’t thickened with flour so its success relies on the crème fraîche not breaking down during the cooking process. For a really silky-smooth, cheese sauce finish, I always recommend Rodda’s crème fraîche (available from Waitrose) because it doesn’t curdle or turn into a thin liquid when heated - this is what usually happens with lesser varieties. If you can’t find Rodda’s, Longley Farm’s crème fraîche is also a good bet.

Cheesy Sweet Potato, Cauliflower & Spinach Gratin (Serves 4) 

Ingredients

280g Leicester cheese (I use Red Fox), coarsely grated

250g crème fraîche (I use Roddas)

1 dsp Dijon mustard

Sea salt and freshly ground black pepper

3 medium orange-fleshed organic sweet potatoes, unpeeled and cut into 1-2inch chunky ‘chips’

1 medium organic cauliflower, broken into largish florets

235g organic spinach, washed

2 tbsp fresh chives, finely chopped


Instructions

Fill the bottom of a steamer with boiling water from the kettle and butter a large gratin dish.

Pre-heat the oven to 190℃ / 375℉ / Gas mark 5 

Steam the sweet potatoes in the top of the steamer, covered, for 10-12 minutes. 

Whilst the sweet potatoes are steaming, make a cheese sauce by whisking the crème fraîche, Dijon mustard and three quarters of the grated cheese together in a medium-sized saucepan set over medium heat. Keep whisking everything together until the cheese has fully melted in to a silky smooth, hot cheese sauce. Don’t let it boil. Season to taste with sea salt and freshly ground black pepper then take the pan off the heat, cover and set aside. 

Using a large metal draining spoon scoop the cooked sweet potato wedges out of the top of the steamer and lay them flat in the bottom of the gratin dish. Cover and keep warm.

Add the cauliflower florets to the steamer basket and steam them, with the pan lid on, for 5-6 minutes. They need to be just cooked through, so don’t let them get too soft or soggy.

Arrange the cooked cauliflower, placing it evenly between the potato wedges in the gratin dish. 

Now pile the spinach into the steamer basket, put the lid back on and steam for 1-2 minutes until the leaves have just collapsed. Drain well then add to the sweet potatoes and cauliflower in the gratin dish spreading it out evenly. Sprinkle the chopped chives on top. 

Whilst stirring constantly, re-heat the cheese sauce to just below boiling point. Spoon over the vegetables making sure they’re all nicely coated. Finally, sprinkle over the remaining cheese and bake the gratin in a hot oven for 15 minutes. 

At the end of the cooking time switch the overhead oven grill to hot and continue to cook the gratin a little longer under the direct heat until the top is gorgeously crisp and golden. 

Serve immediately with a fresh green salad, if liked.  


Carbohydrate 43g Protein 26g - per serving


Cheddar Muffins

by Susan Smith in , , , , ,


Tasty, filling and sustaining, these yummy Cheddar Muffins are a high-protein, low-carbohydrate viable alternative to bread and the perfect accompaniment to soup. So perfect, that soup need no longer be relegated to starter or snack status but can sit proudly at lunch or dinner as the main event. The fact is that these bread-like Cheddar Muffins pack enough nutritional oomph to turn every veggie soup into a satisfying meal. 

But don’t stop there. Their ‘breadiness' invites you to slice them through and fill them like a sandwich. They also toast beautifully - you only need to toast their cut side - before serving with scrambled eggs, creamy mushrooms, cheese and tomato or any other toast topper that takes your fancy. 

I like them best of all when they’re still warm from the oven and spread with generous amounts of grass-fed butter. A veritable nutritional powerhouse of goodness, it appeals to the child in me to split them in half horizontally (like a scone), then eat the all the bottom halves before slowing-down to savour the warm, golden, crunchy, deliciousness of their cheesy toppings. If you’re craving comfort food, Cheddar Muffins can be on the table in 40 minutes - with satisfaction guaranteed.  

Cheddar Muffins (Makes about 10)

IngredientsMakes 10

75g unsalted butter, melted

150g ground almonds

50g coconut flour

2 tsp baking powder

1 tsp sea salt

1 tsp paprika

freshly ground black pepper

4 large eggs, beaten

6 tbsp diluted milk (50/50 with filtered water)

125g organic vegetarian Cheddar cheese, finely grated

30g vegetarian parmesan-style cheese, finely grated

Instructions

Pre-heat the oven to 200℃ (fan) / 400℉ / Gas mark 6 and line a muffin tray with 10 large paper cases.

In a small saucepan melt the butter over a very low heat. Take the pan off the heat and allow the butter to cool slightly.   

In a large bowl mix together the ground almonds, coconut flour, baking powder, salt, paprika and black pepper. Add the grated Cheddar and combine well with a fork.

Add the melted butter, the beaten eggs & the diluted milk to the dry ingredients and continue to mix everything together well with a fork until a thick batter is formed.

Spoon the batter into the muffin cases (about 65-70g mixture per muffin) - for speed I use a self-releasing ice cream scoop - then lightly press the mixture down evenly into the paper cases with the back of a fork.  

Sprinkle over the grated Parmesan-style cheese, dividing it equally between the muffins and bake in the oven for 25 minutes (I turn the muffin tray around halfway through the cooking time to ensure even browning). 

Best served still warm from the oven.


Notes

Whilst I recommend these muffins are served warm fresh from the oven, they do have a tendency to vexingly stick to their paper cases until they’ve gone cold. If you don’t want the hassle of scraping remnants of muffin off their paper cases with a teaspoon, use non-stick tulip wrap muffin cases instead. 

Carbohydrate 7g Protein 14g - per muffin


Spiedini - Two Ways

by Susan Smith in , , ,


Once you’re committed to a low-carb/high fat, Primal, predominantly vegetarian diet, the option of eating-out well often requires imagination, ingenuity and well-developed interpersonal skills! Whatever you do, don’t over-indulge at the bar before ordering your meal because you’re still ‘on-duty’ until you’ve successfully managed to cut through the swathe of waiting staffs’ confusion when you tell them that you don’t eat any grains, potato, meat, legumes, pulses or sugar! I can’t tell you how many times I’ve patiently explained that pasta counts as grain and it’s dried legumes e.g. chickpeas, lentils, beans - not fresh beans and peas - that are off limits. I’ll even re-jig the menu in advance so they can ask Chef if we can mix and match elements from several different dishes already listed to create just one meal that we can eat! That done, there are still numerous occasions when the bread basket appears, even after our in-depth discussion! 

Happily, there are three notable restaurant exceptions in our locale - namely, Hart’s, World Service and Piccolino - that without any fuss are still able to feed us ‘body and soul’. Thanks guys! In fact, the inspiration for this Primal Plate Valentine’s day main course of Spiedini (the Italian for ‘skewer’) is an almost copy-cat version of our favourite dish on Piccolino’s menu - skewered scallops, tuna and prawns. As with previous Primal Plate recipes, I felt compelled to conjure up a vegetarian equivalent and, as you can see in the photographs, swapping vegetables and Halloumi cheese for fish doesn’t compromise on its looks or yumminess. 

As this is a Valentine’s day celebration dinner for two, I’ve gone all fanciful and Italianesque when naming the recipes. After all, fish skewers or vegetarian skewers doesn’t do either justice, whilst Spiedini Di Pesce and Spiedini Vegetariani sound altogether more romantic and enticing…you can always trust the Italians on this score! 

However, in case you’ve not already picked up on my last blog post, the pièce de résistance of this special occasion meal is dessert. I think Feeling Fruity Sweet-Hearts is probably my best creation on this blog to date! Not only does this bold, colourful, sassy dessert say “I love you”, it tastes absolutely divine. It's a sweet treat that takes no more than 30 minutes hands-on time in the kitchen - but looks like fine restaurant dining at its best. A stunning, creamy, dreamy, fruity pudding that offers up pure pleasure by the mouthful. Talk about swoon! 

And as if this wasn’t enough to make you feel truly cared for, can you believe that this healthy, low-carb, two course dinner à deux boasts no more than 40g carbohydrate per person with Spiedini Di Pesce and just 44g with Spiedini Vegetariani?

When all you need is love, this amazingly simple, seriously impressive food served with a decent bottle of wine (I think Champagne’s obligatory) makes for a romantic, not-so-sober evening at home that has all the potential for this year's Valentine celebration being one to remember.

Spiedini Di Pesce

Spiedini Di Pesce

Spiedini Di Pesce (Serves 2 - Makes 6 skewers)

Ingredients

325g thick lean fresh tuna steak (sustainably sourced, MSC certified)

6 king scallops (sustainably sourced, MSC certified)

6 large peeled prawns (sustainably sourced, MSC certified)

24 ripe cherry tomatoes on the vine

50g organic butter, melted

3 tbsp parsley, finely chopped

Juice of ½ large organic lemon

sea salt and freshly ground black pepper

Olive oil - for cooking

1 organic lemon, halved - to serve

Sprigs of flat-leaf parsley - to serve

Organic Romaine lettuce, finely shredded - to serve

6 bamboo skewers - soaked in cold water for 30 minutes

Raw, marinated Spiedini Di Pesce ready for cooking

Raw, marinated Spiedini Di Pesce ready for cooking

Spiedini Di Pesce is delicious served simply with crispy lettuce and a wedge of lemon

Spiedini Di Pesce is delicious served simply with crispy lettuce and a wedge of lemon

Instructions 

Cut the tuna steak in to 6 even-sized pieces.

Thread a tomato, a prawn, a tomato, a scallop, a tomato, a tuna chunk and finally a tomato (in that order) on to 6 skewers and place them on to a large flat plate.

Combine the melted butter, parsley and lemon juice together and season with sea salt and freshly ground black pepper. 

Liberally brush the Spiedini di Pesce with the butter mixture and set aside.

Pre-heat the oven to 220℃ / 425℉ / Gas mark 7

Line a large baking tray with non-stick foil or a silicon baking sheet. 

Lightly oil a griddle pan with olive oil and set it over a medium/high heat. When the pan is really hot - you should see a slight haze rising - place the spiedini in to the griddle pan, buttered side down. Cook over a high heat for about 1-2 minutes, without moving.

Whilst they’re cooking, brush more of the butter mixture over the top of the spiedini. Once the underside is starting to lightly char, gingerly lift the ends of the skewers up with your fingers and turn them over. Cook for another 1½ minutes or so, then frequently turn the skewers thereafter making sure the surface of the fish stays in contact with the griddle pan - gently press it down once or twice with the back of a flat spatula if it doesn’t seem to be cooking evenly.

The process of griddling the spiedini should take no longer than 5-6 minutes, by which time the pieces of fish will be attractively and lightly charred and the prawns just turning pink. N.B. At this stage, the fish doesn’t need to be cooked all the way through but it does need to have taken on some stripes of gold from the grooves in the pan. This will likely mean cooking the spiedini in two batches. An overcrowded pan causes food to release too much moisture and you don’t want the fish to end up steamed rather than griddled.

Transfer the griddled spiedini to the baking tray and place in the hot oven for a further 3 minutes until sizzling hot.

Arrange three Spiedini di Pesce on each of two serving plates lined with shredded lettuce and garnish with lemon halves and flat leaf parsley. 

Serve immediately. 


Carbohydrate 12g Protein 62g - per serving (3 skewers per person)


Spiedini Vegetariani (Serves 2 - Makes 6 skewers)

375g (1½ 250g packs) Halloumi cheese, cut into 18 pieces (approx 4cm x 4cm x 2.5cm each)

24 ripe cherry tomatoes on the vine

12 marinated baby artichoke hearts, drained

12 large fresh basil leaves

1 medium/large organic courgette, cut lengthways into 12 very thin slices (best done on a mandolin or with a vegetable peeler)

50g organic butter, melted

3 tbsp fresh mint, finely chopped

Juice of 1 lime

sea salt and freshly ground black pepper

Olive oil - for cooking

Organic Romaine lettuce, finely shredded - to serve

1 lime, halved - to serve

sprigs of bay leaf or mint leaves - to serve

6 bamboo skewers - soaked in cold water for 30 minutes

Raw, marinated Spiedini Vegetariani ready for cooking

Raw, marinated Spiedini Vegetariani ready for cooking

Instructions

Cut the halloumi in to 18 even-sized pieces.

Roll-up a single basil leaf and a baby artichoke heart inside each slice of courgette. Repeat until you've made 12 courgette and artichoke rolls.

Thread a tomato, a piece of halloumi, a tomato, a courgette/artichoke ‘roll’, a piece of halloumi, a tomato, a courgette/artichoke ‘roll’, a piece of halloumi and finally a tomato (in that order) on to 6 skewers and place them on to a large flat plate.

Combine the melted butter, mint and lime juice together and season with sea salt and freshly ground black pepper. 

Liberally brush the Spiedini Vegetariani with the butter mixture and set aside.

Pre-heat the oven to 220℃ / 425℉ / Gas mark 7

Line a large baking tray with non-stick foil or a silicon baking sheet. 

Lightly oil a griddle pan with olive oil and set it over a medium/high heat. When the pan is really hot - you should see a slight haze rising - place the spiedini in to the griddle pan, buttered side down. Cook over a high heat for about 1-2 minutes, without moving.

Whilst they’re cooking, brush more of the butter mixture over the top of the spiedini. Once the underside of the cheese is turning golden, gingerly lift the ends of the skewers up with your fingers and turn them over. Cook for a further minute or so then frequently turn the spiedini thereafter until all the pieces of halloumi are attractively and lightly charred and striped with gold from the grooves in the pan. N.B. This will likely mean cooking the spiedini in two batches. An overcrowded pan causes food to release too much moisture and you don’t want steamed spiedini instead of griddled! The total griddling time for each batch of skewers should not exceed 5-6 minutes.

Transfer the griddled spiedini to the baking tray and place in the hot oven for a further 3 minutes until sizzling hot.

Arrange three Spiedini Vegetariani on each of two serving plates lined with shredded lettuce and garnish with lime halves and sprigs of bay leaves or mint.

Serve immediately. 

Spiedini Vegetariani with crisp lettuce and a squeeze of lime

Spiedini Vegetariani with crisp lettuce and a squeeze of lime

Notes

Threading halloumi on to skewers can be quite a challenge because the cheese has a tendency to split. My man watched me get quite frustrated before suggesting that maybe he could literally drill a hole in the cheese first! I told him that this wasn’t something I could specify as part of a food recipe. Nevertheless, he proceeded to find a fine metal implement (actually the end of a very fine screwdriver - clean of course!) and gently rotated it back and forth into the centre of the cheese to ‘carve’ out a small hole, which actually meant it didn’t fall apart when I pushed the skewers through. I was gobsmacked! Needless to say, he’s voted himself for the job in future!

Furthermore, it does seem to matter what type of halloumi cheese you’re using. I found that Waitrose’s Hand Folded Halloumi With Mint performed best for taste, texture and skewering.

If the halloumi does fall off the skewers whilst griddling just carry on with the cooking process - they can easily be put back together on the plate and no-one will notice! 


Carbohydrate 16g Protein 47g - per serving (3 skewers per serving)


Savoury Primal Pancakes with Tomato, Cheese & Mushrooms

by Susan Smith in ,


My focus is on Valentine’s Day this week, so in terms of Primal Plate’s blog I don’t have a lot of time to rabbit-on about pancakes. However, in honour of Shrove Tuesday I have re-visited last year’s Primal Pancakes and made a few adjustments to the recipe. Namely, I’ve reduced the amount of carbs by decreasing the amount of arrowroot flour and improved my pancakes ‘flip-ability’ (is that even a word?) by increasing the amount of fat. Sometimes I think being a food blogger has an air of mad-food-scientology about it! 

Anyway, it all works. So if you’re trying to lose weight, want to eat low-carb, follow a Primal or vegetarian, gluten-free, grain-free diet, these delicious, savoury pancakes are a ‘flipping-good’ alternative to traditional wheat-based ones!

Savoury Primal Pancakes with Tomato, Cheese & Mushrooms (makes 10)

Ingredients - for the pancakes

50g organic butter (or coconut oil)    

300 ml raw whole milk or homemade organic almond milk or 50/50 filtered water & milk

4 large organic eggs                            

75g organic ground almonds            

40g Sukrin organic reduced-fat coconut flour            

15g organic arrowroot flour                        

½ tsp organic apple cider vinegar                    

½ tsp gluten-free baking powder

Extra coconut oil, for cooking


Ingredients - for the pancake filling and topping 

1 tbsp olive oil

230g organic button mushrooms, wiped and finely sliced

1 x 400g tin organic chopped tomatoes ( I used Mr Organic)

2 tbsp fresh basil leaves, finely sliced

1-2 drops organic liquid stevia

250g full-fat natural cottage cheese (I used Longley Farm)

75g vegetarian parmesan-style cheese, finely grated (I used Gran Moravia)

Fresh basil sprigs - for serving


Instructions - to make the pancakes

Put the butter (or coconut oil) in a small saucepan and set over a very low heat until just melted.

Then, place all the ingredients for the batter into a blender and blend thoroughly until it is smooth and the consistency of pouring cream.

Heat a 20cm (8 inch) non-stick pancake pan over a medium heat until it is hot.

Add a smidgeon of coconut oil to the pan, then quickly ladle - or pour - just enough of the batter into the pan to coat the base thinly (¼ US Cup - about 60 -70ml should do it). Ideally, you’d be blessed by being naturally ambidextrous at this point - swiftly pouring the batter into the frying pan with one hand whilst simultaneously tilting and turning the pan to ensure it levels out evenly with the other. N.B. the pancakes should be as thin as possible.

Fry over a medium heat for about 2 minutes without moving. Then, using a flat-bladed non-stick spatula, flip the pancake over and cook for a further 1 minute. 

Slide each pancake onto a large flat plate and repeat this process until all the batter has been used to make 10 pancakes.

Instructions - to make the filling

Heat the oil in a large frying pan and fry the mushrooms until tender

Add the tomatoes and basil, stir well and continue to cook uncovered on a low heat until the mixture has reduced down to a thick puree.

Take the pan off the heat and season the mixture to taste with sea salt and freshly ground pepper - adding 1-2 drop of liquid stevia if the tomatoes taste too acidic.

Add the cottage cheese and 25g parmesan-style cheese then stir everything together until thoroughly combined.

Instructions to assemble the pancakes and cook

Pre-heat the oven to 190℃ / 375℉ / Gas mark 5

Lay one of the pancakes flat on a work surface with the side that was cooked last uppermost (best looking side underneath). Spoon a large (heaped) tablespoon of the filling along the bottom edge then roll the pancake up into a cigar shape and place into a large gratin dish with the loose edge facing downwards (so it can’t unfurl). 

Fill the rest of the pancakes in the same way, until all the mixture is used, laying each pancake snugly side by side in the dish.

Sprinkle with the remaining 50g parmesan-style cheese and bake in the oven for 15-20 minutes until piping hot and golden brown on top. 

Garnish with a sprig of basil and serve immediately with a crisp green salad. 


Carbohydrate 6g Protein 11g - per pancake (allow 2 pancakes per serving)


Cream of Cauliflower Soup

by Susan Smith in , , ,


Back in the 1960s, for one brief year, I attended catering college. During our daily student briefings, prior to lunch service in the college’s public restaurant, I learned culinary French. For example, today’s recipe for Cream of Cauliflower Soup would have appeared on the restaurant menu as Crème Dubarry. 

It’s funny how half a century later the words ‘Crème Dubarry’ kept haunting me when, due to an oversight, I’d defrosted too much milk. A glut of defrosted milk taking up too much fridge space is not a good thing, so I knew I needed to conjure up a ‘cream of something’ soup and do it quickly. A foray into my second fridge (I have one solely dedicated to storing fresh fruit and vegetables!) revealed an organic cauliflower and a couple of leeks left over from last week’s food shop. Clearly my subconscious was trying to tell me something, because at this point cream of cauliflower soup was a foregone conclusion! And, since I really like the story of how cauliflower soup came to be known as Crème Dubarry, so was today’s blog post.

Madame du Barry was a very beautiful, highly desirable courtesan - a high-class prostitute to the men of the French court - before officially becoming King Louis XV’s last mistress. Later she lost her head during the French Revolution and was guillotined in December 1793. Cauliflower was first introduced to the French court during Louis XV reign and having tasted it boiled in stock, flavoured with nutmeg and served with melted butter, the king liked it so much that he dedicated it to his mistress Mme. du Barry. It is said that if she was ever served anything other than cauliflower soup for a starter, she would send it away and demand that it be replaced. Subsequently, cauliflower soup became known as Crème Madame du Barry and, given its origins, it is a veritable ‘upper-class’ soup, to say the least! 

Silky smooth, milky-sweet, almost nutty flavoured, this elegant soup is destined to become another Primal Pronto classic. For a special occasion it can be garnished with sautéed wild mushrooms, pan-fried king prawns or a poached egg, but for a family meal it really is a lovely, luxurious soup that’s best kept simple with a drizzle of melted butter and a dusting of fresh nutmeg. Since it was this simple pairing of nutmeg and butter with cauliflower that so impressed King Louis XV and popularised it in France, I hope it will impress you too!

To make a meal of this soup you need something more that can hold its own against cauliflower’s potency and nuttiness. I thought Cheddar Muffins might do the trick, and they did. Spread with butter and still warm from the oven, Primal Plate’s cheesy, savoury muffins with their ‘crusty’ tops are a cross between a bread roll (they don’t fall to pieces when you spread cold butter on them) and a muffin. Just the thing if you’re on a low-carb diet and haven’t figured out how to satiate your appetite without a slab of bread with your soup. I’ll be posting the recipe soon!

Cream of Cauliflower Soup (Serves 6)

Ingredients

1 medium/large cauliflower, stalks discarded and florets broken into small pieces (about 450g prepared weight)

2-3 medium leeks, white part only, finely sliced (about 165g prepared weight)

20g butter

2 tbsp olive oil

600ml vegetable stock (made with freshly boiled filtered water and 2½ tsp organic Marigold Vegetable Bouillon powder)

500ml full-fat milk

1 bay leaf - optional

sea salt 

freshly ground white pepper

50g raw cashews

100ml double cream

a little melted butter, freshly grated nutmeg and single parsley leaves. to garnish


Instructions

Put the cauliflower florets and leeks into a large saucepan with the butter and the olive oil. 

Gently heat the contents of the pan, stirring the vegetables around in the melting butter and oil until they are evenly coated and they start to sizzle. 

Cover with a lid and sweat over a low heat for about 10 to 15 minutes, stirring from time to time. At the end of this cooking time, the vegetables should be softened but not browned.

Pour in the stock and bring to the boil, then pour in the milk and return gently to a boil. Turn down the heat, season to taste and simmer, uncovered, for 10 minutes.

Take the pan off the heat and add the cashews. Leave to stand for a further 10 minutes - the hot soup will help soften the raw cashews.

Add the cream (if using) then blend everything together in a food processor or blender. 

Pass the puréed soup through a fine metal sieve into a clean pan. Taste and adjust the seasoning if necessary.

When you’re ready to serve the soup, gently re-heat to just below boiling point, stirring occasionally. 

Ladle the hot soup into individual warmed bowls, then spoon or drizzle a little melted butter on top, dust with grated nutmeg and add a parsley leaf to each bowl. 


Notes

If preparing ahead, cool, cover and chill for up to a day.

Primarily a vegetarian, I am in a constant state of flux trying to achieve a balance between fulfilling my nutritional needs (organic, raw milk and cheese is an excellent source of Omega-3, calcium and protein) and pacifying my sensibility towards animals (the cruelty involved in the dairy industry per se breaks my heart). Gentle souls and vegans rejoice! I made a second batch of Cream Of Cauliflower Soup using just almond milk instead of cow’s milk and cream. And, because the flavour profiles of cauliflower and almonds have a natural affinity, it turns out that the finished soup was equally as creamy and delicious as when it was made with full-fat dairy milk and cream! 

However, this does necessitate making your own almond milk before making the soup. I do not recommend shop-bought almond milk that’s been industrially-processed and loaded with stabilisers, emuslifiers, thickeners and sugar! Meanwhile, for all cow’s milk naysayers, the environmental ravages of siphoning off water in California for their almond crops isn’t boding well for the planet either! I don’t pretend to have all the answers!

If you do eat dairy and are not up for making your own nut milk, please seek out the best quality cow’s milk you can buy. By the best, I mean milk that’s good for you, has been ethically produced and is environmentally-sustainable. At Primal Plate we don’t consider purchasing cheap milk from abused cows an option. The cheap, mass-produced, heat-treated (pasteurised) stuff found on supermarkets shelves is not a nutritious health-giving food, furthermore animal welfare is ignored and the environmental cost is too high. 

I buy my milk online from Gazegill Organics’s happy cows because there is simply is no substitute for clean, full-fat, organic, grass-fed, raw milk. The more expensive price you have to pay for real milk is worth every penny. It contains all it’s vital nutrients, tastes more rich and creamy and behaves differently to the watery substance that passes for milk in supermarket chiller cabinets. For months Sarah complained that her chocolate banana milk shakes (made with organic pasteurised milk purchased from a supermarket) didn’t come out nearly as thick and creamy as my Raw Chocolate Banana Milkshake. When I finally realised what was going on, I substituted some of my supply of raw milk for her pasteurised milk and…Voila! No more thin milkshakes! Remember, pasteurisation not only destroys harmful germs but kills off useful bacteria and a high percentage of vital nutrients too. It also makes the calcium contained in raw milk insoluble, so there’s little point in feeding it to your kids to build strong bones!

Then there’s the horrific reality of mass milk production - one of the most exploitative and cruellest industries in Britain today. Sad cows, housed en masse in concrete confinement feeding centres, fed an unnatural diet of corn, soy and other grains that their bodies aren’t designed to eat. Overfed, over-milked and kept alive on a chemical cocktail of hormones and antibiotics, they are pushed to their limits 24/7. When these poor animals are finally worn-out - literally milked-dry of their profit potential by humans - they are dispatched to the abattoir, where their vastly shortened, miserable lives end violently. I have to ask myself, who in hell wants to drink this stuff?

Meanwhile, the oldest, luckiest, milk-producing cow on Gazegilll Organics farm, where she has access to 16 acres all year round and a diet that's kept as natural as possible, is twenty-one years old already! How fabulous is that?  As consumers, we have a choice. Please do yourself and farm animals a favour. Only support dairy farmers that produce organic, grass-fed milk from cows that are treated with this much love and respect. Thank you.  

Carbohydrate 13g Protein 6g - per serving


Warm Salad Of Root Veg With Cheese & Pine Nuts

by Susan Smith in , , , ,


In this first week of 2016 I’m not in the mood for cooking. I suppose my cook’s laziness is a sort of counterbalance to the flurry of Primal festive food creativity that fully occupied my mind, my time and my kitchen for the past six weeks. Now minimalist meals seem infinitely more appealing. Since Primal Pronto is currently where it’s at, a salad seems just right. 

Nothing could be simpler to prepare (✓) or more seasonal (✓) than this Warm Salad of Root Veg with Cheese & Pine Nuts. Furthermore, the remnants of my Christmas food shopping frenzy meant I didn’t have to dig too deep in my fridge and store cupboard to find the ingredients. My ‘in with the new’ approach to getting dinner on the table ‘pronto’ had this delicious, really healthy plateful prepped, cooked and served within 45 minutes of its conception. Light but surprisingly satisfying, this recipe is such a great combination of flavours and textures that I think it belies being called salad!

Until recently, my culinary interest in beetroot has been a tad conflicted. On the one hand, I love beetroot’s ruby-purplish hue and its gentle, sweet, earthiness. On the other, it has an intimidating reputation for bleeding over everything and for taking anything up to 1-2 hours to cook! In this recipe beetroot redeems itself. Cut into wedges and roasted with other winter roots, it is a game changer. It cooks quickly, stains to advantage - makes this salad look so vibrantly pretty - and it’s dense sweetness provides the perfect foil to salty goat’s and sheep’s milk cheeses. 

Sometimes the simplest things are the best! 

Warm Salad of Root Veg with Cheese & Pine Nuts (Serves 2)

Ingredients

1 fennel bulb, cut in half lengthways and sliced

1 large carrot, cut on the slant into chunks

1 large beetroot, peeled and cut into wedges

1 organic sweet potato

4 shallots, halved (or a medium red onion, cut into eights)

2 tbsp olive oil

sea salt

freshly ground black pepper

100g semi-hard sheep’s or goat’s cheese (I used Parlick Fell)

1 tbsp balsamic vinegar (I used Sainsbury’s Giacobazzi Aged Balsamic Vinegar)

25g pine nuts, toasted

2 tbsp fresh parsley, chopped


Instructions

Pre-heat the oven to 200℃/180℃ fan-assisted / 400℉ / Gas mark 6

Pile all the vegetables into a large bowl, add the olive oil and season. Tip into a large roasting tin, making sure the all vegetables are sitting in a single layer, and cook for 25 minutes, turning the vegetables over halfway through the cooking time.

Whilst the vegetable are roasting, toast the pine nuts, crumble the cheese and chop the parsley. Cover and set aside.

Take the roasted veg out of the oven and add the balsamic vinegar. Stir to coat the vegetables evenly and then put back in the oven for a further 10 minutes.

Turn out onto 2 warmed plates and top with the cheese, the pine nuts and the chopped parsley - in that order.

Drizzle a little more of the balsamic vinegar around the edge of the plates and serve immediately.


Notes

If you’re cooking for four, double-up the recipe and use two roasting tins/trays - swapping them over half-way through the cooking times. It’s important to roast the vegetables in a single layer - if you pile them on top of each other they’re much more likely to steam rather than roast.

Real balsamic vinegar is absolutely essential to the success of this recipe so beware of imitations! Aged balsamic vinegar from Modena, Italy costs a small fortune. So, if you’ve paid less than you’d pay for a decent bottle of wine (£12 - £60), you’ve likely purchased cheap wine vinegar with colour added! Look at the ingredients list for the words “grape must”, “aged grape must,” “Mosto d'Uva" or “DOC. 

The real stuff is a deliciously sticky, dark brown, sweetly-sour, glossy syrup that always adds a certain ‘je ne sais quoi' when used as a marinade or condiment to other fine foods. If you buy it, you can use it for bread dipping (grain-free, of course!), adding to sauces, drizzling over cooked foods, brushing onto vegetables, meat, fish or poultry before grilling or roasting, or even as a perfect pairing with fresh strawberries! It’s well worth the expense. 


Carbohydrate 40g Protein 17g - per serving


Red Pepper Rolls with Goat’s Cheese

by Susan Smith in , ,


Make a statement with this bright red and green Christmas Day starter of Red Pepper Rolls With Goat’s Cheese that looks like Christmas on a plate! Tasty and nutrient dense, I think the red pepper rolls are a luxed-up vegetarian version of smoked salmon! Though brought together with a goat’s cheese filling, a fresh tomato vinaigrette, basil pesto and watercress, I suspect this fresh-tasting, light introduction to the main event will do you more good!

Packed with the great flavours of Provence, these delicious red pepper rolls seem to hark back to warmer days. But for now, open a bottle of chilled Champagne or a crisp, grassy, Marlborough Sauvignon to cut through the flavour of the goat’s cheese, and you have a fantastic festive beginning to your foodie celebrations. 

As with the rest of Primal Plate’s vegetarian Christmas day menu, most of the preparation for this dish can be done in advance of the big day. Then just before you sit down to eat, simply bring the different components together on pure white porcelain plates. Absolutely stunning to look at, this light and flavourful starter will still leave plenty of room for what is to follow.  

Red Pepper Rolls With Goat’s Cheese (serves 4)

Ingredients - for the pepper rolls 

4 red Romano peppers (the long, pointy ones!)

140g full-fat, soft, vegetarian goat’s cheese, without rind (I used Rosary Goat’s Milk Cheese)

2 tbsp extra virgin olive oil

1 tbsp chopped fresh chives

20g pine nuts, toasted

Freshly ground black pepper

1 tbsp Nonpareille capers, well rinsed - to garnish

Watercress sprigs, washed - to garnish

Whole fresh chives - to garnish


Ingredients - for the tomato vinaigrette

120g ripe tomatoes, chopped

2 tbsp red wine vinegar

2 tbsp low sugar tomato ketchup

1 tsp tomato paste

4 tbsp extra-virgin olive oil

sea salt and freshly ground pepper, to taste

1-2 drops liquid stevia (alternatively, ½ - 1 tsp maple syrup), to taste - optional


Ingredients - for the basil pesto

50g fresh basil leaves

25g vegetarian Parmesan-style cheese

25g pine nuts, very lightly toasted (in a dry frying pan over a low heat)

4-6 tbsp extra virgin olive oil (just enough to bind everything together into a thick, slushy sauce) 

1 small squeeze of fresh lemon juice - optional (but it helps the basil to keep its green colour)

sea salt and freshly ground black pepper, to taste


Instructions for the red peppers and cheese filling

Pre-heat a grill to High. Line a large flat baking sheet or the grill pan with a non-stick baking mat or non-stick aluminium foil.

Cut the peppers in half lengthways, then remove the stalk end, seeds and any white stringy bits. 

Place the pepper halves cut side down - skin side up - on the baking tray and grill fairly close to the heat source for about 6 minutes, or until their skins blister and start to blacken. 

Remove from the grill. Lay a sheet of cling-film over the top of the peppers and allow to cool completely.

Meanwhile, in a bowl mix the goat's cheese and olive oil together with a fork until softened. Add the chopped chives, pine kernels and season with pepper. Set aside.

Carefully peel the cold peppers and place skinned side down onto a large clean plate.

If you're working in advance, the peppers and cheese can now be covered and refrigerated until needed.

Instructions - to make the basil pesto 

The easiest way to make pesto is to process the basil, cheese, toasted pine nuts and 4 tablespoons of olive oil in a food processor or blender - or use a hand-held stick blender - until it comes together into a thick, smooth, fragrant, bright-green sauce (scraping down the sides of the bowl as required). 

Tip the mixture into a bowl, stir in an extra tablespoon or two of olive oil if you think more is needed to make an oozy consistency, then season the pesto to taste with salt and pepper, adding a small squeeze of lemon juice, if liked.

Alternatively, you can pound the ingredients together in a pestle and mortar, gradually adding the olive oil until it is the right consistency.

Cover and refrigerate until needed.


Instructions - to make the tomato vinaigrette

Blend all the ingredients in a small food processor or blender, or with a hand-held stick blender, for 30 seconds until fully amalgamated.

Strain through a fine sieve into a small bowl. Taste and adjust seasoning to taste, then cover and refrigerate until needed.


Instructions - to assemble the dish

When you’re ready to serve the pepper rolls, lay the peppers out onto a cutting board - trim off any straggly edges, if necessary. 

Fill with the goat’s cheese mixture - about 1 generous tablespoon per pepper half. Spread the mixture evenly along the length of the peppers, leaving about 5mm clearance around the edges. Roll each half up into a neat roll.

Arrange the pepper rolls on individual plates. Garnish with sprigs of fresh watercress and whole chives (see picture). Drizzle the tomato vinaigrette around the edges of the plates and add 3 to 4 small dollops of the basil pesto. Finally, randomly scatter a few of the capers over and around. 

Serve with aplomb! Wowzers!  You’ve surpassed yourself!


Notes

The pesto will keep 3-5 days in a sealed jar in a fridge - it’s best to cover its surface with a little more olive oil if storing for more than a couple of days.

The tomato vinaigrette will keep for 2-4 days, in a sealed jar in a fridge. 


Crumble-topped Mince Pies

by Susan Smith in ,


Healthy, Primal, vegetarian mince pies (or vegan, if you substitute coconut oil for butter) without added sugar, wheat flour or other grains? Yes please! 

This recipe is my adaptation of an original recipe I found in Good Food Magazine, Christmas 2007. However, Primal Plate gluten-free mince pies are made with tiger nut and almond flour pastry encasing dollops of delicious homemade mincemeat that has no sugar or fat added. So in spite of them tasting like the best mince pies you’ve ever eaten, you can have all of the pleasure with none of the guilt. I should warn you, even if you’re stuffed to the gunnels with other Christmas food, you’re still going to want to find room for more when you espy these sweet delights! 

But that’s okay, because you can’t really ‘fall off the wagon’ when you’re substituting nutritious, low-carb ingredients for grain flour and only using half the pastry of normal mince pies! Plus, these Crumble-Topped Mince Pies are so meltingly delicious, and look so winter wonderland with their crunchy ‘snow-capped’ topping, that it just won’t seem right to let Christmas day pass you by without one!

They disappear fast in our house, so blogging the recipe seemed sort of compulsory in the run up to Christmas - my fella thinks that eating at least two a day will help keep you in the festive spirit! They’re a much lighter and healthier alternative to the ‘heavy-weights’ found stacked on supermarket shelves (since last September!) and those endorsed by baking traditionalists, and happily, given the demand by my nearest and dearest, they are also ridiculously easy to make. 

Essentially, the mincemeat and the tiger nut pastry both only need a quick ‘whizz’ in a food processor and they’re made. And, since the mince pies can conveniently be cut, pre-assembled and frozen in their tins, you can always have a batch 'at the ready’ for when you need them. Once defrosted, making the crumble and topping the pies takes less than 5 minutes. 

If you like mince pies, these extra special mince pies can’t fail to impress. You won’t like them...you’ll love them! 

Crumble-topped Mince Pies (V)

Ingredients - for the mince pies

1 medium/large ripe banana

100g organic raisins

100g organic sultanas

100g organic currants

50g organic dried cranberries, no added sugar

60g Medjool dates (about 3), stoned and chopped                        

50g flaked almonds

Finely grated zest of 1 organic orange, juice of ½ orange

25g Sukrin Gold

½ tsp grated cinnamon                        

½ tsp ground nutmeg                            

½ tsp ground ginger                            

3 tbsp brandy


Ingredients - for the pastry

125g unsalted butter, chilled and cut into small cubes + a little extra for greasing (or to convert to vegan use coconut oil)

150g organic tiger nut flour

50g Sukrin reduced-fat organic almond flour

1 tbsp Sukrin icing sugar

Finely grated zest of 1 organic orange

1tbsp cold water


Ingredients - for the crumble topping

25g butter, melted (or use coconut oil if you don’t eat dairy)

25g organic ground almonds

25g flaked almonds

¼ tsp ground cinnamon

25g Sukrin Gold


To serve

A little Sukrin icing sugar


Instructions - to make the mincemeat

Simply mix everything together in a food processor until well combined and the texture of mincemeat. Done!


Instructions - to make the pastry

Put the tiger nut flour, almond flour, butter (or coconut oil), icing sugar and orange zest into the bowl of a food processor and whizz together until the mixture starts to clump together.

Add the tablespoon of water and briefly whizz again.

Tip the mixture out onto a sheet of non-stick (parchment) paper. Press it together into a ball, flatten into a disc with the palm of your hand then cover with another piece of non-stick pastry. 

Pre-heat the oven to 180℃ / 350℉ / Gas mark 4. Lightly grease a shallow bun tin.

Roll the dough out between the two sheets of non-stick baking parchment to a 2-3mm thickness. Using a 7½ cm (3 inch) fluted round cutter, stamp out discs from the pastry. Gently place the discs of pastry into each section of the bun tin. 

Press any pastry trimmings back together, re-roll and continue cutting out more discs until you have as many pastry cases as you want, or the pastry is used up - this quantity of pastry dough should make about 16 mince pies. 

Fill each pastry shell with 1 heaped teaspoon mincemeat and spread out to smooth.

At this point, the mince pies can be frozen, uncooked in trays for up to 1 month    


Instructions for the crumble-topping

When you’re ready to cook the mince pies, melt the butter over a low heat, allow to cool slightly, then combine all the crumble ingredients in a small bowl and sprinkle a little on the top of each mince pie. 

Bake on the middle shelf of the oven for about 15 minutes, or until the pastry is cooked and golden brown. 

Cool in the tin(s) for 5 minutes before transferring to a wire cooling tray. 

Sift a little Sukrin icing sugar over the top of the mince pies before serving.


Notes

The mincemeat recipe will make about 36 mince pies. Because it doesn’t contain any sugar, it won’t keep like ordinary mincemeat. However, it can be stored in a covered container in the refrigerator for up to a week.  

These mince pies are good eaten warm or cold. To re-heat them after baking, simply warm them in a pre-heated oven at 180℃ for 5 minutes. Don’t forget to dust with a little extra Sukrin icing sugar before serving, as any previously sprinkled on top of the mince pies dissolves in the heat of the oven second time around!


Carbohydrate 14g Protein 3g - per mince pie


Cheese Cocktail Biscuits

by Susan Smith in , , , ,


Continuing the theme of keeping Christmas simple, please raise your glasses to these deliciously rich Cheese Cocktail Biscuits! Quick and easy to prepare, these grain-free, low-carb nibbles are just perfect for handing out with pre-dinner drinks. Plus, they’re so tasty, you don’t need to serve any other accompaniments with them.

To get the party started, simply pile these elegant-looking, cheesy, crispy, buttery delights onto a platter and serve with ice-cold dry martinis, chilled Champagne, Manzanilla sherry or frosty glasses of dry white wine. Talk about eat, drink and be merry!

Because they can be stored for up to a week in an airtight container, they’re also the ideal finger-food to accompany drinks when unexpected guests pop-by. 

In fact, I think they’re at their crispiest-best when ‘twice-baked’ and still warm from the oven. So if I’m not going to serve them as soon as they’re made, I just re-heat as many biscuits as I need later on. Simply lay the pre-baked biscuits out on a baking tray and bake at 180℃ for a further 5 minutes, cool briefly on a wire tray and then serve warm to your guests. Totally delicious and utterly brilliant - they must be one of the simplest and fastest party foods to make and bake ever!

Cheese Cocktail Biscuits (makes 20-24 biscuits)

Ingredients

55g butter, chilled and cut into small cubes

100g organic ground almonds

1 tsp gluten-free baking powder

50g Sukrin reduced-fat organic almond flour

80g ‘Parmesan-style’ vegetarian cheese, finely grated

¼ tsp sea salt

large pinch of cayenne 

freshly ground black pepper

1 tbsp cold water

1 small organic egg, beaten

1 dsp each of fresh rosemary and thyme leaves

Maldon sea salt flakes


Instructions

Pre-heat the oven to 180℃ /  350℉  / Gas mark 4. Line a baking sheet with parchment paper.

Put the butter, ground almonds, almond flour, baking powder, cheese, sea salt, cayenne and black pepper into the bowl of a food processor and whizz until just starting to clump together - takes about 30 seconds.

Add the tablespoon of cold water and whizz again until a soft dough starts to form - takes about 15 seconds. 

Tip the dough onto a sheet of non-stick baking parchment and knead lightly until the mixture comes together into a ball. Flatten out into a disc with the palm of your hand, then place another sheet of non-stick paper on top of the dough - this will stop it sticking to your rolling pin. Roll out the dough evenly (do quarter turns of the paper every few rolls) to 4mm-6mm (½ cm / ¼ inch) then using a 5cm plain-edged cutter, cut into rounds.

Place the biscuits on the pre-lined baking sheet - they won’t spread much. Gather up the rest of the dough and re-roll the trimmings, cutting out rounds as before until all the dough is used up - you should end up with about 24 biscuits.

Lightly brush the tops of the biscuits with beaten egg, then sprinkle over the fresh thyme and rosemary leaves. Finally, add a small pinch of Maldon sea salt flakes to each biscuit. 

Bake in the pre-heated oven for 12 to 15 minutes or until the biscuits are crisp and golden brown. You may want to turn the baking tray around half way through the cooking time to ensure the biscuits bake evenly.

Transfer to a wire baking tray and allow to cool before serving, still slightly warm, with drinks.   


Notes

The quality and flavour of the cheese you use for this recipe is vitally important to the end result. I highly recommend you track down the Gran Moravia Parmesan-style vegetarian cheese I’ve used because it is so like Parmesan in both texture and flavour that even I am hard-pressed to tell the difference. It’s a real find for vegetarians who love the taste of Parmesan but don’t want to eat Parmesan Reggiano because it contains animal rennet. This Italian-made hard cheese is truly the one I rave about every time I need a cheese to look, taste and behave like Parmesan - not only is it vegetarian and costs a lot less money, even my pernickety Parmesan-eating cat loves it! 


Carbohydrate 1g Protein 3g - per biscuit

A more-ish accompaniment to pre-dinner drinks, these simple canapés are a real crowd pleaser. If you're making them ahead of time, pop them back in the oven for 5 minutes to crisp them up, before serving them to your guests!

A more-ish accompaniment to pre-dinner drinks, these simple canapés are a real crowd pleaser. If you're making them ahead of time, pop them back in the oven for 5 minutes to crisp them up, before serving them to your guests!


Parsnip, Cranberry and Chestnut Loaf with Port Wine Sauce

by Susan Smith in , ,


In just three weeks time we’ll all be sitting down to (or feeling replete from) one of the most planned-for meals of the year; Christmas Day. I love it!  I especially love it now I’m fully committed to eating vegetarian. 

Notwithstanding that I’m not getting the goodwill vibe of the ritualistic killing of 10 million factory-farmed UK turkeys immediately before Christmas, I’m actually somewhat bewildered by people’s obsession with eating a traditional turkey dinner. If you’re not an experienced cook (and all the feedback I get tells me they’re few and far between) roast turkey has to be be one of the trickiest, most labour intensive, time consuming meals to get right. Then there’s the expense of putting a decent, organic, free-range turkey on the Christmas table (albeit, in my opinion, nothing less will do).

Putting my money where my mouth is, four years ago I blew almost an entire week’s housekeeping (£120) on a medium-sized (6kg) organic Kelly Bronze turkey for our celebration meal. To meet my self-imposed lunchtime deadline of 1pm, I set my morning alarm call for 7:30am so I could switch the oven on at 8:00am. A pre-prepared bird that size (firstly you have to stuff it and lubricate it up-to-the-nines, inside and out, in butter) takes 4.5 hours to cook, including five essential clock-watching interruptions of rather more pleasant social interactions, such as opening presents and drinking Champagne, if you want to be certain of a ‘tah-dah’ moment and gasps of appreciation when you present your perfectly roasted and dressed bird at the table. In retrospect, all the effort required now seems a bit passé and Bah Humbug for my taste! 

This year I will not be found up to my elbows in turkey early on Christmas morning, nor will I be on tenterhooks waiting for the kitchen buzzer to repeatedly call me to my basting duties. Instead, I will have pre-prepared for our delectation a leisurely, spectacular-looking, vegetarian lunch full of the flavours of Christmas, without the fuss. 

The star of the show, a Parsnip, Cranberry and Chestnut Loaf, isn’t altogether my idea. The original recipe for Parsnip, Cranberry and Chestnut Loaf first appeared in Good Food Vegetarian Christmas magazine, December 2009 and, as you can see, I’ve borrowed its presentation (sort of!). However, being a Primal-phile, my version had to be grain-free (no breadcrumbs allowed), refined sugar-free (found lurking in their cranberry sauce) and, for my taste, much more umami-savoury. Without the addition of the mature Cheddar that I’ve added to my recipe, the original seemed boringly bland. I believe that this is why many people eschew eating vegetarian, especially on special occasions, because all too often what you end up with is second-rate stodge - pastry, pasta, potato or rice and other grain-based dishes - that in their mundanity simply don’t sing-out ‘celebrate’, or entice you to eat them, even if you could. Which, being staunchly Primal I can’t - though sometimes I could kill for a decent roast potato!

In reality, vegetarians do not need to be short-changed. Even followers of the Primal/Paleo diet, who don’t eat grains or potatoes and, for compassionate reasons are reluctant to eat meat, can feast just as well, if not better than, their carnivore counterparts. This is how Primal Plate’s Christmas lunch is shaping up (although the starter and dessert may still yet be subject to further flights of fancy!): A red, green and white starter of Red Pepper Rolls with Goats Cheese, which looks like Christmas on a plate. Then, today’s amazing recipe for Parsnip, Cranberry and Chestnut Loaf with Port Wine Sauce, accompanied by Braised Red Cabbage, Creamed Celeriac and Baby Brussel Sprouts. Followed by cinnamon-laced Horchata Ice Cream with Stuffed Baked Apples in Clementine Syrup. Maybe, a platter of cheese with seasonal fruit and finally, coffee and mince pies. 

All this fabulous food with absolutely no added sugar, no grains, no legumes, no potato, no meat and, if everything goes according to my ‘get-ahead’ menu plan, definitely nothing to drive me into a cook’s frenzy on Christmas morning. In fact, I intend to spend less than an hour doing hands-on cooking on the day itself, and even that will largely involve primping the food so it looks its best on the plate! 

This should help to make Christmas everything it promises to be - a happy, food-filled celebration that everyone, including the cook, can enjoy. Almost every component of this lavish, rainbow-coloured, festive vegetarian feast can be made oven-ready and/or stashed in the fridge/freezer and ready-to-go by Christmas Eve and, in most instances, well before. By my reckoning, that means the most exacting thing I’ll have to do on Christmas day is core and stuff the apples through a Champagne-induced haze of alcohol! As much as I love cooking, not spending almost the entire day in the kitchen sounds like the best-ever Christmas to me!

Parsnip, Cranberry and Chestnut Loaf (Serves 8)

Ingredients

45g butter, plus a little extra for greasing

3 onions, finely chopped

15g pack sage, 8 leaves reserved, the rest finely chopped

180g pack cooked chestnuts

120g walnuts

100g ground almonds

1 tsp ground mace

100g good quality vegetarian Cheddar cheese, finely grated

2 eggs, beaten            

600g baby parsnips, trimmed, peeled and cut in half lengthways (or choose standard parsnips - long, thin ones if you can - peeled then halved lengthways) 

1 tbsp honey

sea salt and freshly ground black pepper

180g Low-Sugar Cranberry & Orange Relish

Fresh cranberries and flat leaf parsley - to decorate 


Instructions

Boil a kettle of water. Grease a 900g (2lb) loaf tin with some butter, line with a long strip of non-stick baking parchment to cover the bottom and the two ends of the tin.

Melt 15g butter in a non-stick pan, add the onions and gently cook with the lid on the pan for 10-15 mins over a medium low heat until very soft and just starting to turn golden. Stir in the chopped sage, cook for a further 1 minute, then tip into a large mixing bowl. 

Pulse the chestnuts in a food processor until chopped into small bits, then tip these into the bowl with the onions and repeat with the walnuts. Now add the ground almonds, cheese, mace, beaten eggs, 1½ tsp salt and a generous amount of freshly grated pepper and mix everything together well.

Pour the boiling water from the kettle into the bottom half of a steamer. Put the halved parsnips in the top of the steamer, put the lid on and steam for 3 minutes.

Tip the parsnips onto a clean dry tea towel and pat them dry. Line up the best looking halves of parsnip (you’ll need about 10 halves) and lay them widthways, cut side down, along the bottom of the loaf tin. You will need to alternate the parsnip halves ‘thick ends to thin’ and pack them tightly side-by-side, so they fit snugly in the base of the tin. N.B. If you’re using normal-sized parsnips, cut off lengths of parsnip from the thinner ends and fit across the base of your loaf tin in the same way. Keep going until you have enough parsnip halves to snugly line the base of the tin. 

Take the parsnip halves back out of the loaf tin and set aside. Chop all the leftover parsnip into small neat dice and mix into the nut mixture. 

Melt the remaining 15g of butter in a heavy based frying pan over a medium heat. When it starts to foam add the honey and the reserved parsnip halves laying them cut side down in the pan. Fry gently in the butter (on the cut side only) for about 5 minutes or until they are lightly browned - they should be just turning golden. Take off the heat and set aside to cool. 

Heat oven to 180℃ (160℃ fan) / 350℉ Gas mark 4

When the fried parsnip are cool enough to handle, fit them back into the loaf tin, as before (cut and browned side down). Top with ⅓ of the nut mixture – pack it down well and smooth the surface. 

Spread the cranberry and orange relish on top, leaving a small space around the edges. 

Top with the remaining nut mixture and pack down as before. Cover with tin foil. 

The loaf can be made up to 24 hrs ahead, then covered and chilled, before continuing. 

Bake in the pre-heated oven for 1 hour. Take the loaf out of the oven and remove the foil, then put back in the oven for a further 10 minutes. 

Remove from the oven and allow to stand for 10 minutes.

Meanwhile, melt the remaining 15g butter in a small frying pan and sizzle the reserved sage leaves for 1 minute. 

Loosen around the sides of the loaf with a round-bladed knife if you need to, then turn the loaf out onto a warm serving platter. Peel off the parchment paper. 

Brush the top of the loaf with the hot sage butter then decorate with cranberries, fried sage leaves and sprigs of flat-leaf parsley.  

Serve in slices with extra Cranberry Orange Relish and Port Wine Sauce.


Carbohydrate 30g Protein 12g - per portion

Port Wine Sauce (Serves 6)

Ingredients

2 tbsp olive oil

1 medium onion, finely chopped

600ml (1 pint) soft, fruity red wine (I used McGuigan Estate Merlot)

1 dsp Marigold organic vegetable bouillon powder

2 tsp arrowroot powder 

3 tbsp port wine

1 dsp sugar-free redcurrant jelly

sea salt and freshly ground black pepper

25g cold butter, cut into small pieces


Instructions

Heat the oil in a medium saucepan, add the onion, cover and fry over a low-medium heat for 10 minutes until it is tender but not browned. 

Stir in the bouillon powder and then pour in the wine, bring to the boil, and leave to simmer, without a lid, for about 15 to 20 minutes, or until it has halved in volume i.e. reduced to 300ml (½ pint). Take off the heat and strain through a sieve into a small clean saucepan

Put the arrowroot into a small bowl and mix to a paste with the port. Add a tablespoon of the hot wine mixture, stir, then quickly pour the slaked arrowroot into the saucepan with the rest of the wine mixture and stir briefly until it has thickened slightly (just below boiling point). 

Stir in the redcurrant jelly. Taste, then add salt and pepper, if necessary

You can make the sauce up to this point in advance. Either freeze and defrost overnight the day before you need it, or keep in the fridge until you want to serve.

Just before you want to serve the sauce, re-heat in a small saucepan to just below boiling point, then quickly whisk-in the cubes of cold butter to make it glossy.


Carbohydrate 5g Protein 0g - per portion


Roasted Cauliflower & Mushroom Curry with Green Pea Fritters and Avocado Cream

by Susan Smith in , , , , ,


Continuing my quest to find Primal Pronto veggie-inspired meals, I discovered these delicious Green Pea Fritters at The Healthy Chef. Initially, I was just looking for an alternative to Primal Naan Bread and Cauliflower Rice to accompany a family supper of Roasted Cauliflower & Mushroom Curry because, as satisfying as Primal naan bread might sound, since posting the original naan bread recipe I subsequently found out that I need to re-invent it without tapioca flour, (which increases blood sugar even more than wheat flour) and zanthan gum. Yikes! Sorry for the oversight! Plus, cauliflower ‘rice’ and cauliflower curry have zero gastronomic appeal when eaten in combo, so I wanted something new and tasty, preferably vegetable-based, to make our curry meal more appetising. 

As it turned out, the Green Pea Fritters were such a hit that I’m including them as part of this week’s blog, so today, three recipe posts for the price of one! Whilst the Green Pea Fritters and Avocado Cream are a perfect stand-alone meal for a fast and simple supper or to serve with drinks, when brought together with Roasted Cauliflower & Mushroom Curry you have several wonderful things that make for a fresh, creative, vegetarian meal fit for entertaining friends. I think the whole thing looks mouthwatering on the plate and it tastes just as good - spicy, savoury, creamy and delicious!

The cauliflower and mushroom curry recipe is adapted from a recipe in Daniel Green’s book, The Paleo Diet but there is one notable exception - if you try to make this curry with “1 tablespoon of chilli powder (or more to taste)” as directed in the book, please do not even think of inviting me for supper! It may simply be a ‘typo’ (I think it should read 1 teaspoon of chilli!) but it would nevertheless be ruinous to the finished dish and most likely would get missed by an inexperienced cook slavishly following the recipe. Thank goodness for Primal Plate’s extensive testing and tasting of all blog featured recipes before posting! 

I have added tiger nut flour to the pea fritter recipe to enhance the sweetness of the peas and on this occasion left out the lemon zest in favour of fresh mint because a) fresh mint and peas are a classic and b) the avocado cream has a lemony ‘hit’ all of its own that more than compensates for its absence in the fritters. Plus, it saves the time and effort of grating a lemon!

The pea fritters are very quick and easy to make - it’s just a matter of mixing everything together in a bowl and dropping spoonfuls of the mixture into a hot frying pan (only a few at a time), pressing them flat with the help of a spatula and cooking (for less than a total of 10 minutes) until they’re golden brown on each side. Meanwhile the avocado and cream cheese can be quickly whizzed to a luscious pale green cream in a food processor or with a hand-held blender.  

The Roasted Cauliflower and Mushroom Curry is just as fuss-free and makes a great vegetarian low-carbohydrate option for followers of Paleo and Primal diets. 

Put it all together for warming, nourishing mouthfuls of extreme pleasure.  

Green Pea Fritters (Serves 4)

Ingredients

300g frozen peas, defrosted

2 tablespoons fresh chopped parsley (about 10g without stalks)

1 tablespoon freshly chopped mint leaves

2 large organic free range eggs, lightly beaten

100g full-fat soft cheese, softened (I used Longley Farm)

25g organic tiger nut flour

15g organic coconut flour

1½ tsp sea salt and a generous grinding of black pepper

1 small organic lemon, finely grated zest only - optional

1tbsp olive oil, for frying

Handful of pea shoots, to garnish - optional


Instructions

Crush the peas in a food processor using the pulse button. Make sure you keep the peas a coarse texture, this is not meant to be a puree.

Transfer the crushed peas to a bowl, add the parsley, mint, eggs, lemon zest (if using), tiger nut and coconut flours. The ground tiger nuts and coconut flour help to hold the mixture together during cooking. 

Season with the sea salt and freshly ground black pepper. Taste and correct the seasoning if necessary. 

Soften the cream cheese by breaking it down with a fork then add to the pea fritter batter and combine well.

Heat a little olive oil in a large heavy-based non-stick frying pan over a low heat.

Add heaped tablespoons of the pea fritter mixture to the pan -  you should get about 16 bite-sized fritters. To avoid overcrowding the pan you may need to cook them in several batches. 

Cook the pea fritters over a medium heat for 5-6 minutes without disturbing them. When they are firm and golden on the underside, carefully turn them over with the aid of a flat-ended spatula. 

Continue to cook for a further 3-5 minutes or until the fritters are cooked through and golden brown on both sides. 

Immediately transfer to an oven proof dish (or serving platter if you’re handing them out with drinks) and then into a pre-heated hot oven until you’ve cooked the rest of the fritters and you’re ready to eat.


Avocado Cream (Serves 3-4)

Ingredients

1 large ripe avocado

½ lemon, juiced

100g full-fat soft cheese, softened by breaking down with a fork (or use Waitrose Duchy Organic Soft Cheese straight out of the tub).

Sea salt

Cayenne pepper


Instructions

Peel, stone and mash the avocado with the lemon juice then mix together with the soft cheese, sea salt and cayenne pepper to taste until it is completely smooth and creamy - this is best done in a food processor or with a hand-held blender.  

Serve as a dip with Green Pea Fritters or crudités.


Roasted Cauliflower & Mushroom Curry (Serves 4)

Ingredients

1 medium head of cauliflower, broken into small bite-sized florets

1 large onion, finely chopped

3 tbsp olive oil

250g button mushrooms

1 x 2½ cm piece of fresh ginger, grated

1 tbsp ground coriander

1 tbsp ground cumin

1 tbsp garam masala

1 tsp chilli powder

1 tbsp Marigold organic vegetable bouillon powder

400ml full-fat organic  coconut milk

sea salt and freshly ground black pepper

a large handful of fresh coriander, chopped - to garnish


Instructions

Pre-heat the oven to 200℃ / 400℉ / Gas mark 7

In a large bowl, toss the cauliflower florets in 2 tablespoons of olive oil and season with freshly ground black pepper.

Tip onto a non-stick roasting tray and roast for 25 minutes, turning occasionally until the cauliflower is nicely browned. Remove from the oven and set aside.

In a wide, shallow pan set over a moderate heat, fry the onion in the remaining olive oil with the pan lid on for about 8 minutes, stirring from time to time, until softened and starting to brown.

Add the mushrooms and ginger and cook for another 1-2 minutes, stirring. Stir in the spices and bouillon powder and cook for another minute.

Add the coconut milk and season to taste. Bring to the boil then stir in the cauliflower.

Reduce the heat to low, cover the pan and cook for about 5 minutes. 

Ladle into warmed bowls and top with plenty of fresh coriander. 


Notes

I was in two minds about the Primal Pronto status of the Green Pea Fritters and Roasted Cauliflower & Mushroom Curry because both these recipes are so easy and fuss-free. In the end I decided that Primal Pronto should be defined as: a recipe with 5 or less main ingredients, or one that can be prepped, cooked and on the table within 45 minutes. The Roasted Cauliflower & Mushroom Curry didn’t quite make it on both counts (realistically it’s takes more like 50 minutes to make) but it is still wonderfully warming comfort food that’s simple to prepare. It’s also suitable for vegans.  

You can defrost the peas quickly by putting them in a heat proof jug and pouring boiling water over. Allow to stand for a few minutes, then drain well and proceed with the recipe. 

The uncooked pea fritter batter can be made well in advance and stored in the fridge overnight. The mixture will make approximately 16 small or 8 large fritters. I use a heaped tablespoon to make the bite-sized ones and a ¼ US cup for bigger ones.

Two large Green Pea Fritters per person served with a medium/soft boiled egg and a dollop of avocado cream is great for a fast and easy low-carb brunch or supper.

If you can’t get button mushrooms for the curry, use closed-cap mushrooms cut into halves or quarters instead.


Carbohydrate 14g Protein 11g - per serving (4 small or 2 large) of Green Pea Fritters

Carbohydrate 5g Protein 2g - per serving of Avocado Cream

Carbohydrate 22g Protein 8g - per serving of Roasted Cauliflower & Mushroom Curry


Roasted Squash Soup

by Susan Smith in , , ,


Autumn delivers an incredible array of squash, pumpkins and gourds, so what better way to celebrate the season than to come in out of the cold to a steaming bowl of glorious golden-orange Roasted Squash Soup? 

Creamy, with a distinct flavour and delicate sweetness, it contains neither cream or sweetener. It is comforting, delicious and vegan. You can serve it as it is but it’s even lovelier topped with toasted pumpkin seeds and sprigs of fresh thyme.

I’ve included this recipe in the Primal Pronto section of the blog because although the squash takes about 45 minutes to roast, the ingredients list is short and it’s such an easy soup to make. Basically, the squash roasts in the oven whilst you unhurriedly fry-off an onion and boil a kettle of water. Then all that’s left to do when the squash is cooked, is to spoon its flesh into a blender with water and vegetable bouillon powder and whizz to velvety smooth perfection.

Roasted Squash Soup (in mugs), Vegetarian sausages with Autumn Coleslaw (recipe coming soon) and Primal Pronto Energy Bars are the perfect outdoor grub to eat around the bonfire with family and friends to help make your Guy Fawke’s celebration a night to remember. 

Roasted Squash Soup (serves 4)

Ingredients

1 medium-sized organic squash (I used onion squash but if you can’t get hold of one use butternut squash instead)

1 large onion, finely chopped

2-3 tbsp olive oil

1.2 litres water

1 tbsp Marigold organic vegetable bouillon powder

2 tbsp pumpkin seeds

4 sprigs of fresh thyme


Instructions

Boil a kettle of fresh water. 

Pre-heat the oven to 190℃  375 ℉ Gas mark 5

Cut the top end off the onion squash then cut down lengthways into 4 quarters. Scoop out the seeds and fibres (discard these) then put the quarters of squash skin-side down on to a baking tray. 

Brush the cut surfaces with olive oil and roast in the pre-heated oven for about 45 minutes, or until the squash in soft. 

Whilst the squash is cooking heat 1 tablespoon of olive oil in a saucepan over a gentle heat. Add the onion, cover and cook gently for about 8 minutes until it is soft and just starting to brown. 

Add 1 litre of hot water from the kettle and the bouillon powder to the pan, bring to a simmer, then cover and take off the heat. 

When the squash is cooked, scoop out the flesh into a blender or food processor (discarding the skin) along with the onion/vegetable stock. Puree together until velvety and smooth.  

Tip the puréed soup through a metal strainer into a clean pan. At this stage, you can stir in in a little more water to make a consistency that’s pleasing to you. Season to taste with sea salt and pepper and gently heat through.

Meanwhile, heat a splash of olive oil in a small non-stick frying pan set over a moderate heat and fry the pumpkin seeds for 1-2 minutes until just toasted. Tip the pumpkin seeds onto a plate lined with piece of kitchen paper.

Serve the hot soup in 4 warmed bowls with the toasted pumpkin seeds and thyme sprigs on top of each bowl. 


Carbohydrate 22g Protein 3g - per serving

An array of homegrown squashes make a beautiful Autumnal display. Image courtesy of Mirror Imaging Photography

An array of homegrown squashes make a beautiful Autumnal display. Image courtesy of Mirror Imaging Photography


Eggs Florentine

by Susan Smith in , , , ,


I’ve come in for a bit of flack recently from people who say they’d like to eat simple, tasty, healthy (low-carb) food on a regular basis, but at the end of a long day are too tired, busy or hungry to cook the recipes I post on Primal Plate’s blog. 

I can empathise, but like everything else in life, whether you cook or don’t cook really depends on your perception and priorities. The likes of Jo Wicks (The Body Coach) and TV celebrity chefs may be able to briefly convince you that it’s possible to knock up a delicious meal in 15 minutes flat, but try a couple of their ‘simple’ recipes out for yourself (how about a vegetable stir-fry?) and you’ll likely conclude one of two things; 1) there’s something wrong with you because it’s taken you nearly an hour to cook a meal that’s should have taken a quarter of that time, or; 2) it’s a con, so next time you’ll just buy a ‘ready-meal’ instead. 

The fact is, it wouldn’t take me much less than 15 minutes to singlehandedly boil an egg and prepare a couple of slices of buttered toast - let alone to create a family meal. Realistically, if you want to eat well, you need to make space in your life to cook. That said, many Primal Plate recipes are no more complicated than the fast and furious meal suggestions promoted on television and social media. 

Many of the recipes I post often involve nothing more than throwing everything together in a bowl, whacking it into a tin and getting on with life whilst the oven does its thing. I suggest you start with Grain-free Bread and take it from there. 

However, if you want ‘speedy’ recipes, look for those that have no more than 5 main ingredients. For example, Primal Plate’s Courgetti with Cherry Tomatoes & Asparagus, Leek, Stilton & Walnut Stuffed Mushrooms or Italian Style White Fish in Tomato Basil Broth. You can add today’s recipe for Eggs Florentine to the list. 

Personally, I don’t find cooking a chore when it’s a shared opportunity to create something tasty to eat with the people I love, but on this occasion, just to satisfy my curiosity, I asked my ‘sous chef’ John to step down from his food-prep duties, whilst I switched on a stop-watch and got on with making Eggs Florentine without his help. 

No slouch in the kitchen, I could make this recipe in my sleep! In my head, I’d roughly calculated 12 minutes to steam-boil the eggs, 2 minutes to peel them, 4 minutes to make a quick cheese sauce, 3 minutes to wilt and drain some ready-washed spinach and 4 minutes final cooking time under a hot grill. Total: 25 minutes. 

But not so fast! It actually took 37 minutes 21 seconds to bring everything together and about 3 minutes to finish if off under the grill - i.e. 40 minutes for an experienced cook to prepare and serve a simple meal for three people. A novice cook would take longer. My point is, there’s a lot of kidology going down in the kitchen! What you see on TV cookery programmes and on social media is not what you get. I know, because I trained Sarah to compete in Junior Masterchef and the winner in her heat had the majority of his ingredients for his curry pre-made by his mother! Sure, a professional celebrity chef could probably chop an onion in 20 seconds flat but who peeled the damn thing in the first place? Eggs Florentine requires you to grate cheese and peel eggs - simple enough to do but time-consuming. If you’re being filmed, you can make these behind the scenes tasks magically disappear but you have to allow for these ‘extras’ when cooking at home. 

In my case, every partner I’ve ever had (similarly my children) will step into the breach to fulfil the role of peeling, chopping, slicing, grating - as well as the ongoing washing-up. A glass of wine in hand, our combined efforts to get the meal on the table heralds the end of our working day and the start of social time. It’s pleasure not pain and something we all look forward to. 

None of the photographs on Primal Plate are ‘staged’ - it is the actual food we’re about to eat that day. Primal Plate is a cookery blog and its raison d’être is to encourage people to spend more time in the kitchen and learn how to eat properly. By showing you what we eat and sharing innovative, primarily vegetarian recipes that aren’t made with sugar, grains, legumes, unhealthy fats and cancer-causing meat I hope to convince people that cooking at home pays dividends on the time invested, namely: quality time spent with your family, delicious dinners, optimal health, quick loss of excess body-fat and easy weight maintenance.  

You reap the consequences of your actions either way. With so many major health issues now affecting so many people, it’s time for us to get back in the kitchen and to teach our children to do likewise. 

It’s not just that people think themselves too busy to cook - it’s a lack of basic cookery knowledge that’s also part of the problem. Primal Plate is here to help. Off the top of my head, I can think of more than a dozen home-cooked, easy-to-make meals that we turn to for busy days, which haven’t yet featured on this blog. In response to your feedback, I’ll be rolling out my quick, tasty ideas in the forthcoming weeks and months. You’ll find these in the Recipes section of Primal Plate’s blog under Primal Pronto.

To start with, my variation on the classic Eggs Florentine recipe. It's made with spinach, hard steam/boiled eggs and topped with a flour-less Primal cheese sauce before being finished off under the grill. A truly indulgent brunch, light lunch or supper to treat family and friends to. 

Eggs Florentine (Serves 4)

8 organic free-range eggs

1 tbsp olive oil

500g organic spinach, ready-washed

225g crème fraîche (I used Rodda’s crème fraîche because it doesn’t split when heated)

200g Gruyere cheese, finely grated

1 dsp (20g) Dijon mustard

Pinch of cayenne pepper

sea salt and freshly ground black pepper


Instructions

Boil a kettle of water. Pour about 2.5cm (1 inch) of the boiling water straight from the kettle into a saucepan. 

Place a steaming basket inside the pan and place the eggs into the steamer-basket (I find a collapsible steamer most useful because one-size fits all pans). 

Put the lid on the pan and steam/boil the eggs for 12 minutes until hard-boiled. 

Whilst the eggs are cooking, heat up a large pan (big enough to hold all the spinach) over a high heat. When the pan is really hot add a tablespoon of olive oil and throw in the spinach (you may need to do this in 2 or 3 batches - allowing each batch to wilt down slightly before adding the rest). Stir fry the spinach for 1-2 minutes until it has all wilted. 

Tip the cooked spinach into a colander and press out as much liquid as you can - I use a potato masher but the back of a spoon will do. Return to the pan and lightly season with sea salt and black pepper.

Heat the crème fraîche, mustard and 160g of the cheese together in a saucepan over a medium/high heat. Whisk continuously until the cheese has melted and you have a very hot, but not boiling, unctuously smooth, cheese sauce. Take the pan off the heat and season with a pinch of cayenne pepper and two pinches of sea salt.

Tip the eggs into a bowl of cold water then quickly peel them (if they're still too hot, hold them in a clean tea towel so you don’t burn yourself) then place each shelled egg onto a clean chopping board and cut in half.

Preheat the grill to high.

To assemble the dish: spoon the spinach along the bottom of four individual gratin dishes (alternatively, use one large gratin dish). Place four egg halves per person (yolk side down) on top of the spinach then evenly spoon or pour over the hot cheese sauce making sure each egg is covered. Sprinkle the rest of the grated cheese evenly over the top of the eggs.

Finish under the hot grill for 3-4 minutes or until heated through and golden brown. 


Notes

If you’re looking for quick, healthy, vegetarian and Primal meal ideas, organic, free-range ‘pastured’ eggs are the business! However, after all my years in the kitchen I’ve only just ‘twigged on’ to steam-boiling eggs! I can’t even remember where I read about this method, but it’s altogether a much easier and reliable way to boil eggs because you can take them straight from the fridge and, because they’re not actually immersed in the boiling water, they're much less likely to crack when the heat first hits them. They’re cooked to perfection in exactly 6 minutes for a soft-boiled egg and 12 minutes for hard-boiled. Primal Pronto at its best! 

Annoyingly, as with Parmesan cheese, it’s hard (impossible?) to find vegetarian Gruyere. Joseph Heler make British Gruyere with non-animal rennet but having spoken to them today, I was informed they do not supply their cheese pre-packed to supermarkets but rather to retail, wholesale food service suppliers as an ingredient for their ‘ready meals’. You may have more luck finding vegetarian versions of Emmental (the melting quality and nutty taste is quite similar to Gruyere) or Edam (always check the packaging to confirm it’s vegetarian) - use either of these instead of Gruyere if you’re strictly vegetarian.  


Carbohydrate 4g Protein 35g - per portion


Sweet Potato, Cheese & Chilli Muffins

by Susan Smith in , , , ,


I like Jamie Oliver's recipe and I like Rose Elliot's recipe... but which is better?!

Today’s blog post for Sweet Potato, Cheese & Chilli Muffins was inspired by both and as both are a frequent source of reference for me, I take my hat off to each of them for being the innovative and inspiring food crusaders that they are. Nevertheless, I still think Primal Plate can legitimately take credit for these incredibly tasty, savoury muffins. Let me explain.

I first made Rose Elliot’s Cheese & Sun-Blush Tomato Muffins, featured in her book Vegetarian Supercook, about ten years ago, then last week I was watching Jamie’s Super Food programme on Channel 4 and was again reminded how useful Rose Elliot’s original recipe was for a low-carb, gluten-free lifestyle because it didn’t contain wheat flour. On the other hand, I really liked Jamie’s idea for Sweet Potato Muffins with a chilli ‘kick’, but cannot agree that wheat, or any other grain qualifies as super food.

“Cutting-edge research, for example, has revealed that consumption of modern wheat [the only sort of wheat most people are likely to encounter in their entire lifetime] is the first step in triggering autoimmune diseases such as type 1 diabetes, rheumatoid arthritis, and multiple sclerosis.” says Dr. William Davis, author of Wheat Belly. And, “Wheat raises blood sugar higher than nearly all other foods, including table sugar and many candy bars”.

And for those who think that a gluten-free diet is the answer he advises: “The few foods that increase blood sugar higher than even wheat include rice flour, cornstarch, tapioca starch and potato flour—the most common ingredients used in gluten-free foods, which leads to weight gain, diabetes, cataracts, arthritis, cancer, dementia, heart disease and growing belly fat. This is why many celiac patients who say goodbye to wheat but turn to gluten-free foods become fat and diabetic. Gluten-free foods as they are currently manufactured are very poor substitutes for wheat flour.” For more information visit the Wheat Belly Blog.  And, here's a list of recommended alternative flours for baking.
 
You live and learn! Perhaps it was the tapioca flour in my Primal Naan Bread, which we ate four times in quick succession whilst I was developing the recipe that caused me to gain two pounds in weight in one week (thankfully now lost again)! As with previous health warnings on this food blog, the message is this: Anyone who consumes gluten-free foods, including my gluten-free naan, and/or other baked goods made with healthier sugar/flour substitutes, should still regard them as an occasional indulgence.

Anyway, I digress because there are no bad things listed in the ingredients for these quick, easy-to-make, gluten-free Sweet Potato Cheese & Chilli Muffins. Going back to Rose’s and Jamie’s recipes, the only jar of sun-blush tomatoes that I had in my food cupboard had a sell-by date of 2013 (must have a clear-out!) so I decided to substitute the missing tomatoes with Jamie’s idea for sweet potato and chilli - albeit not weight for weight. Both their recipes included cottage cheese (in massively varying amounts) but to be honest, by the time I’ve changed everything around to make my recipe Primal (grain-free) and/or added or subtracted ingredients and amounts for a different flavour or texture, I always end up forewarning my family that it is by no means certain the end result will be something good for us to eat! On this occasion, I knew about half-way through the cooking time we had a definite ‘winner for dinner’ by the way my muffins were rising admirably to the challenge. High-five me!

Light, puffy and protein-packed these Sweet Potato, Cheese & Chilli Muffins truly are a super delicious super-food for you to enjoy at any time. Two muffins per person served with a bowl of hot soup makes for a simple but filling lunch or supper. Eat them for breakfast and they’ll keep you going until lunchtime. Perfect for picnics (a bit of an obsession of mine as a wedding photographer’s assistant that often needs to pack up healthy food for Sarah and I to eat on-the-move) or as a nutritious snack, they’re sustaining, easy to transport and can be eaten one-handed (important for all busy multi-taskers).   

Taking the best from Jamie and Rose, I reckon I’ve trumped both with this muffin recipe. Cook up a batch this weekend and see if you don't agree!

Sweet Potato, Cheese & Chilli Muffins

Ingredients (Makes 9)

225g sweet potato (approximately 190g peeled weight)                    

2 tbsp fresh chives, finely chopped

2 fresh red chillies, 1 finely chopped, 1 finely sliced            

5 large organic free-range eggs, lightly beaten

250g cottage cheese (can be low-fat if you prefer)

100g ground almonds                                        

50g coconut flour 

50g vegetarian parmesan-style cheese, finely grated

1 tsp baking powder

60ml milk (or water)

sea salt and freshly ground black pepper                 

2 tbsp sunflower seeds


Instructions

Preheat the oven to Preheat oven to 180°C / 350°F / Gas mark 4.

Line a muffin tin with 9 medium-sized (cup-cake sized) paper cases.
 
Peel the sweet potato and coarsely grate into a large bowl. Add the cottage cheese to the bowl with all but 15g of the grated ‘parmesan’ cheese, the chopped chilli and chives, coconut flour, ground almonds, baking powder, beaten eggs and milk.

Mix together with a fork until everything is nicely combined then season with salt and pepper, to taste.

Evenly divide the mixture between the muffin cases (about 105 grams per muffin) - spooning it into the cases until they’re three-quarters full. Scatter each muffin with the reserved cheese, then sprinkle over the sunflower seeds and arrange 2-3 thin slivers of chilli on top.

Bake for 35 minutes or until set, risen & golden brown.

Served warm = totally yum!


Notes

Everyone will enjoy these savoury muffins straight from the oven - just allow them to cool down for about 5 minutes before serving. They’re also surprisingly good cold and will keep for a couple of days in an airtight container stored in the fridge.

Unfortunately, no one seems to sell non-stick baking parchment muffin liners. I certainly don’t fancy spraying the inside of my paper cases with commercial non-stick baking spray (processed oils are not good to eat) but you can make your own non-stick cases by cutting out 12½cm (5 inch) squares of parchment paper and pressing them down into your muffin mould with the aid of a small measuring cup. You can also buy non-stick silicon muffin moulds.

On this occasion I simply opted for baking my muffins in greaseproof paper cases and eating them directly out of their cases with a spoon - using it to scrape off the last crumbs of muffin that were frustratingly ‘glued' to the paper.  

Carbohydrate 9g Protein 14g - per muffin


Vegetarian Sausages, Creamy Cauliflower Mash and Red Wine & Onion Gravy

by Susan Smith in , , ,


The Brits love sausages. Grilled or fried to perfection, and piled on top of creamy ‘mash’ and slathered in onion gravy, or put to bed in a soft pillowy bread roll with tomato ketchup - sausages taste great! As a teenager, I certainly thought so. Every Sunday night a crowd of us would leave our church youth club and walk into town to catch the bus home. There was a burger stand next to my bus stop that sold what we thought were the most delicious hot sausage ‘cobs’  (a Northern English word for bread rolls) with HP sauce. Myself and my boyfriend, who always walked me to my bus stop before crossing town to catch his own bus home, would shelter together in a shop doorway, like young lovers do, to eat our late night feast before saying a long and wistful goodbye prior to my return to weekly boarding school. My father too always prided himself on buying ‘proper’ fresh sausages from a traditional butcher and would travel 25 miles across the county of Nottinghamshire for the privilege. Whilst nothing like the mass-produced muck that you find on today’s supermarket chiller shelves, my dad probably didn’t realise that sausages per se are one of the oldest processed foods in history and, despite their reputation for tasting good, most sausage-making is almost certainly best done behind closed doors!

Although sausages are currently making a comeback with the consumption of them soaring, producers bulk out their sausages with scraps, fat, cereal, chemical preservatives and water. In my view, it’s high time for a sausage re-think. I don’t want sausages packed out with cereal and other nasties and I don’t want to cause farm animals immeasurable suffering just so I can eat them. Notwithstanding the risks to our health, if you’re a pig, any mention of sausage is never going to be a good idea!

The highlight of many a British BBQ, a cooked English breakfast, or a child’s favourite meal of sausage and baked beans, I think it is perhaps more the walk down memory lane that’s responsible for our adult sausage cravings, rather than the reality of what they are and where they come from. But there is a kinder and healthier way to satisfy our desire.

Today’s blog post features no ordinary ‘bangers and mash’. It is a no-meat, grain-free, potato-free, alternative to this great British staple, which is nonetheless every bit as comforting and tasty as the original and, most importantly, looks just like people think ‘sausage and mash’ should!

For taste and texture these cheesy veggie sausages are as close to their meat counterparts as ‘damn it’ is to swearing! Plus, they cook like a dream (see note below) because they don’t spit and splutter like ‘bangers’ do. Fabulous with low-carb creamy cauliflower mash and served with a deeply satisfying vegetarian red wine and onion gravy, it is the best transition to autumnal comfort food that you could ever hope for. 

Vegetarian Sausages (Makes 12 large sausages - allow 2 sausages per serving)

Ingredients

600g vegetarian Lancashire cheese, crumbled or grated (I coarsely grated mine in a food processor)

4 large spring onions, finely chopped

165g organic ground almonds

20g organic milled flaxseed

15g green banana flour

1 tbsp Marigold organic bouillon powder

2 tbsp fresh thyme leaves, finely chopped

2 tbsp fresh flat leaf parsley, finely chopped

3 large organic eggs, lightly beaten 

Sea salt (about 1½ tsp) and freshly ground black pepper (about ¾ tsp)

Olive oil - for frying


Instructions

Put the grated cheese, spring onions, ground almonds, ground flaxseed, banana flour, bouillon powder and herbs into a large mixing bowl and mix everything together well. 

Add the beaten eggs and a generous amount of seasoning, then using a fork or your hand bring the mixture together so it binds into a soft cheesy dough-like consistency. 

Cover the bowl with cling film and set aside to chill in the refrigerator for a couple of hours.

When the sausage mixture is thoroughly chilled, form into 12 large sausages - about 7.5cm (3”) long, weighing approximately 85g each.

Pour a large glug of olive oil into a large non-stick frying pan and set it over a high heat until the oil is really hot. When the surface of the oil starts to shimmer shallow-fry the sausages until deep golden brown and crispy on all sides, about 5-6 minutes. Drain the cooked sausages on paper kitchen paper. 

Serve hot with the creamy cauliflower mash, red wine & onion gravy and peas for a low-carb, vegetarian ‘twist’ on a favourite British classic. 


Red Wine & Onion Gravy (Serves 4)

Ingredients

1 tbsp olive oil

2 large onions, finely chopped

1 tsp coconut palm sugar

1 tbsp green banana flour

200ml vegetable stock, made with 1dsp Marigold organic vegetable bouillon powder

200ml red wine

1 tbsp Clearspring tamari (soy sauce)

1 fresh bay leaf

Sea salt and freshly ground black pepper


Instructions

Heat the olive oil over medium-high heat in a large pan. Add the onion and coconut palm sugar to the pan, then cover and cook, stirring occasionally, for 4 minutes or until beginning to brown. Reduce the heat to medium/low and continue to cook with the pan lid on for another 15 minutes, stirring from time to time, until the onion is deep golden brown.

Add the banana flour and stir over the heat for another minute to incorporate, then gradually stir in the stock and wine. 

Bring to the boil, stirring continuously until the sauce has thickened, then turn the heat back down to low.

Add the tamari and taste check. Season with a very little sea salt (only if you think it needs it) and some freshly ground pepper 

Add the bay leaf (or thyme sprig) and gently simmer for another 20 minutes. Remove the bay leaf.

Serve this intensely flavoursome gravy really hot with sausages and other vegetarian savoury dishes. 


Creamy Cauliflower Mash (Serves 4)

Ingredients

1 large head of cauliflower, trimmed and cut into florets

1 fresh bay leaf

100g full-fat soft cream cheese (I used Longley Farm)

Generous pinch of freshly grated nutmeg 

Sea salt and freshly grated black pepper


Instructions

Boil a kettle of water.

Place the cauliflower in the top half of a steamer with the bay leaf tucked in-between the florets. 

Pour the boiling water from the kettle into the bottom half of the steamer, add some sea salt then bring back to the boil. Steam the cauliflower with the pan lid on for about 8 minutes, until it is cooked through.

Tip or spoon the cauliflower into a large bowl and allow it to cool down for a couple of minutes - this will let the steam evaporate and make for a drier mash. Remove the bay leaf. 

Using a stick blender or food processor, whizz the cauliflower into a rough puree. Add the salt, pepper, nutmeg and cream cheese then briefly process again into a creamy mash consistency.

Put the cauliflower mash into a clean pan and gently re-heat, stirring from time to time so it doesn’t catch on the bottom of the pan. 

Serve hot as a delicious low-carb alternative to mashed potato.   


Notes

Keep the formed ‘sausages’ really cold (in a refrigerator) until you’re ready to start cooking them. This will ensure that they stay sausage-shaped in the cooking process i.e. cook to a crispy exterior before the cheese gets a chance to melt and they become misshapen. For the same reason, it is important not to overcrowd the pan because this lowers the temperature of the oil. You want your sausages to fry quickly in the hot oil, not semi-steam, which can cause them to ‘squidge' out of shape as you’re turning them over in the pan (also causing them to absorb more oil).  

The uncooked sausage mixture will keep for several days in a refrigerator. With this recipe being hot-off-the-press I haven’t tried freezing it yet but I think that would probably work too.

If it looks like a sausage, tastes like a sausage and behaves like a sausage it probably IS going to be mistaken for a non-vegetarian sausage! Apart from the difference in colour when you bite into them (pale gold cheese colour rather than cooked-meat-grey) I’d defy anyone to distinguish the difference between these veggie sausages and meat ones, especially when cold. Cooked leftovers, eaten next day straight from the fridge, still had their crispy exterior intact and tasted so ‘porky’ I was genuinely gob-smacked! Which means I’ve also developed a brand new picnic food to go, which is an absolute god-send for when Sarah and I are doing full-day weddings on the move #happy

If you want a smooth gravy i.e. without onion bits,  strain through a fine sieve into a clean pan before re-heating and serving.

If you think the finished gravy is a little too thick just add more water to thin it out to your liking.

I used steamed cauliflower to create a creamy ‘mash’ that’s very similar to - albeit a lighter, low-carb version of - mashed potatoes. Sweet potatoes, carrots, celeriac, swedes, parsnips and turnips - either alone or in combination - all make a good alternative to potato mash. Just be wary of stacking up the carbohydrates when you eat the sweeter root vegetables i.e. parsnips and sweet potatoes.


Carbohydrates 11g Protein 40g - 2 sausages per serving

Carbohydrates 13g Protein 1g - per serving of gravy

Carbohydrates 12g Protein 6g - per serving of creamy cauliflower mash


Primal Naan Bread

by Susan Smith in , , , ,


Following on from last week’s blog post, we’ve recently been going through a spicy phase at our house. We love curry, which is a good thing because for the past week we’ve been eating it most days whilst I tried to figure out how to make the perfect grain-free naan bread accompaniment. Happily (actually I am ecstatic!), Primal Plate has cracked the code for a grain-free naan bread that looks and tastes as close to an authentic Indian flatbread as you can get, without using traditional ingredients.

I had to go from memory when developing this recipe because with rice, legumes and grains all off-limits, I’ve not eaten out at an Indian restaurant or had an Indian ‘take-away’, for a very long time. I always remember the best naan being soft, chewy and subtly sweet, so my first thoughts turned to tiger nut flour, which I knew would give my naan a slight sweetness, without adding sugar. 

Traditionally, naan is made from plain wheat flour and leavened with yeast before baking. To get the taste, smell and texture of traditional naan it seemed important that the raising agent for my naan was also yeast, although I wasn’t certain whether this was a Paleo/Primal-approved ingredient or not. Consulting Mark’s Daily Apple, I discovered that if you drink wine or beer, the type of yeast used to make both is the same as the yeast used for bread making. And, assuming you’re not yeast sensitive, there are some nutritional benefits to eating it, especially if you avoid animal products. As a primal, vegetarian wine drinker, I concluded yeast was good to go! 

For the rest of the recipe I got my inspiration from the queen of Indian cuisine, Madhu Jaffrey. However, when refined wheat flour, the primary ingredient of naan bread isn’t an option, I had to find alternative ingredients and put them together in just the right amounts so that my naan bread would look and taste like the real deal.

To be honest, my first attempt included a high proportion of green banana flour (a brilliant source of resistant starch, which is one of the best foods to feed our good gut bacteria) but it turned out almost exactly like wholewheat pitta bread instead (another recipe for another day). For naan, I wanted it to be altogether softer and fluffier.

Substituting ground almonds for banana flour and changing the ratio of ingredients finally did the trick. The virtually no-need-to-knead dough rose better (doubled in size at the first proving), looked like I’d used plain flour rather than whole-wheat (more naan-like) and had the desired soft, fluffy texture I was looking for.

It was another ‘Eureka!” moment in my Primal cook’s career. I am still totally amazed that each new recipe I attempt to develop with the same handful of ingredients - albeit in differing amounts - can be transformed into an endless variety of grain-free, refined sugar-free cakes, breads, biscuits, scones and pancakes that look and taste no different to those made with conventional ingredients like wheat flour and sugar. 

If you're trying to lose weight and eat low-carb please be aware that these naan are extremely moreish! They’re lovely as an occasional treat, but don’t go overboard. Although a well known supermarket’s plain naan has 50% more grams of carbohydrate than Primal Plate’s naan bread, I have in fact gained 2 pounds this week, which I can only attribute to multiple testing of this recipe. It was worth it!

PRIMAL NAAN BREAD (Makes 3 decent-sized naan)

Ingredients

75ml hand hot milk            

1 tsp raw organic liquid honey                

5g (about 1 heaped tsp) dried active yeast

150g tapioca flour

20g coconut flour

30g tiger nut flour

1½ tsp baking powder                    

¾ tsp xanthan gum

50g ground almonds

½ tsp tsp sea salt    

1 tbsp olive oil + ¼ tsp for greasing            

50ml yogurt, beaten

1 medium egg, lightly beaten

1 tbsp butter or ghee, melted - for brushing        


Instructions

Gently warm 75ml milk to ‘blood’ temperature with the honey. Put the milk/honey in a bowl. Add the yeast. Stir to mix. Set aside for 15-20 minutes or until the yeast has dissolved and the mixture is frothy.

Meanwhile, sift the tapioca, coconut, tiger nut flours, baking powder and xanthan gum into a large bowl. Add the ground almonds and sea salt and make a well in the centre. 

In a separate bowl, combine the beaten egg, olive oil and yogurt, then pour it into the well, along with the bubbling yeast mixture. Gradually bring the mixture together with a fork then gently knead with your hand for a few minutes until it forms a soft, smooth ball of dough.

Pour ¼ tsp oil into a medium/large bowl and roll the ball of dough in it. Cover the bowl with cling film and set aside for 1-1½ hours in a warmish place until doubled in size. (I heat my oven to 40℃, then switch it off and put the covered bowl of dough in the closed oven to prove).

Tip the proofed dough out of the bowl onto a work surface then briefly knead again. Divide the dough into three equal balls. Lightly cover with cling film and set aside whilst you melt the butter or ghee in a small saucepan over a low heat. 

Heat a heavy non-stick frying pan over a high heat for 5 minutes or so and put the oven on low. 

Meanwhile, gently flatten each of the balls between two sheets of cling film then lightly roll or press into a tear-shaped naan, about 25cm long and 13cm wide at its widest point and slightly thicker around the edge. Keep lightly covered until you’re ready to cook them. 

Put the naan into the hot frying pan (no oil is needed) and cook until it starts to puff up and is tinged brown in patches (about 1-2 minutes), then using a flat bladed spatula flip the naan over and cook the other side until that too is patched with brown (another 1-2 minutes). Turn it back over one final time and cook for about another 30 seconds or so until cooked through and there are no doughy bits remaining.

Brush the cooked naan with the melted butter or ghee and put in the warm oven whilst you make the other flatbread(s). Serve with curry. 


Notes

If the dough seems too sticky when you’re trying to knead it, add more tapioca flour - a very little at a time - only just enough so that the dough leaves the sides of the bowl and isn’t sticking to your fingers.

You may have guessed that I regularly cook for three people (hence a recipe for three naan). For a family of four or more, simply double the ingredients to make six. Alternatively, divide the existing dough recipe into four balls to make the finished naan smaller.  

We struggled trying to determine the best and simplest way to cook the naan - or at least that was our excuse to keep taste-testing them! As well as cooking them on top of the hob, they can be baked in a super-hot oven for 5 minutes. Firstly, pre-heat a heavy baking sheet in an oven set to its highest temperature. Literally, ’slap’ each prepared naan down onto the hot baking sheet. It will puff up. Bake for 2½ minutes then turn over and continue cooking for a further 2-2½ minutes. Wrap each naan in a clean tea-towel and keep warm whilst you make the rest in the same way. 

Naan bread cooked in the oven will turn out more evenly golden but not quite as soft and chewy as when cooked on top of the stove in a frying pan. We finally all agreed that the pan-cooked ones had the ‘edge’ i.e. looked and tasted the most authentic. 


Carbohydrate 52g  Protein 8g - per serving

Grain-free, gluten-free Primal Naan Bread is the perfect sharing bread to eat with curries and Indian food, shown here with Cauliflower & Mushroom Curry

Grain-free, gluten-free Primal Naan Bread is the perfect sharing bread to eat with curries and Indian food, shown here with Cauliflower & Mushroom Curry


Best Ever Vegetable Curry

by Susan Smith in , ,


Fifty years ago I was at catering college (a career I never pursued) and there is one particular memory of my student days that’s stayed with me. One afternoon Mr Green, our lecturer, demonstrated the methodology for making meat stew and afterwards we students, who had all been given identical ingredients to work with, were told to recreate the dish from scratch. 

Given the constraints of a predetermined set of ingredients, it was truly bizarre to experience how differently our individual interpretations of a simple recipe for beef stew turned out, which varied between downright inedible to very tasty indeed. It was then I realised that cooking isn’t just about acquiring skills - it’s an instinct.

From a food blogger’s perspective this has taught me that I need to create and test recipes very precisely to ensure there’s virtually no room for error in their translation. Not an easy task when ‘season to taste’ is purely subjective and people don’t know what’s wrong or missing from a recipe unless, like me, they instinctively do. You’d be surprised at how many times I read a recipe and ‘know’ it’s not going to work before I’ve even cooked it. 

I have five golden rules for success:

  • Read every recipe through at least twice before you start to cook it.
  • Prepare everything in advance e.g. assembling ingredients, chopping vegetables, lining tins etc. 
  • Taste your dish each step of the way - add extra seasoning etc. cautiously.
  • Consider the overall balance of the meal -  colours, taste, texture, ratio of protein to carbs etc. 
  • Delegate - there is nothing more bonding than cooking a meal with people you love, then sitting down together to eat it.

Sadly, none of this is an issue for people who’ve already been persuaded by the food industry that it’s better to stay out of the kitchen and let someone else (in a factory) do their cooking for them. In my view, this is precisely why factory-farming and other ecologically unsound food production methods have flourished. The demands of big business supplying ready-meals and cheap convenience food has consistently applied pressure on farmers to keep driving food production costs down. Economies of scale now forces millions of factory farmed animals to live and die in abject misery and to be treated with less respect than a fruit farmer must give to a crate of apples to prevent them from being bruised - all in the name of profit. 

Feeling energetically connected to the food you eat goes with the territory for the instinctive cook, so in the face of gross acts of cruelty to these sentient beings, I feel compelled to create vegetarian meals that taste as good, if not better, than meat-based ones. Morally, veganism would be better, but since both grains and legumes are off limits for a Primally inspired lifestyle, it is an impossible decision to make if I want to continue living healthily. My best hope is to encourage readers to roll up their sleeves and acquaint themselves with the sheer pleasure and satisfaction of cooking real, nutrient dense foods that don’t exploit animals and aren’t at odds with nature.

I created this weeks’ recipe for the Best Ever Vegetable Curry (indeed the best-of-any-type of curry I’ve ever tasted), for that reason. John, Sarah and I needed something to eat at my son-in-laws recent 40th birthday party, because although his favourite curry house delivered enough food for 50 guests, none of it was compatible with our self-imposed no meat, no legumes, no grains diet. 

I’ve called this fresh-tasting, fresh-looking, aromatic vegetable curry ‘Best Ever’ because Sarah and I only had to take one mouthful before we both excitedly announced “This is the best tasting curry I’ve eaten…ever!” Perfectly balanced - not too hot, not too spicy, not too creamy - I spent most of the evening congratulating myself! 

Craving curry? This one ticks all the boxes. It’s delicious, it’s inexpensive, it’s vegetarian (I like that many Indians are strict vegetarians), it’s a complete meal in a bowl and, because it’s one of those dishes that tastes even better the next day when the flavours have been allowed to fully develop, it’s the perfect make-ahead meal for family and friends. Served with Coriander & Mint Chutney, it’s in a flavour-packed league of its own that could convert even the most dedicated meat eater.  

For those of you that already follow the Primal eating plan and think that curry nirvana can’t exist without naan bread, I agree! There is no better way to get curry into your mouth! Which means that a Primal Plate recipe for grain-free naan bread is already in development and (fingers crossed) will be posted soon. Watch this space!

Best Ever Vegetable Curry (Serves 4)

Ingredients

2 tbsp olive oil

2 medium onions, finely diced

walnut-sized piece fresh ginger, peeled and finely grated (about 1 tbsp when grated)

2 tsp ground coriander

2 tsp ground cumin

1 tsp ground turmeric

1 green chilli

1 dsp organic tomato paste

1 dsp Marigold organic reduced salt vegetable bouillon powder

350g organic sweet potatoes

250g organic carrots

1 small celeriac (about 500g unpeeled weight) 

1 x 400g tin organic plum tomatoes

160ml organic coconut cream

3-inch piece cinnamon stick

Sea salt (about 1½ tsp) and freshly ground black pepper (about ¼ tsp)

1 small head of cauliflower, cut into small bite-sized florets

120g baby spinach, washed and dried

Coriander and Mint Chutney - to serve


Instructions

Heat the oil over medium-high heat in a large deep sauté / frying pan. Add the onion, cover and cook, stirring occasionally, for 4 minutes or until beginning to brown. Reduce the heat to medium and continue to cook with the pan lid on for another 8 to10 minutes, stirring from time to time, until the onion is deep golden brown.

Peel and chop all the root vegetables (carrot, sweet potato, celeriac) into even-sized dice (about 15mm / ¾ inch) - you should have about 950g prepared vegetables in total.

Halve, deseed and finely chop the chilli. Peel and grate the ginger. 

Add the chilli and ginger to the onions; cook, stirring, for 1 minute to combine the flavours. 

Add the coriander, cumin, turmeric; stir for another minute to toast the spices. Add the bouillon powder and tomato paste and stir for another minute until well blended into the spice mix.

Add the diced vegetables, stir to evenly coat them in the aromatics, then cover the pan and continue to cook over a medium/low heat whilst you open the tomatoes and drain the juice into a measuring jug. 

Remove any daggy stalk ends, bits of skin etc. from the tomatoes, then chop them and add to the pan. Make the drained tomato juice up to 300ml with filtered water and add that too. 

Add the coconut cream, cinnamon stick, salt, and freshly ground pepper and bring to the boil. Reduce the heat to medium/ low and simmer for 15 minutes, or until the root vegetables are almost tender. 

Add the cauliflower florets, stir well, cover and cook for a further 10 minutes until the cauliflower is tender. Remove the cinnamon stick. 

Stir in spinach and cook until the spinach has wilted, about 2 minutes more. Check the seasoning, adding more salt if necessary. 

Serve in warmed bowls topped with a generous spoonful of Coriander and Mint Chutney.


Sweet Potato Hash With Crispy Fried Eggs

by Susan Smith in , ,


If there was one word to describe my life right now it would be “overwhelming”. Nearly four months ago it seemed like a good idea to order a large quantity of new self-build furniture to grab a seventy-per-cent-off deal at Laura Ashley. In retrospect, an odd choice given that DIY is not our forte. Since delivery, half our bedroom space has been relinquished to twenty-two enormous and very intimidating boxes.

Now (subject to us finding a competent joiner!), they’re not going to be gathering dust for much longer. The re-vamp of our living/bedroom space, which has been overdue for the past ten years has finally begun and we, with all our clothes and personal possessions, have been displaced throughout the rest of the house whist the work is carried out. I hate the disruption, but at least the financial liability of a large, cold Edwardian property that’s a nightmare to heat and maintain is offset by having space! Perhaps we should have considered moving when my two daughters flew the nest, but the prospect of a new owner coming in and cutting down the trees and destroying the habitat of numerous squirrels and birds that have made our garden their home, prevents us. So given that we feel we have to stay, we're stuck with the ongoing commitment and upheaval of one costly home improvement after another.

With all the chaos going on around me, what I don’t have too much time for is cooking, food shopping and devising new recipes for this blog! Hence, for the next few weeks, I’ll be in the same boat as most people who prefer to eat ‘fast’ food. However, in my world, fast food can never mean processed, ready-made or take-aways. Simplicity is key to making healthy meals that are quick and easy to get to the table, which also means me relying heavily on my family’s co-operation and team work. My husband John is my brilliant commis chef that does most of the chopping and slicing, whilst Sarah is a dab-hand at making perfect fried eggs for this comforting Sweet Potato Hash With Crispy Fried Eggs. 

A delicious, nutritious, inexpensive meal that really works, it is one of my all-time favourites for an uncomplicated supper.

Sweet Potato Hash With Crispy Fried Eggs (V) (Serves 3)

Ingredients

750g organic sweet potatoes, cut into small (about 2cm) cubes

1 small organic Savoy cabbage, stem and stalks removed and thinly sliced

3 tbsp olive oil 

1 organic red onion, finely chopped

30g butter

1 dsp cumin seeds

Sea salt and freshly ground black pepper

6 organic medium eggs

Large handful of fresh parsley, finely chopped


Instructions

Boil a kettle of water. Put the boiling water into the bottom pan of a steamer and the sweet potato cubes in the top of the steamer.

Steam the sweet potato cubes with the pan lid on for about 10 minutes, until almost tender. Use a draining spoon to scoop the potato cubes out of the steamer into a large bowl. Season well with sea salt and black pepper and add the cumin seeds, being careful not to break the potato cubes up. Set aside. 

Add the cabbage to the steamer, put the lid back on and cook for 2 minutes until tender. Tip the cooked cabbage into a separate bowl. Season with a little sea salt and a good grinding of black pepper. 

Heat 1 tablespoon of olive oil in a large deep frying pan over a moderate heat and fry the onion for 3 minutes or until just softened. Turn the heat up to medium/high, add half the butter and the sweet potatoes and fry, stirring frequently, until the potatoes and onions start to caramelise and turn golden brown.

Add the cabbage and the rest of the butter to the sweet potato mixture and continue frying, stirring from time to time, whilst you simultaneously cook the eggs.

Take a second large frying pan and heat the remaining 2 tbsp of olive oil until the surface seems to slightly shimmer. Crack each egg into a small bowl or cup then carefully pour into the hot oil. After 1 minute reduce the heat to medium and continue to cook until underneath the whites of the eggs are crispy and golden.

While the yolks are still runny, use a fish slice to transfer the eggs to a plate lined with kitchen paper to drain off any excess oil. 

Pile the sweet potato hash on to three warmed plates and gently place two fried eggs on top of each. Season the eggs with a little sea salt and black pepper then scatter over the chopped parsley to serve. 


Notes:

Sweet potatoes are naturally sweet-tasting but their natural sugars are slowly released into the bloodstream, helping to ensure a balanced and regular source of energy, without the blood sugar spikes linked to fatigue and weight gain. 

If the eggs stick together in the frying pan, use a non-stick flat ended spatula to 'cut' and separate them. Do not try to dowse the egg yolks in hot oil - they should be cooked to perfection (soft and runny) if you leave the eggs alone in the frying pan until the edges of the whites are a lacey, crisp and golden.

Wear a bibbed apron to fry the eggs - they can spit and splutter in hot oil!


Carbohydrates 58g Protein 23g - per serving


Courgette Linguine With Cashew Pesto and Marinated Mushroom and Broccoli

by Susan Smith in , , ,


Although at Primal Plate we’re more than happy to occasionally have our grain-free, refined sugar-free cake and to eat it too, there comes a time (usually after a second slice of said cake) that I begin to pull back from borderline over-indulgence to something altogether more healthy and savoury. 

Sugar is sugar, and although raw honey, coconut palm sugar and pure maple syrup are much healthier options than refined sugar, they are still sugar. Even fructose, the natural sugar found in fruit, is unhealthy when eaten to excess. I know that because I used to make myself what I thought was a healthy multiple-fruit smoothie, which oftentimes boasted more than my ‘five-a-day’ in just one potent glass full. During this time I developed an inflammatory skin condition, which my doctor initially diagnosed as shingles. In fact it was a severe case of atopic eczema, which became infected. Within two weeks of switching to a low-carb Primal diet, which meant I stopped drinking excessive amounts of fructose in my breakfast smoothie, the rash disappeared for good.

The occasional sweet treat probably doesn't do much harm, but eating too much sugar (this applies to virtually everyone who eats a processed, high-carb Western diet and doesn’t do significant amounts of exercise) can have harmful effects on metabolism and is pro-inflammatory. Inflammation can lead directly to the development of all sorts of diseases throughout the body including diabetes, cardiovascular disease and cancer and undoubtedly it was sugar-linked inflammation that caused my erstwhile eczema. 

So, after developing and testing last week’s recipe for Tiger Nut Victoria Sandwich, which involved baking and eating two cakes within three days, I came across a recipe in Paul Gayler’s book Pure Vegetarian that is the perfect antidote to sugar overdose. 

My adaptation of Courgette Linguine With Cashew Pesto and Marinated Mushroom and Broccoli is a refreshing, vegan plateful of gorgeous colour and outstanding texture. Classic, Asian-style flavours come together in perfect harmony for one of the healthiest, zingiest, freshest-tasting meals ever! With virtually no cooking involved, it is also surprisingly simple to make. 

Try this almost raw ‘detox’ recipe if you don’t cook / won’t cook, if you need an instant energy boost or if you simply want to make amends for some recent foodie indiscretion. Good to look at, good to eat and oh so good for you, it really is health food at its best. 

Courgette Linguine With Cashew Pesto and Marinated Mushroom and Broccoli (V) (Serves 4)

Ingredients - for the cashew pesto

50g raw organic cashews

1 red chilli, deseeded and finely chopped

2cm piece of root ginger, peeled and grated

100ml extra-virgin olive oil

25g fresh coriander

15g fresh mint leaves

15g fresh basil leaves

Juice of 1 lime

Sea salt


Instructions

Place the cashews in a blender and blitz until broken down. 

Add the ginger, chilli, oil and herbs and blend until pureed.

Add lime juice, then season with sea salt to taste (I used ½ teaspoon) and briefly whizz again to incorporate.

Cover and set aside.


Ingredients - for the marinated vegetables

200g organic chestnut mushrooms, cleaned (I just wipe them over with a damp paper towel)

100ml organic extra-virgin olive oil

1 tablespoon tamari (wheat-free soy sauce)

1 organic spring onion, very finely chopped

2cm piece of root ginger, peeled and grated

100g organic broccoli, cut into small florets (without stalk)

50ml fresh lime juice (approx. 1 large or 2 small limes)

4 crispy and firm organic courgettes

Sea salt and freshly ground black pepper

Instructions

Slice the mushrooms very thinly, place in a large bowl and add the oil, soy sauce, onion and ginger. Allow to marinate for 30 minutes (no longer than this or they create too much juice)

Meanwhile, steam the broccoli for about 2 to 3 minutes until it turns bright green but is still crunchy in texture. Quickly remove and add to the mushrooms along with the lime juice and season to taste.

Cut the ends off the courgettes, then using a kitchen mandolin, spiralizer, vegetable peeler or sharp knife, slice as thinly as possible lengthways into long strips or ‘linguine’. 

Toss with the mushrooms and broccoli, adjust the seasoning and serve with a dollop of cashew pesto on top. 


Carbohydrate 13g Protein 8g - per serving

A Spirilizer makes perfectly thin and even courgette 'linguine'

A Spirilizer makes perfectly thin and even courgette 'linguine'