Courgette & Blue Stilton Gratin

by Susan Smith in ,


Our lives are pretty hectic nowadays, so recently my focus has been on creating healthy meals that can quickly be pulled together after work. Although other commitments mean I’ve not been able to post as many recipes on this blog as I’d like, the beat goes on. You’d have to come to my home on a weekday to see that even when I barely have time to sneeze, I have dozens of fast and easy recipes (still yet to share) for nutritious meals that are easily prepared and cooked within an hour.

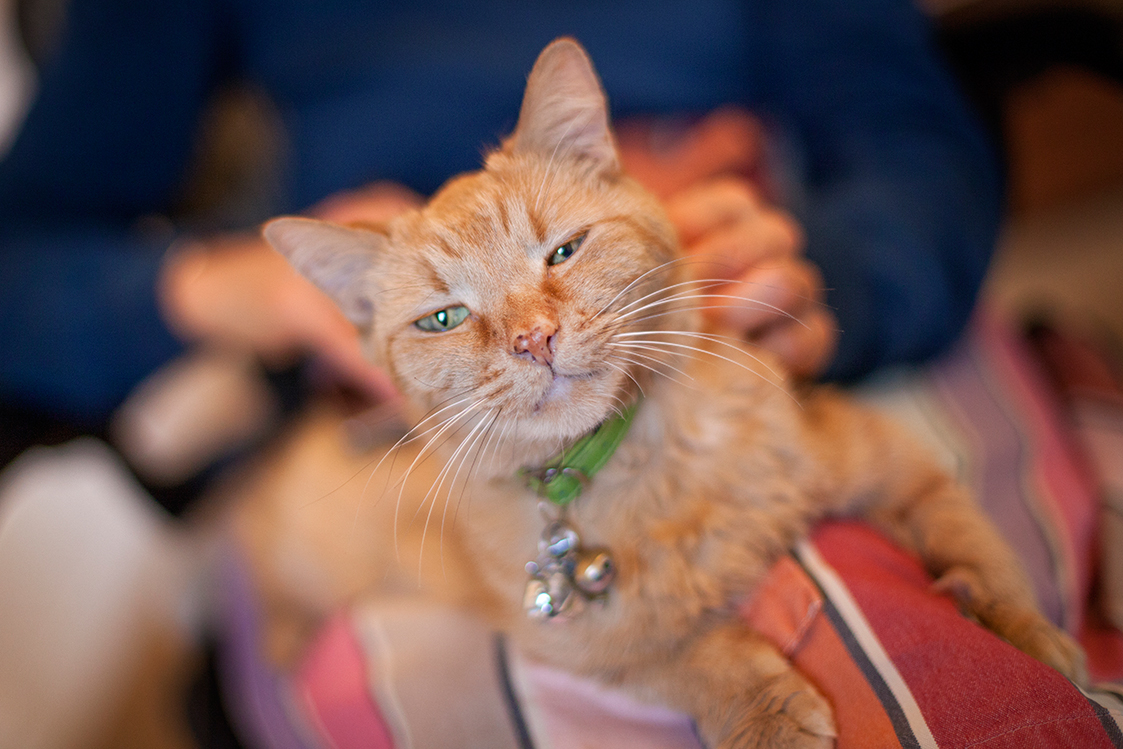
This past week I’ve been helping Sarah with Mirror Imaging meetings, collaborating on a designer catwalk and prosecco party for what promises to be the East Midland’s wedding event of the year, cooking real food every day (even if it’s just soup and sandwiches), creating new recipes, writing my blog, playing catch-up with my finances (not least with tenants threatening non payment of rent!) and spending many hours online researching yet another kitty-related health scare when my cat Sushi, now in her eighteenth year, stopped eating for 5 days. Turns out, she was suffering with a troublesome tooth. This is the fourth time in the past 2 years that our feisty feline has been spared the doom and gloom of a more serious prognosis and my heartfelt thanks goes to her brilliant, kind-hearted vet, who deftly removed the damn thing with minimum fuss and distress to both Sushi and I. When cats of more than 10 years old get ill, the spectre of chronic kidney disease (CKD) seems to continually rear its ugly head, so the offending tooth was pulled out without anaesthetic or pain relief. Sushi and I were very brave! 

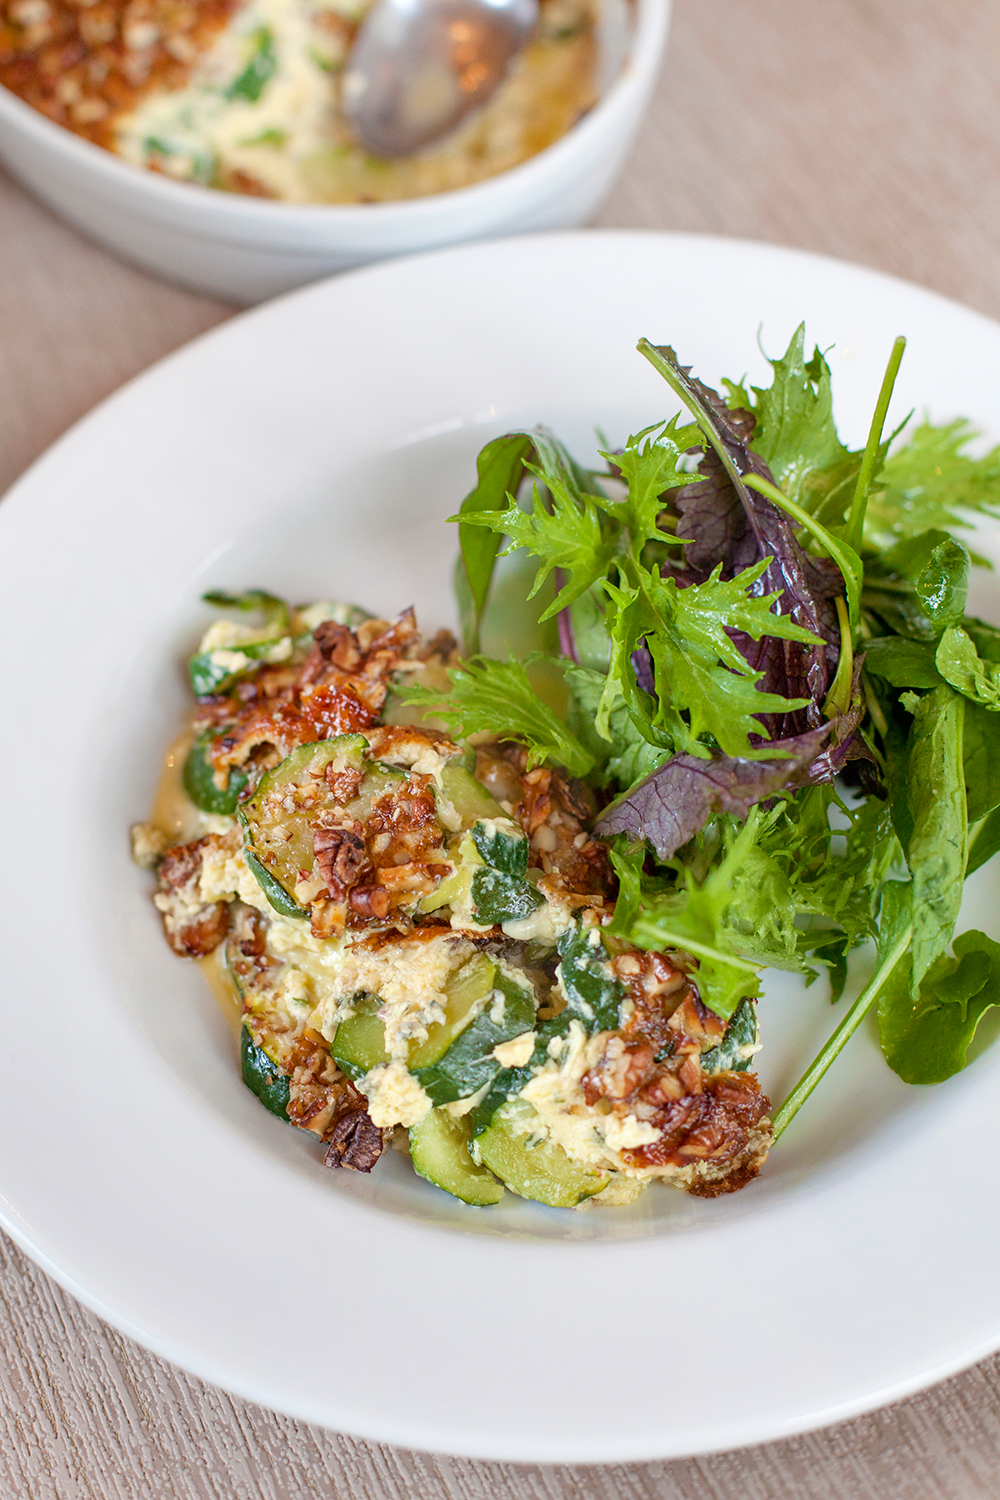
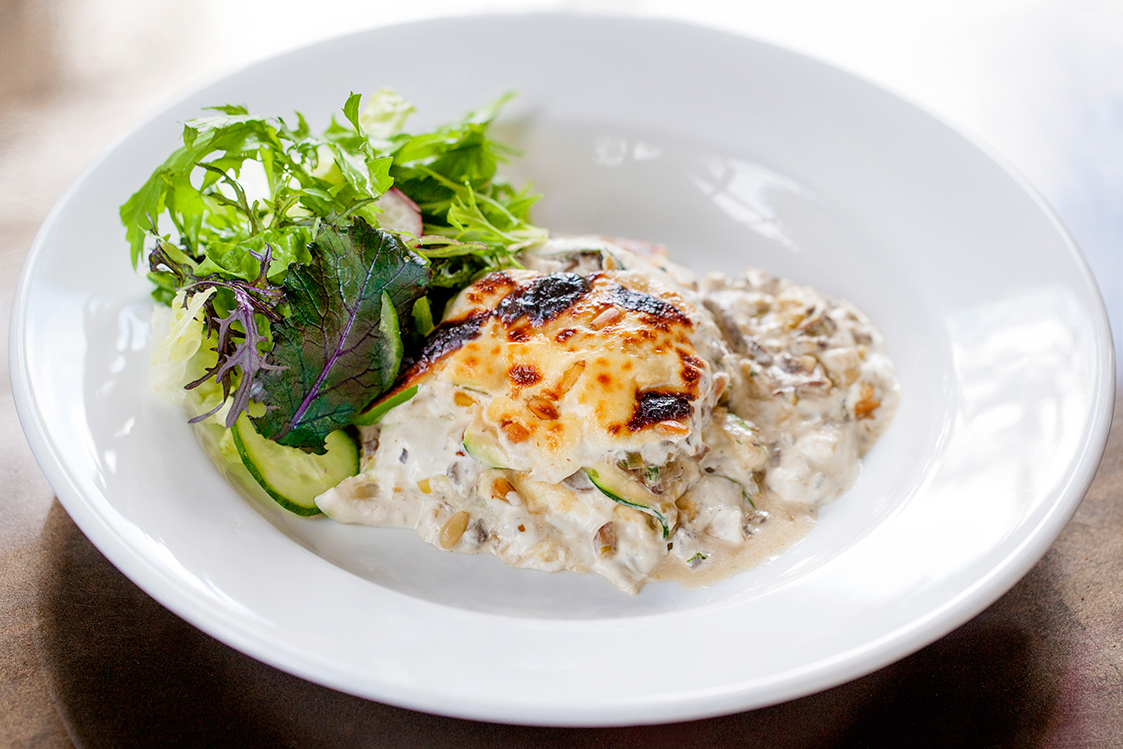
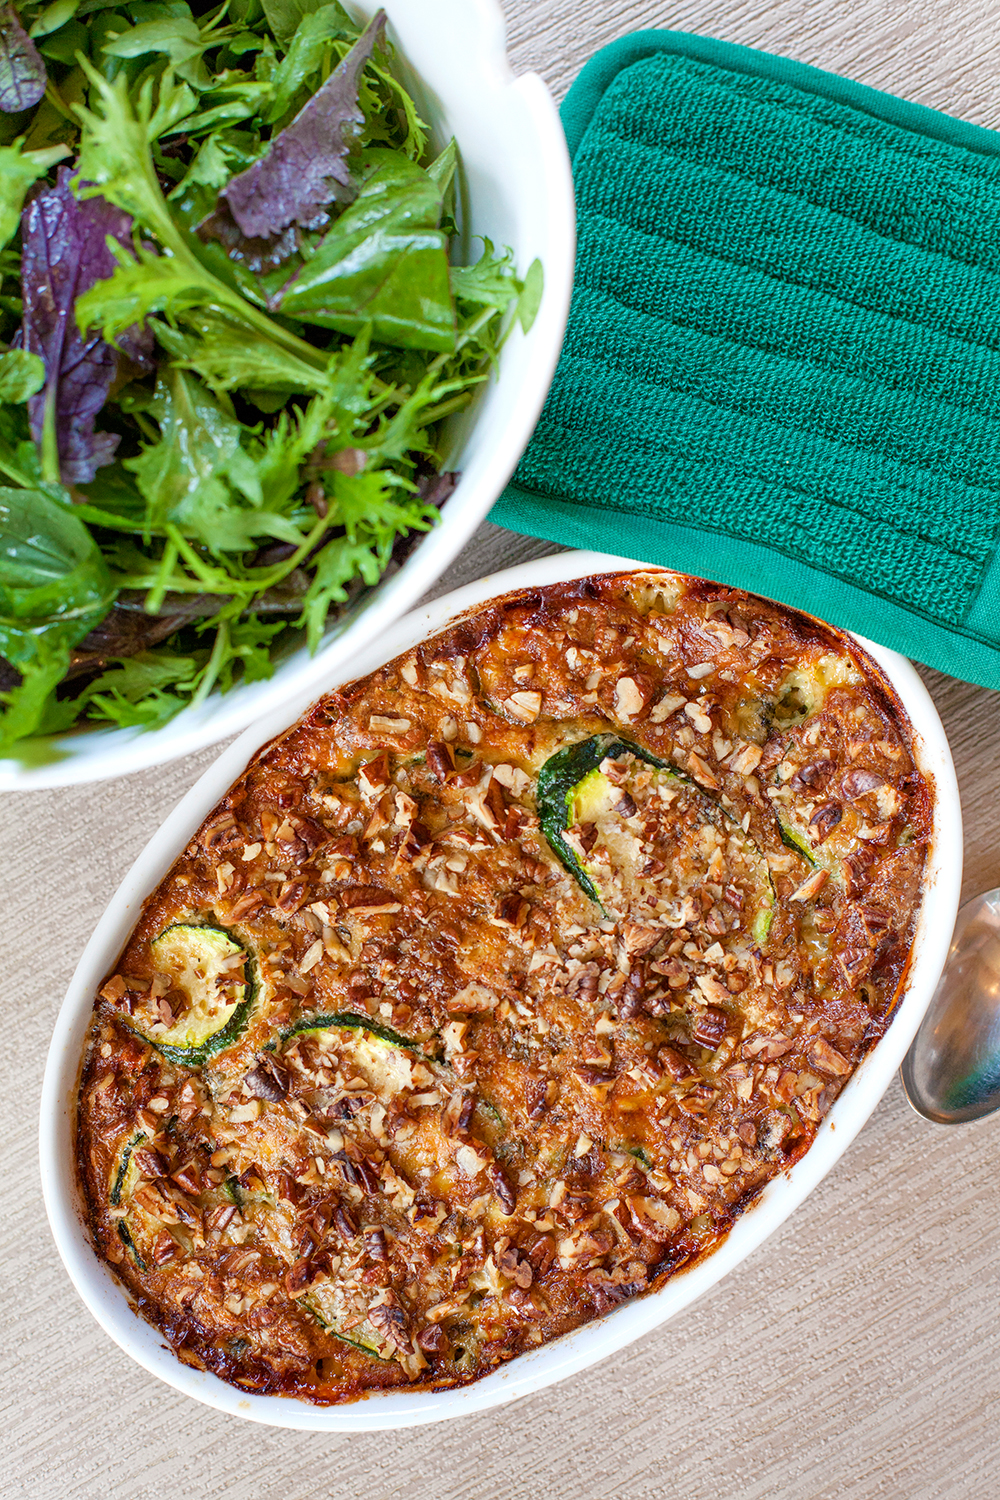
Because our puss-cat has always been afforded the status of a family member (in my view, you should never keep a pet if s/he isn’t) her needs are our highest priority. Caring for her when she’s in crisis takes a lot of time and loving dedication. It’s when you’re multi-tasking and knackered that easy-to-prepare food, which comforts and revives is a godsend. Courgette & Blue Stilton Gratin does the job perfectly. Simply serve with lightly dressed salad leaves for minimum effort.

Although this gratin does require a little forethought prior to making - you need to degorge the courgettes (sprinkle with salt to draw out their water content) for at least half-an-hour before assembling the dish - it’s a simple and quick meal for busy people to cook at the end of a working day. Unfortunately, you can’t skip the salting process because if you do, you’ll end up with curdled custard sat in a pool of excess liquid. Just breathe and pour yourself a glass of wine while you wait. Or do what I do when I’m working away from home…call your partner and ask them to do this part of the food prep ahead of time. If he remembers to open a bottle of red wine to let it breathe so I’m handed a glass the minute I walk through the door, it’s all good. It then only takes 10 minutes to assemble the dish and get it in the oven.

Cream, eggs and tangy blue cheese topped with crunchy toasted pecans is a luxurious, vegetarian, ketogenic meal that reminds me of Christmas. An all-in-one dish to include in your healthy eating repertoire at any time of the year - high in healthy grass-fed cream, butter and cheese makes food taste better and you feel more satisfied - it’s a shopper’s delight in the countdown to Christmas. It’s also an indulgent, low-carb, vegetarian main course to serve with traditional festive accompaniments for those of us that don’t want, or would like to take a break from, all the meaty fare on offer at Christmas.

Thankfully, 'meat-free' no longer applies to Sushi. With painful tooth extracted, she’ll be looking forward to chowing down on turkey!

courgette stilton bake.jpg

Courgette & Blue Stilton Gratin (Serves 3)

Ingredients

3 medium-large (approx 600g) organic courgettes

Pure Himalayan fine salt

200g organic blue stilton cheese

2 tbsp organic fresh thyme leaves

3 large organic eggs

300ml organic double cream 

Pinch of organic nutmeg, freshly grated 

Organic black pepper, freshly ground

50g organic pecan nuts, roughly chopped

ingredients.jpg

Instructions

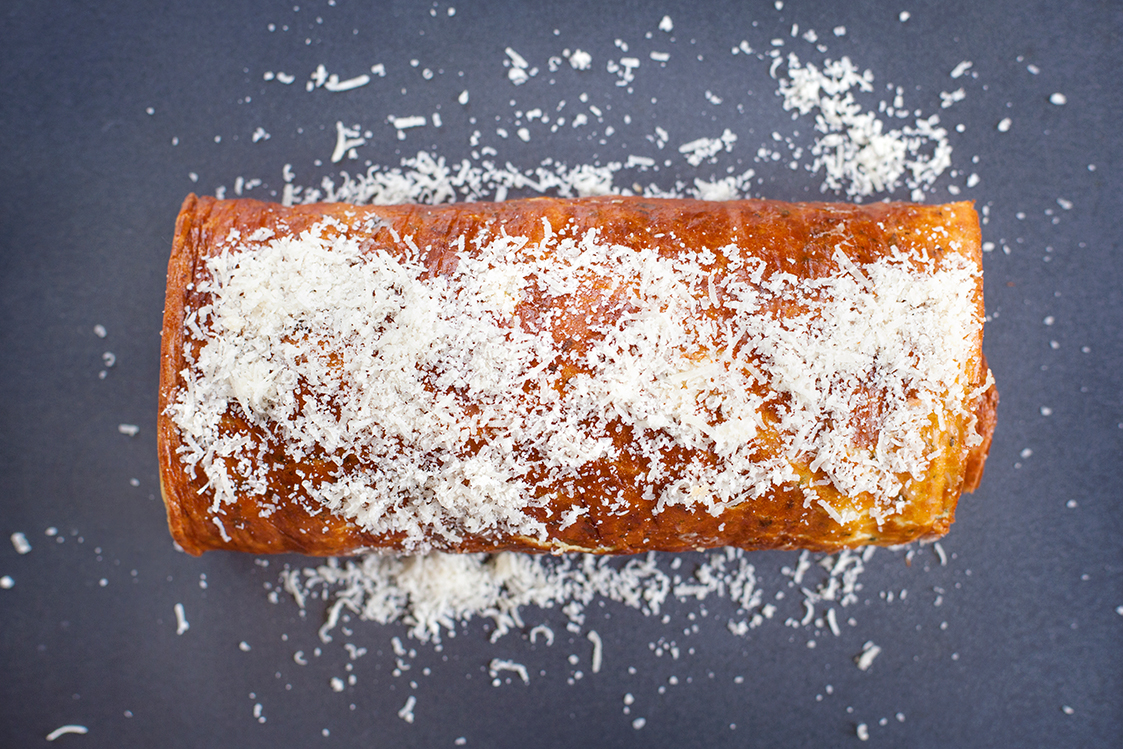
Wash, trim and dry the courgettes. Using a sharp knife or mandolin, slice the courgettes diagonally into 6-8 mm thick ovals. Season with salt and leave them in a sieve or colander set over a bowl, to remove excess water (i.e. degorge) for 30 minutes to 1 hour.

Whilst the courgettes are degorging, cut the Stilton cheese into small cubes. Set aside. Put the thyme leaves and chopped pecans into two separate bowls.

Place the eggs, double cream, grated nutmeg and pepper into a large jug and lightly whisk until combined. You can add a pinch of salt, but season cautiously because the cheese will already be quite salty.

Pre-heat the oven to 200℃ / 400℉ / Gas mark 6

Dry the courgette slices thoroughly between two clean tea towels and/or dab them dry with paper kitchen roll.

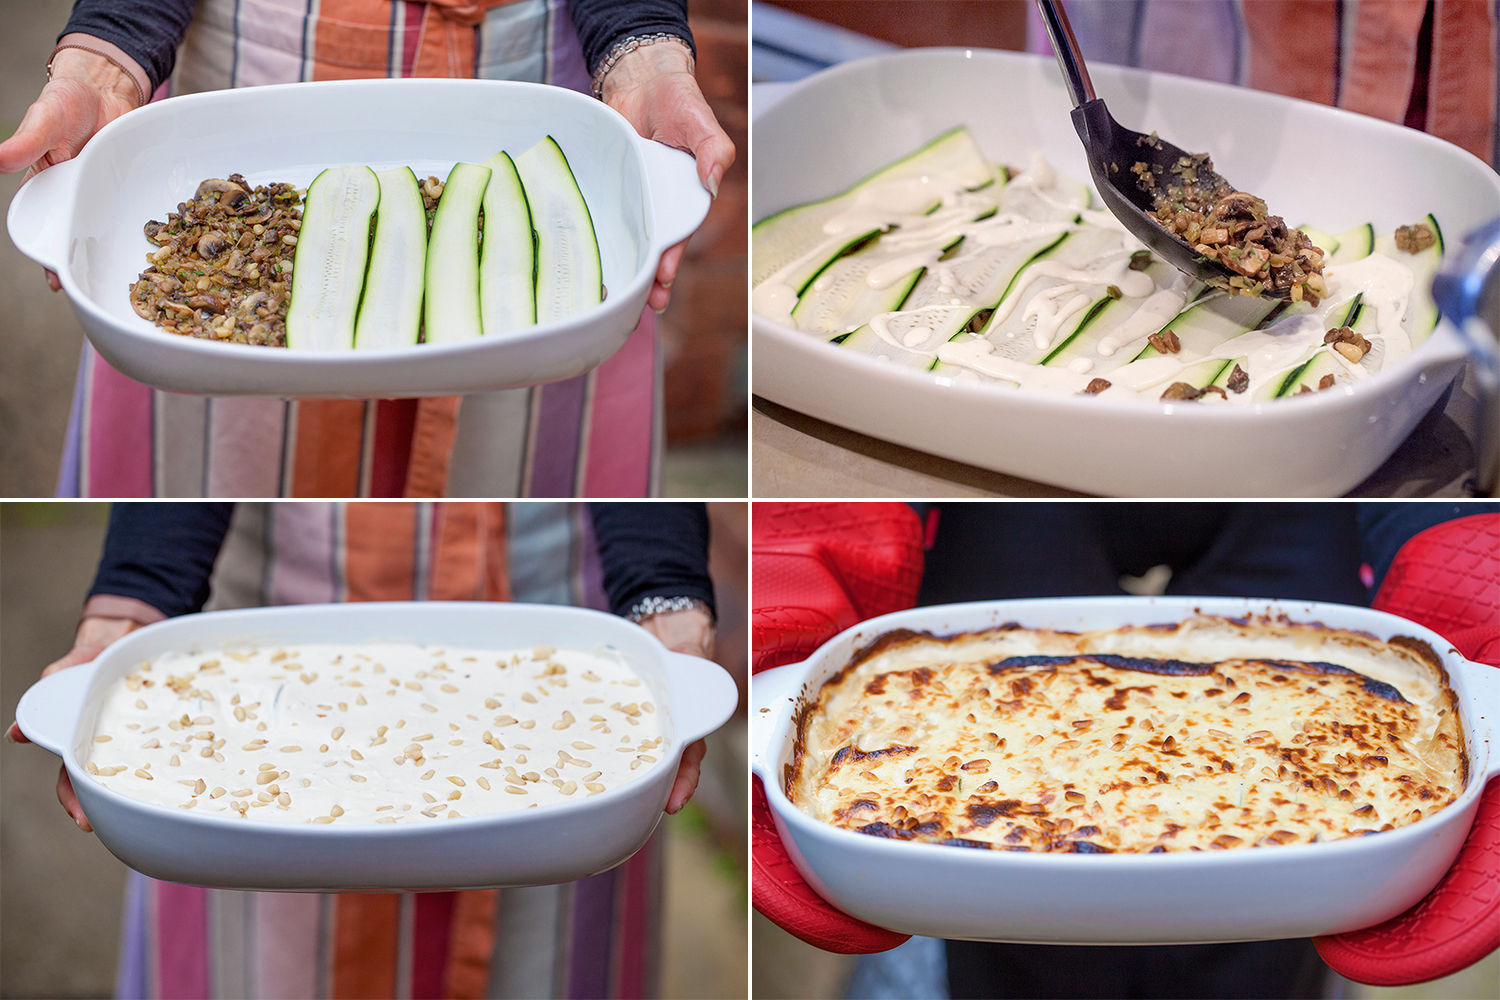
Lay one-third of the courgette slices evenly in the base of an ovenproof (gratin) dish. Add one-third of the cheese, dotting it around the dish. Sprinkle over half the thyme leaves. 

step by step recipe.jpg

Repeat with a second layer of courgette slices, cheese and thyme leaves, then finish with a third layer of courgettes and finally the remaining cheese.

Give the egg mixture a quick stir and pour evenly into the dish. Scatter over the chopped pecans.

Cook in the oven for 35 minutes until the egg custard is set. 

Remove from the oven and let the gratin stand for 5 minutes before serving.


Fat 96g Protein 30g Carbohydrate 7g

primal recipes.jpg

Chocolate Truffle Pots With Raspberries

by Susan Smith in ,


For crying out loud! How do I know that Christmas is already snapping at my heels again? Answer: When Waitrose start to email and text me that it’s time to bag my preferred Christmas delivery date before all their slots are taken. Apparently, if you don’t want to miss out and be forced to jostle with the rest of the shoppers in-store this Christmas, you’d better be one of the first in their virtual queue. The trouble is, to qualify you have to fill your shopping basket today with everything you might fancy eating in three months time! Looks like wild sockeye salmon, king Madagascan prawns and Nyetimber fizz - the ultimate English alternative to Champagne - are already destined to feature in our Christmas celebrations this year! 

As it happens, last Sunday was one of those all too rare occasions when both my lovely daughters and I sat down together for a family meal. So taken was I at the prospect of this mini social gathering that even though I am currently as run off my feet as it’s possible to be - think headless chicken - I still felt inspired to make something really special for us to eat. These Chocolate Truffle Pots With Raspberries were devoured with so much enthusiasm, I now also know what’s going to be the grand finale to our Christmas lunch! Organised by default, or what? To be honest, they’re such an easy, make-ahead dessert to simply grab from the fridge as you need them, they’ll probably make several dinner party appearances before the festive season gets underway in earnest.

Besides, there’s nothing more un-diet-like than a rich, chocolatey pudding to show people how deliciously easy it is to eat yourself healthy and then stay slim once you’ve decided to ditch high carbohydrates and switch your body’s energy source from sugar to high quality fats. WARNING: If you eat lots of high-fat food whilst continuing to eat sugar and grains, you will get fat! 

Pregnant women and high performance athletes may be an exception, but for the vast majority of us carb intolerants, a high-fat, moderate protein and low-carb diet, especially in combination with gentle intermittent fasting, will burn-off excess body fat, keep you at your optimum weight, reduce chronic inflammation (the root cause of most disease) and help you take back your health and vitality. Sounds too good to be true but I invite you to give LCHF the chance to work its magic before the party season kicks off…by which time there should be significantly less of you to fit into your party clothes!

Very good quality, organic chocolate and a mere tablespoon of organic maple syrup makes six individual Chocolate Truffle Pots With Raspberries that are neither too sweet or too bitter. A sophisticated, delectable dessert that keeps on giving with every luscious spoonful - dig deep for the pretty pink raspberry centre that pairs beautifully with the creaminess of chocolate truffle - and don’t let the big fat lie that you’ve been told, particularly about saturated fat, mar your enjoyment. Though everyone finds it difficult to believe, this heavenly, ‘fit for the gods’ high-fat pudding gets you over the psychological hump of diet deprivation and hangry sugar cravings to actually help you shed body fat. Do you really need any other excuse not to make it?

chocolate pots.jpg

Chocolate Truffle Pots With Raspberries (Serves 6)

Ingredients

150g organic frozen raspberries

50g organic *100% cocoa solids dark chocolate (see Notes below)

75g organic *76% cocoa solids dark chocolate (see Notes below)

300ml organic double cream

4 drops organic liquid stevia

1 tbsp organic maple syrup

1 tsp pure vanilla extract

4 large organic egg yolks

2 tbsp Sukrin:1

Raw organic cacao powder, to dust (see Notes below)

Sukrin icing sugar, to dust

chocolate pots primal recipes.jpg

Instructions

Boil a kettle of water. Pre-heat the oven to 150℃ (130℃ fan) / 300℉ / Gas mark 2.

Put the chocolate into a saucepan with the cream and place over a medium heat. Heat slowly to just below boiling point whilst stirring from time to time until the chocolate is completely melted and the mixture smooth. Stir in the liquid stevia, vanilla extract and maple syrup then set aside to cool slightly.

Divide the frozen raspberries between 6 x 125ml ramekins (25g per ramekin)

recipe step by step 1.jpg

Place the egg yolks and Sukrin:1 into a bowl and stir together using a wooden spoon. Stir in the chocolate mixture and stir to combine.

step by step recipe.jpg

Divide the mixture between the ramekins (approximately 80g per ramekin), settle the mixture evenly into their pots by gently tapping the sides of the ramekins before placing them into a deep roasting tin. Pour enough boiling water into the tin to come halfway up the sides of the ramekins.

step by step chocolate pots.jpg

Bake for 25 minutes. Remove from the oven and leave to to cool, then cover and chill overnight. 

Remove the ramekins from the fridge 30 minutes before serving to allow them to reach room temperature. 

Just before serving dust with cacao powder and a sprinkling of Sukrin icing sugar, if liked  


Notes

Raw cacao is less processed than cocoa powder and so retains natural antioxidants and essential fatty acids. It has the same great taste as cocoa and is used in exactly the same way but for this recipe I chose to go one better. People often ask me if I believe in taking nutritional supplements and indeed I do. Never one to miss a golden opportunity, I used Miessence Berry Radical Antioxidant Superfood - a chocolatey-tasting food supplement - to dust my truffle pots. In fact, if you suspect your diet is deficient in fruit and vegetables, this tasty, high potency formulation gives you the antioxidant equivalent of eight servings of fruit and vegetables in every teaspoon! 

I always prioritise eating well to support good health so there’s no point in being cheap…er frugal, when it comes to feeding your body with the nutrients it needs. Along with Miessence Berry Radical antioxidants, which we usually make into a delicious chocolate milk sweetened with pure stevia drops, we also take a teaspoon each of Miessence InLiven Probiotics and DeepGreen Alkalising Superfood mixed with fresh lemon juice and water, each and every day. At least I then know that no matter how hectic or stressful life gets, my family is never going to be nutritionally short-changed. If you know you don’t always have the time to cook fresh, healthy meals, the Miessence Vitality Pack is the most convenient, natural way to reliably supplement an inadequate diet. 

chocolate pots ingredients.jpg

I had a glut of 100% cocoa solids, no added sugar, organic chocolate bars given to me to sample for a birthday surprise. To be honest, I must be a 100% cocoa solids chocolate ‘wimp’ because I found only one of them smooth and mellow enough to eat straight from its wrapping! The rest will find their way into future Primal Plate recipes to make them even more low-carb. * If you prefer (it’s much cheaper), you can replace the two types of chocolate that I used with 125 grams of Green & Black’s 85% organic dark chocolate. I haven’t tested it out, but I imagine to get a similar taste profile to my chocolate truffle pots (I don’t like overly sweet chocolate), you will need to add less stevia - try adding just 2 stevia drops at first, then taste before adding more to adjust the sweetness to your liking. 


Fat 40g Protein 5g Carbohydrate 9g - per serving


Almond Coconut & Blueberry Cake

by Susan Smith in


It’s my birthday this weekend and to celebrate I’m eating cake…a lot of it since there are only three of us sharing! Of course, my b’day cake is not cake as most people know it. Far from being ‘naughty but nice’, this Almond Coconut & Blueberry Cake is a superfood extravaganza that looks like cake, tastes like cake, emotionally satisfies like cake yet does no harm. Seriously, what sort of a celebration is it if you know you’re going to suffer afterwards? On the other hand, do puritans ever have fun?

Sweet-toothed, cake scoffers and fans of ‘The Great British Bake Off’ take note: high carbohydrate intake (sugar and grains) makes you fat, diseased and sends you to an early grave. Unfortunately, it appears there’s a growing army of people disassociated from cooking healthy dinners but magnetised towards the kitchen when it involves baking cake. 

gluten free cake.jpg

Today’s recipe for Almond Coconut & Blueberry Cake goes with the flow. Yummy, sweet-tasting, light and moist, this lovely cake is something for sugar addicts to drool over. It’s also perfect for the likes of me, who wants nourishment not punishment from life’s celebrations!

The final word goes to a recent scientific study published in The Lancet (29 August 2017) 

"High carbohydrate intake was associated with higher risk of total mortality, whereas total fat and individual types of fat were related to lower total mortality. Total fat and types of fat were not associated with cardiovascular disease, myocardial infarction, or cardiovascular disease mortality, whereas saturated fat had an inverse association with stroke. Global dietary guidelines should be reconsidered in light of these findings."

To translate, high fat and low carb is the future of cake and, birthday or not, this simple to make Almond Coconut & Blueberry Cake is way to go to bake yourself happy! 

paleo cake recipe.jpg

Almond Coconut & Blueberry Cake (serves 12) 

Ingredients

180g organic ground almonds

100g organic coconut butter (not all coconut butters are created equal, I recommend Biona’s Coconut Bliss)

150g organic virgin coconut oil (or use organic grass-fed unsalted butter, if you prefer)

100g organic tiger nut flour

1½ tsp gluten free baking powder

60g Sukrin:1

4 large organic eggs

1½ tsp pure vanilla extract

60ml organic maple syrup

200g organic fresh blueberries

60g organic flaked almonds

blueberry cake.jpg

Instructions

Line the base and sides of a 21cm springform baking tin with non-stick parchment paper and preheat the oven to 180℃ /  350℉ / Gas mark 4

Gently melt the Coconut Bliss and coconut oil (or unsalted butter) together in a saucepan set over a very low heat. Do not let it get too hot, it needs to be no warmer than blood heat to melt the two ingredients together. 

Place the ground almonds, tiger nut flour, baking powder and Sukrin:1 into a separate bowl and aerate with a whisk until there are no lumps and all the ingredients are evenly incorporated into the mix.

In another bowl, lightly whisk the eggs together with the vanilla extract and maple syrup.

Make a well in the dry ingredients, then pour the wet ingredients (egg mix and melted butter/oil) into the dry mix and whisk thoroughly. 

Add 150g blueberries to the batter, folding them in with a spoon.

Pour the cake batter into the tin and sprinkle the rest of the blueberries on top together with the flaked almonds (in that order)

Bake for about an hour, or until a toothpick or skewer inserted into the centre of the cake. comes out clean. Cook longer, if needed (mine took 1 hour 5 minutes!)

Cool the cake in its tin, then turn out carefully and remove the paper before placing the cake the right way up on to a cake stand or serving plate. For a simple but charming birthday cake, place a single lighted candle in the centre of the cake.  

Serve at room temperature with a cup of tea. Alternatively, serve warm for dessert with a dollop of organic créme fraîche. 


Fat 32.5g Protein 8g Carbohydrate 13g - per slice

primal cake recipe.jpg
blueberry cake gluten free recipe.jpg

Wild Salmon & Tomato Curry

by Susan Smith in ,


In 2010 we started on a project to completely refurbish our three-storey Edwardian property, one room at a time. It’s a massive commitment that we’re still only halfway through. The first job was to change the boiler for more energy efficient heating. The second was to install a luxury bathroom complete with crystal chandelier, elegant, Italian stone basins and matching solid ‘egg shell’ bath for the ultimate, ‘pamper-me’ experience.

Talk about best laid plans! Fuelled by junk food and numerous sugar-laden beverages, I’m convinced that the modern workman's lack of care or effort is most likely a dietary affliction! Pleasure in my newly refurbished bathroom lasted for less than a year. Thereafter, the grouting in the shower cubicle fell out and the free-standing floor bath tap broke, meaning I could neither use the shower for risk of it leaking, nor take a bath. Soon after, everything else went kaput. The bidet tap corroded and the mastic sealant around all the waste outlets turned a nasty, dark-golden-urine colour. Unbeknownst to us, the original skirting had been surreptitiously stripped out and replaced with MDF - a well known bathroom ‘clanger’ because when MDF is subjected to moisture it will swell and bow, which it did. As for the central heating system, the plumber told me that at least one radiator in the house, which happened to be the one in our sitting-room and the main one in the new bathroom, needed to stay partially cold for the rest of the system to work and “not to worry”, this was absolutely normal! When the expansion tank in the airing cupboard fell off the wall I knew for sure we were in trouble. The one thing I do have to put my hand up to is the dreadful choice of ‘eco-friendly’ cork floor tiles, which quickly faded and started to lift along their edges, albeit that the sub-floor wasn’t properly levelled to begin with.  

I now view most tradespeople with deep distrust! Occasionally, I get really lucky (thanks Callum at Ceramicals for doing such a brilliant tiling job) but all too often my worst fears are realised. It took 6 years for me to bite the bullet and get the central heating fixed. It’s still working, so two weeks ago I dared myself to have the entire bathroom and upstairs toilet ripped out so we could re-tile the floors and replace all the broken bits. The noise and upheaval was enough to make me have kittens! The floor now looks stunning but when the plumber from hell finally finished reconnecting the sanitary ware - never agree to pay a man by the hour when he can talk for England! - and the mains water was turned back on, water poured forth from the toilet and bath, flooding my newly tiled floor. Estimated to be a 4 day job, it took 12 days of pandemonium before I finally got my bathroom and loo back in service…umm, sort of! Neither room has a door - you try sitting on the loo in full view of the stairs and landing - the bath is still unusable, the new bidet tap lever won’t budge and one washbasin waste isn’t watertight. Essentially, it’s back to the drawing board; the onus resting on me to find another plumber who doesn’t have an attitude problem. 

If I’m going to cook and blog my way through times like these it had better be something quick, simple and nutritious. Hugh Fearnley-Whittingstall’s book River Cottage Light & Easy came to my rescue yet again with a recipe for fish and tomato curry. With a couple of minor adjustments - wild salmon holds together better than white fish fillets and I’ve added some fresh chilli too - it became Wild Salmon & Tomato Curry.

Making fish curry may sound like an undertaking but when the spicy tomato sauce is this easy to make and the fish cooks in a matter of minutes, it is the perfect ‘Friday night is curry night’ antidote to a particularly stressful week. Served with spicy cauliflower ‘rice’ or charred broccoli and a very good bottle of red wine it can make life seem worth living even when the sword of Damocles hangs over me for telling the now enraged plumbing misogynist that I won’t be paying his bill in full! 

salmon curry gluten free recipe.jpg

Wild Salmon & Tomato Curry (Serves 3-4)

Ingredients

25g organic coconut oil

1 large organic onion (or 2 medium ones), finely sliced

2” piece of organic fresh ginger, peeled and finely grated (yields about 2 teaspoons)

1 organic chilli, finely chopped

1 tbsp organic curry powder

1 cinnamon stick

300ml organic tomato passata

200ml organic full fat coconut milk

Pink Himalayan salt (fine crystals)

Organic black pepper, freshly ground

2 drops organic liquid stevia

500g wild keta salmon fillets, skinned (see Notes below)

Juice of half a large organic lime

To finish:

Fresh organic coriander leaves

Organic black onion (kalonji) seeds

Organic Greek yogurt - optional

primal paleo recipes.jpg
salmon curry paleo recipe.jpg

Instructions

Heat the coconut oil in a large, deep sauté pan over a medium-low heat.

Add the onion to the pan and cook, stirring regularly for 10 minutes.

Add the ginger and chilli and cook for a further minute. Now add the curry powder and cinnamon stick and fry for another minute or two.

Stir in the tomato passata and coconut milk, then add the stevia and season to taste with salt and black pepper.

Stir well and simmer, stirring from time to time, for about 10 minutes until rich and well blended. 

Meanwhile, skin the salmon fillets and cut them into large pieces, about 4cm square.

Add the salmon to the sauce, bring back to a very gentle simmer and cook for 4-6 minutes until the fish is just cooked through, stirring very carefully a couple of times. N.B. Don’t break up the fish pieces if you can help it. 

Finally, stir in the lime juice, then taste and add more salt and pepper if needed.

Serve straight away with cauliflower ‘rice’ or a green vegetable. Finish with fresh coriander and black onion seeds scattered on top of the curry and pass around a bowl of Greek yogurt to accompany, if you like.

salmon curry low carb high fat recipes.jpg

Notes

Because I usually cook for three people, I find just 2 packs of Waitrose's Wild Keta Alaskan Salmon will suffice. This allows for about 5 large pieces of salmon per person. If you’re cooking for four, I’d purchase 3 packs and possibly save some of it to feed to my cat Sushi! 

Not all reviews for Wild Keta Salmon are good. Perhaps its rather unappetising sounding Alaskan name “Chum salmon” or “Dog salmon” doesn’t do it any favours. Nevertheless, I’ve found keta salmon to be a firm, high quality salmon that I actually prefer for this recipe. When it comes to choosing salmon, it’s a case of horses for courses, albeit I always select wild Alaskan fish, never farmed. Wild Alaskan Sockeye Salmon has bright orange-red flesh - perfect for impressive dinner party presentations - which is oilier, stronger tasting and richer in healthy Omega 3s than its pink fleshed, Wild Keta Salmon counterpart. Sockeye salmon holds up really well to grilling. However, I’ve chosen MSC certified Alaskan keta salmon for this recipe because it’s cheaper than sockeye and I actually prefer its lighter colour, flavour and softer texture in this curry.


Fat 34g Protein 27g Carbohydrate 11g - per serving of curry (4 people)

Fat 45g Protein 35g    Carbohydrate 14g - per serving of curry (3 people)

Fat 2g Protein 1g Carbohydrate 1g - per 25g serving of Greek yogurt


Avocado & Tomato Toasts

by Susan Smith in ,


Simple food is often the best. Today’s post isn’t so much about the recipe, it’s more about awakening the senses with some visual inspiration for a really healthy, low-carb, quick and easy meal. What you see is what you get!

Cool, creamy avocado, roughly mashed together with lime juice and fresh coriander, piled on to hot toast and topped with sweet, sizzling, grilled tomatoes is a delicious, hot and cold taste sensation that beats beans on toast any day of the week! 

Vegan, Paleo and keto friendly, this savoury offering contains enough healthy fat to keep you satiated for hours. Perfect! 

Avocado & Tomato Toasts (serves 4) 

Ingredients

2 large, preferably Hass, organic avocados (or 3 medium)

Organic lime juice, freshly squeezed

Small bunch (approx 20g) fresh organic coriander, leaves only, roughly chopped 

2-3 drops Tabasco pepper sauce

Himalayan fine pink salt

250g organic mixed baby or cherry tomatoes

Freshly ground organic black pepper

Organic extra virgin olive oil, for grilling and drizzling

Extra sprigs of fresh organic coriander leaves, to garnish

Instructions

Pre-heat the grill to High. 

Warm 4 individual serving plates (I do this in the microwave).

Peel and stone the avocados and place in a bowl together with half the lime juice and the tabasco sauce. Roughly mash together with a fork into a fairly coarse textured consistency. 

Taste and season with salt. Add more lime juice if you think it needs extra ‘zing’ then stir in the chopped coriander. Cover the bowl with cling-film and set aside in a refrigerator.

Put the tomatoes in an ovenproof dish and drizzle with a little olive oil. Season with salt and pepper then place under the hot grill for 3-5 minutes until cooked through but not collapsed. 

Whilst the tomatoes are grilling, toast slices of Vegan Paleo Nut & Seed Bread (2 slices per person) on both sides. 

Place the toast on the pre-warmed serving plates. Pile the cool avocado mixture on to the hot toast, dividing it evenly between the slices of toast, then top with the grilled tomatoes. 

Drizzle over a little extra olive oil and decorate with extra coriander leaves, if liked.

Tuck in!


Notes

Avocados ripen after picking. I buy them whilst they’re still hard and keep them in the refrigerator. They’ll usually ripen at room temperature within a couple of days, but you can speed up ripening by putting in a fruit bowl with a ripe banana. Avocados are ready to eat when they yield to gentle pressure in the palm of your hand - please don’t prod them with your fingers as they bruise! Once ripened, they can be put back into a refrigerator to store for a few days longer.


Fat 41g Protein 3g Carbohydrate 6g - per serving of guacamole & tomatoes

Fat 17g Protein 5g Carbohydrate 8g - per slice of Vegan Paleo Nut & Seed Bread toast


Smoked Mackerel Tartare

by Susan Smith in ,


When you’re low on time and high on hunger, Smoked Mackerel Tartare is a tasty little number that you can whip up in less than half an hour. Isn’t that just music to your ears?

As a retiree - well, at least from lucrative employment - I still find myself racing against the clock to get things done. Quick and easy meals are increasingly becoming the order of the day and I’m guessing that it’s not just me that’s struggling to stay on top of my life situation. 

Oftentimes, this means that at the end of a busy day I’m frantically searching for last-minute inspiration from my extensive library of cookery books to find those recipes that either meet my criteria for Primal or that can be adjusted to suit. Sometimes I’ll stumble across an “If it ain’t broke don’t fix it” recipe that I can bring straight to the table without any fussy whatsoever. 

This one is rich in omega-3 fatty acids that reduce inflammation and may help lower risk of chronic diseases such as heart disease, cancer, and arthritis, as well as being virtually carb-free. Perfect for Primal, Paleo and ketogenic diets, all credit goes to Hugh Fearnly-Whittingstall’s book ‘River Cottage Light & Easy’.

Call me greedy but I have adjusted the quantities slightly upwards. For a main meal, I think you need to allow 1 mackerel fillet and 1 egg per person. To help keep your omega-3 to omega-6 ratio in balance (see Notes below), I also recommend that you make your own healthy 3-Minute Mayonnaise to bind the ingredients together. C’mon peeps, 3 minutes still makes this recipe do-able within 30 minutes! 

For a quick and easy, satisfying lunch or supper, Smoked Mackerel Tartare is wonderful. Simply add crisp salad leaves and Paleo friendly, oven-baked ‘bruschetta’ to balance out its fishy virtues. As well as being a fat-for-fuel lunchbox solution to sustain Sarah and I at Mirror Imaging weddings, it also makes yummy, low-carb hand-me-rounds simply piled into hearts of Little Gem lettuce or chicory leaves to serve at picnics and parties.

Very moreish and made in minutes, I think you’ll find that this recipe is just too good to pass up.

Smoked Mackerel Tartare

Ingredients - for the smoked mackerel tartare

3 smoked mackerel fillets

3 hard-boiled organic eggs, coarsely chopped

4 organic cornichons (or 1 large gherkin), finely chopped

4 tbsp organic 3-Minute Mayonnaise

1 tbsp chopped organic dill or parsley, roughly chopped - plus a little extra to garnish

Squeeze of lemon juice

Freshly ground organic black pepper


Ingredients - to make 3-Minute Mayonnaise

UPDATE: I now use cold pressed Macadamia Oil in my 3 Minute Mayonnaise rather than Sunflower Oil. Get the recipe here.

2 organic eggs

2½ tbsp organic lemon juice

1 tsp organic Dijon mustard

½ tsp sea salt

a good pinch of organic white pepper

1-2 drops organic liquid stevia

150ml Clearspring Organic Sunflower Frying Oil

100ml organic cold-pressed light olive oil

Ingredients - to serve

Little Gem lettuce, Vegan Paleo Nut & Seed Bread “bruschetta’, organic radishes.


Instructions - to make the mackerel tartare

Skin the mackerel and use your fingers to break the fish up into chunky, bite-sized pieces.

Put the mackerel into a bowl with the rest of the ingredients and fold everything together very gently so you don’t break up the ingredients too much. 

Taste the tartare and add a little more black pepper and lemon juice if you think it needs it. N.B. The smoked mackerel usually has enough salt, so you shouldn’t need to add more.


Instructions - to make 3-Minute Mayo

Place all the ingredients into a tall, narrow container.

Using a hand-held stick blender, blend everything together until it emulsifies into a pale, creamy mayonnaise. Takes about 30 seconds!

Taste and add a little more lemon juice, sea salt and freshly ground pepper, if liked.

Transfer to a glass container and seal with an airtight lid. Use within 5 days

Instructions - to serve

Place Little Gem lettuce hearts or other crisp salad leaves on to a serving plate or on to individual plates. Intersperse the salad leaves with thinly sliced radishes (extra pretties and peppery crunch!), if using. Pile the mackerel tartare on top of the leaves. 

Sprinkle over the remaining parsley or dill and add another grinding of black pepper, if liked.

Serve with Vegan Paleo Nut & Seed Bread ‘bruschetta’ (see Notes below)


Notes

UPDATE: I now use cold pressed Macadamia Oil in my 3 Minute Mayonnaise. Get the recipe here.

The best smoked mackerel I’ve found for flavour and texture is Sainsbury’s Taste The Difference smoked mackerel. For this recipe, paying a little extra, really does make a difference! 

To make Vegan Paleo Nut & Seed Bread ‘bruschetta’, slice the bread very thinly and brush both sides with olive oil. Put the slices of bread on a baking sheet lined with non-stick foil and bake at 200℃ / 400 ℉ / Gas mark 6 for 12-15 minutes until golden brown. Allow to cool.

I don’t buy shop-bought mayonnaise anymore because it’s made with processed vegetable oils high in polyunsaturated fats, particularly pro-inflammatory omega-6 fats. Dr Mercola comments :

“If you want to increase your overall health and energy level, and prevent health conditions like heart disease, cancer, depression and Alzheimer's, rheumatoid arthritis, diabetes, ulcerative colitis, and a host of other diseases, one of the most important strategies at your disposal is to increase your intake of omega-3 fats and reduce your intake of processed omega-6 fats.”

  • Omega-6 fats are found in vegetable oils such as rapeseed, corn, sunflower, soybean and some nuts. 

  • Omega-3 fats are found in oily fish such as mackerel, kippers, herring, trout, sardines and wild salmon.

To balance our intake of omegas we should aim to eat more omega-3s and significantly less omega-6s. Unfortunately, most people eat way more omega-6s than they do omega-3s - 10 to 25 times more - so although Smoked Mackerel Tartare helps redress the balance in favour of eating more omega-3s, not so much if you bind it together with mayo that’s loaded with omega-6s! Swapping processed vegetable oils for naturally low in omega-6 organic oils, such as olive or avocado, makes sense. The trouble is I find both olive and avocado oils too overpowering (strong and bitter) to make good mayonnaise and I don’t like using processed ‘mild’ olive oils either. 

This is where I invite you to say hello to Clearspring's Organic Sunflower Frying Oil. It is one of the few cold pressed oils that uses special sunflower seeds that are high in monounsaturated oleic acid (the sort found in olive oil) and low in omega-6. Irrespective of its name, this sunflower oil combined with olive oil makes a delicious, authentic-tasting, mayonnaise that’s so good I could stand on farmer’s markets and sell it! 

N.B. You will need a hand-held stick-blender to successfully make 3-Minute Mayonnaise. 


Fat 34g Protein 35g Carbohydrate 2g- per serving of mackerel tartare

Fat 31g Protein 2g Carbohydrate 0g - per serving of 3-Minute Mayonnaise


Courgette Leek Mushroom & Pine Kernel Lasagna

by Susan Smith in ,


Fancy some Italianesque indulgence that comforts and fills you up like a proper, creamy pasta dish does but without any pasta, grains or cheese? Look no further. You wouldn’t know that this very clever Courgette Leek Mushroom & Pine Kernel Lasagna wasn’t the real deal unless I told you so.

Many people reject the hoo-ha of subscribing to a home-cooked, organic, low-carb diet and thereby default to eating agrichemical-ridden fruit, vegetables, grains, sugar, factory farmed animal-centric aberrations and other bona fide junk because they simply can’t be arsed. What’s worse is these same people attack my dietary preferences and erroneously label me the “weirdo”. They have no idea how liberating it is to eat plentifully for pleasure without getting fat and sick. I wish I could persuade them…  

A LCHF diet combined with exercise and intermittent fasting turns back the clock on most aspects of ageing, including an ever expanding waistline that comes from eating high carbohydrate, sugary, processed and/or low-fat diet foods. Excess body fat tends to creep up on you exponentially in middle-age, which is also the time you’re likely to find that your knees have finally given up on trying to help you outrun your fork. Kate Moss was slated for saying so, but “nothing tastes as good as skinny feels” has more than a grain of truth in it, especially when counting chemicals not calories is the priority. A low carb diet needs to be high in fat to fuel your energy needs and because fat tastes so good - think fat bombs - there’s none of the dietary deprivation associated with calorie counting.  

Based on the latest, scientifically proven nutritional principles, Primal Plate recipes are a wonderful, practical guide to eating for health. Admittedly, organic ingredients do cost more but if you want to be on the right side of healthy and you’re on a budget the advice is: Cook from scratch, eat less meat, buy seasonal, grow your own and know the ‘Dirty Dozen’ and ‘Clean Fifteen’

In my experience, whether you’re vegetarian, vegan or primal, there are socially negative consequences for being selective about your food and drink. You may have to sacrifice eating out at what used to be your favourite restaurants and come to terms with being a Billy no mates. No matter, when it comes to making intelligent food choices, the law of consequences will demonstrate soon enough that the proof of the pudding was in the eating.  There’s no time like the present to choose healthy!

Meanwhile, as today’s recipe for Courgette Leek Mushroom & Pine Kernel Lasagna shows, if you can’t beat ‘em you can at least give the impression of joining them. This is food to share when you’re not hanging out with like-minded low-carbers (aside from my immediate family, did I ever?). A hearty, savoury pasta dish layered up with a classic creamy bechamel sauce is, according to the masses, the epitome of relaxed party food so this gorgeous lasagna that I’ve adapted from a Jackie Le Tissier recipe in Food Combining For Vegetarians, easily slips under the radar.

Served with a generous glass of red wine and a crisp, garden-fresh salad, this amazebells grain-free and meat-free lasagna creates a warm and friendly Italian vibe that invites you to sit back and watch the most intransigent dining companion make the unconscious but very healthy transition from high carbohydrates to high fat, without being any the wiser. High five me!

I think it’s the perfect recipe to bring family and friends together for a relaxed, non-segregated meal. Now that’s what I call community spirit!

Courgette Leek Mushroom & Pine Kernel Lasagna (Serves 4)

Ingredients 

2 tbsp organic cold-pressed virgin olive oil

450g organic leeks, very finely chopped

250g organic mushrooms, very finely chopped

250g organic mushrooms, finely sliced

40g organic pine kernels

3 tbsp fresh organic marjoram leaves, finely chopped (if you can’t find marjoram use 2 tbsp oregano leaves instead)

1 tbsp organic tamari soy sauce

¼ tsp freshly grated organic nutmeg

sea salt and black pepper

2 large organic courgettes (or 3 medium plump ones), ends cut off and sliced lengthways into 3mm slices (best done on a mandolin) 

Topping

4 tbsp pine kernels 


Ingredients - for the pine kernel sauce

40g organic grass-fed butter

100g organic ground almonds

150ml organic double cream 

450ml freshly filtered water

100g organic pine kernels

sea salt and black pepper


Instructions

Pre-heat the oven to 200℃ / 400℉ / Gas mark 6

Heat the oil in a large sauté pan and cook the leeks covered over a medium-low heat for 10 minutes.

Add the sliced and chopped mushrooms, the pine kernels, tamari and marjoram and cook uncovered over a medium-high heat for a further 5-6 minutes, or until the liquid released by the mushrooms has evaporated. 

Remove the pan from the heat and season with the nutmeg, sea salt and black pepper. Set aside whilst you prepare the pine kernel sauce.

To make the pine kernel sauce: Dilute the cream with the filtered water by mixing the two together in a glass measuring jug. 

Melt the butter in a large saucepan over a medium heat and then stir in the ground almonds to make a ‘roux’.

Gradually add half the diluted cream to the roux, stirring constantly as you go until the mixture comes together and is free of lumps. Tip the mixture into a blender, then add the rest of the diluted cream and the pine kernels and whizz everything together until you have a smooth, creamy white sauce.

Tip the contents of the blender back into the saucepan, return the pan to the heat and bring to a gentle boil stirring continuously until the sauce thickens - this may take a while. If the sauce seems too thick, add an extra tablespoon of filtered water to thin it out slightly.

Remove the pan from the heat and season with salt and black pepper.

To assemble the lasagna: Place a layer of the mushroom, leek and pine nut mixture in the base of a deep, square or rectangular oven-proof dish. Top with a layer of courgette slices to cover completely, and then add a little of the sauce.

Repeat these layers twice more, leaving enough sauce to finish with a thick layer. 

Sprinkle the surface with 4 tbsps of pine kernels.

Bake for 40 minutes until golden brown and tender. 

Bring the dish to the table and serve with a crisp green and/or tomato and basil salad.

Notes 

If you’d like the lasagna to be more browned on top, you can finish the dish under the grill. N.B. You’ll need to watch it like a hawk as pine nuts swiftly turn from golden brown to scorched under direct heat. 

If you have a Vitamix or similar high powered machine, you can thicken the sauce in the blender by letting the machine continue to run for an extra 3-4 minutes or so i.e. you can omit transferring the sauce back into a saucepan to thicken it. The reason I choose to transfer the sauce mixture back in to a saucepan and thicken it by hand is because it’s less time consuming than trying to get all the finished sauce from around the base and blades of a Vitamix container!   


72g fat 20g protein 15g carbohydrate - per serving


Chocolate Orange & Cardamom Fat Nuggets

by Susan Smith in ,


The majority of people think my diet-led lifestyle, as documented on Primal Plate’s blog, is impossibly hard to follow. So at the risk of repeating myself, in today’s post I’m going to attempt to sort the ‘wheat from the chaff’ of excuses people give for turning a blind eye and continuing to make dietary choices that are clearly detrimental to their health. 

First up, “I’ve no time to cook”. Aside from eating raw food or at the very least throwing everything together in a blender to make nutritious soups and smoothies, if you won’t regularly cook real food at home, you’re in trouble. If you’re not willing to invest the time to eat healthy food now, you’ll almost certainly spend time later in a sickened state rueing the day you thought you had something better to do. My secret weapon in the kitchen is enlisting my husband’s help. Don’t try to go it alone, it’s much too much like hard work. I am as much a time-poor cook as you, but needs must if you want to safeguard your health and/or reverse obesity and other diseased states. 

“I can’t cook”. As someone who extrapolates information from unintelligible recipes and reconstructs them for Primal Plate’s website, I can understand that many people, having given cooking a go, have deduced from the results that they can’t cook. However, it’s not your fault if the recipe you followed is just plain wrong, which they often are! All Primal Plate recipes are throughly tested before publication and we re-visit them - oftentimes over and over again - when cooking our own meals. In my absence, both my partner John and daughter Sarah faithfully follow Primal Plate recipes on their iPhones to both shop for and then produce the same delicious results. It’s comforting to know that if anything happens to me they’ll have a volume of healthy recipes to refer to that won’t ever let them down. If you can read, you can cook.

“It’s too expensive”. Buying organic is something I’m really strict about - not just fruit, vegetables, nuts, seeds, meat, fish and dairy but also tea, coffee (made with filtered water), the wine we drink (very low sulphite) and condiments like salt, vinegar, pepper, other spices, herbs and flavourings. The same rule applies to all our personal care and household cleaning products etc. Whilst you can never avoid all the noxious chemicals man has devised in the name of profit and experimentation in this mad world (hello Monsanto/Bayer), you can at least limit your exposure by filtering out all those toxins in your food and drink, the air you breathe and what you absorb via your mouth (toothpaste etc.) and skin. What happens when you combine processed junk food, GMOs, antibiotics, agricultural chemicals, dodgy school dinners, fluoride-loaded water, chemical-based prescription medicines and toxic vaccination programmes? God only knows, but there are people and corporations that are hell-bent on de-populating the earth, and it seems to me that they have the process well in hand! Eating mostly fresh, raw, organic whole foods and going ‘green’ may cost a little more money but it is an act of defiance in support of the environment that can help prevent disease, keep you out of hospital and extend life. What price good health? You decide. 

A high fat diet makes you fat”. No it does not. Eating foods that are high in healthy fats fills you up and makes you want to eat less, which aids weight loss. Just don’t combine high-fat food with high-carbohydrate foods or too much protein. If you eat high carbohydrate foods and more protein than your body requires, it will simply convert most of those calories to sugar (glucose) and then fat. Increased blood sugar levels from whatever source also fuels cancer cell growth. Since reading Fat For Fuel, my goal, which I track most days via myfitnesspal.com, is to eat a diet high in healthy fat with medium amounts of protein and low amounts of carbohydrate. The ratio looks something like this: 94g fat, 65g protein and 49g carbohydrate per day. Anyone who wants to lose weight, combat disease, slow down ageing, boost their brain power and have more energy, needs to get onboard with the principles of Fat For Fuel and quit thinking that the body needs carbohydrates (glucose) for energy, or that eating low-carb means replacing carbohydrates with excessive amounts of protein (also glucose forming!) as subscribed to by followers of Atkins, Paleo and Primal.

One of the concerns I had whilst making the adjustment to our family meals was how to keep up with John and Sarah’s requirement for the extra calories that I don’t need (ah, the joys of ageing!). To get our calorific needs more in alignment, I now practice intermittent fasting i.e not eating solid food for 16-18 hours in every 24 hours. However, these Chocolate Orange & Cardamom Fat Nuggets - little calorific nuggets made primarily from coconut and almond butter (generally referred to by ketogenic dieters as “fat bombs”) have been a real game-changer for us all. 

There will be many more keto-inspired (LCHF) recipes coming soon on Primal Plate’s blog, but for now these Chocolate Orange & Cardamom Fat Nuggets are the most enjoyable way I could think of to satiate your appetite for something sweet, provide bags of energy and to ease the process of switching your body from its reliance on burning glucose for energy to fat burning instead.

Standing in for luxury truffles, after dinner petits fours, semifreddo, mini chocolate parfaits or - in its unformed state - a delicious spoon-from-the-jar chocolate spread, the sophisticated flavour combo of chocolate, orange and cardamom tastes like really expensive chocolate. Better than any chocolates I’ve ever tasted, these little nuggets of goodness are what you might call “happy superfood”. Pure gold for keto-dieters and also the health conscious, sports people and keep fit fanatics, these easy-to-make Chocolate Orange & Cardamom Fat Nuggets should help convince you that if you want to look good on the outside and feel good inside, fat is your new best friend. 

Half this recipe will make 30 chocolates, the other half a ready-to-eat chocolate spread. Very yummy, very moreish, Orange & Cardamom Chocolate Fat Nuggets are no longer a dietary stop-gap for John and Sarah but have earned their place in our house as a daily ‘must-have’ nutritional necessity. 

Chocolate Orange & Cardamom Fat Nuggets (Makes 30 x 10g nuggets plus approx. 200g chocolate spread)

Ingredients:

100g organic coconut butter

100g organic almond butter

200ml organic full-fat coconut milk

50g organic pasture-fed unsalted butter

1 tsp pure vanilla extract

4 tbsp raw organic cacao powder

15 drops organic liquid stevia

1 tbsp raw organic honey

20 organic cardamom pods crushed in a pestle and mortar, husks removed and seeds finely ground

2 organic oranges, zest only


Instructions:

Boil a kettle of water.

Place all the ingredients into a large glass heatproof bowl. 

Pour the boiling water from the kettle into a saucepan large enough to accommodate the bowl of ingredients. 

Place the bowl of ingredients on top of the saucepan of water to create a double-boiler i.e. the base of the bowl should not be in direct contact with the water. Set over a medium-low heat.

Stir the ingredients together until everything melts into a smooth, creamy, pourable mixture that easily drops from a spoon. As soon as the ingredients are well combined take the pan off the heat. N.B. It’s important not to let the mixture get too hot as this will cause it to separate into an oily mess! 

To make a batch of professional-looking, individual fat nuggets, immediately spoon half of the melted mixture into a silicone chocolate mould (I used this one from Lakeland). 

Pour the remaining mixture into a Kilner/mason jar whilst it’s still warm. Cover and set aside to cool.

Meanwhile, open-freeze the individual fat nuggets in their chocolate mould until solid. When completely frozen, unmould them and store in a lidded freezer-proof container in the freezer until you’re ready to eat them. Take them out of the freezer to soften about 10 minutes before serving. Tip: I place each frozen nugget on a dinky, decorative spoon to ‘come-to’ in readiness for serving; this means they melt in your mouth, not on your fingers!    

If posh presentation isn’t your thing, simply pour all of the mixture directly into a 500ml Kilner/mason jar and when it’s cooled down, store in the fridge. You can then spoon it out of the jar as required - i.e. eat it straight off the spoon, add to dairy or nut milk and whizz together in a blender to make chocolate milk, or use as a delicious chocolate spread on hot toast or bread. 

Notes

If the mixture overheats during the melting process causing it to separate, it can be saved by quickly whisking-in a couple of ice cubes.  

To fully enjoy these healthy Chocolate Orange & Cardamom Fat Nuggets, please ignore the recent attack made on saturated fat by the American Heart Association. In my view, it's no more than the death rattle of a desperate organisation that’s lost its credibility and should be defunct. Still, I enjoyed the furore they caused on social media last week! Most people know from experience that public health guidelines encouraging you to eat a diet low in fat and high in carbohydrate and to substitute natural saturated fats for processed, polyunsaturated vegetable oils, simply doesn’t work. It is a dietary formula that makes you sick and fat. Specifically, there never was, and still isn’t, a single shred of scientific evidence to support the demonisation of saturated fat as the root cause of heart disease, high cholesterol, clogged arteries or myocardial infarction. It’s all a big, fat lie! To read more, click here.


Fat 3g Carbohydrate 1g Protein 1g - per nugget or 10g serving of chocolate spread


Vegan Victoria Sandwich Cake

by Susan Smith in


Lurking in the pages of Rose Elliot’s book Fast, Fresh and Fabulous (on page 186 to be precise) is a recipe for a vegan Victoria sandwich cake. No pictures or anything, just a list of ingredients that specifically excludes eggs and butter. I’ve passed over this recipe many times in favour of more enticing cake recipes because any sense of deprivation never sits well in this foodie’s heart. Besides which, surely you need eggs to make cake mix rise up properly into a light and moist cake? Erm, turns out the answer is, “No”! 

This Vegan Victoria Sandwich Cake is beautiful in its simplicity and it looks and tastes - to my utmost surprise - exactly like a well-made Victoria sandwich cake should look and taste. Booom! 

Furthermore, there’s no beating, no whisking, no sifting and no holding your breath whilst trying to extract hot cake from its tin onto a cooling rack. It’s so easy to make, I reckon I could teach a 7-year old!  

Of course, I’ve got rid of the sugar, self-raising flour and rapeseed oil in the original recipe to make this Primal/Paleo/Vegan cake a more desirable and healthier cake to eat. Oh, and I’ve even included a 5-minute recipe for a fresh-tasting, sugar-free alternative to raspberry jam. On second thoughts, I’ve made so many changes to this Vegan Victoria Sandwich Cake, it’s not Rose’s, it’s most definitely mine!

Vegan Victoria Sandwich Cake (serves 10 )

Ingredients - for the cake

175g extra fine organic tiger nut flour

125g organic ground almonds

25g Sukrin:1

3 tsp gluten-free baking powder

Grated zest from 1 organic orange

100ml fresh organic orange juice (i.e. 1-2 organic oranges, freshly squeezed)

30ml organic maple syrup

170ml freshly filtered water

90g organic coconut oil, melted & cooled for 5 minutes, plus a little extra for greasing the sandwich tins


Ingredients - for the filling and to serve

 3-4 tbsp sugar-free raspberry jam - or better still, make your own in 5 minutes with my Raw Sugar-Free Raspberry Jam recipe

Sukrin Icing sugar - for dusting the finished cake


Instructions - to make the cake

Pre-heat the oven to 180℃ / 350℉ / Gas mark 4

Melt the coconut oil over a low heat and set aside to cool

Grease and line the base of 2 x 18cm / 7 inch sandwich tins with non-stick baking parchment http://www.lakeland.co.uk/5521/100-Baking-Parchment-Liner-Paper-Circles-18cm 

Put the tiger nut flour, ground almonds, Sukrin:1, baking powder and grated orange zest into a large bowl and mix together well.

Mix the orange juice, maple syrup and water together in a separate glass bowl or jug and add to the dry ingredients. Mix well with a large rubber spatula until all the ingredients are evenly incorporated into a cake batter.

Divide the mixture evenly between the 2 tins, stand these side-by-side on a large baking tray and bake in the centre of the oven for 20 minutes, or until the top of the cake springs back when lightly pressed.

Leave to cool in the tins before turning out onto a wire rack and stripping off the paper. 

Sandwich the cakes together with the jam. 

Sift the Sukrin icing on top of the cake just before serving.

Notes

Tiger nuts are high in MUFAs (pronounced moo-fahs) namely, monounsaturated fatty acids in plant-based fats, which are found in some of the world's most delicious foods such as avocado, nuts and seeds, olives, and dark chocolate! These good-for-you fats enhance heart health and protect against chronic disease. Tiger nuts are also extremely high in fibre and contain good levels of vitamin E, iron, magnesium, zinc and potassium. They are full of oleic acid - the healthy fat found in olive oil and most important of all, resistant starch (RS). Eating like a carbohydrate but behaving like fibre, RS is a prebiotic starch that passes through the body undigested. i.e. it passes through the stomach and small intestine without being digested. When it finally reaches the colon it feeds the friendly bacteria in your gut. Anything that enhances the health of your gut has a direct impact on maintaining good health per se. To up your intake of resistant starch, try adding plain tiger nut flour to smoothies or stir through Greek yogurt for a subtle nutty sweetness. Alternatively, Primal Pronto Energy Bars are an enjoyable way to feed your face and your gut!

Although bright yellow rapeseed oil (aka canola oil) is an ingredient in Rose Elliot’s recipe that would visually enhance this orange-scented cake, I chose to use coconut oil instead. Recently, many health pundits, top chefs and recipe writers have been touting rapeseed oil as a healthier alternative to olive oil (omega 3 levels of rapeseed oil is 10 times that of olive oil and its high smoke point makes it better for cooking) but what they don’t tell you is that most rapeseed oil is heavily processed, and almost all of it comes from plants that have been genetically engineered. So far as I am aware, there is currently only one supplier of organic, cold-pressed rapeseed oil in Britain. My concern is that unmodified (non GMO), natural rapeseed is loaded with erucic acid. Erucic acid is a fatty acid that’s associated with heart damage, specifically fibrotic lesions of the heart. Not exactly a welcome side effect! Until tests have been done to show rapeseed oil is safe for human consumption (and unfortunately extensive animal testing would suggest otherwise), I prefer not to take the risk. For now, I’m sticking with healthy, organic, virgin, cold-pressed coconut oil for baking.

To be clear, there has never been a single shred of scientific evidence to support the demonisation of saturated fat or for it being declared public health enemy number one by successive governments and health advisers over the past sixty years. The low-fat, high-carbohydrate hypothesis was fundamentally flawed at the outset and the subsequent recommendations to replace natural fats with highly processed vegetable and seed oils, has decimated people’s health. Thankfully, the tide is turning. Saturated fats such as coconut oil and butter are not dangerous, nor for that matter is the healthy type of trans-fat known as vaccenic acid, which is found naturally in some foods like grass-fed meats and dairy fats.


Carbohydrate 18g Protein 4g - per slice of cake (filled with Primal Plate’s Raw Sugar-Free Raspberry Jam)

Carbohydrate 21g (approx) Protein 4g - per slice of cake (filled with The Fruit Tree’s Raspberry Fruit Crush)


Raw Sugar-Free Raspberry Jam

by Susan Smith in ,


What to say about this jammy delight? Simply that it’s a healthy alternative to regular jam that can be made in less than 5 minutes flat. I recommend you keep a pot of it in your fridge to slather on toasted Vegan Paleo Nut & Seed Bread - trust me, there are few better ways to start the day than with freshly brewed coffee and pure raspberry jam spread thickly on buttered toast! 

Also delicious served with Grain-Free Scones, for making into smoothies, as a topping for yogurt or ice cream and for sandwiching together Primal Plate’s Vegan Victoria Sandwich Cake.

Raw Sugar-Free Raspberry Jam

Ingredients

200g organic frozen raspberries, defrosted

2 tbsp organic white chia seeds (white chia seeds are nutritionally identical to black chia but are visually more appealing! You can use either)

1½ tsp organic psyllium husks

1 tbsp organic lemon juice

30g Sukrin 1

1 tsp pure vanilla extract


Instructions

Place all the ingredients into a blender or food processor and pulse gently until just smooth. 

Taste and add a little more Sukrin:1 (or a couple of drops of liquid stevia) if you would like a sweeter jam.

Transfer the mixture to a glass container with a lid (I used a mason jar) and allow to set in the fridge.

Notes

This jam is veering towards the tart, which is how I like it! If you want it to taste more like regular jam (sweeter) and you’re not keeping to a keto (very low carb) diet, a tablespoon of raw, organic ‘runny’ honey or maple syrup (for vegans) would be a better choice.


Carbohydrate 36g Protein 8g - per whole pot of jam! 


Braised Thai Style Vegetables with Golden Cashews

by Susan Smith in


Today’s recipe is a light but very satisfying, spicy, Thai-inspired ‘vegfest’ for Valeos i.e. those people who want to avoid meat and make vegetables the mainstay of their Primal/Paleo diet. To be honest, if you’re opposed to eating eggs and dairy too, it’s probably not possible to make up for the nutritional deficit you’ll suffer if you try to combine veganism with a Primal lifestyle. Nonetheless, most of the vegetarians and vegans that I’ve known would fare much better health-wise if they lived up to their namesake by actually eating far more plants and much less pasta! 

In my view, it is perfectly feasible, nay advisable, for everyone to go grain-free. Grains contain anti-nutrients such as phytic acid (prevents the absorption of minerals), enzyme inhibitors (inhibits digestibility), lectins (compromises our gut and disrupts the immune system) and gluten (causes gut inflammation and increased intestinal permeability a.k.a. “leaky gut”). Conversely, organically grown potatoes, purple and orange sweet potatoes, jerusalem artichokes, taro, tiger nuts, bananas, apples, pears and berries can provide all the carbohydrates, minerals, protein, fibre and vitamins, without the unpleasant and dangerous side effects of grains. In a nutshell, strict vegans/vegetarians should be eating real, nutrient-dense vegetables and fruits and, if they insist on eating grains, they should make sure they’re sprouted, both to increase their nutrient content and to decrease their anti-nutrient effects.

Meanwhile for those of us that favour vegetarian, or at least believe less meat is more when embracing Primal dietary principles, Braised Thai Style Vegetables with Golden Cashews is a delicious way to eat at least four portions of vegetables in one go. In fact, we became so enthused about eating the colours of the rainbow in a single bowl of goodness that we created the photo backdrop to match!

You can mix and match this recipe with any seasonal vegetables you fancy, just make sure that all the vegetables are chopped or sliced to roughly the same size to ensure even cooking. 

Braised Thai Style Vegetables with Golden Cashews (Serves 4)

100g raw, organic cashews

2 tbsp organic coconut oil

1 organic onion, finely chopped

4 organic shallots, thinly sliced

2 stalks fresh lemongrass, finely chopped (see note below for how to prepare lemongrass)

2 kaffir lime leaves, fresh or dried - optional

450g organic carrots, peeled 

1 x organic red pepper, deseeded and sliced into long strips

2 x 400ml tins organic full-fat coconut milk

3 tbsp tamari

2 tbsp Thai red curry paste (see Notes below)

2 tsp organic cumin seeds

1-2 drops organic liquid stevia - optional

Sea salt and freshly ground organic black pepper

225g small florets of organic cauliflower

225g organic frozen petits pois, defrosted

200g organic asparagus (or 4 large handfuls of organic baby spinach leaves - or both)

2 tbsp organic lime juice

Small bunch of fresh, organic coriander, roughly chopped

Instructions

Boil a kettle of water.

Heat a medium non-stick frying pan and add the raw cashews, stirring from time to time until they are golden brown - they burn very easily so keep a watchful eye on them. Once brown, transfer to a plate and set aside. 

Cut the carrots on the diagonal into ¼ inch slices. Prepare the asparagus by bending the spears until they snap at their natural breaking point, then throw away the woody ends. For a more attractive finish, you can pare away the outer skin from the bottom third of the spears with a vegetable peeler.

Heat the coconut oil in a large wok or deep sauté pan, add the onions and shallot to the pan, then cover with the pan lid and cook for 5 minutes to soften without colouring. 

Remove the pan lid, then add the lemon grass and kaffir lime leaves. Stir-fry for 2 minutes. 

Add the sliced carrots and red pepper strips to the pan and stir-fry for a further 3 minutes.

Add the curry paste, coconut milk, tamari and cumin seeds, gently stirring everything together until evenly incorporated. Taste and season to taste with salt, pepper and a drop or two of liquid stevia if you think it needs it. Cover and simmer for 5 minutes,

Meanwhile, tip the boiling water from the kettle into the bottom of a steamer. Put the cauliflower florets and asparagus in the top of the steamer. Cover and blanch the vegetables for just 1-2 minutes, then quickly remove them from the steamer into a metal sieve. Briefly run under a cold tap to ‘set’ the bright green colour of the asparagus and to stop the cooking process. Drain well, then cut the asparagus spears in half. 

Add the drained cauliflower, asparagus and defrosted petits pois to the rest of the braised vegetables. Cook for 1-2 minutes more before stirring in the spinach and cooking just long enough to allow the spinach leaves to wilt down - only takes 30 seconds or so. Take the pan off the heat and add the lime juice. Check the seasoning and adjust to taste if necessary.

Ladle the vegetables with the sauce into four pre-warmed serving bowls, making sure the different vegetables are divided evenly between the diners. Finally, sprinkle over the toasted cashews and chopped coriander and serve immediately.

Notes

To prepare lemongrass, begin by treating it pretty much like you would a spring onion. First, remove the root and top, then peel away a couple of the fibrous outer layers until you reach the smooth, pale green centre. Next, smash the lemongrass stalk with a rolling pin - this breaks down the fibres to release more of its fragrant oil - then using a very sharp knife, finely slice across.

Geo Organics ready-to-use Red Thai Curry Paste contains cornstarch, a grain best avoided. To make your own vegetarian Red Thai Curry Paste, try this Riverford Organics recipe - although I’d leave out the sugar and replace it with a teaspoon of organic honey, maple syrup or a drop or two of organic liquid stevia. 


Carbohydrate 35g Protein 15g - per serving


Spinach, Cherry Tomato & Avocado Salad with Spicy Sicilian Almonds

by Susan Smith in , , ,


Having initially accepted the challenge of featuring delicious, primarily vegetarian, Primal/Paleo recipes on Primal Plate’s blog, I now find myself obsessed with the idea of going one step further. Accordingly, it’s my intention to include many more vegan recipes that can be enjoyed as part of a Primal lifestyle. I’m excited at the prospect. With summer almost upon us, light and easy is the order of the day and it feels entirely appropriate for our meals not to be so dairy dependant. Vegan food eaten in this context, means moving away from Primal and more towards the Paleo diet, which excludes milk, butter, cheese, crème fraîche, cream, ice cream and yogurt.

I am too much of a hedonist to go the whole hog (strictly speaking, Paleo peeps don’t even drink red wine for heaven’s sake!), but I do want to consciously use dairy products less often. Sarah has coined a new phrase for what’s turning out to be a delicious voyage of discovery. She calls it ”Valeo”, which in my view perfectly sums up the logic of eating more healthily without exploiting animals. If there’s one thing that miffs me about the Primal/Paleo diet, it’s the emphasis on eating animal protein.  

Yesterday we enjoyed a valeo meal of soup and salad…a Roasted Beet Borscht with Horseradish Cream (recipe coming soon) and this amazingly tasty, healthful Spinach, Cherry Tomato and Avocado Salad. Vivid colours and packed with goodness, eating valeo is light years away from the high-carb pasta, rice, bread, potato and legumes that most vegetarians and vegans rely on. 

As I’m a complete novice entering the world of veganism, I’m sailing in relatively unchartered waters. Therefore, I make no apology for seeking out the best vegan recipes from other authors that obviously don’t contain meat, fish, eggs or dairy as well as all the Primal ‘no-no' foods such as grains, potatoes, legumes, processed soy and fats etc. It’s a tall order! Nevertheless, this Spinach, Cherry Tomato and Avocado Salad with Spicy Sicilian Almonds, which I’ve borrowed from Annie Bell’s book Gorgeous Greens, immediately hit the culinary jackpot by ticking all the aforementioned boxes. Sod’s law that it’s been Primal Plate’s most popular posting on Instagram to date! 

Clearly this is not just a dish for Paleos or Vegans but also for meat-free Mondays, dairy free dieters and anyone that finds themselves somewhere in-between (me!). Full of punchy flavours, this hearty salad is a wake-up call for the senses that can be on the table in less than 30 minutes.  

Spinach, Cherry Tomato & Avocado Salad with Spicy Sicilian Almonds (serves 4)

Ingredients - for the nuts

100g organic whole, blanched (skinned) almonds

1 tbsp organic extra virgin olive oil

1 tsp organic Tamari

1 tsp, organic fresh thyme leaves

¼-½ tsp organic chilli pepper 


Ingredients - for the salad

2 organic avocados

125g organic baby spinach leaves, or torn young spinach leaves

2 tbsp organic extra virgin olive oil

a good squeeze of organic lemon juice

200g organic cherry tomatoes, halved

a small handful of organic fresh chives, finely chopped

sea salt (my favourite for serving at the table is fine Pu‘uwai Deep Ocean Hawaiian Sea Salt)

Instructions - for the nuts

Pre-heat the oven to 170℃ / 325℉ / Gas mark 3

Toss the almonds in a bowl with the olive oil and tamari, then toss in the thyme, scatter over the cayenne pepper and toss again.

Tip the nuts into a small roasting tin or baking tray and spread them out into a single layer. 

Toast in the oven for 15 to 20 minutes, until deep golden and crisp. 

Transfer the nuts to a plate lined with a paper towel and leave to cool.


Instructions - for the salad

Remove the avocados from the stone by cutting in two halves and picking the stone out. 

Peel the skin off the avocado halves, then slice each half into four long segments (8 segments per avocado).

Toss the spinach in a large bowl with the olive oil and lemon juice, then carefully fold in the halved cherry tomatoes and chopped chives.

Pile the salad on to four individual plates and scatter over the spiced nuts.

Serve straight away, leaving each diner to season their own salad with sea salt. 


Notes

Impossible to resist, the spicy, piquant almonds make a superb stand-alone snack. I chose premium, organic, ready-skinned almonds from sunny Sicily for their larger size and superior creamy, sweet taste but any raw, organic, blanched almonds are fine.

Readers will notice that I always create Primal Plate recipes from organic ingredients. For your health and wellbeing, it’s extremely important you do likewise. Many nuts have a high oil content, which means that they easily absorb pesticides. It is always best to purchase organic. For more information read why you need to buy organic nuts and seeds.


Carbohydrate 15g Protein 8g - per serving


Vegan Paleo Nut & Seed Bread

by Susan Smith in


After suffering the financial loss of a ‘rental void’ for the past six months, we’ve finally found new tenants for Sarah’s much beloved old home. Whilst landlords shouldn’t let their heart strings rule their heads when choosing prospective tenants, on this occasion they seemed to be so much ‘on our page’ it was almost love at first sight! Nature lovers, vegan and spiritually inclined, we can at least be rest assured that they won’t be poisoning our lawns and garden with Glyphosate, which is what our last tenants did because they were too idle to pull up the weeds! 

A vegan at heart but not in practice, I frequently find myself drawn to the possibility of being vegan à la Paleo - that is, without eating grains, pulses and white potatoes. It goes without saying that processed soybeans used in tofu, soy milk and various revolting dairy and meat substitutes would be off limits too. I suppose I’m just a deluded vegan food fantasist, because in reality I don’t even qualify as a fully-fledged vegetarian. The reason being, I find it virtually impossible to go to a restaurant or socialise without eating meat or fish and I can’t envisage a diet that’s not high in healthy fats such as organic egg yolks, cheese, butter, milk and cream, being anything but bland and boring. Nevertheless, our new tenants have piqued my interest in vegan recipes, so I can but try harder. 

Today’s Vegan Paleo Nut & Seed Bread, is precisely everything it says it is. A loaf of bread full of healthy protein and fibre made without eggs, grains, dairy, yeast or added sweetener. If ever the day comes when I’m ready to make the transition, I’ll rename this recipe Susan’s Vegan Survival Bread because it’s probably one of the easiest and most useful recipes I’ve ever come up with. It really works. As well as being Primal, Paleo and vegan friendly, it’s tastes absolutely wonderful and slices brilliantly - even when still warm from the oven. As with all grain-free bread, there’s no kneading or proving required. Just whack it all together for not much more than a minute in a food processor and you’re almost done. Plus, you can make the loaf well in advance of when you want to bake it (it can be left out at room temperature for several hours or as long as overnight), it will keep well in the fridge in a sealed container for up to five days and it makes really good, hot toast. 

The ace up your sleeve for making this loaf of bread successfully, is fabulously nutritious, naturally sweet, organic tiger nut flour. Tiger nuts are an antioxidant-rich, antibacterial, high-in-fibre, pre-biotic ‘superfood’ that not only makes this bread super tasty without adding sweetener, it’s also thought to benefit male sexual performance. Surely a ‘Bread For Life’ that you shouldn’t have any problem getting the man in your life to make for you!

All in all, an amazing Paleo-inspired loaf of bread for vegans and the gluten sensitive, which looks, tastes and behaves like real bread - crusty on the outside and nicely dense and chewy in the middle. A must-bake recipe for anyone who wants an easy-to-make, healthy, omega-3 packed, sustaining, gluten-free bread to add to their low-carb repertoire. 

Vegan Paleo Nut & Seed Bread (makes a 900g/2lb loaf - approximately 24 slices)

Ingredients

45g cold pressed organic coconut oil (or grass-fed, organic unsalted butter or ghee)

120g raw, organic seeds (I used 40g each of pumpkin, sunflower and sesame seedsplus…

2 tbsp chia seeds

80g organic whole flaxseeds

250g raw, organic nuts (I used 100g unblanched almonds and 150g roasted blanched hazelnuts)  

125g organic tiger nut flour

50g organic ground almonds

4 tbsp organic psyllium husks

1½ tsp fine grain sea salt

350ml filtered water

Clockwise, from top right: psyllium husk; sesame seeds, chia seeds, sea salt, flaxseeds, pumpkin seeds, sunflower seeds, ground almonds, whole almonds, tiger nuts, whole hazelnuts

Clockwise, from top right: psyllium husk; sesame seeds, chia seeds, sea salt, flaxseeds, pumpkin seeds, sunflower seeds, ground almonds, whole almonds, tiger nuts, whole hazelnuts

Instructions

In a small saucepan over a low heat, heat the coconut oil (butter/ghee) until it’s just melted. Use a little of the melted oil to grease the inside of a 2lb / 900g non-stick or silicone loaf pan (I used this one), then set the rest of the oil aside to cool slightly.

Place all the dry ingredients - all the seeds, nuts, tiger nut flour, ground almonds, psyillium husks, and salt - into the bowl of a food processor and whizz for about 30 seconds, or until it’s ground into a flour-like consistency.

Add the melted coconut oil (butter or ghee) to the dry ingredients and whizz for about 10-15 seconds to incorporate. With the machine still running, add the filtered water and process for another 20 to 30 seconds or until the mixture comes together into a very thick, almost paste-like dough. 

Immediately tip the dough into the greased loaf pan, press it down very firmly then smooth out the top with a flat spatula or the back of a spoon. Cover loosely with cling film and set aside for 2 hours or longer to rest. 

When you’re ready to bake the loaf, pre-heat the oven to 180℃ / 350℉ / Gas mark 4

Place the loaf in the centre of the oven and bake for 25 minutes. 

After 25 minutes, take the loaf out of the loaf pan and place it upside down directly onto the oven rack (see note below) - then continue to bake for another 40-45 minutes.

To check if the bread is done, take it out of the oven and give it a firm tap with your knuckles. It’s cooked when it sounds hollow. 

Leave the loaf to cool on a wire rack before slicing. 

paleo vegan bread.jpg

Notes

If you have one, I recommend you use the oven’s grill pan and rack for the second baking so that you can calmly re-position the hot, part-baked, upturned loaf onto the grill rack before placing the whole grill tray back into the oven. This is far less risky than reaching into the oven and burning yourself on an already dangerously hot oven rack!

You can use any mixture of seeds and nuts, just make sure that they’re all raw, organic and within their use-by date. Any hint of rancid nuts, seeds - and indeed pysillium husk - will totally wreck the taste of the finished bread. As a food blogger and recipe developer, I always buy my nuts and seeds in bulk from Healthy Supplies but for most people it’s better to buy in smaller quantities and use them whilst they’re still really fresh.

Grinding all the seeds and nuts down into a coarse textured flour enhances the nutrient availability of Vegan Paleo Nut & Seed Bread and allowing the raw dough to rest for several hours, or even overnight, helps ease digestion. 

I consider good health to be the first form of wealth, so I always invest in the best ingredients - pure, unadulterated and organic - when cooking for my family and developing Primal Plate recipes. I don’t flinch at the price of good food, so I used finely ground Pu‘uwai Deep Ocean Hawaiian Sea Salt in this Vegan Paleo Nut & Seed Bread because it’s the finest, purest sea salt in the world. This delicious, mineral-rich sea salt provides 2% daily value of calcium and magnesium per serving and also contains potassium and selenium, plus many trace elements such as copper, iron, zinc, manganese and chromium, which are missing from common surface sea water. Worlds away from cheap table salt, you can learn the truth about table salt and the chemical industry here. If the price makes your eyes water, fine ground Celtic sea salt or fine Himalayan Rose Pink Salt, are good alternatives that can be purchased for about half the cost. 

This bread freezes well and can be made into croutons or breadcrumbs for coating.


Carbohydrate 8g Protein 5g - per slice


Mango & Passion Fruit Fool

by Susan Smith in ,


When pondering what to eat for our Easter vegetarian feast last weekend, fruit fool - a light and creamy dessert simply made by combining fruit puree with softly whipped cream - was my dessert of choice. I’ve always loved fruit fools, particularly when made with stewed and pureed rhubarb or gooseberries, which back in my sugar-eating days (before I was older and much wiser) I liked to serve with homemade shortbread fingers for dunking. 

Albeit that the first homegrown rhubarb is now in season, this more exotic, fragrant Mango and Passion Fruit Fool is all about its bright daffodil-yellow colour and abstract beauty, which reminds me of springtime and eggs - set off beautifully by serving it in delicate, glass teacups. 

Don’t be alarmed by the extravagant amount of double cream used in the recipe. It’s deliberate. You could lighten things up a bit by substituting 100g of thick, natural Greek yogurt for the same amount of double cream before whipping them together and then folding in the fruit puree, but I like this gorgeous dessert just the way it is and consider it to be healthy.

Consuming saturated fat does not by itself make you fat. Weight watchers take note: A high-fat diet, makes it easier for people to lose weight, lower blood levels of triglycerides (the other circulating fat, besides cholesterol) and raises levels of heart-protective high density lipoprotein, or HDL, the “good” cholesterol (to read more, click here). Conversely, a low-fat diet is fattening and makes you sick. 

The low-fat / high carbohydrate dietary ‘Dementors’ have had their heyday and in the process they destroyed the health of millions of people along with their faith in eating natural (real) food. The truth is, the human body prefers ‘Fat for Fuel’ and furthermore, it’s healthy fats such as raw organic butter and cream that actually make food taste delicious. Way to go! 

More than this, switching your body’s energy supply from glucose to fat is vital for improving health and increasing longevity. It’s almost a case of: If it tastes good, eat it! But, and it is a big BUT, you can only be part of the dietary revolution going on all around you if you are willing to stop eating refined sugar and grains - including conventional breads, cakes, biscuits, breakfast cereals, white rice, pasta - as well as white potatoes, corn and all high sugar food and drinks. Are you ready?

I hope so, because the likes of this creamy, dreamy fruit fool awaits you. In the context of a carbohydrate-sparing diet, it is a healthy, quick and easy dessert that works on every level. Welcome to Primal Plate living. It’s the future.  

Mango & Passion Fruit Fool (Serves 4)

Ingredients

1 large, ripe organic mango

4 large ripe passion fruit (or 6 medium ones)

300ml organic double cream, preferably raw (unpasteurised)

3-4 drops organic liquid stevia


Instructions

Chill the cream and bowl at least 2 hours before you start.

Using a sharp serrated knife, prepare the mango by slicing the mango lengthways - about 5mm (¼ inch) either side of the stalk - to cut the flesh from the flat stone. Peel off the skin and cut the flesh into rough pieces. Remove as much of the flesh from around the stone as possible. 

Place the chopped flesh into a high powered blender and whizz to a puree. Set aside.

Cut the passion fruits in half and using a teaspoon, scrape out all the pulp, seeds and juice into a small bowl. Divide half of the passion fruit between 4 individual glass serving dishes or teacups. 

Using an electric whisk set at medium-high speed, whip the cream until it begins to thicken. Then turn to medium speed and beat only until the cream holds itself up in soft peaks. N.B. Don’t let the cream become too stiff or you won’t be able to fold in the fruit puree. 

Gently fold the mango puree together with 3 or 4 drops of liquid stevia into the whipped cream until it’s roughly incorporated - you don’t need to be too thorough, a marbled effect is quite nice!  

Divide the mango and cream mixture evenly between the 4 serving dishes, spooning it on top of the passion fruit. Then add the remaining passion fruit on top of each cup of fool.   

Cover and chill for at least 30 minutes before serving. 


Notes

Fruit fool is best served within 24 hours of making. Make sure it is well covered (airtight) before chilling, otherwise it can pick up the smells and flavours of other stored food in the refrigerator. 

Other soft fresh fruits, such as strawberries and raspberries can be used instead of mango to make delicious fruit fools. 

Harder fruits such as gooseberries, dried apricots and rhubarb (strictly speaking, the latter is a vegetable) will need cooking before being pureed. Remember, if your chosen fruit needs extra sweetener (I suggest a 50/50 combo of either organic acacia honey or maple syrup and organic liquid stevia - use minimally) it will add extra grams of carbohydrate to the finished dish.


Carbohydrate 18g Protein 3g - per serving


Cheddar, Herb & Mushroom Roulade With Red Wine Sauce

by Susan Smith in ,


Less than two weeks ago I was boasting that Sushi our cat was in rude health, yet last week she suffered a six-day near death experience, which left us stressed-out and frantic with worry. Forgive my indulgence, but this is a cautionary tale that applies to anyone who solely relies on medical opinion and interventions as a strategy for health and healing. It seems to me that physicians should not get paid on the number of sick patients they treat but rather on the number of people (or animals) on their books that actually enjoy good health.

When a vet tells you to seriously consider euthanising your 17-year old cat because “You have a very, very poorly animal” that’s "too sick to go home", what would you do? It is at a times like these it pays to be contrarian. I’d only taken Sushi to the Minster Vets because three days earlier she’d suddenly stopped eating and was straining to use her litter tray. I’d even phoned them beforehand to explain my cat seemed to be constipated and to ask if they would give her an enema. As far as I was concerned, this was the only medical intervention required. 

According to the vet, I was wrong. After a brief physical examination, we were told that Sushi wasn’t seriously backed-up, but rather her intestine and colon were very thickened and inflamed and there was a distinct possibility that a cancerous tumour was the cause of the blockage. It still looked and smelt like ‘poo’ to me, but the vet made no attempt to clean-up Sushi’s backside and rejected giving her an enema because it would further dehydrate a cat suffering from kidney disease. Pardon? How do we know that she is? Furthermore, an X-ray might not show up a tumour so they’d need to perform an endoscopy, which had to be done under general anaesthetic. However, this might endanger Sushi's life because thirty per cent of cats her age do have kidney disease and undergoing a general anaesthetic can cause complete organ failure. Brilliant! If we didn’t want Sushi to suffer needlessly, euthanasia was, on the face of it, our best option. Naturally, I asked for a blood test to be done straight away to establish whether Sushi had kidney disease or not but was told: “Mum and dad can’t stay” for this procedure and we would have to leave Sushi with them.

In tears, I told the vet I couldn’t make a decision whilst in a state of shock and that if we were to agree to her killing our cat, we would need time to say our goodbyes. Not satisfied with this, the vet volunteered to leave the room for a few minutes, presumably so we could come to a more ‘reasoned’ decision in private. She needn’t have bothered, my mind was made up…if Sushi was going to die, it would be at home in my arms. Right on cue, the most horrendous howling of some poor creature that had been previously dispatched by it’s owner into the Minster’s veterinary care emanated from behind scenes to let me know with absolute certainty I needed to get us the hell out of there.  

The next 24 hours were an emotional roller coaster, not least because I knew we’d have to clean Sushi up and administer the enema ourselves. Nevertheless, I did have one ace up my sleeve. I’d just agreed to a new 10-year Lease on our old office premises and its change of use to a small veterinary practice. I managed to track down the vet that is going to be running the practice when it opens in a couple of months time and she was able to reassure me that the symptoms and events as I described them over the phone didn’t sound like Sushi was anything like at death’s door as far as she was concerned. She arranged to do a home visit the next day. 

Meanwhile, it took three of us to sort out Sushi’s nether regions. “Don’t try this yourself at home” applies to giving your feisty cat an enema and then some!  It’s a highly intimidating, emotionally charged procedure for both you and your cat! Three enemas later (organic coconut oil melted to blood temperature) Sushi had started to show more interest in grooming herself and the fragrance of coconut oil rather than poo pervaded the air as she was able to walk with her tail held high (a sign of confidence and contentment), rather than down at floor level, as if in an attempt to cover up her indignity.  

When the vet arrived the next day, Sushi had not eaten for four days nor had she had any success in the litter tray, but at least she was clean and ready for inspection. This is when drugs come into their own. Two injections later - one as an appetite stimulant and the other to get things moving along - Sushi started to come back to life. Life lesson: Never get stuck in your opinions. 

In desperation the day before, I had decided to contact Lily’s Kitchen to enquire about their organic cat food because it seemed it would be easier to persuade Sushi to eat something soft and pâté-like in texture than it would raw meat. I also bought her some probiotics to support healthy gut bacteria and intended to add a pinch of organic pysillium husk to her meals for extra fibre. At the time, I didn’t even know if Sushi would ever eat again. Lily’s Kitchen, sensing my distress, had sent complimentary samples of their cat food to me first class. Anyway, within three quarters of an hour of the vet leaving, Sushi was tucking into Lily’s Organic Chicken Dinner with relish. 

The next day Sushi passed something resembling a small, hard rock - the obvious cause of her discomfort - and within the hour everything was functioning normally again. Never have you seen more rejoicing over poo! Sushi now appears to enjoy Lily’s Kitchen dinners more than my lovingly prepared, fresh, organic meat - even with probiotic powder and pysilium husk added. Who am I to argue? Today, she is lively, chirrupy and content. Her coat is like silk and her breath as ‘fresh as a daisy’. Thank God, when it comes to taking responsibility for my family’s health, I fear the medics conditioning and stupidity more than I fear their disapproval! Some people might call it perverse, but my innate refusal to kowtow to a seemingly higher authority has again and again proven to be a lifesaver. Above all, I am so very grateful to Charlotte, Sushi’s new personal ‘physician’, who will hopefully help navigate us through any future cat crisis and who I think should be nominated for a ‘Vet With Heart’ award. Her professionalism together with her extremely gentle ‘first do no harm’ owner-empowering attitude to veterinary care, is a rare and precious find for any animal lover. When the Animal Doctor officially opens for business, Primal Plate will be celebrating the fact by baking this gorgeous girl a cake to show our appreciation. Local pet owners might want to take note.

Sushi fully recovered, enjoying being brushed!

Sushi fully recovered, enjoying being brushed!

Meanwhile, with Easter Sunday just around the corner, I am thinking about what we’re going to eat for our lunch. Today’s recipes for Cheddar, Herb & Mushroom Roulade with Red Wine Sauce are both taken from Rose Elliot’s book The Classic Vegetarian - although you’ll have to keep flicking between pages 34-37, 94 and 121 for instructions to cook. To help, I’ve brought both recipes together in one place for easy reference.

This is what I call ‘dinner party’ food. Just right for when you want something extra special for family and friends. To make things easy on yourself, cook the roulade in advance, then wrap it in tin foil and warm through in a hot oven for 15 minutes just before you want to serve it. Purple sprouting broccoli is my vegetable of choice. It’s a springtime seasonal star that’s just perfect with Cheddar, Herb & Mushroom Roulade with Red Wine Sauce because its dark green purplish hue sits so beautifully on the plate alongside the deep ruby red colour of the wine sauce. A truly elegant and impressive dish that’s every bit as tasty as a traditional Easter Sunday lunch but without a little lamb having to lose its legs. 

After the events of the past week do I need reminding that animals have a right to life and love as much as humans? No I do not! With this delicious festive meal, I wish everyone a happy, peaceful, vegetarian Easter.

vegetarian recipes primal plate.jpg

Cheddar, Herb & Mushroom Roulade With Red Wine Sauce (Serves 4)

Ingredients - for the roulade

Butter and very finely grated dry vegetarian Parmesan-style cheese for coating the base of the tin

60g organic full-fat soft ‘cream’ cheese

150ml organic single cream

4 large organic eggs, separated

200g organic Cheddar cheese, grated

3 tbsp of organic fresh herbs such as thyme, oregano and parsley

Sea salt and freshly ground black pepper

Freshly grated vegetarian Parmesan-style cheese to garnish, optional


Ingredients - for the mushroom filling

40g butter

600g mushrooms, cleaned and thinly sliced (I used a variety of organic & exotic mushrooms e.g. Chestnut, Shitake, Crimini, Enoki, Oyster and Beech) 

Sea salt and freshly ground black pepper 

Ingredients - for the red wine sauce

80g butter

2 organic shallots, finely chopped

2 tsps fresh thyme leaves, finely chopped

300ml red wine

45ml (3 tbsp) port, or other fortified wine

½ tsp vegetable bouillon powder

sea salt and freshly ground black pepper


Instructions to make the roulade

Pre heat the oven to 200℃ / 400 ℉ / Gas mark 6

Line a 22 x 12cm Swiss roll tin with nonstick paper. Grease the paper lightly with butter and sprinkle with the very finely grated Parmesan-style cheese.

Put the cream cheese into a large bowl, add the cream and mix until smooth. Beat in the eggs yolks one by one. Finally, stir in the grated cheese and the herbs and season to taste.

In a separate grease-free bowl, whisk the egg whites until stiff - but not so dry that you can slice them.

Gently fold the egg whites into the cheese mixture using a large metal spoon or a rubber spatula.

Pour the cheese and egg white mixture into the prepared tin, smoothing it to the edges. Tip: If you bang the tin down firmly onto a hard, flat surface this will help the mixture settle down evenly into the tin.

Bake until risen and just firm in the centre: 12 - 15 minutes.

Place a piece of nonstick paper large enough for the roulade onto a work surface close to the oven. Sprinkle it with vegetarian Parmesan-style cheese. 

Take the roulade to of the oven and turn it out, face side down onto the paper with a short side facing you. Peel the nonstick paper that was used to line the tin from the top of the roulade.

Allow the roulade to become cool to the touch before covering with the mushroom filling and rolling up. 


Instructions - to make the mushroom filling

Melt the butter in a large deep sauté or frying pan over a medium heat. 

Add the mushrooms and cook, stirring occasionally, until the mushrooms are tender and the liquid has evaporated: 12 - 15 minutes. Season to taste. 


Instructions to assemble the roulade

Cover the roulade base with the mushrooms and roll up as follows:

Spread the mushrooms over the base, leaving a border of about 1cm (½ inch) all round to make the roulade easier to roll.

Starting from a short side, firmly roll up the roulade - use the paper to help lift the base ‘up-and-over’ as you roll it.

Place the roulade with the seam underneath so it cannot unravel. Trim the ends if desired (I don’t bother) and sprinkle the top with more grated Parmesan-style cheese. 

The roulade may be served at once or reheated later (to reheat, see instructions below). 

Instructions - to reheat the roulade

Wrap in nonstick tin foil and place in a preheated oven (160℃ / 325℉ / gas mark 3) for 15 minutes.

Serve hot with red wine sauce. 


Instructions - to make the red wine sauce

Melt half the butter in a medium sized saucepan over a moderate heat and put the rest of the butter in the refrigerator.

Add the shallots and thyme to the pan, cover and cook for 5 minutes.

Add the wine, port wine and bouillon powder and season well. Bring to the boil. Cook until reduced by half. 

Meanwhile, cut the rest of the chilled butter into small pieces.

Strain the reduced sauce through a fine metal sieve into a small clean saucepan. Cover and set aside. 

Just before serving, bring the sauce back to boiling point, then take the pan off the heat and whisk in the cold butter, a little at a time, to make the sauce glossy. 

Serve immediately with the Cheddar, Herb & Mushroom Roulade.


Carbohydrate 13g Protein 25g - per serving of roulade with red wine sauce


Almond Apricot & Lemon Cake

by Susan Smith in


Whilst fresh, ripe apricots are a metaphor for summer, I couldn’t wait to bring the clocks forward by making this very useful, springtime Almond Apricot & Lemon Cake. All light and lovely - almonds and apricots are a fabulous pairing - I decorated my cake with a top layer of no-sugar almond paste and fresh wild violets from the garden in readiness for an Easter Sunday teatime treat.

The fact is, I’m not brilliant at cake decorating, so homemade almond paste, edible flowers, which smell divine by the way, and a pretty ribbon does the job. The result is a really moist, light, golden cake studded with small pieces of fruit, which isn’t a million miles away from traditional Simnel cake, but looks prettier. 

Gorgeous as this cake is, if you want something less fussy, simply top with a sifting of icing sugar and serve with coffee or, better still, mint tea. You can also try your own homemade Lavender Mint Tea.

The cake is then easily transformed into an ‘after dinner’ dessert by serving with poached apricots, rhubarb, plums or pears. Or you can substitute an orange for the lemon in the recipe and serve with a fresh orange salad and whipped cream. In my imagination, the cake eating possibilities for this simple, delicious cake are endless.

Easy to make, it keeps like a dream.  

healthy baking.jpg

Almond Apricot & Lemon Cake (Serves 12)

Ingredients - for the cake

1 organic lemon

100g organic sun dried apricots

6 organic eggs - preferably at room temperature

100g raw organic runny honey (raw acacia honey resists crystallization so retains its runny consistency without heating)

50g Sukrin:1

250g organic ground almonds

Sukrin Icing - for sifting over


Ingredients - for the almond paste, optional

125g organic ground almonds

25g Sukrin Gold

25g Sukrin icing sugar

1 tsp fresh organic lemon juice

1-2 tsp organic maple syrup

1 organic egg yolk


Ingredients - to assemble, optional

3 tbsp organic no sugar apricot jam

Edible flowers

Organic flaked almonds, lightly toasted

Ribbon


Instructions - to make the cake

Wash the lemon, then put it in a small saucepan and cover with cold water. Bring to the boil and simmer gently until soft (about 45 minutes). Take off the heat, add the dried apricots to the pan. Leave to cool.

Grease a loose-based 8” cake tin (preferably springform) and line the sides and base with non-stick baking parchment.

Pre-heat the oven to 150℃ / 300℉ / Gas mark 2.

Drain the lemon and apricots. Cut the lemon into quarters and remove any pips. Dry the apricots on kitchen paper then cut each one into several pieces. Put the lemon quarters and apricots into a food processor or blender and whizz together until very finely chopped into almost - but not quite - a smooth puree i.e. it needs to retain some texture.

Using an electric whisk, whisk the eggs, honey and Sukrin:1 together for about 6 to 8 minutes until they are pale and thick and until the mixture holds its shape for a few seconds when it’s flicked across the surface of the rest of the mix.

Whisk in the lemon and apricot puree. Then, using a large metal spoon or rubber spatula, gently fold in the ground almonds.

Pour into the prepared tin and bake for 1¼ hours, or until a cocktail stick inserted into the centre of the cake comes out clean. N.B. To prevent the cake from getting too brown, cover the top of the cake lightly with a circle of non-stick baking parchment after the first 45 minutes baking time. 

After you take the cake from the oven, leave it to cool completely in the tin, then turn out carefully and remove the paper. 

Dust the cake with Sukrin Icing just prior to serving.

gluten-free cake recipe.jpg

Instructions - to make the almond paste, optional

Put the ground almonds, Sukrin Gold and Sukrin Icing into a food processor and pulse to combine.

Add the egg yolk, lemon juice and 1 teaspoon of maple syrup and process until a soft, dry paste forms (takes about 1 minute). If it doesn’t come together into a malleable paste (test by squeezing a little of the mixture between two fingers to see if it holds together), add another teaspoon of maple syrup and whizz again. It’s a fine balance. The longer you process the almonds the more oil is released, which helps bind the mixture together. However, it you over-process it, the paste becomes too oily and sticky to handle.  

Form the almond paste into a ball then place between two sheets of cling film or baking parchment. Flatten slightly with the palm of your hand, then roll out evenly into an 8 inch (20 cm) circle. N.B. You can either draw a circle on the back of the bottom sheet of baking parchment to guide you or use a cake tin liner placed under the bottom sheet of cling film.


Instructions - to assemble the cake

Invert the cake onto a serving plate so that the bottom side of the cake becomes the top i.e. you have a completely flat surface to work on. 

Heat the jam slightly in a small saucepan and brush it over the top of the cake.

Remove the top sheet of parchment or cling film from the rolled out circle of almond paste, then with the help of the paper or cling film still underneath, lift the almond paste onto the top of the cake. Press down lightly with your hands, then peel away the remaining paper/cling film.

Crimp the edge of the almond paste with your fingers or alternatively create a pattern around the top edge of the cake by light indenting with the prongs of a fork or wooden skewer. Decorate with organic edible flowers, toasted flaked almonds and a matching ribbon (see photo).

Just prior to serving, sift a little Sukrin Icing over the top of the cake.  


Carbohydrate 13g Protein 9g - per serving of plain cake

Carbohydrate 16g Protein 11g - per serving of cake with almond paste

primal recipe cake.jpg

Bone Broth With Vegetables

by Susan Smith in ,


We don’t eat much meat because intrinsically we believe that animals belong in our hearts, not in our stomachs, but that doesn’t mean I don’t regularly buy meat. Almost exactly a year ago to the day, my cat Sushi was suffering from distressing symptoms that the vet diagnosed as the onset of renal failure. We thought her death was imminent. Rather than accept the vet’s unhappy prognosis, which meant subjecting Sushi to the ongoing stress of regular blood tests, injections and the daily oral administration of drugs for the rest of her life, I boldly decided that I would responsibly ‘manage’ her condition by fully taking care of her nutritional needs. It is no mean feat to hand prepare fresh, organic pet food from scratch, but that was what I committed to do and one year later (Sushi’s now 17), she’s completely free of symptoms and, as they say, “As happy as Larry.”

When people think the cost of organic food is too expensive and cooking is a bore, they need to also think about the future cost of healthcare for humans and animals once good health disappears - as it most surely will - when they choose to feed themselves and their pets chemically processed food made with heavily refined ingredients and artificial additives that essentially amounts to toxic crap. It’s this catastrophic dietary decision that makes so many people and animals sick and fat. Good for vets’ profits maybe, but not so good for a cash-strapped NHS when the lifestyle and dietary choices of an ageing population starts to catch up with them! Today I am out to prove a point. Even though my idea of pet food is freshly ground, organic, grass-fed beef, lamb and chicken made from meat cut off the bone by me, when you factor in a nutritious meal for four conjured-up out of the leftovers, 63 pence per portion for my pet food versus 45 pence for Lily’s Kitchen is, in my view, a monetary piffle. What’s 19 pence when I’ve saved £100’s on veterinary fees and my beloved cat’s quality of life?   

Bone Broth, or homemade stock as we used to call it, has been hailed as a trendy new superfood by the Paleo/Primal fraternity, but in fact our ancestors always used to have a pot of meaty bones continually brewing over the fire. Our modern day equivalent would be to throw some good quality bones (they must be organic) and vegetables into a slow-cooker in the morning, go to work and come home to a beautiful, clear, savoury broth. The longer bone broth is slow-cooked, the more nutritious and gelatinous the broth. Yet, for the forward thinking cook, this is healthy, fast food at it’s best because it requires nothing more than shoving a few ingredients into a pot and walking away. 

Renowned for healing the gut, fighting inflammation and strengthening bones and teeth, the numerous nutrients found in bone broth are easily absorbed and used by the body. However, today’s recipe is not just for the health conscious, it’s for foodies, cooks and those of us with darling pets to care for because from scraps and remnants, a few meaty bones, freshly filtered water and a handful of organic vegetables, Bone Broth With Vegetables is a fuss-free way to produce the most soothing, nourishing, warming ‘hug-in-a-bowl’ imaginable. 

Last week Sushi’s monthly meat order coincided with me working at a wedding fair with Mirror Imaging at the weekend and because Perfect Roast Chicken is one of the simplest of meals for my husband to prepare in our absence, I ordered an extra chicken for us too. Whilst it isn’t always about preferring to eat vegetarian, it is always about consciously eating less meat and fully appreciating it when we do. For me this this means not throwing out what most people think of as waste i.e. leftover raw bones, giblets and the Sunday roast chicken carcass. And, when it comes down to it, the more variety of bones, the better the broth. Simmered long and slow in freshly filtered water with a handful of vegetables, these simple ingredients are the makings of another meal. All that’s needed to elevate the delicious resulting broth into a visually appealing, light yet filling lunch or supper is some finely chopped vegetables, seasoning and a generous handful of fresh parsley.

Not so much a recipe, more ‘waste not, want not’ opportunism, bone broth can be made from the remains of Perfect Roast Chicken, including the roasted vegetables you cooked it with, plus a few raw, organic meat bones and/or half a dozen raw organic chicken wings, a stick or two of celery, a carrot and an onion. This super cheap, super satisfying ‘superfood’ is so good, you’ll probably be left wondering why you never thought of making it before.

Bone Broth With Vegetables (Serves 4)

Ingredients - to make the broth

The remains of a Perfect Roast Chicken including the vegetables/herbs you roasted it with

Raw, organic lamb/beef bones or 500g raw organic chicken wings

1 organic onion, unpeeled and chopped into quarters

1 large or 2 medium organic carrots, scrubbed (no need to peel) and cut into thick wedges

2 sticks organic celery, washed and chopped into large pieces

Fresh filtered water - enough to virtually cover the bones/chicken carcass  


Ingredients - for the vegetables (can be varied according to what’s fresh and in season)

30g organic butter or olive oil

I large or 2 medium organic leeks, tough green tops and roots removed, cut into fine dice

1 small organic sweet potato, peeled and cut into small dice (no bigger than a pea)

2 organic carrots, peeled and cut into small dice (no bigger than a pea)

2 medium sticks organic celery, washed, trimmed and cut into small dice (no bigger than a pea)

½ large organic courgette, washed and cut into small dice (no bigger than a pea) 

100g organic frozen peas, defrosted 

1-2 tbsp organic tamari

a little sea salt and freshly ground black pepper


Ingredients - to serve

small bunch organic parsley, finely chopped

cold, roast chicken, cut or shredded into small pieces - optional

Instructions - to make the bone broth

Place all the ingredients into a very large saucepan (or you can use a slow-cooker, if you have one).

Add enough cold, freshly filtered water to virtually cover - push down any bits and pieces that are sticking out above the water line.

Set the pan over a medium-high heat and bring to boiling point. Keep your eye on it. As soon as the liquid starts to boil, turn the heat down to a very low setting and, using a metal tablespoon, skim off any scum that’s risen to the surface. 

Cover with the pan lid and allow the liquid to simmer very gently for at least 2 hours - although 4 hours would be better. N.B. It is very important that the liquid does not boil rapidly at any time because this will make the finished broth cloudy rather than clear.

After a couple of hours - longer if possible - the liquid will have turned into a clear, golden broth and will smell really inviting. Allow the contents of the pan to cool down a little before straining the hot broth through a metal sieve into a clean saucepan. Or, if you’re not planning to use it straightaway, a glass bowl. Leave to cool completely, then cover and store in the refrigerator, where it will turn into a savoury jelly.


Instructions - to cook the vegetables and finish the dish

In a large saucepan, melt the butter (or gently heat the olive oil) then add the diced vegetables and stir everything together well to lightly coat the vegetables in the oil.

Cut a circle of greaseproof paper to fit the pan and press this down directly on top of the vegetables. Put the pan lid on and cook gently over a medium-low heat for approximately 8 minutes or until the vegetables are just soft - they should retain their natural, vibrant colour.

Bring the bone broth back to boiling point, then season to taste with Tamari, sea salt and black pepper. 

Add the hot broth to the saucepan containing the vegetables and simmer over a medium-low heat for 10 minutes. 

If using, add the diced chicken to the broth and allow to warm through for a further minute before ladling into individual pre-warmed serving bowls - making sure that the vegetables and chicken pieces are evenly distributed between each bowl. 

Sprinkle over the chopped parsley and serve. 


Notes

The broth will keep for up to 5 days covered in a refrigerator.

Before using jellied broth straight from the fridge, scrape off the top layer of fat from the surface.

You can freeze the cooled liquid broth in ice cube trays and then use the resulting frozen stock cubes individually to add depth of flavour to savoury sauces and gravies. 


Carbohydrate 21g Protein 5g - per serving


Caramelised Pineapple

by Susan Smith in


As much as I like the sweet-yet-tart, juicy freshness of a properly ripe pineapple, when I’m feeling down in the dumps this Caramelised Pineapple recipe lifts the spirit by transforming the pure and simple into something more like comforting confectionary with a flavour profile redolent of candy-floss. Yum! Very appealing, no matter what your age or state of mind.

Yes, I know that pineapples are full of natural sugar (fructose) and should be eaten in moderation but they’re also a good source of antioxidants, particularly vitamin C, minerals and an enzyme called Bromelain, which is a powerful anti-inflammatory, anti-cancer compound. 

In short, this wonderful, sticky, caramelised dessert is not only fast and simple to make, it’s really good for you too. For a zingy, nutritious taste of the tropics, I recommend you tuck in!

Caramelised Pineapple (V) (serves 4)

Ingredients

1 organic, fair-traded pineapple, peeled, cored and cut into thick wedges

20g organic coconut oil (or organic unsalted grass-fed butter)

2-3 tbsp organic maple syrup

To Serve

A sprinkling of organic ground cinnamon

A sprinkling of Sukrin Icing sugar

Fresh mint leaves, torn

Organic creme fraîche - optional

Ingredients primal recipe.jpg

Instructions

Melt the coconut oil (or butter) with the maple syrup in a large, heavy-based frying pan over a medium heat.

When it is hot, add the pineapple wedges to the pan and with a pair of tongs, turn to coat all the pieces evenly with the syrup.

Continue to fry the pineapple for about 4-5 minutes on each side, frequently turning them over with in the pan until they’re caramelised to a deep golden brown. 

Stack the wedges onto a warm serving platter or individual plates and dust over with a little cinnamon and Sukrin icing. Decorate with torn mint leaves scattered over. 

Serve immediately with creme fraîche, if liked


Notes

Whole pineapples should be stored at room temperature, while cut pineapple should be stored in the refrigerator. 


Carbohydrate 35g Protein 1g - per serving


Sarah’s Taleggio, Broccoli & Leek Tart

by Susan Smith in


I am never one to say “No” to an invitation to dinner and last week Sarah surprised me by inviting us over to her’s…twice! It just so happens that’s she’s become a dab hand at making today’s recipe for Taleggio, Broccoli and Leek Tart - although after years of perfecting the art, neither of us can remember where her original inspiration came from. As with all things Primal, there have been enough modifications to allow me to confidently call this deeply delicious, satisfying tart “Sarah’s Taleggio, Broccoli & Leek Tart.” 

Firstly, being Primal, there are no grains allowed and secondly, she’s confidently upped the ante on the eggs and cheese to make this a really luxurious and filling family dinner - albeit it’s not unknown for us to eat the whole of this tart, which is supposed to feed six, between the three of us. 

As it turns out, it was much trickier to get the recipe out of Sarah’s head and into written form than it is for her to bake it! It took her a couple of hours to write the recipe down and me twice as long as that to decipher what she’d written before it could make an appearance on Primal Plate’s blog! Nevertheless, as you can see from the picture of my serving of tart, it is very worthy of its honorary place.

Taking on the ‘huff and puff’ of food blogging is very much akin to photographing the finished food on the plate. From time to time, this strong mother-daughter team, of which I am so proud, will attempt to walk a mile in each other’s shoes. Sometimes Sarah passes me her camera, but on this occasion she volunteered for a day in the life of a food blogger. This is what workplace equality is all about and as I write, epitomises the spirit of today’s ‘International Women’s Day’ (8 March 2017) but more than this, it is always a privilege to have Mirror Imaging Photography create such beautiful images to bring to life all of Primal Plate's recipes. 

This one is an absolute winner. It’s also much easier to make than a conventional tart because the nut-based pastry behaves itself so much better than a normal wheat flour pastry does. Sarah learned this lesson very early on in life from Mrs Bainbridge, her home economics teacher at secondary school, who thought that the way to get a crumbling flour pastry mix under control was to bash it around on the worktop until it surrendered itself up as a pliable piece of dough, which then cooked out to something resembling a brick. Did I miss my vocation? Is this why so many of Sarah’s generation have given up on cooking their own food? Over-handling or adding too much water to normal flour is the sure-fire way to achieve pastry disaster. This can’t happen with nut-based pastry. Provided that you add the diluted milk judiciously - just enough to bring the mixture together (see instructions below) - you cannot help but achieve a crispy, golden, melt-in-the-mouth almond pastry because, without gluten, it’s impossible to overwork. Perfect for the novice cook and, without any grains or gluten, it's much healthier for you too.

Sarah’s Taleggio, Broccoli & Leek Tart (serves 6)

Ingredients - for almond pastry

400g organic ground almonds

2 teaspoons gluten-free baking powder 

50g organic butter, melted + a little extra for greasing

4-6 tbsp diluted whole organic milk (to dilute the milk, mix 3 tbsp milk & 3 tbsp fresh filtered water together)


Instructions - to make the pastry case

Preheat oven to 190℃ / 375℉ / Gas mark 5 

Grease a 25cm / 10inch round, fluted, non-stick, loose-bottomed pastry case with a little melted butter, then line the base with a round piece of non-stick baking parchment for good measure.

To make the almond pastry - sieve the baking powder into the ground almonds and mix together well. 

Stir the melted butter into the almond mixture, then add the diluted milk - one tablespoon at a time - and stir everything together with a fork. N.B. We’ve found that 4 tablespoons of diluted milk is usually enough to bind the mixture without the pastry becoming too wet.

When it starts to clump together, abandon the fork and use your hand to bring the mixture together into a firm but moist dough (the warmth of your hand will help to do this by releasing the oil in the nuts). Shape into a ball.

Lay out a large sheet of clingfilm onto a work surface (you may need two sheets overlapped), then place your smooth ball of pastry in the middle and flatten it out slightly.

Lay a second sheet of clingfilm over the top of the pastry (this will stop it from sticking to your rolling pin) and roll out evenly to about 3mm-5mm thickness. As you roll, turn regularly to achieve an even round shape that is approximately 2½cm/1” larger than the circumference of your tart tin (this allows for the sides of the tart). 

Carefully peel off the top layer of clingfilm, then loosely wrap the pastry around your rolling pin removing the bottom layer of clingfilm as you do. Then using the rolling pin to support the pastry, lift it in one piece directly into the tart tin. If it splits or breaks in transition (as it often does!), don’t worry, just patch it back together by pressing it firmly and evenly into the base and up the sides of the tin with your hands. You can add smaller pieces of pastry to fill any gaps and particularly to reinforce the top edge - just press any seams together with your fingers so there are no gaps and it’s as even as you can make it. N.B. Since almond nut flour is gluten-free it’s easier to handle than normal shortcrust pastry, because it doesn't get harder and tougher when you re-work it.

Once it’s settled in the tart tin in an even thickness, prick the base with the prongs of a fork, then lift the pastry tin into the air and, rotating the tin with one hand, use a sharp knife to trim any raggedy bits of pastry off the top edge to create a neat finish. Form any leftover pastry into a ball, cover in clingwrap and store in the fridge for up to a week. You can then re-roll and make into almond biscuits, which are perfect served with cheese after dinner, or as a base for pre-dinner smoked salmon canapés.

Bake the pastry case blind i.e. place a large piece of baking parchment on top of the pastry - it needs to be big enough to cover the entire pastry case - and weight down with ceramic baking beans (rice grains, dried peas or dried beans will do just as well) then bake in the pre-heated oven for about 8-10 mins. 

After this first baking, remove the baking beans and parchment and cook for a further 5-6 minutes - you’re looking for an evenly baked, pale golden case without any wet pastry showing in the middle. N.B. Keep a careful eye on it to ensure that the top edge doesn’t get too brown - nut-based pastry can scorch easily and if it’s over-browned at this stage it will be too dark after it’s filled and re-baked. 

When cooked, remove from the oven and set aside. 

Ingredients - for filling

Head of organic broccoli (about 350g)

200g taleggio cheese

6 tbsp organic whole-fat milk

2 tsp English mustard powder

6 organic eggs

120ml organic double cream

sea salt and freshly ground black pepper

1 tbsp organic butter, melted (or organic olive oil)

2 organic medium-sized leeks

1 tbsp organic fresh thyme leaves, chopped 


Instructions - to make filling

Reduce the oven temperature to 170℃ / 325℉ / Gas mark 3

Cut the broccoli into small florets. Steam for about 4-5 minutes or until just tender. Drain and put straight into ice cold water (or run under the cold tap) to stop the cooking process and to keep their colour.

Trim off the roots and coarse dark green tops of the leeks, then with a sharp knife slice them lengthways halfway through i.e. from top to root without actually cutting them in half. Wash under a running tap, fanning the layers out with your fingers to rinse away any grit or soil trapped between them. Drain thoroughly and then slice across into 1cm thick rings. 

Place the leeks and the olive oil into a large saucepan, give the leeks a quick stir to make sure that they’re evenly coated in the oil, then cover with a circle of greaseproof paper cut to fit the pan and the pan lid. Cook over a gentle heat for about 8-10 minutes until the leeks are soft and tender but not coloured. 

Remove the paper lid and stir in the broccoli and thyme then, whilst continually stirring, turn up the heat to cook off any excess liquid. You need to make sure the mixture is as dry as possible without browning the vegetables. Season with salt and pepper and set aside.

Prepare the taleggio cheese by removing its wrapping and cutting off any of the rind as thinly as you can (it will have a mould-like bloom, which you don’t want in the tart). Slice into thin pieces, and set aside.

In a Pyrex jug or bowl, first whisk the mustard powder into a little of the milk until smooth, then add the rest of the milk, cream, eggs and season to taste with salt and pepper. Whisk the mixture until the eggs are broken up and all the ingredients are well combined. Set aside.


Instructions - to assemble the tart

Lay a sheet of tin foil on a flat baking sheet, then place your pastry case, still in its tin, on the sheet. Scrunch the tinfoil up a little around the base of the tin because if your pastry has any gaps at all, this will prevent the filling running out all over your oven!

Evenly distribute the vegetables in the base of the pastry case. 

Give the egg custard mixture a quick stir (sometimes the mustard settles at the bottom) and carefully pour into the pastry case over the vegetables. Lay the slices of taleggio cheese evenly over the top. 

Bake immediately in the pre-heated oven for about 25 minutes, or until the custard is lightly set and the surface of the tart is nicely golden.

Remove from the oven and let the tart cool for 5-10 minutes. Then, using a small sharp knife, loosen around the top edge of the tart before releasing from its tin.

Slice and serve warm or cold. 


Notes

Sarah doubles up on the quantity of Primal Plate’s original almond pastry recipe to make sure there is plenty to roll out without scrimping; this means that there will be about a third left over for almond biscuits etc. The remaining raw dough can be stored in a refrigerator for up to a week. 

Taleggio cheese is made from non-vegetarian rennet, strict lacto-vegetarians could substitute a soft-melting cheese such as Duchy’s organic brie.


Carbohydrate 12g Protein 33g - per serving


Beef Stroganov

by Susan Smith in ,


Because I didn’t get around to grinding-up Sushi The Cat’s finest, organic steak in time for her to enjoy last week, I was forced to put Beef Stroganov on our Saturday night dinner menu so that it didn’t go to waste. It’s come to something when our puss-cat is apparently more of a fussy eater than her health conscious owners, but there you have it. According to Sushi, if anything is left in the refrigerator for more than 3 days before mincing and freezing it down for cat food, it’s not fit for her to eat. Her loss. 

However, I hadn’t just been lackadaisical in prepping Sushi’s meals. Every week there is a last minute panic for me to create something fabulous that will use up all the previous week’s Riverford organic fruit and vegetables so we have enough fridge space to store the current week’s delivery. Inevitably, I get so excited when I’m placing my regular Riverford order that I double-up on fruit and veggies still not eaten from the week before. On this occasion, I had mushrooms, onions, a pack of salad leaves, organic cream, lemon and cauliflower leftovers. I suppose it’s a testament to the lack of air miles and their just-picked freshness, but I always marvel at how Riverford’s produce stays ‘alive’ for so long - especially their bags of organic salad leaves. Truly, the salad you see in the photos had been sat in my fridge for over a week! Anyway, I had everything I needed to put together, what is for us, a rare treat.

It must be in the 1960’s that I last made Beef Stroganov. Back then it was the height of sophistication to order this dish in a posh restaurant and have it cooked at your table in an elaborate chafing dish by the maître d’ (headwaiter). As rich-tasting and as luxurious as this meal is, if you don’t even need to be in the kitchen to cook it, it’s clearly not that difficult to make!

Beef Stroganov is named after Count Pavel Stroganoff (1774–1817) or should that be Count Pavel Alexandrovich Stroganov? I think it should, and named my recipe accordingly. The ridiculously wealthy, Europe-hopping, Russian Count Pavel Stroganov was born in Paris and later employed French chefs. For me, just one delicious mouthful of lightly sautéed, tender beef in its creamy, tangy sauce tells me that Beef Stroganov’s origins are clearly French. It was in fact gourmet Pavel’s renowned French chef who adapted a simple beef fricassee from a textbook recipe by adding Smetana (a type of soured cream from Eastern Europe), and then christened it Beef Stoganov after his Russian employer. Rich food for rich people! I like to think that Beef Stroganov was perhaps one of the first fusion foods to be invented.

Pure, simple and indulgent, don’t be tempted to make Beef Stroganov with anything other than prime, organic, grass-fed steak. Fillet steak is best, but the good news is that you need about a third less meat for this recipe than you do when cooking individual steaks, and the finished dish is so deeply satisfying that you won’t even notice that ‘less’ has remarkably transformed itself into ‘more’. Partnered up with cauliflower ‘rice’ and a fresh green salad drizzled over with the finest olive oil and balsamic vinegar, it’s a dish fit for Counts, Kings and all of us that are primally-orientated towards turning our bodies into fat-burning mode rather than sugar-burning.  

Enjoy with a decent bottle of organic no-added-sulphur red wine and you’ll soon see why this quick to make, full of flavour, ultimate comfort food earned itself the reputation of fancy-pants dining in restaurants in the 1960’s. Because it can be on the table in less than thirty minutes, I think it’s a classic that’s perfectly suited to make a comeback in our kitchens, with or without my kitty’s approval!

Beef Stroganov (Serves 4)

Ingredients

45g organic unsalted butter

3 organic onions, very thinly sliced

250g organic chestnut mushrooms, sliced

600g organic beef steak, cut into strips 

sea salt

organic black pepper, freshly ground

1 tsp organic whole grain or Dijon mustard

250ml organic full-fat creme fraîche, sour cream or fresh organic double cream soured with the juice of ½ an organic lemon

small handful of organic flat-leaf parsley, finely chopped

Instructions

Heat half the butter in a heavy frying pan and fry the onions slowly over medium-low heat for 10-15 minutes until soft and golden brown. Lift out with a slice and keep warm.    

Add the mushrooms to the pan and quickly fry over medium-high heat for 3-5 minutes. Keep warm with the onions.

Add the rest of the butter to the frying pan and turn the heat up to high. Very quickly stir-fry the steak for 1-2 minutes on each side until it is seared brown on both sides. N.B. Take care that the juices don’t run. To avoid this, fry the meat in two batches - overcrowding the pan will ‘steam’ the meat rather than fry it.

Return all the meat to the pan, season well, then add the mushrooms and onions. Shake everything together over a high heat, then pour in the soured cream and add the mustard, stirring it in well.   

When everything is bubbling, finally stir in the parsley and take off the heat. 

Serve with mounds of cauliflower ‘rice’ and a fresh green salad dressed with a little olive oil and balsamic vinegar drizzled over.


Carbohydrate 6g Protein 25g - per serving