Savoury Primal Pancakes with Tomato, Cheese & Mushrooms

by Susan Smith in ,


My focus is on Valentine’s Day this week, so in terms of Primal Plate’s blog I don’t have a lot of time to rabbit-on about pancakes. However, in honour of Shrove Tuesday I have re-visited last year’s Primal Pancakes and made a few adjustments to the recipe. Namely, I’ve reduced the amount of carbs by decreasing the amount of arrowroot flour and improved my pancakes ‘flip-ability’ (is that even a word?) by increasing the amount of fat. Sometimes I think being a food blogger has an air of mad-food-scientology about it! 

Anyway, it all works. So if you’re trying to lose weight, want to eat low-carb, follow a Primal or vegetarian, gluten-free, grain-free diet, these delicious, savoury pancakes are a ‘flipping-good’ alternative to traditional wheat-based ones!

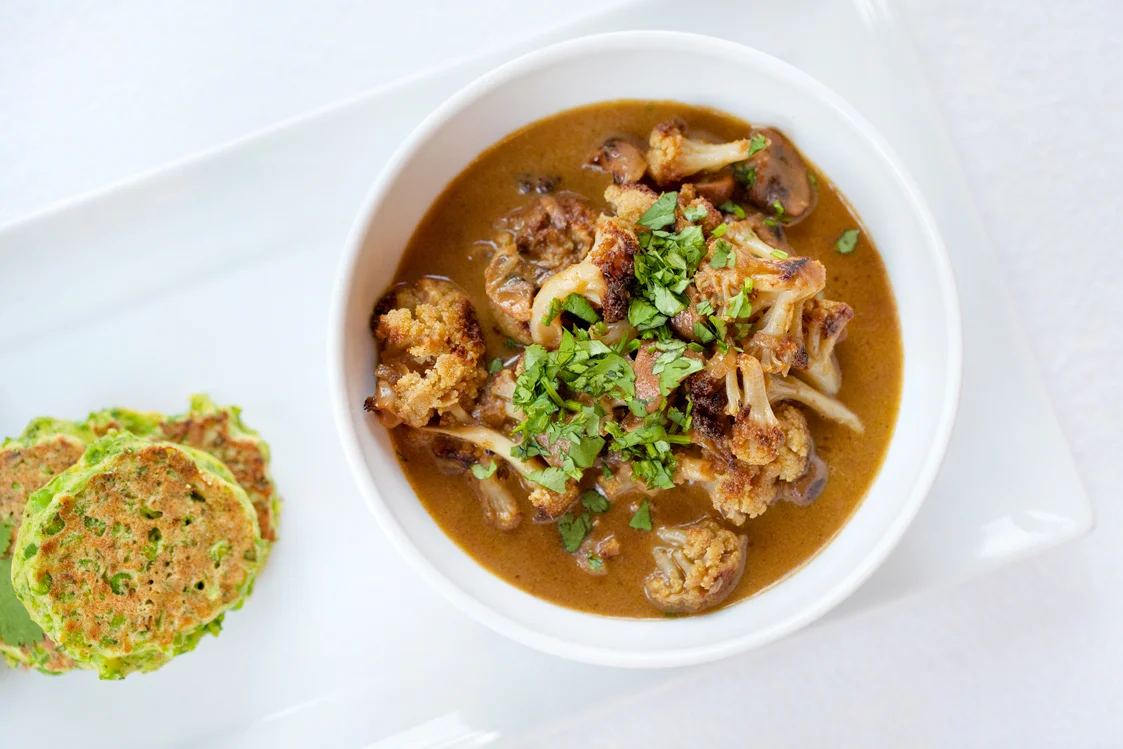
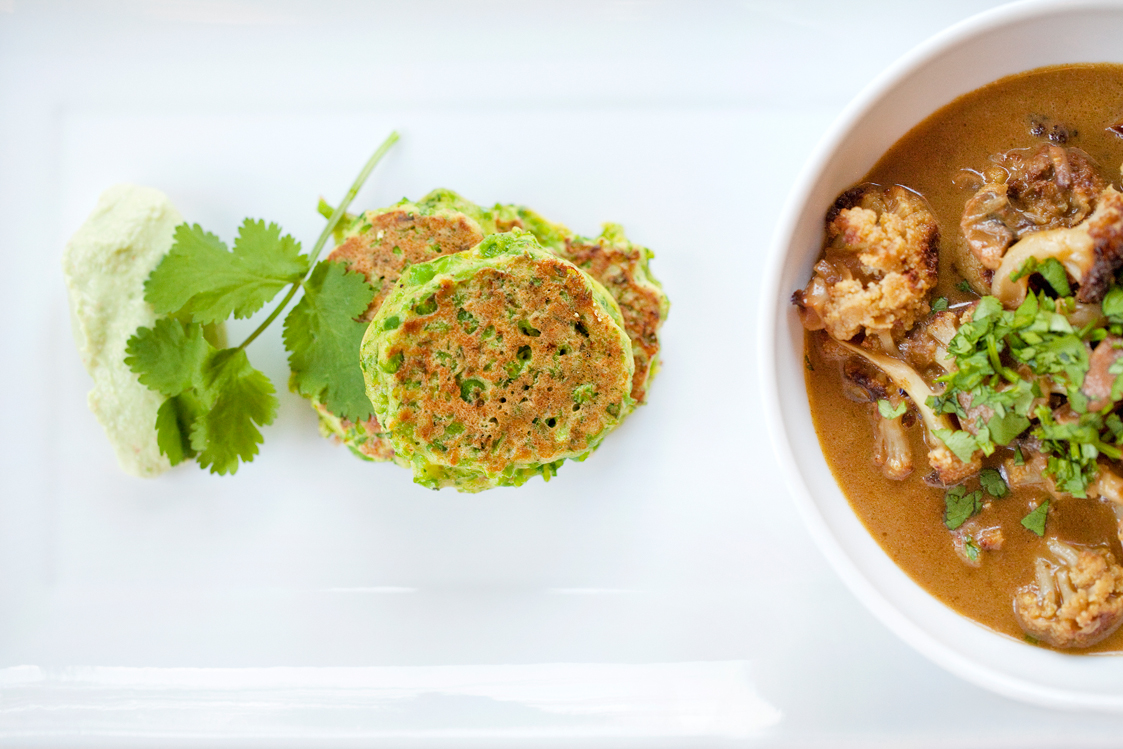
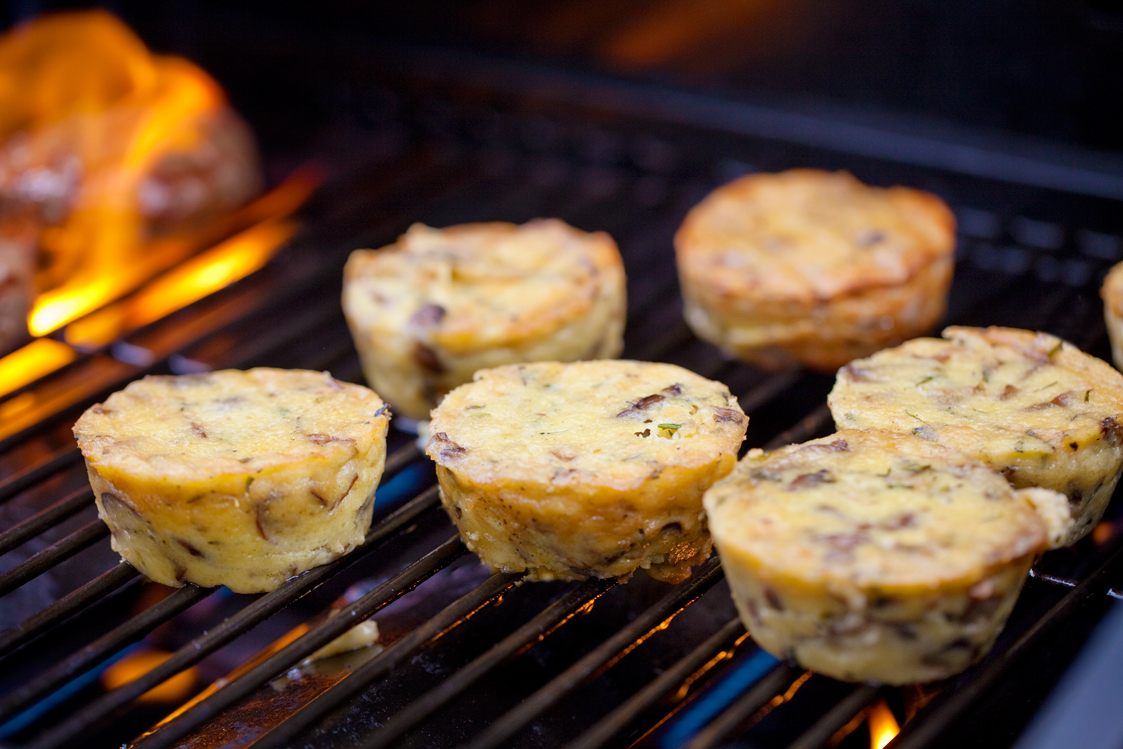
Savoury Primal Pancakes with Tomato, Cheese & Mushrooms (makes 10)

Ingredients - for the pancakes

50g organic butter (or coconut oil)    

300 ml raw whole milk or homemade organic almond milk or 50/50 filtered water & milk

4 large organic eggs                            

75g organic ground almonds            

40g Sukrin organic reduced-fat coconut flour            

15g organic arrowroot flour                        

½ tsp organic apple cider vinegar                    

½ tsp gluten-free baking powder

Extra coconut oil, for cooking


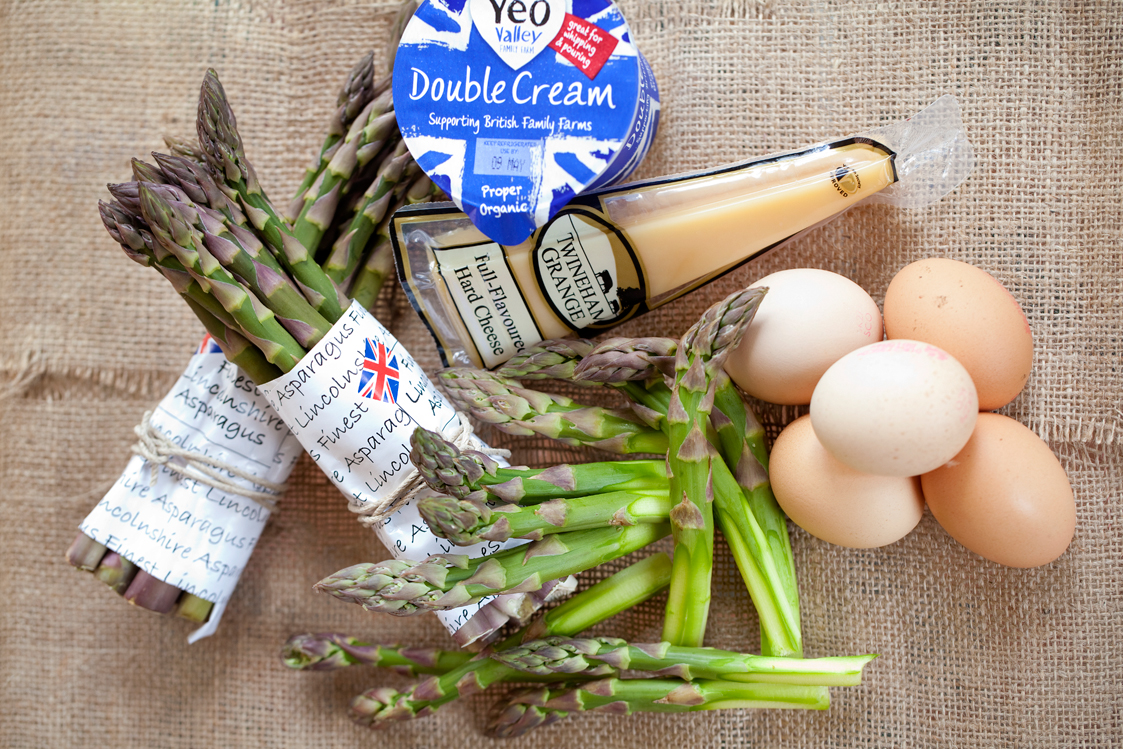
Ingredients - for the pancake filling and topping 

1 tbsp olive oil

230g organic button mushrooms, wiped and finely sliced

1 x 400g tin organic chopped tomatoes ( I used Mr Organic)

2 tbsp fresh basil leaves, finely sliced

1-2 drops organic liquid stevia

250g full-fat natural cottage cheese (I used Longley Farm)

75g vegetarian parmesan-style cheese, finely grated (I used Gran Moravia)

Fresh basil sprigs - for serving


Instructions - to make the pancakes

Put the butter (or coconut oil) in a small saucepan and set over a very low heat until just melted.

Then, place all the ingredients for the batter into a blender and blend thoroughly until it is smooth and the consistency of pouring cream.

Heat a 20cm (8 inch) non-stick pancake pan over a medium heat until it is hot.

Add a smidgeon of coconut oil to the pan, then quickly ladle - or pour - just enough of the batter into the pan to coat the base thinly (¼ US Cup - about 60 -70ml should do it). Ideally, you’d be blessed by being naturally ambidextrous at this point - swiftly pouring the batter into the frying pan with one hand whilst simultaneously tilting and turning the pan to ensure it levels out evenly with the other. N.B. the pancakes should be as thin as possible.

Fry over a medium heat for about 2 minutes without moving. Then, using a flat-bladed non-stick spatula, flip the pancake over and cook for a further 1 minute. 

Slide each pancake onto a large flat plate and repeat this process until all the batter has been used to make 10 pancakes.

Instructions - to make the filling

Heat the oil in a large frying pan and fry the mushrooms until tender

Add the tomatoes and basil, stir well and continue to cook uncovered on a low heat until the mixture has reduced down to a thick puree.

Take the pan off the heat and season the mixture to taste with sea salt and freshly ground pepper - adding 1-2 drop of liquid stevia if the tomatoes taste too acidic.

Add the cottage cheese and 25g parmesan-style cheese then stir everything together until thoroughly combined.

Instructions to assemble the pancakes and cook

Pre-heat the oven to 190℃ / 375℉ / Gas mark 5

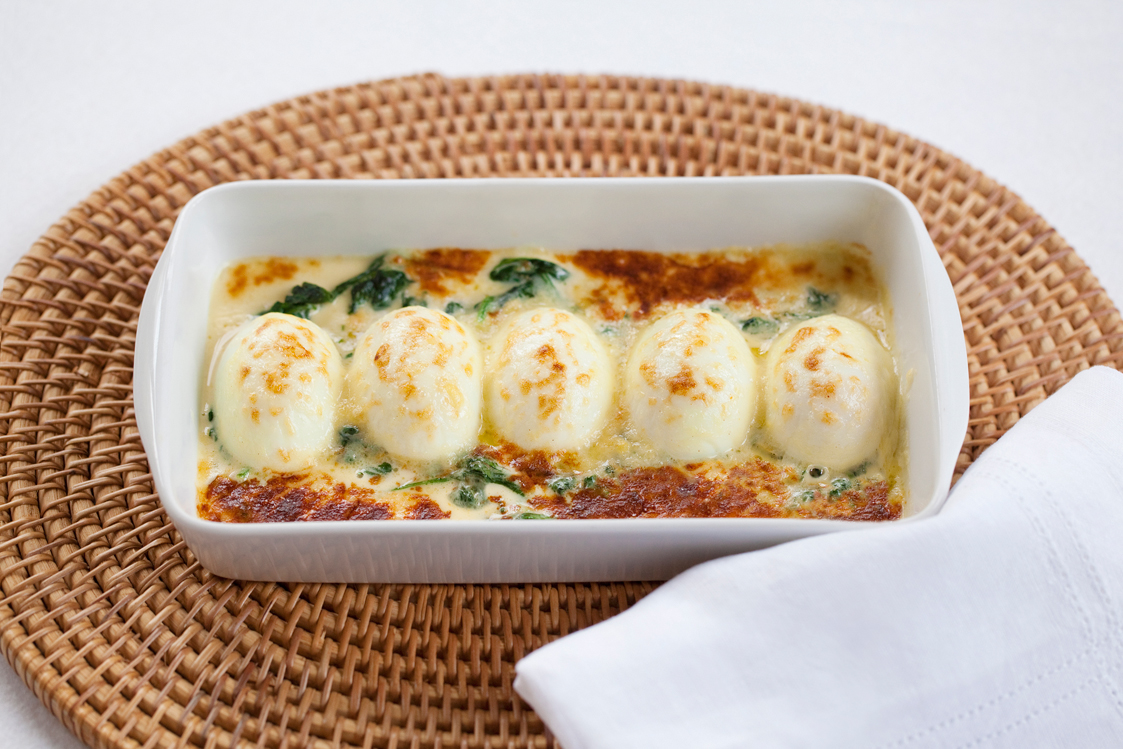
Lay one of the pancakes flat on a work surface with the side that was cooked last uppermost (best looking side underneath). Spoon a large (heaped) tablespoon of the filling along the bottom edge then roll the pancake up into a cigar shape and place into a large gratin dish with the loose edge facing downwards (so it can’t unfurl). 

Fill the rest of the pancakes in the same way, until all the mixture is used, laying each pancake snugly side by side in the dish.

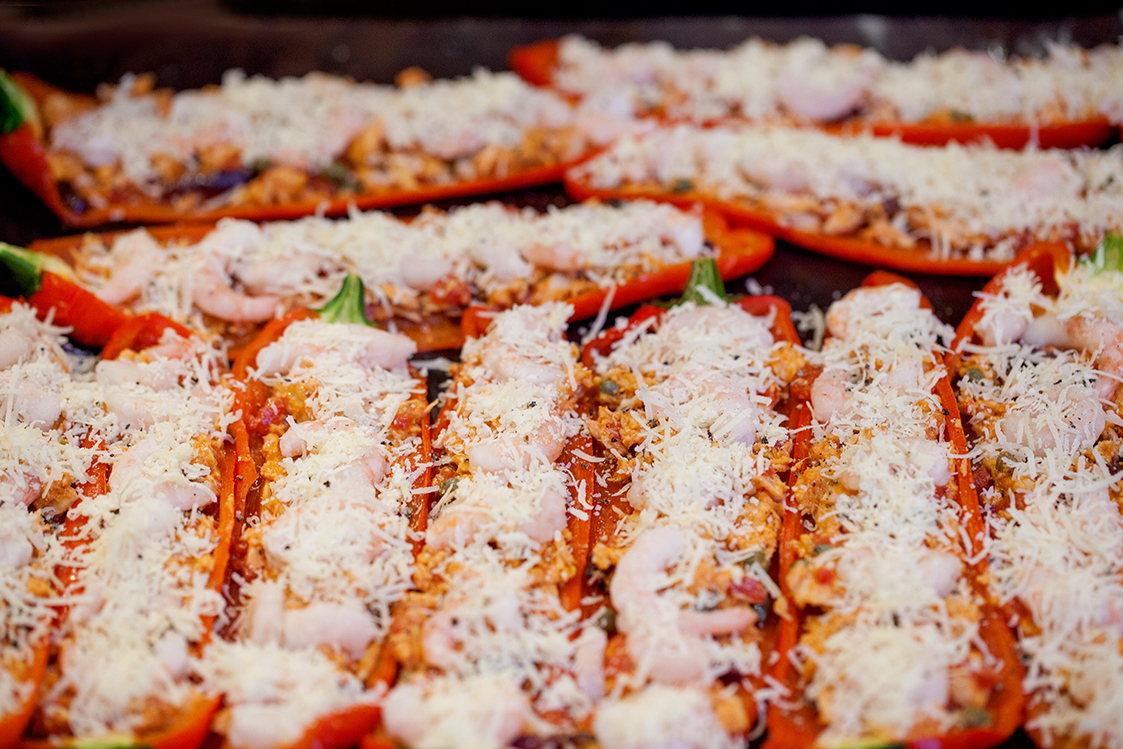
Sprinkle with the remaining 50g parmesan-style cheese and bake in the oven for 15-20 minutes until piping hot and golden brown on top. 

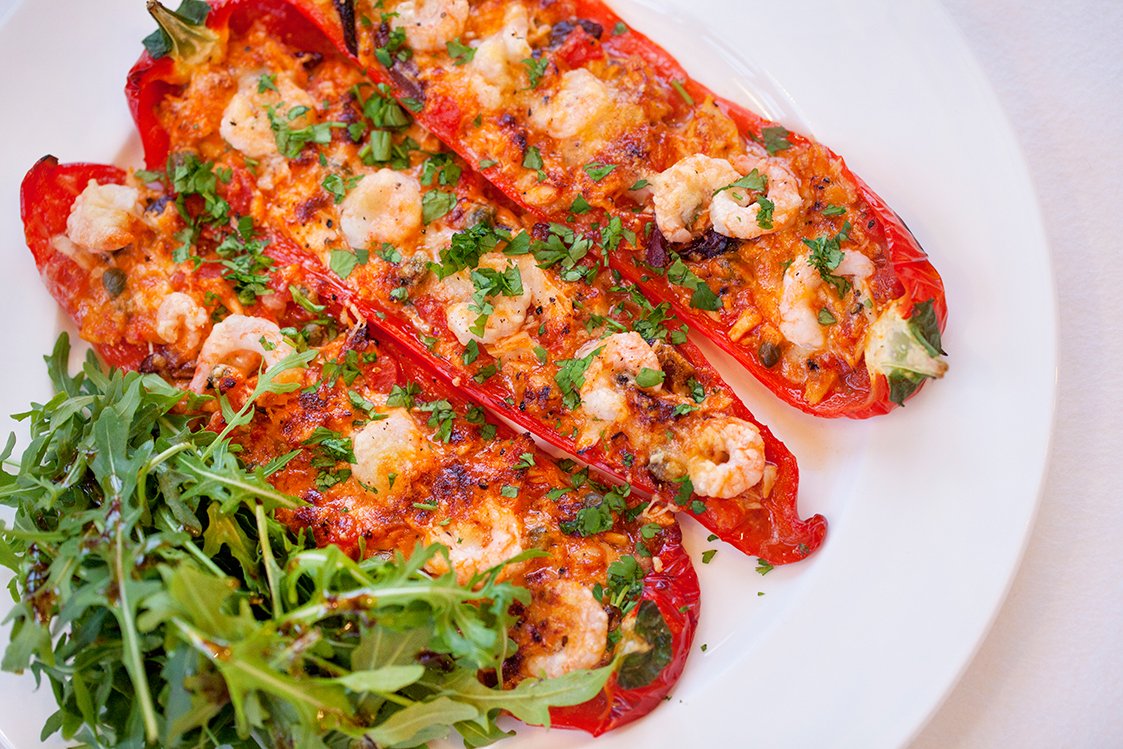
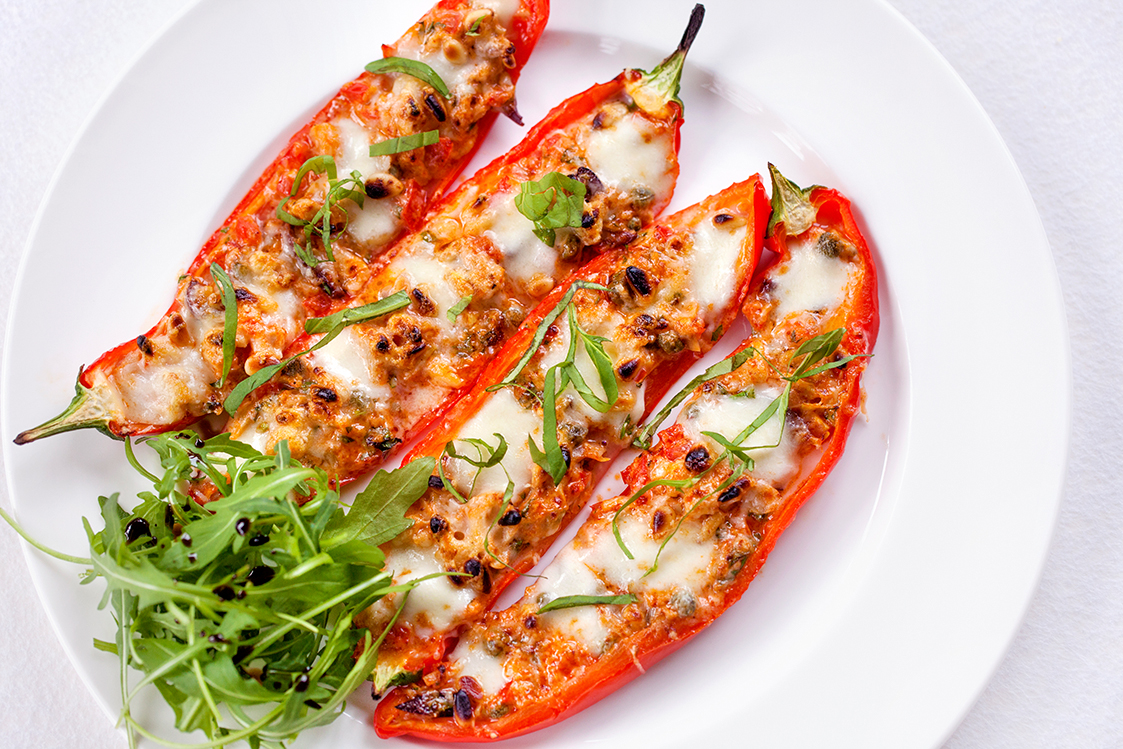
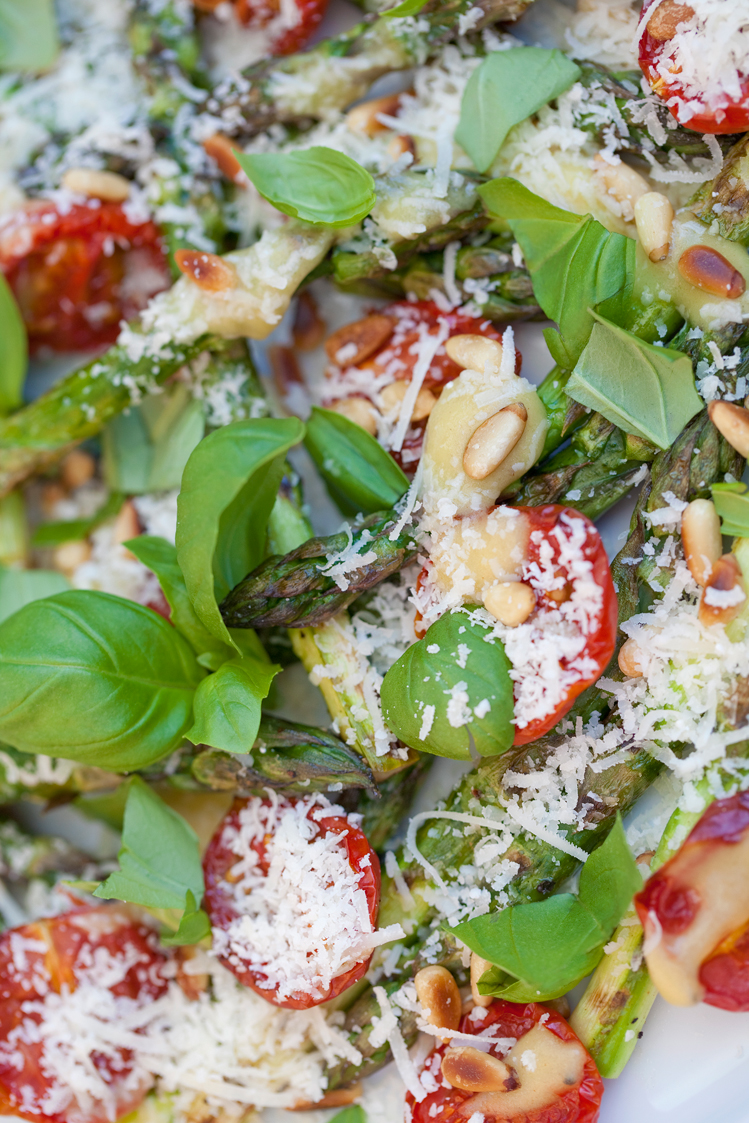
Garnish with a sprig of basil and serve immediately with a crisp green salad. 


Carbohydrate 6g Protein 11g - per pancake (allow 2 pancakes per serving)


Pizza Peppers

by Susan Smith in , ,


Who doesn’t love pizza? Since ditching grains, the anticipation, convenience and sheer pleasure that I still associate with sitting down to eat meltingly hot, delicious pizza with a glass of red wine just refuses to go away. I’ve done Primal Pizza before on this blog (and it is a real treat to eat) but if I’m honest, I’ll tell you what I really want…it’s to redefine pizza as a positively healthy, gourmet food that’s just as quick and easy to make as its classically-made ‘junk-food’ cousin.

Today’s Primal Pronto recipe for Pizza Peppers is intended to take all the time and effort out of creating a low-carb, ‘laid back’ pizza experience at home. There’s no cauliflower ‘crust’ to make - because I’ve used nature’s own convenient carriers of goodness in the form of red peppers to create the pizza ‘base’. 

However, what I was really wanting to tease out of the recipe was a flavour combination that would satiate my appetite for pizza:- basically, to create a pizza topping that replicates our all-time Pizza Express favourite: “Cajun, with extra tuna please!” It’s all changed now, but Pizza Express used to top their Cajun pizza with red peppers, prawns, Tabasco sauce, onion, mozzarella and, at our request, extra tuna.

Pizza Peppers with tuna and prawns

Pizza Peppers with tuna and prawns

First off the bat, these Pizza Peppers fully lived up to our expectations. Made with a smoky, scorched red pepper base, tomatoes, tuna, prawns, chillies, cheese, black olives, capers and onion we were transported back in time to the very same taste sensation that’s kept luring me back to thoughts of pizza ever since. But then remorse set in. Although I am pescatarian I mainly eat vegetarian, so it didn’t feel right to give the ‘green light’ to eating a plethora of fish without a second thought for vegetarian values. 

I didn’t have to ponder the problem for long. A quick ingredients check online for another of our former favourites at Pizza Express (Giardiniera) reminded us that this pizza topping included artichokes. It just so happens, I had a jar of marinated artichoke hearts in my cupboard (as you do!) and it seemed to me that they were possibly the nearest vegetarian equivalent to tinned tuna in olive oil that I could hope for. And so they proved to be. It turns out that artichokes in combination with vegetarian mozzarella are - from a taste, texture and visual perspective - so surprisingly akin to tuna and prawns that we could barely discern the difference between the two! 

Vegetarian Pizza Peppers with artichokes and mozzarella

Vegetarian Pizza Peppers with artichokes and mozzarella

Which is a remarkable triumph for vegetarianism, I’d say.  Who’d have thought that simple veggies could be compared to luxe ingredients like top quality cold-water prawns and Albacore tuna and still come out on top?  The fact is they can and they do, and for this reason, when it comes to our favourite Pizza Peppers, vegetarian wins hands down.

To be fair, both versions of these Pizza Peppers are equally delicious. Accordingly, I’ve posted both recipes so you can decide which gets your vote. This maybe pizza ‘reinvented’ but it still ticks all my boxes - healthy, tasty, fun, fast-food - in short, everything that’s good about pizza but without the downside of grains. Just grab a bottle of Chianti and your lover or a friend to fully appreciate this Primal Pronto Italiano-style supper that’s made for sharing. Buon appetito!


Pizza Peppers (Serves 3)

Ingredients - for pizza peppers with tuna and prawns

6 medium/large even-sized ‘pointy’ Ramiro/Romano organic red peppers (wider and fatter is better than longer and very thin!)

1½ 140g tins sustainably-sourced tuna (Waitrose, Marks & Spencer and Sainsbury’s are your best bet)

3 tbsp organic tomato puree (or organic low-sugar tomato ketchup)

90g mature vegetarian Cheddar cheese

¾ tsp organic chilli flakes

6 black (Kalamata) olives, stoned and cut into slivers

30g nonpareille capers, rinsed in cold water, drained and dried on kitchen paper

3 organic spring onions, finely chopped

3 medium-sized organic tomatoes, finely chopped

3 tbsp fresh parsley, finely chopped

sea salt and freshly ground black pepper, to taste

225g sustainably sourced frozen peeled prawnsnot defrosted

60g vegetarian ‘parmesan-style’ cheese (I use Gran Moravia)


Instructions - for pizza peppers with tuna and prawns

Pre-heat a grill to its highest setting. Line a large flat baking sheet or the grill pan with a non-stick baking mat or non-stick aluminium foil.

Cut the peppers in half lengthways, then remove the seeds and any white stringy bits (I don’t bother to remove the stalks). 

Place the pepper halves cut side down - skin side up - on the baking tray and grill fairly close to the heat source for about 4-5 minutes, or until their skins start to blister and slightly blacken. 

Remove from the grill, allow to cool for a couple of minutes then turn them over (be very careful when you do, the steam trapped underneath can still scald!)

Drain the tuna fish then place in a medium-sized bowl with the tomato puree/ketchup, mix together well, breaking the tuna up with a fork.

Add the Cheddar cheese, chilli flakes, olives, capers, spring onions, tomatoes, two tablespoons of the parsley and continue to mix with a fork until well combined. Taste and add a little sea salt and black pepper if you think it needs it.

With the help of two teaspoons, divide the mixture between the peppers spreading it out evenly along the length of each pepper half.

Top each pepper half with 4 or 5 ‘still-frozen' prawns. Sprinkle the parmesan-style cheese over the prawns, dividing it equally between them.

Place under the hot grill - fairly close to the heat source - for 3-4 minutes or until heated through and the cheese has melted into a crispy, golden-brown crust.

Transfer 4 pepper halves per person to individual hot plates, scatter over the remaining tablespoon of chopped parsley and serve immediately with a lightly dressed salad of rocket leaves. 

Pizza Peppers with tuna and prawns ready for the grill

Pizza Peppers with tuna and prawns ready for the grill


Ingredients - for pizza peppers with artichokes and mozzarella (V)

6 medium/large even-sized ‘pointy’ Ramiro/Romano organic red peppers (wider and fatter is better than longer and too thin!)

9 artichoke hearts preserved in olive oil (about 90g), drained and chopped (I used Frutti Bosco Artichoke Hearts)

3 tbsp organic tomato puree (or organic low-sugar tomato ketchup)

90g organic vegetarian Cheddar cheese

6 Kalamata olives, stoned and cut lengthways into slivers

30g nonpareille capers, rinsed in cold water, drained and dried on kitchen paper

3 organic spring onions, finely chopped

3 medium-sized organic tomatoes, finely chopped

125g ball vegetarian mozzarella, drained, dried on kitchen paper and cut into smallish cubes

45g organic pine nuts, lightly toasted

60g vegetarian ‘parmesan-style’ cheese (I use Gran Moravia)

Handful of fresh basil leaves, finely shredded - to serve


Instructionsfor artichoke and mozzarella pizza pepper topping (V)

Pre-heat a grill to its highest setting. Line a large flat baking sheet or the grill pan with a non-stick baking mat or non-stick aluminium foil.

Cut the peppers in half lengthways, then remove the seeds and any white stringy bits. 

Place the pepper halves cut side down - skin side up - on the baking tray and grill fairly close to the heat source for about 4-5 minutes, or until their skins start to blister and slightly blacken. 

Remove from the grill, allow to cool for a couple of minutes then turn them over (be very careful when you do, the steam trapped underneath can still scald!)

Place the artichoke hearts with the tomato paste/ketchup into a medium-sized bowl. Mix together well with a fork.

Add the Cheddar cheese, olives, capers, spring onions, tomatoes and continue to mix with a fork until well combined. Taste and add a little sea salt and freshly ground black pepper if you think it needs it.

With the help of two teaspoons, divide the mixture between the peppers spreading it out evenly along the length of each pepper half.

Top each pepper half with 4-5 cubes of mozzarella. Divide the pine nuts equally between the peppers halves then finally sprinkle over the parmesan-style cheese. Make sure the pine nuts and parmesan-style cheese are divided equally between the peppers and that the final sprinkling of cheese is applied evenly - this cheese topping helps give the pine nuts a little protection from the intense heat of the grill so they’re less likely to burn.

Place under the hot grill - fairly close to the heat source - for about 2 minutes or until the mozzarella cheese is meltingly soft and the pine nuts lightly browned. 

Transfer 4 pepper halves per person to individual hot plates, scatter over the shredded basil leaves and serve immediately with a lightly dressed salad of rocket leaves. 


Notes

Be especially vigilant with the vegetarian pizza peppers during their final grilling - if you leave them too long under the grill the pine nuts can easily burn and the mozzarella starts to release liquid.  

Pizza Peppers are most manageable when they’re being made for ‘dinner a deux'. Insufficient grill space makes it tricky for me to attempt making Pizza Peppers for more than three of us because a) my grill pan isn’t large enough to hold more than 12 halves of peppers and b) too many filled peppers under the grill create steam, which makes for a soggy result rather than a crisp and crozzled pizza-style topping. 

The recipes I’ve posted feed three people (the number I usually cook for) but are easily converted to feed one, two or (if grill space allows) four people. 


Carbohydrate 20g Protein 45g - per serving = 4 pepper halves topped with tuna & prawns

Carbohydrate 25g Protein 29g - per serving = 4 pepper halves topped with artichokes, mozzarella & pine nuts

Vegetarian Pizza Peppers with artichoke and mozzarella

Vegetarian Pizza Peppers with artichoke and mozzarella


Warm Salad Of Root Veg With Cheese & Pine Nuts

by Susan Smith in , , , ,


In this first week of 2016 I’m not in the mood for cooking. I suppose my cook’s laziness is a sort of counterbalance to the flurry of Primal festive food creativity that fully occupied my mind, my time and my kitchen for the past six weeks. Now minimalist meals seem infinitely more appealing. Since Primal Pronto is currently where it’s at, a salad seems just right. 

Nothing could be simpler to prepare (✓) or more seasonal (✓) than this Warm Salad of Root Veg with Cheese & Pine Nuts. Furthermore, the remnants of my Christmas food shopping frenzy meant I didn’t have to dig too deep in my fridge and store cupboard to find the ingredients. My ‘in with the new’ approach to getting dinner on the table ‘pronto’ had this delicious, really healthy plateful prepped, cooked and served within 45 minutes of its conception. Light but surprisingly satisfying, this recipe is such a great combination of flavours and textures that I think it belies being called salad!

Until recently, my culinary interest in beetroot has been a tad conflicted. On the one hand, I love beetroot’s ruby-purplish hue and its gentle, sweet, earthiness. On the other, it has an intimidating reputation for bleeding over everything and for taking anything up to 1-2 hours to cook! In this recipe beetroot redeems itself. Cut into wedges and roasted with other winter roots, it is a game changer. It cooks quickly, stains to advantage - makes this salad look so vibrantly pretty - and it’s dense sweetness provides the perfect foil to salty goat’s and sheep’s milk cheeses. 

Sometimes the simplest things are the best! 

Warm Salad of Root Veg with Cheese & Pine Nuts (Serves 2)

Ingredients

1 fennel bulb, cut in half lengthways and sliced

1 large carrot, cut on the slant into chunks

1 large beetroot, peeled and cut into wedges

1 organic sweet potato

4 shallots, halved (or a medium red onion, cut into eights)

2 tbsp olive oil

sea salt

freshly ground black pepper

100g semi-hard sheep’s or goat’s cheese (I used Parlick Fell)

1 tbsp balsamic vinegar (I used Sainsbury’s Giacobazzi Aged Balsamic Vinegar)

25g pine nuts, toasted

2 tbsp fresh parsley, chopped


Instructions

Pre-heat the oven to 200℃/180℃ fan-assisted / 400℉ / Gas mark 6

Pile all the vegetables into a large bowl, add the olive oil and season. Tip into a large roasting tin, making sure the all vegetables are sitting in a single layer, and cook for 25 minutes, turning the vegetables over halfway through the cooking time.

Whilst the vegetable are roasting, toast the pine nuts, crumble the cheese and chop the parsley. Cover and set aside.

Take the roasted veg out of the oven and add the balsamic vinegar. Stir to coat the vegetables evenly and then put back in the oven for a further 10 minutes.

Turn out onto 2 warmed plates and top with the cheese, the pine nuts and the chopped parsley - in that order.

Drizzle a little more of the balsamic vinegar around the edge of the plates and serve immediately.


Notes

If you’re cooking for four, double-up the recipe and use two roasting tins/trays - swapping them over half-way through the cooking times. It’s important to roast the vegetables in a single layer - if you pile them on top of each other they’re much more likely to steam rather than roast.

Real balsamic vinegar is absolutely essential to the success of this recipe so beware of imitations! Aged balsamic vinegar from Modena, Italy costs a small fortune. So, if you’ve paid less than you’d pay for a decent bottle of wine (£12 - £60), you’ve likely purchased cheap wine vinegar with colour added! Look at the ingredients list for the words “grape must”, “aged grape must,” “Mosto d'Uva" or “DOC. 

The real stuff is a deliciously sticky, dark brown, sweetly-sour, glossy syrup that always adds a certain ‘je ne sais quoi' when used as a marinade or condiment to other fine foods. If you buy it, you can use it for bread dipping (grain-free, of course!), adding to sauces, drizzling over cooked foods, brushing onto vegetables, meat, fish or poultry before grilling or roasting, or even as a perfect pairing with fresh strawberries! It’s well worth the expense. 


Carbohydrate 40g Protein 17g - per serving


Roasted Cauliflower & Mushroom Curry with Green Pea Fritters and Avocado Cream

by Susan Smith in , , , , ,


Continuing my quest to find Primal Pronto veggie-inspired meals, I discovered these delicious Green Pea Fritters at The Healthy Chef. Initially, I was just looking for an alternative to Primal Naan Bread and Cauliflower Rice to accompany a family supper of Roasted Cauliflower & Mushroom Curry because, as satisfying as Primal naan bread might sound, since posting the original naan bread recipe I subsequently found out that I need to re-invent it without tapioca flour, (which increases blood sugar even more than wheat flour) and zanthan gum. Yikes! Sorry for the oversight! Plus, cauliflower ‘rice’ and cauliflower curry have zero gastronomic appeal when eaten in combo, so I wanted something new and tasty, preferably vegetable-based, to make our curry meal more appetising. 

As it turned out, the Green Pea Fritters were such a hit that I’m including them as part of this week’s blog, so today, three recipe posts for the price of one! Whilst the Green Pea Fritters and Avocado Cream are a perfect stand-alone meal for a fast and simple supper or to serve with drinks, when brought together with Roasted Cauliflower & Mushroom Curry you have several wonderful things that make for a fresh, creative, vegetarian meal fit for entertaining friends. I think the whole thing looks mouthwatering on the plate and it tastes just as good - spicy, savoury, creamy and delicious!

The cauliflower and mushroom curry recipe is adapted from a recipe in Daniel Green’s book, The Paleo Diet but there is one notable exception - if you try to make this curry with “1 tablespoon of chilli powder (or more to taste)” as directed in the book, please do not even think of inviting me for supper! It may simply be a ‘typo’ (I think it should read 1 teaspoon of chilli!) but it would nevertheless be ruinous to the finished dish and most likely would get missed by an inexperienced cook slavishly following the recipe. Thank goodness for Primal Plate’s extensive testing and tasting of all blog featured recipes before posting! 

I have added tiger nut flour to the pea fritter recipe to enhance the sweetness of the peas and on this occasion left out the lemon zest in favour of fresh mint because a) fresh mint and peas are a classic and b) the avocado cream has a lemony ‘hit’ all of its own that more than compensates for its absence in the fritters. Plus, it saves the time and effort of grating a lemon!

The pea fritters are very quick and easy to make - it’s just a matter of mixing everything together in a bowl and dropping spoonfuls of the mixture into a hot frying pan (only a few at a time), pressing them flat with the help of a spatula and cooking (for less than a total of 10 minutes) until they’re golden brown on each side. Meanwhile the avocado and cream cheese can be quickly whizzed to a luscious pale green cream in a food processor or with a hand-held blender.  

The Roasted Cauliflower and Mushroom Curry is just as fuss-free and makes a great vegetarian low-carbohydrate option for followers of Paleo and Primal diets. 

Put it all together for warming, nourishing mouthfuls of extreme pleasure.  

Green Pea Fritters (Serves 4)

Ingredients

300g frozen peas, defrosted

2 tablespoons fresh chopped parsley (about 10g without stalks)

1 tablespoon freshly chopped mint leaves

2 large organic free range eggs, lightly beaten

100g full-fat soft cheese, softened (I used Longley Farm)

25g organic tiger nut flour

15g organic coconut flour

1½ tsp sea salt and a generous grinding of black pepper

1 small organic lemon, finely grated zest only - optional

1tbsp olive oil, for frying

Handful of pea shoots, to garnish - optional


Instructions

Crush the peas in a food processor using the pulse button. Make sure you keep the peas a coarse texture, this is not meant to be a puree.

Transfer the crushed peas to a bowl, add the parsley, mint, eggs, lemon zest (if using), tiger nut and coconut flours. The ground tiger nuts and coconut flour help to hold the mixture together during cooking. 

Season with the sea salt and freshly ground black pepper. Taste and correct the seasoning if necessary. 

Soften the cream cheese by breaking it down with a fork then add to the pea fritter batter and combine well.

Heat a little olive oil in a large heavy-based non-stick frying pan over a low heat.

Add heaped tablespoons of the pea fritter mixture to the pan -  you should get about 16 bite-sized fritters. To avoid overcrowding the pan you may need to cook them in several batches. 

Cook the pea fritters over a medium heat for 5-6 minutes without disturbing them. When they are firm and golden on the underside, carefully turn them over with the aid of a flat-ended spatula. 

Continue to cook for a further 3-5 minutes or until the fritters are cooked through and golden brown on both sides. 

Immediately transfer to an oven proof dish (or serving platter if you’re handing them out with drinks) and then into a pre-heated hot oven until you’ve cooked the rest of the fritters and you’re ready to eat.


Avocado Cream (Serves 3-4)

Ingredients

1 large ripe avocado

½ lemon, juiced

100g full-fat soft cheese, softened by breaking down with a fork (or use Waitrose Duchy Organic Soft Cheese straight out of the tub).

Sea salt

Cayenne pepper


Instructions

Peel, stone and mash the avocado with the lemon juice then mix together with the soft cheese, sea salt and cayenne pepper to taste until it is completely smooth and creamy - this is best done in a food processor or with a hand-held blender.  

Serve as a dip with Green Pea Fritters or crudités.


Roasted Cauliflower & Mushroom Curry (Serves 4)

Ingredients

1 medium head of cauliflower, broken into small bite-sized florets

1 large onion, finely chopped

3 tbsp olive oil

250g button mushrooms

1 x 2½ cm piece of fresh ginger, grated

1 tbsp ground coriander

1 tbsp ground cumin

1 tbsp garam masala

1 tsp chilli powder

1 tbsp Marigold organic vegetable bouillon powder

400ml full-fat organic  coconut milk

sea salt and freshly ground black pepper

a large handful of fresh coriander, chopped - to garnish


Instructions

Pre-heat the oven to 200℃ / 400℉ / Gas mark 7

In a large bowl, toss the cauliflower florets in 2 tablespoons of olive oil and season with freshly ground black pepper.

Tip onto a non-stick roasting tray and roast for 25 minutes, turning occasionally until the cauliflower is nicely browned. Remove from the oven and set aside.

In a wide, shallow pan set over a moderate heat, fry the onion in the remaining olive oil with the pan lid on for about 8 minutes, stirring from time to time, until softened and starting to brown.

Add the mushrooms and ginger and cook for another 1-2 minutes, stirring. Stir in the spices and bouillon powder and cook for another minute.

Add the coconut milk and season to taste. Bring to the boil then stir in the cauliflower.

Reduce the heat to low, cover the pan and cook for about 5 minutes. 

Ladle into warmed bowls and top with plenty of fresh coriander. 


Notes

I was in two minds about the Primal Pronto status of the Green Pea Fritters and Roasted Cauliflower & Mushroom Curry because both these recipes are so easy and fuss-free. In the end I decided that Primal Pronto should be defined as: a recipe with 5 or less main ingredients, or one that can be prepped, cooked and on the table within 45 minutes. The Roasted Cauliflower & Mushroom Curry didn’t quite make it on both counts (realistically it’s takes more like 50 minutes to make) but it is still wonderfully warming comfort food that’s simple to prepare. It’s also suitable for vegans.  

You can defrost the peas quickly by putting them in a heat proof jug and pouring boiling water over. Allow to stand for a few minutes, then drain well and proceed with the recipe. 

The uncooked pea fritter batter can be made well in advance and stored in the fridge overnight. The mixture will make approximately 16 small or 8 large fritters. I use a heaped tablespoon to make the bite-sized ones and a ¼ US cup for bigger ones.

Two large Green Pea Fritters per person served with a medium/soft boiled egg and a dollop of avocado cream is great for a fast and easy low-carb brunch or supper.

If you can’t get button mushrooms for the curry, use closed-cap mushrooms cut into halves or quarters instead.


Carbohydrate 14g Protein 11g - per serving (4 small or 2 large) of Green Pea Fritters

Carbohydrate 5g Protein 2g - per serving of Avocado Cream

Carbohydrate 22g Protein 8g - per serving of Roasted Cauliflower & Mushroom Curry


Eggs Florentine

by Susan Smith in , , , ,


I’ve come in for a bit of flack recently from people who say they’d like to eat simple, tasty, healthy (low-carb) food on a regular basis, but at the end of a long day are too tired, busy or hungry to cook the recipes I post on Primal Plate’s blog. 

I can empathise, but like everything else in life, whether you cook or don’t cook really depends on your perception and priorities. The likes of Jo Wicks (The Body Coach) and TV celebrity chefs may be able to briefly convince you that it’s possible to knock up a delicious meal in 15 minutes flat, but try a couple of their ‘simple’ recipes out for yourself (how about a vegetable stir-fry?) and you’ll likely conclude one of two things; 1) there’s something wrong with you because it’s taken you nearly an hour to cook a meal that’s should have taken a quarter of that time, or; 2) it’s a con, so next time you’ll just buy a ‘ready-meal’ instead. 

The fact is, it wouldn’t take me much less than 15 minutes to singlehandedly boil an egg and prepare a couple of slices of buttered toast - let alone to create a family meal. Realistically, if you want to eat well, you need to make space in your life to cook. That said, many Primal Plate recipes are no more complicated than the fast and furious meal suggestions promoted on television and social media. 

Many of the recipes I post often involve nothing more than throwing everything together in a bowl, whacking it into a tin and getting on with life whilst the oven does its thing. I suggest you start with Grain-free Bread and take it from there. 

However, if you want ‘speedy’ recipes, look for those that have no more than 5 main ingredients. For example, Primal Plate’s Courgetti with Cherry Tomatoes & Asparagus, Leek, Stilton & Walnut Stuffed Mushrooms or Italian Style White Fish in Tomato Basil Broth. You can add today’s recipe for Eggs Florentine to the list. 

Personally, I don’t find cooking a chore when it’s a shared opportunity to create something tasty to eat with the people I love, but on this occasion, just to satisfy my curiosity, I asked my ‘sous chef’ John to step down from his food-prep duties, whilst I switched on a stop-watch and got on with making Eggs Florentine without his help. 

No slouch in the kitchen, I could make this recipe in my sleep! In my head, I’d roughly calculated 12 minutes to steam-boil the eggs, 2 minutes to peel them, 4 minutes to make a quick cheese sauce, 3 minutes to wilt and drain some ready-washed spinach and 4 minutes final cooking time under a hot grill. Total: 25 minutes. 

But not so fast! It actually took 37 minutes 21 seconds to bring everything together and about 3 minutes to finish if off under the grill - i.e. 40 minutes for an experienced cook to prepare and serve a simple meal for three people. A novice cook would take longer. My point is, there’s a lot of kidology going down in the kitchen! What you see on TV cookery programmes and on social media is not what you get. I know, because I trained Sarah to compete in Junior Masterchef and the winner in her heat had the majority of his ingredients for his curry pre-made by his mother! Sure, a professional celebrity chef could probably chop an onion in 20 seconds flat but who peeled the damn thing in the first place? Eggs Florentine requires you to grate cheese and peel eggs - simple enough to do but time-consuming. If you’re being filmed, you can make these behind the scenes tasks magically disappear but you have to allow for these ‘extras’ when cooking at home. 

In my case, every partner I’ve ever had (similarly my children) will step into the breach to fulfil the role of peeling, chopping, slicing, grating - as well as the ongoing washing-up. A glass of wine in hand, our combined efforts to get the meal on the table heralds the end of our working day and the start of social time. It’s pleasure not pain and something we all look forward to. 

None of the photographs on Primal Plate are ‘staged’ - it is the actual food we’re about to eat that day. Primal Plate is a cookery blog and its raison d’être is to encourage people to spend more time in the kitchen and learn how to eat properly. By showing you what we eat and sharing innovative, primarily vegetarian recipes that aren’t made with sugar, grains, legumes, unhealthy fats and cancer-causing meat I hope to convince people that cooking at home pays dividends on the time invested, namely: quality time spent with your family, delicious dinners, optimal health, quick loss of excess body-fat and easy weight maintenance.  

You reap the consequences of your actions either way. With so many major health issues now affecting so many people, it’s time for us to get back in the kitchen and to teach our children to do likewise. 

It’s not just that people think themselves too busy to cook - it’s a lack of basic cookery knowledge that’s also part of the problem. Primal Plate is here to help. Off the top of my head, I can think of more than a dozen home-cooked, easy-to-make meals that we turn to for busy days, which haven’t yet featured on this blog. In response to your feedback, I’ll be rolling out my quick, tasty ideas in the forthcoming weeks and months. You’ll find these in the Recipes section of Primal Plate’s blog under Primal Pronto.

To start with, my variation on the classic Eggs Florentine recipe. It's made with spinach, hard steam/boiled eggs and topped with a flour-less Primal cheese sauce before being finished off under the grill. A truly indulgent brunch, light lunch or supper to treat family and friends to. 

Eggs Florentine (Serves 4)

8 organic free-range eggs

1 tbsp olive oil

500g organic spinach, ready-washed

225g crème fraîche (I used Rodda’s crème fraîche because it doesn’t split when heated)

200g Gruyere cheese, finely grated

1 dsp (20g) Dijon mustard

Pinch of cayenne pepper

sea salt and freshly ground black pepper


Instructions

Boil a kettle of water. Pour about 2.5cm (1 inch) of the boiling water straight from the kettle into a saucepan. 

Place a steaming basket inside the pan and place the eggs into the steamer-basket (I find a collapsible steamer most useful because one-size fits all pans). 

Put the lid on the pan and steam/boil the eggs for 12 minutes until hard-boiled. 

Whilst the eggs are cooking, heat up a large pan (big enough to hold all the spinach) over a high heat. When the pan is really hot add a tablespoon of olive oil and throw in the spinach (you may need to do this in 2 or 3 batches - allowing each batch to wilt down slightly before adding the rest). Stir fry the spinach for 1-2 minutes until it has all wilted. 

Tip the cooked spinach into a colander and press out as much liquid as you can - I use a potato masher but the back of a spoon will do. Return to the pan and lightly season with sea salt and black pepper.

Heat the crème fraîche, mustard and 160g of the cheese together in a saucepan over a medium/high heat. Whisk continuously until the cheese has melted and you have a very hot, but not boiling, unctuously smooth, cheese sauce. Take the pan off the heat and season with a pinch of cayenne pepper and two pinches of sea salt.

Tip the eggs into a bowl of cold water then quickly peel them (if they're still too hot, hold them in a clean tea towel so you don’t burn yourself) then place each shelled egg onto a clean chopping board and cut in half.

Preheat the grill to high.

To assemble the dish: spoon the spinach along the bottom of four individual gratin dishes (alternatively, use one large gratin dish). Place four egg halves per person (yolk side down) on top of the spinach then evenly spoon or pour over the hot cheese sauce making sure each egg is covered. Sprinkle the rest of the grated cheese evenly over the top of the eggs.

Finish under the hot grill for 3-4 minutes or until heated through and golden brown. 


Notes

If you’re looking for quick, healthy, vegetarian and Primal meal ideas, organic, free-range ‘pastured’ eggs are the business! However, after all my years in the kitchen I’ve only just ‘twigged on’ to steam-boiling eggs! I can’t even remember where I read about this method, but it’s altogether a much easier and reliable way to boil eggs because you can take them straight from the fridge and, because they’re not actually immersed in the boiling water, they're much less likely to crack when the heat first hits them. They’re cooked to perfection in exactly 6 minutes for a soft-boiled egg and 12 minutes for hard-boiled. Primal Pronto at its best! 

Annoyingly, as with Parmesan cheese, it’s hard (impossible?) to find vegetarian Gruyere. Joseph Heler make British Gruyere with non-animal rennet but having spoken to them today, I was informed they do not supply their cheese pre-packed to supermarkets but rather to retail, wholesale food service suppliers as an ingredient for their ‘ready meals’. You may have more luck finding vegetarian versions of Emmental (the melting quality and nutty taste is quite similar to Gruyere) or Edam (always check the packaging to confirm it’s vegetarian) - use either of these instead of Gruyere if you’re strictly vegetarian.  


Carbohydrate 4g Protein 35g - per portion


Sweet Potato, Cheese & Chilli Muffins

by Susan Smith in , , , ,


I like Jamie Oliver's recipe and I like Rose Elliot's recipe... but which is better?!

Today’s blog post for Sweet Potato, Cheese & Chilli Muffins was inspired by both and as both are a frequent source of reference for me, I take my hat off to each of them for being the innovative and inspiring food crusaders that they are. Nevertheless, I still think Primal Plate can legitimately take credit for these incredibly tasty, savoury muffins. Let me explain.

I first made Rose Elliot’s Cheese & Sun-Blush Tomato Muffins, featured in her book Vegetarian Supercook, about ten years ago, then last week I was watching Jamie’s Super Food programme on Channel 4 and was again reminded how useful Rose Elliot’s original recipe was for a low-carb, gluten-free lifestyle because it didn’t contain wheat flour. On the other hand, I really liked Jamie’s idea for Sweet Potato Muffins with a chilli ‘kick’, but cannot agree that wheat, or any other grain qualifies as super food.

“Cutting-edge research, for example, has revealed that consumption of modern wheat [the only sort of wheat most people are likely to encounter in their entire lifetime] is the first step in triggering autoimmune diseases such as type 1 diabetes, rheumatoid arthritis, and multiple sclerosis.” says Dr. William Davis, author of Wheat Belly. And, “Wheat raises blood sugar higher than nearly all other foods, including table sugar and many candy bars”.

And for those who think that a gluten-free diet is the answer he advises: “The few foods that increase blood sugar higher than even wheat include rice flour, cornstarch, tapioca starch and potato flour—the most common ingredients used in gluten-free foods, which leads to weight gain, diabetes, cataracts, arthritis, cancer, dementia, heart disease and growing belly fat. This is why many celiac patients who say goodbye to wheat but turn to gluten-free foods become fat and diabetic. Gluten-free foods as they are currently manufactured are very poor substitutes for wheat flour.” For more information visit the Wheat Belly Blog.  And, here's a list of recommended alternative flours for baking.
 
You live and learn! Perhaps it was the tapioca flour in my Primal Naan Bread, which we ate four times in quick succession whilst I was developing the recipe that caused me to gain two pounds in weight in one week (thankfully now lost again)! As with previous health warnings on this food blog, the message is this: Anyone who consumes gluten-free foods, including my gluten-free naan, and/or other baked goods made with healthier sugar/flour substitutes, should still regard them as an occasional indulgence.

Anyway, I digress because there are no bad things listed in the ingredients for these quick, easy-to-make, gluten-free Sweet Potato Cheese & Chilli Muffins. Going back to Rose’s and Jamie’s recipes, the only jar of sun-blush tomatoes that I had in my food cupboard had a sell-by date of 2013 (must have a clear-out!) so I decided to substitute the missing tomatoes with Jamie’s idea for sweet potato and chilli - albeit not weight for weight. Both their recipes included cottage cheese (in massively varying amounts) but to be honest, by the time I’ve changed everything around to make my recipe Primal (grain-free) and/or added or subtracted ingredients and amounts for a different flavour or texture, I always end up forewarning my family that it is by no means certain the end result will be something good for us to eat! On this occasion, I knew about half-way through the cooking time we had a definite ‘winner for dinner’ by the way my muffins were rising admirably to the challenge. High-five me!

Light, puffy and protein-packed these Sweet Potato, Cheese & Chilli Muffins truly are a super delicious super-food for you to enjoy at any time. Two muffins per person served with a bowl of hot soup makes for a simple but filling lunch or supper. Eat them for breakfast and they’ll keep you going until lunchtime. Perfect for picnics (a bit of an obsession of mine as a wedding photographer’s assistant that often needs to pack up healthy food for Sarah and I to eat on-the-move) or as a nutritious snack, they’re sustaining, easy to transport and can be eaten one-handed (important for all busy multi-taskers).   

Taking the best from Jamie and Rose, I reckon I’ve trumped both with this muffin recipe. Cook up a batch this weekend and see if you don't agree!

Sweet Potato, Cheese & Chilli Muffins

Ingredients (Makes 9)

225g sweet potato (approximately 190g peeled weight)                    

2 tbsp fresh chives, finely chopped

2 fresh red chillies, 1 finely chopped, 1 finely sliced            

5 large organic free-range eggs, lightly beaten

250g cottage cheese (can be low-fat if you prefer)

100g ground almonds                                        

50g coconut flour 

50g vegetarian parmesan-style cheese, finely grated

1 tsp baking powder

60ml milk (or water)

sea salt and freshly ground black pepper                 

2 tbsp sunflower seeds


Instructions

Preheat the oven to Preheat oven to 180°C / 350°F / Gas mark 4.

Line a muffin tin with 9 medium-sized (cup-cake sized) paper cases.
 
Peel the sweet potato and coarsely grate into a large bowl. Add the cottage cheese to the bowl with all but 15g of the grated ‘parmesan’ cheese, the chopped chilli and chives, coconut flour, ground almonds, baking powder, beaten eggs and milk.

Mix together with a fork until everything is nicely combined then season with salt and pepper, to taste.

Evenly divide the mixture between the muffin cases (about 105 grams per muffin) - spooning it into the cases until they’re three-quarters full. Scatter each muffin with the reserved cheese, then sprinkle over the sunflower seeds and arrange 2-3 thin slivers of chilli on top.

Bake for 35 minutes or until set, risen & golden brown.

Served warm = totally yum!


Notes

Everyone will enjoy these savoury muffins straight from the oven - just allow them to cool down for about 5 minutes before serving. They’re also surprisingly good cold and will keep for a couple of days in an airtight container stored in the fridge.

Unfortunately, no one seems to sell non-stick baking parchment muffin liners. I certainly don’t fancy spraying the inside of my paper cases with commercial non-stick baking spray (processed oils are not good to eat) but you can make your own non-stick cases by cutting out 12½cm (5 inch) squares of parchment paper and pressing them down into your muffin mould with the aid of a small measuring cup. You can also buy non-stick silicon muffin moulds.

On this occasion I simply opted for baking my muffins in greaseproof paper cases and eating them directly out of their cases with a spoon - using it to scrape off the last crumbs of muffin that were frustratingly ‘glued' to the paper.  

Carbohydrate 9g Protein 14g - per muffin


Vegetarian Sausages, Creamy Cauliflower Mash and Red Wine & Onion Gravy

by Susan Smith in , , ,


The Brits love sausages. Grilled or fried to perfection, and piled on top of creamy ‘mash’ and slathered in onion gravy, or put to bed in a soft pillowy bread roll with tomato ketchup - sausages taste great! As a teenager, I certainly thought so. Every Sunday night a crowd of us would leave our church youth club and walk into town to catch the bus home. There was a burger stand next to my bus stop that sold what we thought were the most delicious hot sausage ‘cobs’  (a Northern English word for bread rolls) with HP sauce. Myself and my boyfriend, who always walked me to my bus stop before crossing town to catch his own bus home, would shelter together in a shop doorway, like young lovers do, to eat our late night feast before saying a long and wistful goodbye prior to my return to weekly boarding school. My father too always prided himself on buying ‘proper’ fresh sausages from a traditional butcher and would travel 25 miles across the county of Nottinghamshire for the privilege. Whilst nothing like the mass-produced muck that you find on today’s supermarket chiller shelves, my dad probably didn’t realise that sausages per se are one of the oldest processed foods in history and, despite their reputation for tasting good, most sausage-making is almost certainly best done behind closed doors!

Although sausages are currently making a comeback with the consumption of them soaring, producers bulk out their sausages with scraps, fat, cereal, chemical preservatives and water. In my view, it’s high time for a sausage re-think. I don’t want sausages packed out with cereal and other nasties and I don’t want to cause farm animals immeasurable suffering just so I can eat them. Notwithstanding the risks to our health, if you’re a pig, any mention of sausage is never going to be a good idea!

The highlight of many a British BBQ, a cooked English breakfast, or a child’s favourite meal of sausage and baked beans, I think it is perhaps more the walk down memory lane that’s responsible for our adult sausage cravings, rather than the reality of what they are and where they come from. But there is a kinder and healthier way to satisfy our desire.

Today’s blog post features no ordinary ‘bangers and mash’. It is a no-meat, grain-free, potato-free, alternative to this great British staple, which is nonetheless every bit as comforting and tasty as the original and, most importantly, looks just like people think ‘sausage and mash’ should!

For taste and texture these cheesy veggie sausages are as close to their meat counterparts as ‘damn it’ is to swearing! Plus, they cook like a dream (see note below) because they don’t spit and splutter like ‘bangers’ do. Fabulous with low-carb creamy cauliflower mash and served with a deeply satisfying vegetarian red wine and onion gravy, it is the best transition to autumnal comfort food that you could ever hope for. 

Vegetarian Sausages (Makes 12 large sausages - allow 2 sausages per serving)

Ingredients

600g vegetarian Lancashire cheese, crumbled or grated (I coarsely grated mine in a food processor)

4 large spring onions, finely chopped

165g organic ground almonds

20g organic milled flaxseed

15g green banana flour

1 tbsp Marigold organic bouillon powder

2 tbsp fresh thyme leaves, finely chopped

2 tbsp fresh flat leaf parsley, finely chopped

3 large organic eggs, lightly beaten 

Sea salt (about 1½ tsp) and freshly ground black pepper (about ¾ tsp)

Olive oil - for frying


Instructions

Put the grated cheese, spring onions, ground almonds, ground flaxseed, banana flour, bouillon powder and herbs into a large mixing bowl and mix everything together well. 

Add the beaten eggs and a generous amount of seasoning, then using a fork or your hand bring the mixture together so it binds into a soft cheesy dough-like consistency. 

Cover the bowl with cling film and set aside to chill in the refrigerator for a couple of hours.

When the sausage mixture is thoroughly chilled, form into 12 large sausages - about 7.5cm (3”) long, weighing approximately 85g each.

Pour a large glug of olive oil into a large non-stick frying pan and set it over a high heat until the oil is really hot. When the surface of the oil starts to shimmer shallow-fry the sausages until deep golden brown and crispy on all sides, about 5-6 minutes. Drain the cooked sausages on paper kitchen paper. 

Serve hot with the creamy cauliflower mash, red wine & onion gravy and peas for a low-carb, vegetarian ‘twist’ on a favourite British classic. 


Red Wine & Onion Gravy (Serves 4)

Ingredients

1 tbsp olive oil

2 large onions, finely chopped

1 tsp coconut palm sugar

1 tbsp green banana flour

200ml vegetable stock, made with 1dsp Marigold organic vegetable bouillon powder

200ml red wine

1 tbsp Clearspring tamari (soy sauce)

1 fresh bay leaf

Sea salt and freshly ground black pepper


Instructions

Heat the olive oil over medium-high heat in a large pan. Add the onion and coconut palm sugar to the pan, then cover and cook, stirring occasionally, for 4 minutes or until beginning to brown. Reduce the heat to medium/low and continue to cook with the pan lid on for another 15 minutes, stirring from time to time, until the onion is deep golden brown.

Add the banana flour and stir over the heat for another minute to incorporate, then gradually stir in the stock and wine. 

Bring to the boil, stirring continuously until the sauce has thickened, then turn the heat back down to low.

Add the tamari and taste check. Season with a very little sea salt (only if you think it needs it) and some freshly ground pepper 

Add the bay leaf (or thyme sprig) and gently simmer for another 20 minutes. Remove the bay leaf.

Serve this intensely flavoursome gravy really hot with sausages and other vegetarian savoury dishes. 


Creamy Cauliflower Mash (Serves 4)

Ingredients

1 large head of cauliflower, trimmed and cut into florets

1 fresh bay leaf

100g full-fat soft cream cheese (I used Longley Farm)

Generous pinch of freshly grated nutmeg 

Sea salt and freshly grated black pepper


Instructions

Boil a kettle of water.

Place the cauliflower in the top half of a steamer with the bay leaf tucked in-between the florets. 

Pour the boiling water from the kettle into the bottom half of the steamer, add some sea salt then bring back to the boil. Steam the cauliflower with the pan lid on for about 8 minutes, until it is cooked through.

Tip or spoon the cauliflower into a large bowl and allow it to cool down for a couple of minutes - this will let the steam evaporate and make for a drier mash. Remove the bay leaf. 

Using a stick blender or food processor, whizz the cauliflower into a rough puree. Add the salt, pepper, nutmeg and cream cheese then briefly process again into a creamy mash consistency.

Put the cauliflower mash into a clean pan and gently re-heat, stirring from time to time so it doesn’t catch on the bottom of the pan. 

Serve hot as a delicious low-carb alternative to mashed potato.   


Notes

Keep the formed ‘sausages’ really cold (in a refrigerator) until you’re ready to start cooking them. This will ensure that they stay sausage-shaped in the cooking process i.e. cook to a crispy exterior before the cheese gets a chance to melt and they become misshapen. For the same reason, it is important not to overcrowd the pan because this lowers the temperature of the oil. You want your sausages to fry quickly in the hot oil, not semi-steam, which can cause them to ‘squidge' out of shape as you’re turning them over in the pan (also causing them to absorb more oil).  

The uncooked sausage mixture will keep for several days in a refrigerator. With this recipe being hot-off-the-press I haven’t tried freezing it yet but I think that would probably work too.

If it looks like a sausage, tastes like a sausage and behaves like a sausage it probably IS going to be mistaken for a non-vegetarian sausage! Apart from the difference in colour when you bite into them (pale gold cheese colour rather than cooked-meat-grey) I’d defy anyone to distinguish the difference between these veggie sausages and meat ones, especially when cold. Cooked leftovers, eaten next day straight from the fridge, still had their crispy exterior intact and tasted so ‘porky’ I was genuinely gob-smacked! Which means I’ve also developed a brand new picnic food to go, which is an absolute god-send for when Sarah and I are doing full-day weddings on the move #happy

If you want a smooth gravy i.e. without onion bits,  strain through a fine sieve into a clean pan before re-heating and serving.

If you think the finished gravy is a little too thick just add more water to thin it out to your liking.

I used steamed cauliflower to create a creamy ‘mash’ that’s very similar to - albeit a lighter, low-carb version of - mashed potatoes. Sweet potatoes, carrots, celeriac, swedes, parsnips and turnips - either alone or in combination - all make a good alternative to potato mash. Just be wary of stacking up the carbohydrates when you eat the sweeter root vegetables i.e. parsnips and sweet potatoes.


Carbohydrates 11g Protein 40g - 2 sausages per serving

Carbohydrates 13g Protein 1g - per serving of gravy

Carbohydrates 12g Protein 6g - per serving of creamy cauliflower mash


Primal Naan Bread

by Susan Smith in , , , ,


Following on from last week’s blog post, we’ve recently been going through a spicy phase at our house. We love curry, which is a good thing because for the past week we’ve been eating it most days whilst I tried to figure out how to make the perfect grain-free naan bread accompaniment. Happily (actually I am ecstatic!), Primal Plate has cracked the code for a grain-free naan bread that looks and tastes as close to an authentic Indian flatbread as you can get, without using traditional ingredients.

I had to go from memory when developing this recipe because with rice, legumes and grains all off-limits, I’ve not eaten out at an Indian restaurant or had an Indian ‘take-away’, for a very long time. I always remember the best naan being soft, chewy and subtly sweet, so my first thoughts turned to tiger nut flour, which I knew would give my naan a slight sweetness, without adding sugar. 

Traditionally, naan is made from plain wheat flour and leavened with yeast before baking. To get the taste, smell and texture of traditional naan it seemed important that the raising agent for my naan was also yeast, although I wasn’t certain whether this was a Paleo/Primal-approved ingredient or not. Consulting Mark’s Daily Apple, I discovered that if you drink wine or beer, the type of yeast used to make both is the same as the yeast used for bread making. And, assuming you’re not yeast sensitive, there are some nutritional benefits to eating it, especially if you avoid animal products. As a primal, vegetarian wine drinker, I concluded yeast was good to go! 

For the rest of the recipe I got my inspiration from the queen of Indian cuisine, Madhu Jaffrey. However, when refined wheat flour, the primary ingredient of naan bread isn’t an option, I had to find alternative ingredients and put them together in just the right amounts so that my naan bread would look and taste like the real deal.

To be honest, my first attempt included a high proportion of green banana flour (a brilliant source of resistant starch, which is one of the best foods to feed our good gut bacteria) but it turned out almost exactly like wholewheat pitta bread instead (another recipe for another day). For naan, I wanted it to be altogether softer and fluffier.

Substituting ground almonds for banana flour and changing the ratio of ingredients finally did the trick. The virtually no-need-to-knead dough rose better (doubled in size at the first proving), looked like I’d used plain flour rather than whole-wheat (more naan-like) and had the desired soft, fluffy texture I was looking for.

It was another ‘Eureka!” moment in my Primal cook’s career. I am still totally amazed that each new recipe I attempt to develop with the same handful of ingredients - albeit in differing amounts - can be transformed into an endless variety of grain-free, refined sugar-free cakes, breads, biscuits, scones and pancakes that look and taste no different to those made with conventional ingredients like wheat flour and sugar. 

If you're trying to lose weight and eat low-carb please be aware that these naan are extremely moreish! They’re lovely as an occasional treat, but don’t go overboard. Although a well known supermarket’s plain naan has 50% more grams of carbohydrate than Primal Plate’s naan bread, I have in fact gained 2 pounds this week, which I can only attribute to multiple testing of this recipe. It was worth it!

PRIMAL NAAN BREAD (Makes 3 decent-sized naan)

Ingredients

75ml hand hot milk            

1 tsp raw organic liquid honey                

5g (about 1 heaped tsp) dried active yeast

150g tapioca flour

20g coconut flour

30g tiger nut flour

1½ tsp baking powder                    

¾ tsp xanthan gum

50g ground almonds

½ tsp tsp sea salt    

1 tbsp olive oil + ¼ tsp for greasing            

50ml yogurt, beaten

1 medium egg, lightly beaten

1 tbsp butter or ghee, melted - for brushing        


Instructions

Gently warm 75ml milk to ‘blood’ temperature with the honey. Put the milk/honey in a bowl. Add the yeast. Stir to mix. Set aside for 15-20 minutes or until the yeast has dissolved and the mixture is frothy.

Meanwhile, sift the tapioca, coconut, tiger nut flours, baking powder and xanthan gum into a large bowl. Add the ground almonds and sea salt and make a well in the centre. 

In a separate bowl, combine the beaten egg, olive oil and yogurt, then pour it into the well, along with the bubbling yeast mixture. Gradually bring the mixture together with a fork then gently knead with your hand for a few minutes until it forms a soft, smooth ball of dough.

Pour ¼ tsp oil into a medium/large bowl and roll the ball of dough in it. Cover the bowl with cling film and set aside for 1-1½ hours in a warmish place until doubled in size. (I heat my oven to 40℃, then switch it off and put the covered bowl of dough in the closed oven to prove).

Tip the proofed dough out of the bowl onto a work surface then briefly knead again. Divide the dough into three equal balls. Lightly cover with cling film and set aside whilst you melt the butter or ghee in a small saucepan over a low heat. 

Heat a heavy non-stick frying pan over a high heat for 5 minutes or so and put the oven on low. 

Meanwhile, gently flatten each of the balls between two sheets of cling film then lightly roll or press into a tear-shaped naan, about 25cm long and 13cm wide at its widest point and slightly thicker around the edge. Keep lightly covered until you’re ready to cook them. 

Put the naan into the hot frying pan (no oil is needed) and cook until it starts to puff up and is tinged brown in patches (about 1-2 minutes), then using a flat bladed spatula flip the naan over and cook the other side until that too is patched with brown (another 1-2 minutes). Turn it back over one final time and cook for about another 30 seconds or so until cooked through and there are no doughy bits remaining.

Brush the cooked naan with the melted butter or ghee and put in the warm oven whilst you make the other flatbread(s). Serve with curry. 


Notes

If the dough seems too sticky when you’re trying to knead it, add more tapioca flour - a very little at a time - only just enough so that the dough leaves the sides of the bowl and isn’t sticking to your fingers.

You may have guessed that I regularly cook for three people (hence a recipe for three naan). For a family of four or more, simply double the ingredients to make six. Alternatively, divide the existing dough recipe into four balls to make the finished naan smaller.  

We struggled trying to determine the best and simplest way to cook the naan - or at least that was our excuse to keep taste-testing them! As well as cooking them on top of the hob, they can be baked in a super-hot oven for 5 minutes. Firstly, pre-heat a heavy baking sheet in an oven set to its highest temperature. Literally, ’slap’ each prepared naan down onto the hot baking sheet. It will puff up. Bake for 2½ minutes then turn over and continue cooking for a further 2-2½ minutes. Wrap each naan in a clean tea-towel and keep warm whilst you make the rest in the same way. 

Naan bread cooked in the oven will turn out more evenly golden but not quite as soft and chewy as when cooked on top of the stove in a frying pan. We finally all agreed that the pan-cooked ones had the ‘edge’ i.e. looked and tasted the most authentic. 


Carbohydrate 52g  Protein 8g - per serving

Grain-free, gluten-free Primal Naan Bread is the perfect sharing bread to eat with curries and Indian food, shown here with Cauliflower & Mushroom Curry

Grain-free, gluten-free Primal Naan Bread is the perfect sharing bread to eat with curries and Indian food, shown here with Cauliflower & Mushroom Curry


Best Ever Vegetable Curry

by Susan Smith in , ,


Fifty years ago I was at catering college (a career I never pursued) and there is one particular memory of my student days that’s stayed with me. One afternoon Mr Green, our lecturer, demonstrated the methodology for making meat stew and afterwards we students, who had all been given identical ingredients to work with, were told to recreate the dish from scratch. 

Given the constraints of a predetermined set of ingredients, it was truly bizarre to experience how differently our individual interpretations of a simple recipe for beef stew turned out, which varied between downright inedible to very tasty indeed. It was then I realised that cooking isn’t just about acquiring skills - it’s an instinct.

From a food blogger’s perspective this has taught me that I need to create and test recipes very precisely to ensure there’s virtually no room for error in their translation. Not an easy task when ‘season to taste’ is purely subjective and people don’t know what’s wrong or missing from a recipe unless, like me, they instinctively do. You’d be surprised at how many times I read a recipe and ‘know’ it’s not going to work before I’ve even cooked it. 

I have five golden rules for success:

  • Read every recipe through at least twice before you start to cook it.
  • Prepare everything in advance e.g. assembling ingredients, chopping vegetables, lining tins etc. 
  • Taste your dish each step of the way - add extra seasoning etc. cautiously.
  • Consider the overall balance of the meal -  colours, taste, texture, ratio of protein to carbs etc. 
  • Delegate - there is nothing more bonding than cooking a meal with people you love, then sitting down together to eat it.

Sadly, none of this is an issue for people who’ve already been persuaded by the food industry that it’s better to stay out of the kitchen and let someone else (in a factory) do their cooking for them. In my view, this is precisely why factory-farming and other ecologically unsound food production methods have flourished. The demands of big business supplying ready-meals and cheap convenience food has consistently applied pressure on farmers to keep driving food production costs down. Economies of scale now forces millions of factory farmed animals to live and die in abject misery and to be treated with less respect than a fruit farmer must give to a crate of apples to prevent them from being bruised - all in the name of profit. 

Feeling energetically connected to the food you eat goes with the territory for the instinctive cook, so in the face of gross acts of cruelty to these sentient beings, I feel compelled to create vegetarian meals that taste as good, if not better, than meat-based ones. Morally, veganism would be better, but since both grains and legumes are off limits for a Primally inspired lifestyle, it is an impossible decision to make if I want to continue living healthily. My best hope is to encourage readers to roll up their sleeves and acquaint themselves with the sheer pleasure and satisfaction of cooking real, nutrient dense foods that don’t exploit animals and aren’t at odds with nature.

I created this weeks’ recipe for the Best Ever Vegetable Curry (indeed the best-of-any-type of curry I’ve ever tasted), for that reason. John, Sarah and I needed something to eat at my son-in-laws recent 40th birthday party, because although his favourite curry house delivered enough food for 50 guests, none of it was compatible with our self-imposed no meat, no legumes, no grains diet. 

I’ve called this fresh-tasting, fresh-looking, aromatic vegetable curry ‘Best Ever’ because Sarah and I only had to take one mouthful before we both excitedly announced “This is the best tasting curry I’ve eaten…ever!” Perfectly balanced - not too hot, not too spicy, not too creamy - I spent most of the evening congratulating myself! 

Craving curry? This one ticks all the boxes. It’s delicious, it’s inexpensive, it’s vegetarian (I like that many Indians are strict vegetarians), it’s a complete meal in a bowl and, because it’s one of those dishes that tastes even better the next day when the flavours have been allowed to fully develop, it’s the perfect make-ahead meal for family and friends. Served with Coriander & Mint Chutney, it’s in a flavour-packed league of its own that could convert even the most dedicated meat eater.  

For those of you that already follow the Primal eating plan and think that curry nirvana can’t exist without naan bread, I agree! There is no better way to get curry into your mouth! Which means that a Primal Plate recipe for grain-free naan bread is already in development and (fingers crossed) will be posted soon. Watch this space!

Best Ever Vegetable Curry (Serves 4)

Ingredients

2 tbsp olive oil

2 medium onions, finely diced

walnut-sized piece fresh ginger, peeled and finely grated (about 1 tbsp when grated)

2 tsp ground coriander

2 tsp ground cumin

1 tsp ground turmeric

1 green chilli

1 dsp organic tomato paste

1 dsp Marigold organic reduced salt vegetable bouillon powder

350g organic sweet potatoes

250g organic carrots

1 small celeriac (about 500g unpeeled weight) 

1 x 400g tin organic plum tomatoes

160ml organic coconut cream

3-inch piece cinnamon stick

Sea salt (about 1½ tsp) and freshly ground black pepper (about ¼ tsp)

1 small head of cauliflower, cut into small bite-sized florets

120g baby spinach, washed and dried

Coriander and Mint Chutney - to serve


Instructions

Heat the oil over medium-high heat in a large deep sauté / frying pan. Add the onion, cover and cook, stirring occasionally, for 4 minutes or until beginning to brown. Reduce the heat to medium and continue to cook with the pan lid on for another 8 to10 minutes, stirring from time to time, until the onion is deep golden brown.

Peel and chop all the root vegetables (carrot, sweet potato, celeriac) into even-sized dice (about 15mm / ¾ inch) - you should have about 950g prepared vegetables in total.

Halve, deseed and finely chop the chilli. Peel and grate the ginger. 

Add the chilli and ginger to the onions; cook, stirring, for 1 minute to combine the flavours. 

Add the coriander, cumin, turmeric; stir for another minute to toast the spices. Add the bouillon powder and tomato paste and stir for another minute until well blended into the spice mix.

Add the diced vegetables, stir to evenly coat them in the aromatics, then cover the pan and continue to cook over a medium/low heat whilst you open the tomatoes and drain the juice into a measuring jug. 

Remove any daggy stalk ends, bits of skin etc. from the tomatoes, then chop them and add to the pan. Make the drained tomato juice up to 300ml with filtered water and add that too. 

Add the coconut cream, cinnamon stick, salt, and freshly ground pepper and bring to the boil. Reduce the heat to medium/ low and simmer for 15 minutes, or until the root vegetables are almost tender. 

Add the cauliflower florets, stir well, cover and cook for a further 10 minutes until the cauliflower is tender. Remove the cinnamon stick. 

Stir in spinach and cook until the spinach has wilted, about 2 minutes more. Check the seasoning, adding more salt if necessary. 

Serve in warmed bowls topped with a generous spoonful of Coriander and Mint Chutney.


Sweet Potato Hash With Crispy Fried Eggs

by Susan Smith in , ,


If there was one word to describe my life right now it would be “overwhelming”. Nearly four months ago it seemed like a good idea to order a large quantity of new self-build furniture to grab a seventy-per-cent-off deal at Laura Ashley. In retrospect, an odd choice given that DIY is not our forte. Since delivery, half our bedroom space has been relinquished to twenty-two enormous and very intimidating boxes.

Now (subject to us finding a competent joiner!), they’re not going to be gathering dust for much longer. The re-vamp of our living/bedroom space, which has been overdue for the past ten years has finally begun and we, with all our clothes and personal possessions, have been displaced throughout the rest of the house whist the work is carried out. I hate the disruption, but at least the financial liability of a large, cold Edwardian property that’s a nightmare to heat and maintain is offset by having space! Perhaps we should have considered moving when my two daughters flew the nest, but the prospect of a new owner coming in and cutting down the trees and destroying the habitat of numerous squirrels and birds that have made our garden their home, prevents us. So given that we feel we have to stay, we're stuck with the ongoing commitment and upheaval of one costly home improvement after another.

With all the chaos going on around me, what I don’t have too much time for is cooking, food shopping and devising new recipes for this blog! Hence, for the next few weeks, I’ll be in the same boat as most people who prefer to eat ‘fast’ food. However, in my world, fast food can never mean processed, ready-made or take-aways. Simplicity is key to making healthy meals that are quick and easy to get to the table, which also means me relying heavily on my family’s co-operation and team work. My husband John is my brilliant commis chef that does most of the chopping and slicing, whilst Sarah is a dab-hand at making perfect fried eggs for this comforting Sweet Potato Hash With Crispy Fried Eggs. 

A delicious, nutritious, inexpensive meal that really works, it is one of my all-time favourites for an uncomplicated supper.

Sweet Potato Hash With Crispy Fried Eggs (V) (Serves 3)

Ingredients

750g organic sweet potatoes, cut into small (about 2cm) cubes

1 small organic Savoy cabbage, stem and stalks removed and thinly sliced

3 tbsp olive oil 

1 organic red onion, finely chopped

30g butter

1 dsp cumin seeds

Sea salt and freshly ground black pepper

6 organic medium eggs

Large handful of fresh parsley, finely chopped


Instructions

Boil a kettle of water. Put the boiling water into the bottom pan of a steamer and the sweet potato cubes in the top of the steamer.

Steam the sweet potato cubes with the pan lid on for about 10 minutes, until almost tender. Use a draining spoon to scoop the potato cubes out of the steamer into a large bowl. Season well with sea salt and black pepper and add the cumin seeds, being careful not to break the potato cubes up. Set aside. 

Add the cabbage to the steamer, put the lid back on and cook for 2 minutes until tender. Tip the cooked cabbage into a separate bowl. Season with a little sea salt and a good grinding of black pepper. 

Heat 1 tablespoon of olive oil in a large deep frying pan over a moderate heat and fry the onion for 3 minutes or until just softened. Turn the heat up to medium/high, add half the butter and the sweet potatoes and fry, stirring frequently, until the potatoes and onions start to caramelise and turn golden brown.

Add the cabbage and the rest of the butter to the sweet potato mixture and continue frying, stirring from time to time, whilst you simultaneously cook the eggs.

Take a second large frying pan and heat the remaining 2 tbsp of olive oil until the surface seems to slightly shimmer. Crack each egg into a small bowl or cup then carefully pour into the hot oil. After 1 minute reduce the heat to medium and continue to cook until underneath the whites of the eggs are crispy and golden.

While the yolks are still runny, use a fish slice to transfer the eggs to a plate lined with kitchen paper to drain off any excess oil. 

Pile the sweet potato hash on to three warmed plates and gently place two fried eggs on top of each. Season the eggs with a little sea salt and black pepper then scatter over the chopped parsley to serve. 


Notes:

Sweet potatoes are naturally sweet-tasting but their natural sugars are slowly released into the bloodstream, helping to ensure a balanced and regular source of energy, without the blood sugar spikes linked to fatigue and weight gain. 

If the eggs stick together in the frying pan, use a non-stick flat ended spatula to 'cut' and separate them. Do not try to dowse the egg yolks in hot oil - they should be cooked to perfection (soft and runny) if you leave the eggs alone in the frying pan until the edges of the whites are a lacey, crisp and golden.

Wear a bibbed apron to fry the eggs - they can spit and splutter in hot oil!


Carbohydrates 58g Protein 23g - per serving


Courgette Linguine With Cashew Pesto and Marinated Mushroom and Broccoli

by Susan Smith in , , ,


Although at Primal Plate we’re more than happy to occasionally have our grain-free, refined sugar-free cake and to eat it too, there comes a time (usually after a second slice of said cake) that I begin to pull back from borderline over-indulgence to something altogether more healthy and savoury. 

Sugar is sugar, and although raw honey, coconut palm sugar and pure maple syrup are much healthier options than refined sugar, they are still sugar. Even fructose, the natural sugar found in fruit, is unhealthy when eaten to excess. I know that because I used to make myself what I thought was a healthy multiple-fruit smoothie, which oftentimes boasted more than my ‘five-a-day’ in just one potent glass full. During this time I developed an inflammatory skin condition, which my doctor initially diagnosed as shingles. In fact it was a severe case of atopic eczema, which became infected. Within two weeks of switching to a low-carb Primal diet, which meant I stopped drinking excessive amounts of fructose in my breakfast smoothie, the rash disappeared for good.

The occasional sweet treat probably doesn't do much harm, but eating too much sugar (this applies to virtually everyone who eats a processed, high-carb Western diet and doesn’t do significant amounts of exercise) can have harmful effects on metabolism and is pro-inflammatory. Inflammation can lead directly to the development of all sorts of diseases throughout the body including diabetes, cardiovascular disease and cancer and undoubtedly it was sugar-linked inflammation that caused my erstwhile eczema. 

So, after developing and testing last week’s recipe for Tiger Nut Victoria Sandwich, which involved baking and eating two cakes within three days, I came across a recipe in Paul Gayler’s book Pure Vegetarian that is the perfect antidote to sugar overdose. 

My adaptation of Courgette Linguine With Cashew Pesto and Marinated Mushroom and Broccoli is a refreshing, vegan plateful of gorgeous colour and outstanding texture. Classic, Asian-style flavours come together in perfect harmony for one of the healthiest, zingiest, freshest-tasting meals ever! With virtually no cooking involved, it is also surprisingly simple to make. 

Try this almost raw ‘detox’ recipe if you don’t cook / won’t cook, if you need an instant energy boost or if you simply want to make amends for some recent foodie indiscretion. Good to look at, good to eat and oh so good for you, it really is health food at its best. 

Courgette Linguine With Cashew Pesto and Marinated Mushroom and Broccoli (V) (Serves 4)

Ingredients - for the cashew pesto

50g raw organic cashews

1 red chilli, deseeded and finely chopped

2cm piece of root ginger, peeled and grated

100ml extra-virgin olive oil

25g fresh coriander

15g fresh mint leaves

15g fresh basil leaves

Juice of 1 lime

Sea salt


Instructions

Place the cashews in a blender and blitz until broken down. 

Add the ginger, chilli, oil and herbs and blend until pureed.

Add lime juice, then season with sea salt to taste (I used ½ teaspoon) and briefly whizz again to incorporate.

Cover and set aside.


Ingredients - for the marinated vegetables

200g organic chestnut mushrooms, cleaned (I just wipe them over with a damp paper towel)

100ml organic extra-virgin olive oil

1 tablespoon tamari (wheat-free soy sauce)

1 organic spring onion, very finely chopped

2cm piece of root ginger, peeled and grated

100g organic broccoli, cut into small florets (without stalk)

50ml fresh lime juice (approx. 1 large or 2 small limes)

4 crispy and firm organic courgettes

Sea salt and freshly ground black pepper

Instructions

Slice the mushrooms very thinly, place in a large bowl and add the oil, soy sauce, onion and ginger. Allow to marinate for 30 minutes (no longer than this or they create too much juice)

Meanwhile, steam the broccoli for about 2 to 3 minutes until it turns bright green but is still crunchy in texture. Quickly remove and add to the mushrooms along with the lime juice and season to taste.

Cut the ends off the courgettes, then using a kitchen mandolin, spiralizer, vegetable peeler or sharp knife, slice as thinly as possible lengthways into long strips or ‘linguine’. 

Toss with the mushrooms and broccoli, adjust the seasoning and serve with a dollop of cashew pesto on top. 


Carbohydrate 13g Protein 8g - per serving

A Spirilizer makes perfectly thin and even courgette 'linguine'

A Spirilizer makes perfectly thin and even courgette 'linguine'


Nutburgers

by Susan Smith in ,


The heartbreaking news about Cecil the lion continues to haunt me. It isn’t just the immorality of seeking out and killing magnificent endangered species of wild animals for ‘game’, it’s also the general lack of reverence for animals and nature, prevalent in today’s society, which I find so depressing. Who’d think to dye baby chicks neon colours and then seal them inside plastic bags to sell as toys? Closer to home, I’ve just stood and watched a motorist swerve his car across to the opposite side of the road outside my house to deliberately run over a female blackbird that was foraging for insects in the verge!

I’ve been teetering on the brink of eliminating all meat from my diet for a long time, but a constant stream of ugly events, symptomatic of a worldwide epidemic of insensible violent acts against the environment, other people and animals, have pushed me over the edge. It isn’t just a question of killing animals for sport. Whilst ever beautiful vegetarian food is available, why raise innocent sentient beings and subject them to systematic cruelty, mutilation and suffering before destroying their bodies in an industrialised slaughterhouse designed to kill 200 animals per minute? Just to eat? What for?

The fact is, an abundance of delicious, healthy, life-giving vegetarian food IS available, so what need is there to continue the very crude, primitive, uncivilised behaviour involved in destroying a body to eat its flesh? If you think this is okay, why not eat dogs, cats and horses? Or, to take the okay-ness and disconnected-ness of killing unevolved animals for food to its logical conclusion, it's just another step away from killing evolved animals for food, a.k.a. cannabilism. Enough now.

Primal Plate is committed to sharing recipes that are more in tune with compassion, beauty and love - how life should be lived - rather than the inhumane behaviours associated with eating factory farmed meat. 

Sir Paul McCartney sums it all up: "If anyone wants to save the planet, all they have to do is just stop eating meat. That's the single most important thing you could do. It's staggering when you think about it. Vegetarianism takes care of so many things in one shot: ecology, famine, cruelty”.

Primal Plate wants to pave the way for healthy, nutritious, vegetarian, Primal-friendly alternatives to meat that won’t compromise on your foodie sensory pleasure. Quite the opposite in fact. Vegetarians all too often turn to grains and legumes to pack out their meals, but unfortunately these foods contain anti-nutrients, are pro-inflammatory and can ultimately make you fat and diseased. All Primal Plate recipes are created without the unhealthy ‘bad boys’ - grains, legumes, refined sugar, processed seed oils - but look equally as good, and often taste much better, than their gluten, lectin, trans-fat riddled counterparts. Making meat-free meals is aesthetically more appealing because vegetarianism respects life and doesn’t disconnect people from the suffering caused by them consuming “corpse and two veg”.     

These meat-free, vegan Nutburgers are serious contenders for the best of alfresco or BBQ fare. With a full-on savoury taste profile and a better texture than ground beef or lamb, they might easily be confused with ‘sausage-burgers’ for uninitiated carnivores.

Keep the Primal/Paleo ethos intact by ditching the burger bun and wrapping them up in the biggest, freshest raw savoy cabbage leaves you can find. Top with your choice of dressing - tomato ketchup (is sort of obligatory), homemade mayonnaise, or spicy chutney. Serve with sliced tomatoes, avocado and a handful of micro-leaves for a lovely-looking, very filling, nutrient-dense, moreish burger that doesn’t hurt or harm any animal - a conscious lifestyle change that doesn’t add to the pain and suffering in this mad world. Walter Palmer-ites, take note!

Nutburgers (V) (Makes 12-13 burgers)

Ingredients

2 medium onions, peeled and finely chopped

2 sticks of celery, finely diced

100g organic butter or vegan alternative (M&S Simply range do a vegan-friendly sunflower spread)

250g chestnut mushrooms, finely chopped

25g green banana flour

1 tbsp organic ground flaxseed

2 tsp organic Marigold vegetable bouillon powder

2 tbsp Clearspring tamari soy sauce

2 tsp yeast extract (e.g. Marmite)

200ml filtered water

450g mixed nuts (I used raw organic cashews, walnuts, macadamias, brazil nuts and pistachios) - finely chopped 

200g ground almonds

4 rounded tablespoons fresh mixed herbs (parsley, thyme, marjoram, rosemary etc.), finely chopped

Sea salt and freshly ground black pepper

To finish

75g ground almonds, to coat 

Olive oil for shallow frying


Instructions

In a large pan, gently sauté the onions and celery in the butter (or vegan alternative) for 10 minutes until they are soft a just turning golden brown.

Add the chopped mushrooms and cook for a further 5 minutes until soft and most of the liquid has been driven off as steam.

Mix in the banana flour and cook for a further minute. Pour in the water and stir continuously over a medium heat until thickened.

Add the stock powder, ground flaxseed, tamari, yeast extract, mixed nuts, ground almonds, fresh herbs and salt and pepper to taste. Allow the mixture to cool before proceeding to the next step.

Tip extra ground almonds onto a large flat plate in readiness for coating the burgers.

When the burger mixture is cool enough to handle, form into 12 burgers - about 6cm (2½”) wide x 2 cm (¾”) thick, weighing approximately 100g each. N.B. Don’t make the burgers much bigger than this because they’re easier to manoeuvre and turn them over in the pan (without breaking up) if they’re smaller and more compact.

Coat the burgers in the ground almonds and place onto a clean plate. Cover loosely with cling film and store in the refrigerator until you’re ready to start cooking.

Cook on a lightly oiled flat tin (or frying pan) over the barbecue. Alternatively, if you’re not firing up the barbecue, gently fry the burgers in a little olive oil in an oven-proof frying pan over a moderate heat for about 3-5 minutes on each side, until lightly browned. Then place the frying pan in the oven (pre-heated to 190℃) for a further 8-10 minutes to heat through completely. 

We topped the burger with ketchup and mayo, slices of tomato and vegetarian mozzarella and some pretty micro leaves, before wrapping around the savoy cabbage leaf. Knives and forks not needed!

We topped the burger with ketchup and mayo, slices of tomato and vegetarian mozzarella and some pretty micro leaves, before wrapping around the savoy cabbage leaf. Knives and forks not needed!

Notes:

The easiest, quickest and least messy way to finely chop the mixed nuts is in a food processor. Ditto the mushrooms and fresh herbs.

To make this recipe suitable for vegans, I used ground almonds for coating these burgers. However, if you eat eggs and you have some 2-3 day old leftover Grain-free Bread vegetarians can convert this into panko-style breadcrumbs for a crispier coating. 

To make panko-style breadcrumbs for coating: 

  • Pre-heat the oven to 140℃. 
  • Cut about 150g of grain-free bread (including the crust) into cubes. Using the coarse grater/shredding disk of a food processor, push the bread cubes through the feeder tube to make coarse crumbs. 
  • Spread the crumbs out onto a baking sheet in a single layer and bake for about 15-20 minutes until they are dry but not browned. Tip: To ensure the crumbs bake evenly, take them out of the oven every 5 minutes or so and turn them over with a spatula, then give the tray a good shake to level them out again before continuing with the cooking process.
  • When the crumbs are completely dried-out (crispy but not toasted) remove them from the oven and allow to cool.
  • Coat the burgers in the dried breadcrumbs and cook as above,

The burger mixture can be made 2-3 days in advance and kept covered in a refrigerator. It can then be shaped into burgers and coated with ground almonds/dried breadcrumbs the day you intend to eat them. 


Carbohydrate 10g Protein 17g - per burger

Good food, wine, a generous tomato and vegetarian mozzarella salad and our nutburgers are the perfect partners for chilled-out al fresco dining.

Good food, wine, a generous tomato and vegetarian mozzarella salad and our nutburgers are the perfect partners for chilled-out al fresco dining.


Roasted Red Pepper & Tomato Soup

by Susan Smith in , , , , ,


In our neck of the woods (North Nottinghamshire, UK) I’m fed-up with waiting for summer to arrive. As far as I’m concerned, 14℃ day-time temperatures don’t hack it at the end of July. Recently, I’ve even resorted to taking a hot water bottle to bed! 

I don’t know whether it’s symptomatic of global warming or personal stress levels at the height of the wedding season that’s to blame (Mirror Imaging is my second day job) but I’ve felt unseasonably cold for this time of year. Meanwhile, Sarah’s been threatening a sore throat for the past week. This means that whether the weather fails to get any warmer, or is actually getting colder, a bowl of bright-red Roasted Pepper and Tomato Soup is just the thing to improve our disposition.

Peppers and tomatoes hail from warmer Mediterranean climes - the very thought makes me feel more cheery - and are incredibly healthy, being stacked with vitamins and minerals, so they’re perfect for staving off a cold.

So, if we can’t just dive into summer this year, at least we can pretend by bringing a little bit of sunshine into cooler summer days with this great tasting soup. Roasting the peppers and tomatoes really gives a delicious depth of flavour to the end result. Simple to make and gorgeous to look at, I can say with absolute conviction, “Eat soup, be happy!”

Meanwhile, I’m really hoping for a hot and sunny August.

Roasted Red Pepper & Tomato Soup is a vibrant red colour - serve with a drizzle of cream and some shredded fresh basil leaves for a simple but impressive garnish.

Roasted Red Pepper & Tomato Soup is a vibrant red colour - serve with a drizzle of cream and some shredded fresh basil leaves for a simple but impressive garnish.

Roasted Red Pepper & Tomato Soup (V) (Serves 4)

Ingredients

500g ripe plum tomatoes, halved

2 red peppers, halved, de-seeded and chopped into smallish pieces

1 onion, quartered

2-3 sprigs of fresh thyme, leaves only

2 tbsp of olive oil

1 heaped tbsp organic Marigold vegetable bouillon powder

900ml water, freshly boiled water

1 tbsp organic tomato paste

Sea salt and freshly ground black pepper

2-3 drops liquid stevia - optional

To finish:

Double cream

Fresh basil leaves, finely shredded  


Instructions

Pre-heat the oven to 220℃ / 425℉ / Gas mark 7

Place the tomatoes, peppers, onion and thyme into a large mixing bowl, drizzle over the olive oil and season with salt and pepper. Mix everything together well so that the vegetables are evenly coated in oil, then tip onto a large non-stick baking tray in a single layer and roast in the oven for 20-25 minutes, until wilted and slightly charred all over. 

Meanwhile, make a vegetable stock with the bouillon powder and freshly boiled water.

Transfer the roasted vegetables to a large saucepan, cover with the vegetable stock and add the tomato puree. Cook over a moderate heat for 15 minutes. Take off the heat and allow to cool down for 5 minutes before proceeding to the next step.

Ladle the contents of the pan into a blender container (you will need to do this in several batches), then blitz until completely smooth. 

As you go, strain each batch of blended soup through a fine sieve into a clean pan. 

After the final batch of soup has been strained, adjust the seasoning (if it tastes a little acidic, add 2-3 drops of liquid stevia) then re-heat to just below boiling point.

Pour the hot soup into 4 warmed bowls, add a swirl of cream and sprinkle with shredded basil. 


Notes:

Crumbled feta cheese sprinkled on top of the soup just before serving, is a tasty alternative to cream.

I suppose it’s sods law that the minute I decide to blog a hot soup recipe, the weather forecast for this weekend is that Summer 2015 is back on. If so, Roasted Pepper & Tomato Soup is a lovely soup to take on a picnic!


Carbohydrate 15g  Protein 3g - per serving

Sweet red peppers and ripe, juicy vine tomatoes are the basis for this delicious soup.

Sweet red peppers and ripe, juicy vine tomatoes are the basis for this delicious soup.


Griddled Asparagus & Tomato with Pecorino with Parmesan Crusted Chicken / Twice-Baked Cheese Soufflés

by Susan Smith in , , , , , , ,


There’s a debate going on in our household. A sort of ‘Daddy or Chips?’ to-ing and fro-ing. Sarah thinks I should feature more meat recipes on Primal Plate’s blog and I’m not finding any reason to do so. In fact, the opposite is true - I am not interested in promoting meat consumption.

Mass cruelty is going on, and millions of factory-farmed chickens, pigs and cows are suffering the consequences, without any encouragement from me. Most people don’t want to know how the food they eat arrives on their plate, because if they become fully aware of the heartrending, unmerciful, intense farming methods, kept ‘under wraps’ by agribusiness and food advertising agencies, natural empathy will force them to change their eating habits, or at least make them willing to pay the extra price for compassionately and ethically reared farm animals. I have a solution. If you think you can’t afford to buy organic, free-range, grass-fed meat, stop eating meat! Or, if you must eat it, save it for special occasions when you are happy to pay a little more for the privilege.

So now my intention is clear, I can indulge Sarah and look to those people who like to draw attention to the fact that meat is most often missing on Primal Plate’s blog. Today’s post should make the point admirably. 

Griddled Asparagus & Tomato with Pecorino is a fresh, light-bite that’s been slightly modified from an original Waitrose recipe. More than a cold salad but not quite a hot dinner, this dish captures all the flavours of summer with the minimum of fuss. With the exception of griddling the asparagus spears (which only takes about 6-8 minutes) everything else can be pre-prepared and quickly assembled when you’re ready to eat. 

It’s delicious with Parmesan Crusted Chicken (buy your chicken here) assuming you’ve taken on board the importance of provenance - but here’s the thing, it’s twice as good (and a lot more convenient to serve) teamed with Twice-Baked Cheese Soufflés (recipe adapted from Rose Elliot’s book Vegetarian Four Seasons).

This is my sort of food - tasty soft pillows of all-protein goodness, topped with golden, crunchy, cheese - and no animal suffering in the making thereof! When it comes to deciding which is more enticing to eat, I think the photographs here say it for me!

Still, I’ve included the recipes for both chicken and soufflés, so you have the choice. However, I entreat you to please stop supporting the horrors of intensive animal farming by paying the extra money for free-range, outdoor bred, organic chicken - without exception. Thank you.

Griddled Asparagus & Tomato with Pecorino (V - see note below) (Serves 2-4)

Ingredients

250g tomatoes, halved (I used Pome dei Moro)

500g asparagus, trimmed

Fast and easy vinaigrette

30g pine nuts, toasted

25g pack fresh basil, shredded if leaves are large, or left whole if small

30g Pecorino, Parmesan or Twineham Grange cheese, finely grated


Instructions

Pre-heat the oven to 150 ℃ / 300℉ / Gas mark 3

Arrange tomato halves in a single layer on a baking sheet lined with non-stick baking parchment . Cook in the pre-heated oven for up to 1 hour. N.B. Because oven temperatures can vary considerably, check the tomatoes progress after 45 minutes - they should be semi-collapsed, semi-dried and slightly caramelised when they’re done - definitely not scorched! Remove from the oven and set aside.

Gently toast pine nuts in a small dry frying pan over a low heat until golden - watch like a hawk, don’t let them burn!

Make the fast and easy vinaigrette. Set aside.

Wash asparagus, drain and dry. Snap off the bottom of the spears and peel the lower third with a potato peeler. Drizzle the prepared asparagus with olive oil, coating them evenly, then season with salt and pepper and set aside. 

Just before you’re ready to serve, heat a griddle pan to hot. Cook the asparagus in a single layer until lightly charred and tender (takes about 5-8 minutes)

Arrange the cooked asparagus on a large serving plate, scatter with the tomatoes. Drizzle generously with the vinaigrette then top with pine nuts, shredded basil leaves and grated cheese…in that order.

Parmesan Crusted Chicken (Serves 2) 

2 skinless, boneless chicken breasts 

1 egg white, lightly beaten

60g Parmesan cheese, finely grated

A generous grinding of freshly ground black pepper

1 tbsp Clearspring organic sunflower frying oil


Instructions

Pre-heat the oven to 200℃. 

Combine freshly ground black pepper with grated Parmesan.

Dip each chicken fillet into the beaten egg white and then firmly press the chicken into the combined Parmesan and black pepper.

Heat the oil in a non-stick oven-proof frying pan over a medium heat. When it is hot, cook the chicken for 3-4 minutes on each side until golden brown. Do not be tempted to move the chicken around the pan - it will be crispier if you leave it alone. 

Put the frying pan into the pre-heated oven for a further 8-10 minutes until cooked through. N.B. if you’re not sure if it’s completely cooked, cut through the middle of one of the chicken fillets with a sharp knife and check.

Remove from the oven and allow to rest for 3 minutes before serving. 


Twice-Baked Cheese Soufflés (V) (Makes 8 soufflés - serves 4 for a main course, 8 as a starter) 

Ingredients

Butter for greasing 

8 tbsp ready-grated Parmesan cheese

225g full fat cream cheese (I used Longley Farm)

4 large egg yolks, lightly beaten

150g Gruyere cheese, finely grated

5 large egg whites

Sea salt

Freshly ground black pepper


Instructions

Pre-heat the oven to 180℃ / 350℉ / Gas mark 4. Boil a kettle of water.

Generously grease 8 ramekin dishes, then sprinkle the insides with 4 tablespoons of the ready-grated Parmesan.

Put the cream cheese into a large bowl and mash with a fork until it’s smooth. Gradually mix in the egg yolks, then add half the grated Gruyere. Season with sea salt and black pepper. 

In a separate bowl whisk the egg whites with a clean grease-free whisk (preferably electric if you’re not feeling energetic) until they stand in soft peaks.

Stir one tablespoon of the whisked egg whites into the egg yolk mixture to loosen it, then using a metal tablespoon gently fold in the rest of the egg whites.

Spoon the mixture into the ramekins to come level with the top, but don’t pile it up any higher.

Stand the filled ramekins in a roasting tin, pour the boiling water round to come halfway up the sides and bake for 15 to 20 minutes or until they are risen and set.

Remove from the oven and allow to get cold - they’ll sink a bit. Loosen the edges and turn them out. It’s easiest to turn them out into the palm of one hand, then transfer them to an ovenproof dish.

Sprinkle with the remaining Gruyere cheese, then with the rest of the Parmesan cheese. 

They can now wait until you’re ready to bake them. Then, pre-heat the oven to 200℃ / 425℉ / Gas mark 7.

Bake them for 15-20 minutes or until they are puffed up and golden brown.

Serve immediately.

Notes

It’s impossible to make Pecorino or Parmesan cheese without using animal rennet, so they are not suitable for vegetarians. Twineham Grange cheese is made with a vegetarian rennet in place of the animal rennet and is the only cheese of its type to be Vegetarian Society Approved. For more information click here.

Twice-baked cheese soufflés are excellent for a special brunch served alongside slices of wild smoked salmon and accompanied by a glass of freshly squeezed orange and pink grapefruit juice. They can even be made and frozen in their dish, ready to be quickly defrosted and baked.  

The cooking times for chicken breast fillets depend on their size and thickness so I have allowed some latitude in my timings. Try to ensure that both fillets are the same weight so you’re not juggling around with different timings for each. Ultimately, you have to use your discretion but, if in doubt, nothing will spoil if you cut one open, just to make sure it’s nicely cooked all the way through.


Carbohydrate 6g Protein 8g - per serving of Griddled Asparagus & Tomato with Pecorino/Twineham Grange cheese

Carbohydrate 0g Protein 44g - per serving of Parmesan Crusted Chicken

Carbohydrate 2g Protein 28g - per main course serving of 2x individual Twice-Baked Cheese Soufflés (1g carbohydrate 14g protein - per soufflé)


Thai Spiced Aubergine Curry with Cauliflower Rice

by Susan Smith in , , ,


I met one of my oldest friends last week. We go back nearly thirty years, I think. I don’t see her that often, but when I do, it’s as if it’s just a continuum of the time before - even if our last meeting was months, or even years, ago. I love this woman’s courage, directness and no-nonsense attitude to life. Turns out, we’ve both lost a significant amount of weight recently, so obviously our respective weight-reduction diet plans were up for discussion and comparison. Her low-fat / low-calorie / high-nutrient Slimmer’s World diet (by which method she has lost four stone!) is almost the exact opposite of my high-fat / low-carbohydrate / Primal diet that doesn’t give a hoot about counting calories (though it’s still nutrient dense).

It’s a sure-fire thing that Primal Plate has nothing to offer my friend in terms of optimising a weight-loss maintenance plan because she’s doing brilliantly already, thank you very much! What I do know is that you cannot combine Primal eating (no-grains, low-carbohydrate) with a low-fat diet because you’d find yourself in a dietary hell of restricted food choices and no energy. And vice versa. The natural consequence of a high fat, high carbohydrate diet and a sedentary lifestyle is an increasingly fat and unhealthy body. In this context, today’s obesity and type-2 diabetes epidemic is the norm.  

It appears dietary guidelines for weight loss are still polarised between low-fat / high-carbohydrate (including grains, potatoes and wholemeal bread) and high-fat / low-carbohydrate (your source of energy comes from healthy dietary fat like cheese, grass-fed meat, butter and cream). So, the message is, unless you do insane amounts of exercise, you really can’t combine both diets and stay at your optimum weight! Whatever you’ve been conditioned to believe, there is mounting scientific evidence that proves fat, particularly saturated fat (butter, cheese, meat and cream), isn’t the enemy. In fact, it may be high carbohydrates that are more dangerous. Hence, Primal Plate recipes answer the need for comfort food that could be mistaken for carbohydrate-rich meals.

Whilst putting the world to rights, as only sixty-something sagacious women can, I mentioned my inclination towards vegetarian food and my friend went on to tell me how tricky she found cooking for her son and girlfriend, who are both vegan. It was then a light went on inside my head. To make Primal Plate blog more relevant to her, why not develop a low-carbohydrate, Primal (no grains, no pulses, no legumes) easy-to-cook vegan recipe? And with that thought, Thai Spiced Aubergine Curry with Cauliflower Rice was created.

The first time I made this dish, the result was such a pleasant surprise! The aubergine transforms itself into a sort of ‘vegetarian meat’ that absorbs the curry spices and fresh lime juice well, and perfectly blends with creamy coconut milk into an amalgam of sweet-sour, meltingly soft, spicy curry perfection. 

The trick to cooking aubergine is to cook it thoroughly - in this instance, first cutting it into smallish pieces and frying in coconut oil until it’s evenly brown on all sides, then lightly braising in the sauce until it’s unctuously soft and velvety. Low-carbohydrate, grain-free, cauliflower ‘rice’ does a brilliant job of soaking up all the delectable juices and voilà - a healthy, flavoursome vegan meal that is seriously yum!   

You’ll need a food processor to make the Cauliflower Rice.

Thai Spiced Aubergine Curry with Cauliflower Rice (Serves 4)

Ingredients - for the aubergine curry

3 medium aubergines (about 750g (1lb 10oz) total weight)

3 tbsp organic coconut oil

1 large onion, finely chopped

2.5cm (1in) piece root ginger, finely chopped

4 tsp red Thai curry paste (I use Barts)

1 tbsp raw organic coconut sugar

1 lime, juiced

1 tbsp tamari

Sea salt

Freshly ground black pepper

300ml (10½ fl oz) cold water

2 x 400g (14oz) cans full-fat coconut milk

15g (½oz) basil leaves, finely shredded

60g (2oz) raw cashews

1tsp olive oil


Instructions 

Heat 1 teaspoon of olive oil in a small frying pan and slowly toast the cashews over a low heat until they are golden. Allow them to cool on a plate lined with kitchen paper. When cool, use a sharp knife to chop them into smallish pieces. Set aside.

Meanwhile, clean the aubergines with a damp kitchen towel, cut off the stalk end then cut the flesh into small (2cm) cubes.

Heat the coconut oil in a large frying pan over a medium-high heat then add the chopped onion and ginger and cook for 2-3 minutes until softened. 

Add the aubergine cubes and fry, turning over from time to time, until everything is a deep golden brown on all sides. This takes about 10 minutes so keep your eye on it to make sure the mixture browns evenly and doesn’t burn.

Add the curry paste to the pan and cook for a further minute. Then add the coconut sugar, the lime juice, the tamari, sea salt, freshly ground black pepper and the cold water. Bring to the boil, then reduce the heat to gentle simmer and continue to cook for 15 minutes or until the liquid has reduced to about a third of its original volume. 

Stir in the coconut milk and continue to cook gently for another 5 minutes.

Taste to check the seasoning, then serve with shredded basil and toasted cashews scattered over and steamed Cauliflower Rice.

Cauliflower Rice (V) (Serves 4)

Ingredients

1 large head of cauliflower, preferably organic

1-2 fresh bay leaf (optional)


Instructions

Boil a kettle of water.

Wash and dry a large head of cauliflower. Cut off the florets only (you don’t need the stem). Blitz the florets in a food processor for about 30 seconds until it comes together into a powdery cauliflower ‘snow’. 

Tip the cauliflower into the top of a steamer and tuck a couple of bay leaves into the cauliflower, if you have them. Pour the boiling water from the kettle into the bottom of the steamer, cover and steam for 3-4 minutes (do not cook any longer than this - the ‘grains’ of cauliflower should stay separate, not reduce to wet mush!)

Drain well and serve immediately with Thai Spiced Aubergine Curry


Notes:

There’s no need to salt the aubergines for this recipe, or indeed for any recipe calling for aubergine now that the bitterness has been bred out of modern varieties. When it comes to Mellanzane Parmigiana I still do, mainly out of force of habit, which just harks back to the time when I used to fry the aubergine slices in olive oil prior to assembling the dish and, unless they were pre-salted, the amount of olive oil they absorbed was alarming!


Carbohydrate 28g Protein 13g - per serving of aubergine curry with cauliflower rice


Baked Eggs with Asparagus, Mushrooms & Cheese

by Susan Smith in , ,


I love British asparagus. It has to be one of the most distinctly delicious vegetables ever, and right now is the time to be taking advantage of its very short season - traditionally between St. George’s Day (23rd April) and Midsummer day (21st June).

Magnificent whichever way you cook it, perhaps my favourite way is to lightly steam it and serve it with salty dairy ingredients such as butter and cheese. Asparagus also has a particular affinity with eggs, so hollandaise sauce - a heavenly combination of eggs and butter - is for me the ultimate indulgence. 

Suffice to say, I’ll be going mad for British asparagus for the next few weeks…steaming, roasting, boiling, chargrilling, in salads (like the Spanish are wont to do) or raw, this seasonal treat is seriously good! Clearly I’m not the only one to appreciate English asparagus’s delicate, fresh, sweet taste (eaten raw it reminds me of young freshly-podded peas) because sales of this trendy vegetable have sky-rocketed in recent years. So, whilst British asparagus is currently enjoying its truly deserved ‘best in the world’ status, I think it would be remiss of me not to feature some of my pick-of-the-crop recipes.

The shortest and sweetest one I know involves nothing more than snapping off the bottom ends of the spears (they conveniently break just in the right place), placing them in a single layer in a large frying pan with a good knob of butter (25g / 1oz) and 150ml / 5fl oz water and cooking them over a medium high heat for 2-3 minutes until the water has almost evaporated. Turn the heat to medium and continue cooking, turning occasionally, for another 6-8 minutes until the asparagus is glistening and tinged golden in a reduction of buttery juices. Served with lemon, a few flakes of sea salt and a grinding of black pepper, it’s simply irresistible. 

However, after my hyper-excitement about British asparagus now hitting the shops, it would be a bit of a tease to just leave it at that! So today’s recipe for Baked Eggs with Asparagus, Mushrooms & Cheese, is altogether a more substantial dish - a meal in itself. It is also a celebration of asparagus that marries it together with some of its most harmonious flavour pairings - eggs, cheese and mushrooms. 

Baked Eggs with Asparagus, Mushrooms & Cheese can be ready to eat in 45 minutes. It’s also fast and straight forward to prepare. The only tricky part is keeping the egg yolks still slightly runny whilst making sure the egg whites are properly set (though it’s infinitely better to have over-set egg yolks than it is slimy egg whites!) The best way I’ve found to get this dish just perfect is to use individual oven-proof dishes set in a bain-marie (water bath) and to be meticulous with the timing!

Baked Eggs with Asparagus, Mushrooms & Cheese (V) (Serves 2)

Ingredients 

350g asparagus (7-8 spears per person)

150g organic closed-cup mushrooms

1 tbsp olive oil

125 ml organic double cream

80g Parmesan or Twineham Grange (vegetarian) cheese, finely grated

Sea salt and freshly ground black pepper

4 large organic free-range eggs

Fresh flat-leaf parsley sprigs, to garnish

15g butter, for greasing gratin dishes (the dishes I use are 23cm x 17cm / 9in x 5in)


Instructions

Boil a kettle of water. Pre-heat the oven to 180℃ / 350℉ / Gas mark 4

To prepare asparagus, bend the asparagus spear (close to its base) until it snaps, then throw the woody end away. If the ends still feel tough, you can pare away the exterior with a potato peeler to reveal the more tender flesh beneath.

Pour the boiling water from the kettle into the base of a steamer. Lay the asparagus spears in the top of the steamer and, with the lid on, steam for 2-3 minutes until crispy-tender. Drain and plunge immediately in cold water to stop the cooking process (or place under a running cold tap). Drain again, then dry the spears between two sheets of kitchen paper and set aside.

Either quickly wash the mushrooms under a cold tap and dry on kitchen paper or clean them with damp kitchen paper and cut into thickish slices (4-5 slices per mushroom). Heat the olive oil in a frying pan over a medium high heat and quickly stir-fry the mushrooms for 3 minutes or until softened and golden brown. Immediately tip the cooked mushrooms into a metal sieve set over a bowl (to drain off the excess juices), then lightly season the mushrooms with sea salt and black pepper and leave to cool.

Butter two individual oven-proof (gratin) dishes well. 

Boil another kettle of water.

Lightly season the cream with sea salt and black pepper. Divide all but 2 tablespoons of the cream equally between the two dishes. Swirl the dishes around so the cream is distributed evenly over the bottom of each dish then sprinkle over about three quarters (60 grams) of the grated cheese, again dividing it equally.

Arrange the cooked mushrooms and asparagus neatly on top, in that order. Sprinkle over the rest of the cheese. 

Carefully break 2 eggs into each dish, then spoon the remaining cream over the top of each egg. 

Place the dishes in a large roasting tin and pour in enough boiling water from the kettle until it reaches about halfway up their sides. 

Bake in the pre-heated oven on the middle shelf for 10 minutes - since oven temperatures can vary considerably, check after 8 minutes - the egg whites should be just set (still wobbly but opaque) and, hopefully, the yolks slightly runny. N.B. Don’t overcook as the eggs continue to cook in the residual heat of the dishes after they’ve been taken out of the oven.

Carefully (I use silicone oven gloves), remove the dishes from the bain-marie directly onto a dry tea-towel.

Garnish each dish with a sprig of fresh parsley and serve immediately with a decent glass of Marlborough Sauvignon Blanc. Deliciously sexy, unctuous food, or what?

Notes:

Choose asparagus spears that are uniform in size - not too thick and not too thin (definitely not sprue). Given a choice, I like my asparagus to err on the side of thicker rather than thinner because I think you get more flavour and texture. To check the uniformity of thickness within a pre-packed bunch of asparagus, tip it upside down and look at the base of the shoots. You want them all roughly the same diameter so that they will cook evenly. Fresh asparagus should have tight perky tips and shoots that are straight and firm. If possible, eat on the day of purchase - though asparagus will keep in a refrigerator for up to 4 days with the base of their stems wrapped in damp kitchen towel and placed inside a perforated plastic bag.

Asparagus packs a nutritional punch, with high levels of vitamins A and C, potassium, iron and calcium. They're also a diuretic and give your pee an unmistakable aroma (which, weirdly, not everyone can smell!).

Twineham Grange cheese is a delicious vegetarian alternative to Parmesan Reggiano. This full-flavoured hard cheese is absolutely perfect for cooking. It seems to me to have the melting quality of Gruyere with a similar flavour profile to Parmesan. Brilliant! 


Carbohydrate 9g Protein 35g - per individual serving


Stir-Fried Masala Chicken with Crash Hot Bombay Sweet Potatoes and Coriander & Mint Chutney

by Susan Smith in , , ,


I lost my mojo with regard to writing more recipes for the BBQ this past week, because when the weather turns cold, wet and windy, I really don’t want to eat outside thank you. This means the Halloumi & Vegetable Skewers promised in my last blog post will just have to wait, because I’m now more in the mood for something hot and spicy, like Stir-Fried Masala Chicken.

A packet of organic chicken thighs left too long in the fridge was actually intended for Sushi (my cat), but ended up being far too near its sell-by date for her to deign to eat them! Feeling under some obligation not to waste good food, Stir-Fried Masala Chicken just had to be! Accompanied by Crash Hot Bombay Sweet Potatoes, some baby salad leaves and a fresh, green, zingy, Coriander & Mint Chutney it has the cheer-up factor of spring with a little bit of heat for comfort. An all round winner I’d say, especially as Sushi got some fresh organic chicken breasts to compensate for her loss!

If you’re thinking “Is it okay to drink a lager/beer/cider with my curry when you’re following the Primal diet?” the answer is that none of these alcoholic drinks are strictly Primal (they also contain about 10-15 grams of carbohydrate per glass). However, an occasional, gluten-free, ‘light’ beer or lager (only 3-6 grams carbohydrate a glass) can be considered a bit of a ‘cheat’ and is obviously better for you than regular beers and lagers. 

Anyway, I’m off on a tangent because the drink shown in the picture below (just above Notes) is not alcoholic. It is a deliciously different and refreshing drink made from Thorncroft Detox Cordial  and San Pellegrino Sparkling Mineral Water. Having no artificial flavours or preservatives, no refined sugar and being a great detox to boot, this is how I manage to drink my full quotient of water every day! As a bonus for cider lovers, if you add 1-2 tablespoons of raw, organic apple cider vinegar (also recommended for detox and cleansing) you'll end up with a non-alcoholic cider that not only tastes good, but does you good!  

For ease, I have kept the recipes for the Stir-Fried Masala Chicken, Crash Hot Bombay Sweet Potatoes and Coriander & Mint Chutney separate. However, these dishes brought together on one plate work brilliantly. For those of us committed to a low-carbohydrate, grain-free Primal/Paleo diet, it’s safe to say that the rest of you can keep your traditional naan bread accompaniment, because when compared to this flavourful made-in-curry-heaven combination, it won’t even come close!

To help you avoid any last-minute kitchen frenzy, the Coriander & Mint Chutney can be stored in the refrigerator for a few days, the sweet potatoes can be part-cooked, spiced and 'oven-ready' for a final roasting and the chicken sliced, all in advance. Then, with a pre-heated oven on standby, dinner can be on the table within half an hour or so.

Ingredients - for the  Stir-Fried Masala Chicken (Serves 3)

4 tbsp olive oil

1 onion, finely chopped 

1-2 green chillies, finely chopped

1 tsp (about 2.5cm / 1inch piece) fresh ginger, peeled and finely grated

½ tsp ground coriander

½ tsp ground cumin

1 tsp organic curry powder (or garam masala)

1 tsp Marigold organic bouillon powder

6 x free-range, organic chicken thigh fillets, trimmed and cut into bite sized pieces / strips (alternatively, 2 organic chicken breasts, cut into strips)

2 tsp organic tomato puree

Sea salt and freshly ground black pepper

Baby green or mixed leaf salad, to serve


Instructions

Heat the olive oil in a large frying pan over a moderate heat.  Add the onion and fry for 2-3 minutes until softened. Add the chillies and continue to fry for another 3-4 minutes until the mixture begins to turn golden brown.

Add the grated ginger, bouillon powder, curry powder (or garam masala), coriander and cumin to the pan. Stir until well combined and continue cooking for 2 more minutes until the mixture is thick and fragrant (take care that it doesn’t burn).

Stir in the tomato puree, then add the chicken to the pan. Season with salt and pepper and over a medium/high heat dry-fry for 4-5 minutes, stirring continuously until the chicken is cooked through and a deep reddish brown. Taste and adjust the seasoning if necessary.

Serve immediately with baby green leaf salad. 


Ingredients - for the Crash Hot Bombay Sweet Potatoes (Serves 3)

700g Organic Sweet Potatoes

4 tbsp olive oil

1 tsp black mustard seeds

½ tsp dried chilli flakes

1 tsp turmeric

Sea salt

Freshly ground black pepper


Instructions

Pre-heat the oven to 250℃ / 480℉ / Gas mark 9. Boil a kettle of water.

Peel the sweet potatoes then cut them into approx 2.5cm x 5cm (1in x 2in) pieces and put into the top half of a steamer.

Pour the boiling water from the kettle into the bottom of the steamer, cover with the pan lid and cook the sweet potatoes for 8-10 minutes until just tender (test with a skewer, they should just give without too much resistance). Don’t let them go too soft. Remove from the heat, drain well and set aside to steam dry. 

Meanwhile heat the oil in a large frying pan. Check that the oil is hot enough by adding a sprinkling of mustard seeds (they should pop when it is) then add the rest of the mustard seeds, the chilli flakes, the turmeric and a large pinch of salt. Fry for 1 minute until the spices are well combined and fragrant. 

Tip the sweet potatoes into the pan, give everything a good stir so that they are well coated in the oil, spices and mustard seeds then take the pan off the heat. Using a potato masher, squash and flatten the sweet potatoes down to about half their original size. You’re aiming for a coarsely crushed mixture that'll provide lots of crispy, roasted edges after blasting in the oven. 

Tip the spiced crushed sweet potatoes onto a large non-stick baking tray and season well with salt and freshly ground black pepper.

Bake on the top shelf of the oven for 20-25 minutes until crisp and golden. 

Serve hot with Stir-Fried Masala Chicken. 


Ingredients- for Coriander & Mint Chutney (Serves 4-6)

100g (4oz) bunch fresh coriander, rinsed and dried (I use an OXO salad spinner)

20g fresh mint, stalks removed

2 long green chillies, finely chopped

15g fresh ginger, peeled and finely grated (about 1 tsp, grated)

½ large lime or ½ medium lemon, juiced (about 30ml / 1 fl.oz juice)

1-2 drop(s) liquid stevia

Sea salt, to taste

250g organic Greek yogurt


Instructions

Place the coriander, chillies, grated ginger, lime or lemon juice, a single drop of liquid stevia and a generous pinch of sea salt into a food processor or blender. Whizz together into a smooth, thick puree. 

Add the coriander mixture to the yogurt. Taste and adjust seasoning and/or add another single drop of liquid stevia, if you think it needs it.

Serve as an accompaniment to Stir-Fried Masala Chicken, Crash Hot Bombay Sweet Potatoes and a baby green or mixed leaf leaf salad. 

Notes:

Although the recipes for Stir-Fried Masala Chicken and Crash Hot Bombay Sweet Potatoes serve 3 people, Sarah reckons she can never have too much! Therefore, I suggest that if youve only got two mouths to feed (and youre both hungry), don’t reduce the quantity of ingredients but rather knock yourself out and eat the lot! Just remember, if you're trying to lose weight, you’re loading up the carbs when you eat sweet potatoes!

Skinless chicken breasts are easier to prepare than chicken thighs because there’s no fat or sinew to remove prior to cutting them into strips. Eversfield Organic Farm is Soil Association Approved, deliver nationwide and has won many awards for their organic grass-fed meat from Compassion in World Farming, Food and Drink Devon and Great Taste. They’ve also had many recommendations from top food chiefs and writers and I am now about to add Primal Plate Blog to the list! If you eat a Primal or Paleo diet you will know that only organic, pastured meat is recommended, so this is your one-stop shop for the best fresh meat and poultry you can buy. 

Sweet potatoes are strong sources of beta-carotene, manganese, and copper. A small one has 22g carbs and 3g fibre, making it the perfect post-workout snack. They’re also Primal/Paleo and a lot tastier than a bland white potato (which isn’t!). In this Primal Plate recipe, they perfectly balance out the heat of the Masala Stir-fried Chicken and the fresh, green tang of the Coriander & Mint Chutney. Truly delicious!

Coriander & Mint Chutney, whilst obviously the perfect condiment for an Indian dish, also makes an utterly moreish dip for crudités and other finger-licking goodies. I’ve even recently used it as a dipping sauce for the first-of-the-season English steamed asparagus. My advice would be, never let a bunch of fresh coriander go to waste in your fridge - make some fresh coriander chutney with it instead - once tasted, you just can’t seem to get enough!


Carbohydrate 5g Protein 36g - per serving of Stir-Fried  Masala Chicken 

Carbohydrate 51g Protein 3g - per serving of Crash Hot Bombay Sweet Potatoes 

Carbohydrate 4g Protein 2g - per serving of Coriander & Mint Chutney 


Mushroom Cheese Burgers

by Susan Smith in , , ,


Encouraged by some unusually warm spring weather this year, my eldest daughter and son-in-law have been firing up their BBQ since 6th April. Accordingly, the rest of the family were very happy to receive an invitation to join in the fun this bank holiday weekend (even if the weatherman was  threatening rain).

My son-in-law is the archetypal carnivore, so steak, sausage and burgers are his bag. In theory, he should enjoy the Paleo/Primal diet, but won’t be persuaded to give up his high carb favourites! Anyway, between his voracious appetite for meat, people’s general expectation of what’s quintessentially BBQ fare, you’d think there’d be a mis-match with my preference for all things vegetarian. Still, it doesn’t have to be so. In August 2008, I invited all my family to a BBQ and then caused several raised eyebrows when I announced it was going to be an entirely meat-free affair! In spite of some family member’s initial reticence (which turned into disbelief at the variety of vegetarian options on offer) it turned out to be one of the most successful family BBQs ever.

Back then, I relied heavily on vegetarian wonder woman Rose Elliot, and specifically her book Vegetarian Barbecues and Grills for inspiration. Ninety-nine per cent of Rose Elliot’s recipes never let me down. But this week, for the sake of originality, I decided to have a bash at making some Halloumi Veggie Burgers courtesy of Green Kitchen Travels. Unfortunately, when I read through the recipe properly, I couldn’t see how simply combining grated courgette, grated carrot and grated halloumi would work. Turns out, I was right.

Halloumi cheese does not melt when heated, so it’s ideal for grilling in flat slices on a BBQ (like a burger) but as I discovered, if you just add a load of wet ingredients to grated halloumi and nothing else to bind it together, you’ll end up with a halloumi ‘salad’ or at best, halloumi rösti! Undeterred, I added ricotta to the mix, which at least enabled me to mould everything into burger patties. Nevertheless, these were still far too wet and fragile and, in my view, would disintegrate on a BBQ. If the authors would like to elucidate, I’d be most grateful! On the plus side, Primal Plate tries these things so you don’t have to. Essentially, they tasted quite good, so at some point this summer halloumi burgers may well make an appearance on Primal Plate with the essential missing ingredient (what ere that be), added!

For now, I’m going with the thought that if it aint broke, don’t fix it. So instead I’ve adapted a Rose Elliot recipe to create some moist and tasty Mushroom Cheese Burgers. I know from experience that these burgers hold together well on the grill and, being pre-cooked, all I needed to do when we were ready to eat, was brush them with olive oil and compete with Nick for cooking space… 

The day after the night before, and I can vouch it was a very good party. Proof that a flexi-vegetarian rubbing shoulders with a devout meat-eater - aprons donned, cooking tongs and spatulas drawn over hot coals - is definitely viable. I still think the delectably crisp Mushroom Cheese Burgers were the star of the show. However, the halloumi, having been demoted from its intended pole position as a burger, really came into its own as Halloumi & Vegetable Skewers (recipe coming soon) - a colourful, barbecued veggie alternative to meat or, for any meat-eating diehard like my son-in-law, a healthful vegetable distraction!

You’ll need a deep-holed muffin or Yorkshire pudding tin to pre-bake these burgers.

Mushroom Cheese Burgers (Makes 8 x 7cm / 3 inch burgers)

Ingredients - for the burgers

2-3 tbsp olive oil

450g (1lb) button mushrooms, wiped clean with damp kitchen roll and sliced

350g mature Cheddar cheese, grated (I used Sussex Charmer)

2 tbsp fresh chives, finely chopped

1 tbsp fresh thyme, leaves only

3 large eggs, beaten

Sea salt

Freshly ground black pepper

Olive oil, for grilling

Fresh rosemary sprigs, to garnish


Ingredients - for preparing the tin

20g butter, melted

1-2 tbsp Napolina Italian Grated Cheese


Instructions

Pre-heat the oven to 180℃ / 350℉ / Gas mark 4

Brush 8 compartments of the muffin tin with the melted butter. Sprinkle evenly with the dry-grated cheese (Napolina). Set aside.

Heat the olive oil in a large non-stick frying pan, add the sliced mushrooms and fry until tender and free from liquid - this will take about 15 minutes or so. 

Remove the pan from the heat and stir in the chives, thyme, cheese, beaten egg and season with sea salt and black pepper to taste (go steady with the salt - strong-tasting Cheddar already packs a lot of flavour).

Divide the mixture between the tins, smoothing the surface of each ‘cake’ with a spatula knife.

Bake for 15 minutes, until firm to the touch and lightly browned. 

Cool completely in the tins, loosen the edges with a small knife, then turn out.


To barbecue or grill:

Brush the burgers on both sides with olive oil. Place on the grid of the barbecue or under a hot grill and cook until browned. 

Turn over and cook the other side, brushing with a little more oil if necessary.

Top each burger with a sprig of rosemary and serve piping hot. 


Carbohydrate 2g Protein 16g - per burger


Primal Pizza

by Susan Smith in , ,


I really used to enjoy going to Pizza Express for some downtime after a hard days work or shopping. I liked the informality and watching the Pizzaiolos performing their brave tossing and turning of pizza dough - the higher they spinned the floppy discs of dough in the air the more you could anticipate being served a thin, deliciously crispy-crusted pizza! My favourite toppings were Cajun, Fiorentina, Giardiniera, Da Morire. I do so love Italian passion and flair!

For many years I used to take my two girls as a weekly treat. Before ditching the grains, I thought it was the closest thing to a fun fast food experience I could give them, without compromising our health. I confess, there’s still nothing quite like the memory of a traditional wheat-based pizza and a glass of wine to transport me to a happy place, and I’m not the only one. Last week, Sarah told me the one thing she still craves is pizza, so today I felt compelled to try and oblige. 

After scouring the internet for food blogging pioneers of grain-free pizza, and several rejected recipes later, I think my version of cauliflower pizza crust is simply the best! Unlike some I’ve tried, it’s not held together with copious quantities of cheese or eggs and, as a result, my pizza base recipe is definitively more bread-like. When it comes to pizza crust, it isn’t exactly ‘it’ but it does come very close indeed.

The next consideration was the pizza topping. Regular readers of Primal Plate will know that I espouse Primal-friendly vegetarianism and since Peter Boizot, the founder of Pizza Express has been a vegetarian since childhood, and I once read that his personal favourite was a Margherita pizza, I’m thinking…way to go! Besides which, with it’s red (tomato sauce) white (mozzarella cheese) and green (basil) I love the fact that it emulates the colours of the Italian flag!

Unfortunately, there is no such thing as vegetarian Parmesan or, so far as I know, vegetarian Italian buffalo mozzarella. Even lacto-vegetarians are often unaware that Parmesan Reggiano DOP and buffalo mozzarella are made from coagulating milk to produce curds (solids) and whey (liquid), and this coagulation can only be achieved by using rennet, an enzyme obtained from the stomach of slaughtered newly-born calves. The very idea of taking these newborn animals away from their mothers at birth and slaughtering them is an anathema to me (I don’t eat veal on compassionate grounds either - please see *note below) so I’ve substituted Sainsbury’s So Organic Vegetarian Mozzarella for buffalo mozzarella, and Twineham Grange for the parmesan in my recipe. They are both excellent vegetarian alternatives. 

I think Peter Boizot, alias Mr Pizza himself, will approve!

Cauliflower Pizza Crust (Makes a 10 Inch pizza - serves 2) (V)

Ingredients - for the pizza base

1 organic cauliflower (to yield about 500g raw cauliflower ‘rice’)

1-2 fresh bay leaves - optional

50g (2oz) organic ground almonds 

25g (1oz) organic arrowroot

25g (1oz) organic ground flaxseed

25g (1oz) vegetarian parmesan-style cheese, finely grated

50g  (2oz) vegetarian ricotta

1 tsp sea salt

½ tsp baking powder

1 dsp fresh marjoram, finely chopped

1 whole egg, beaten


Ingredients - for the topping

120ml (4fl oz) organic tomato passata (I use Mr Organic)

Pinch of sea salt, freshly ground black pepper

1 drop liquid stevia

125g  (4½oz) organic vegetarian mozzarella

50g (2oz) vegetarian parmesan-style cheese

Fresh basil sprigs, for serving


Instructions - for pizza crust

Preheat the oven to 160℃ / 325ºF / Gas mark 3. Boil a kettle of water.

Take a large piece of parchment paper and, using a large flan ring or pan lid as a guide, draw a 10-12 inch circle on the back of the paper (this will help you shape the pizza into the right size later) Turn the paper over and grease with butter or coconut oil. Place on a flat non-stick baking sheet and set aside. 

Wash and dry a medium sized head of cauliflower. Cut off the florets only (you don’t need the stem). Blitz the florets in a food processor for about 30 seconds until it comes together into a powdery cauliflower ‘snow’. 

Tip the cauliflower into the top of a steamer and tuck a couple of bay leaves into the cauliflower, if you have them. Pour the boiling water from the kettle into the bottom of the steamer, cover and steam for 3-4 minutes (do not cook any longer than this - the ‘grains’ of cauliflower should stay separate not reduce to wet mush!)

Dump the cooked cauliflower onto a clean tea towel and allow to cool down before proceeding to the next step. Once the cauliflower is cool enough to handle, wrap it up in the tea towel and wring out every last drop of water. You need to squeeze out as much water as possible to ensure you get a pizza-like-crust not a crumbly mess!

Put the squeezed-out cauliflower into a large bowl. Now add ground almonds, arrowroot, ground flaxseed, baking powder, Parmesan cheese, ricotta, marjoram, sea salt and black pepper and the beaten egg. Mix together well with a fork. 

Once mixed together, use your hands to form the dough into a crust on your oiled parchment paper. Pat it down thoroughly, you want it nice and tightly formed. Once you’ve got it roughly into shape, the best way to compact it is to take a sheet of cling film, lay it on top of the dough and roll it out more evenly with a rolling pin - don’t make it too thick or too thin - make the edges slightly higher.

Remove the cling film and slide the parchment paper onto your baking sheet. Bake for 35-40 minutes until it is golden brown (you may need to turn it around halfway through the cooking time to make sure it cooks evenly). 

Remove from oven and allow to rest a couple of minutes. 


Instructions - for the topping

Meanwhile, for almost instant tomato sauce, pour passata into a small saucepan, add a pinch of sea salt, a grinding of black pepper and 1 single drop of liquid stevia then cook over a moderate heat for 3-4 minutes to reduce down to a slightly thicker consistency.  

Use a serving spoon or ladle to spread a thin layer of the sauce on top of the pizza base, leaving a 2 centimetre border of crust around the outside edge.

Sprinkle the grated cheese over evenly, then add the slices of mozzarella (in that order). Put back in the oven for a further 5-10 minutes until the cheese is melted and bubbly. 

Slide the pizza onto a serving plate and decorate with basil and a grinding of black pepper, if liked. 

Serve up your delicious, nutritious, gluten and grain-free pizza and enjoy! 

Notes:

I find that it’s best to remove the mozzarella from the fridge, slice it and allow it to come to room temperature before using it to top my pizza. Any excess moisture coming from the mozzarella can then be mopped away with kitchen roll beforehand, - otherwise, the heat of the oven can cause the mozzarella to leak a milky liquid onto your pizza crust and make it go soggy! 

Twineham Grange cheese has a slightly rubbery (they say, “creamy") texture compared to the hard, granular texture of genuine Parmesan Reggiano (and I do so wish they still made it from unpasteurised milk). Eaten straight from the packet, it also lacks Parmesan's rich, sharp flavour. Nevertheless, my first test using Twineham Grange as a substitute in a recipe for baked eggs with asparagus, cream and Parmesan was a triumph! It melted down beautifully to create a smooth, creamy and delicious cheesy sauce. Therefore, I am more than happy to recommend it as a viable alternative to Parmesan for anyone with concerns about animal welfare. 

Furthermore, Bookham Harrison Farms Sussex Charmer Cheese and Southdowns Butter are absolutely sublime tasting and, as such, will no doubt feature in many future Primal Plate recipes. They offer a brilliantly efficient online shop and delivery service. 

 *Milk fed veal calves are often anaemic. The calves are fed a low iron diet to produce the most desired white meat. They are fed milk replacer, which can be laced with antibiotics in order to control the diarrhoea that is caused by an inadequate diet. These calves are restricted from moving and spend their lives in small stalls or hutches. They are slaughtered at 18 to 20 weeks of age. Calves can be so crippled from confinement that they have to be helped into the truck or trailer on the way to the slaughter house. Click here for further information.


Carbohydrate 26g Protein 27g - per serving of pizza crust

Carbohydrate 3g Protein 22g - per serving of topping


Keralan Fish Curry with Crispy Shallots

by Susan Smith in , ,


Since I started my blog writing career (can’t believe it’s only 3 months ago!), I’ve been focused on researching and developing recipes à la Primal - basically, dissing all junk food and substituting healthy ingredients for grains, refined sugar, unhealthy fats, beans/legumes. Then my sister phoned last weekend asking for “simpler things to cook”. She has a point.

Beyond the consideration of limiting my list of ingredients to Primal-friendly and the creative endeavour of bringing them together in harmony for visually exciting, flavourful food, what if some people can’t, or don’t have much time, to cook? I don’t want to cop out by ignoring the problem, so I’ve rummaged through my collection of recipes and found some fast and gloriously easy food to make. Today’s recipe is an adaptation of Keralan Fish Curry taken from a Waitrose recipe card (February 2012) found lurking in the back of my kitchen cupboard!

This tamarind-tangy, yet delicately sweet and spicy fish curry, looks and tastes ‘the business’ but actually takes less that 30 minutes to prepare and cook.

True, I’ve added one extra cooking process by dressing my version up with crispy fried shallots because a) I don’t like raw onion in any of it’s guises (so anti-social when you breathe near someone else!) and b) crispy shallots are fantastic for adding extra flavour and texture - especially juxtaposed against the creamy and aromatic flavours of this curry. They shouldn’t cause ‘cook meltdown’ because they can be made several hours ahead, or even the day before.

Keralan Fish Curry with Crispy Shallots (Serves 4)

Ingredients - for the fish curry

4 x (200g each) sustainably sourced haddock fillets, skinned 

2 tsp ground turmeric

½ tsp chilli powder

Sea salt and freshly ground black pepper

25g (1oz) coconut oil

2 onions, very thinly sliced (I use OXO’s hand held mandolin slicer)

1 tsp cumin seeds

1 tsp black mustard seeds

400ml (15 fl oz) full-fat organic coconut milk

1 tbsp tamarind paste

5 cm (2”) piece fresh ginger, grated

225g (8 oz) frozen peas

Handful of fresh coriander leaves (or coriander micro sprouts)

1 long red chilli, seeded and thinly sliced

Crispy shallots slices (see separate recipe below) or 2 spring onions, finely sliced


Instructions:

Combine the turmeric and chilli powders. Sprinkle the fish fillets with the combined spices, season with sea salt and black pepper and set aside.

Boil a kettle of water. Measure the frozen peas into a heatproof jug, pour the boiling water over the peas to defrost them, strain through a wire sieve and set aside.

Melt coconut oil in a large pan over a moderate heat and gently fry the onions with the cumin and mustard seeds for 10 minutes, or until golden. 

Add the coconut milk, tamarind paste and grated ginger, stir well and bring to a simmer. Season with salt and pepper.

Add the fish to the pan, cover and simmer gently for 5-6 minutes, or until the fish is just cooked through. 

Add the peas to the pan, bring the sauce back to a gentle simmer and cook for a further minute.

Using a fish slice, carefully transfer the fish fillets to 4 warm soup plates/bowls. Spoon the sauce over and around, then top with fresh coriander leaf, slivers of chilli and crispy shallots.

Serve immediately.


Crispy Shallots (based on a David Tanis recipe)

Ingredients

175ml / 6 fl oz good quality oil, for frying (I used Clearspring sunflower frying oil but organic ghee or coconut oil are also safe/healthy oils for cooking)

4 medium-sized shallots, peeled and finely sliced 

Sea salt


Instructions:

Put the cold oil into a smallish saucepan. Add the sliced shallots and place over medium heat. 

Cook gently, stirring occasionally, for about 15 minutes until they gradually become brown (turn down the heat if the shallots seem to be colouring too quickly)

Place a fine-meshed sieve over a bowl. Transfer the cooked shallots to the sieve and let them drain well.

Tip the shallots onto a plate lined with a paper towel. Sprinkle lightly with sea salt and allow to cool - they will crisp up as they do. 


Notes:

I like my fish fillets left whole, but if your pan isn’t big enough to hold them in a single layer, cut into bite-size chunks and reduce the cooking time i.e. from 5-6 minutes (for fillets) to 3-4 minutes (for chunks). 

If you don’t want the extra effort (not much, apart from slicing!) involved in making crispy shallots, you can finish the dish with 2 finely sliced salad onions instead. 

Crispy shallot slices are fantastic sprinkled over chops and burgers, and just as good on salads or steamed vegetables. They may be made several hours ahead, or even the day before. The flavourful cooking oil is ‘pure gold’ for cooks so save it in a sealed container and use it for other recipes.


Carbohydrate 19g Protein 39g - per serving of fish curry

Carbohydrate 1g Protein 0g - per serving of crispy shallots